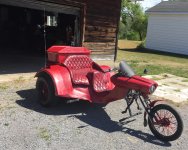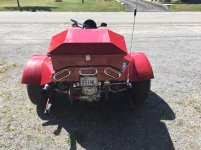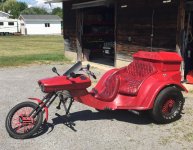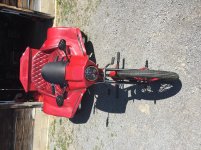
Stires Stallion Flat Back

20181019_043806.jpg

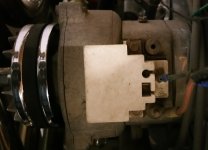
Not saying I have a memory, but the generator I remember on the old 65 bug was just a straight round thing.

This is a late 73 model case, so it might have 74 stock accessories to the enginge.

I am not being lazy, just thought a pic might help others (and me ) figure out what a newer generator or alternator looks like.

I do agree after looking over it a bit more, I do need to address this issue while all is open and exposed.

Cheers to everyone and have a great day and a better weekend.
 
alternator

I do agree after looking over it a bit more, I do need to address this issue while all is open and exposed.

Yep, you have an internally regulated alternator. Here is a simple wiring diagram for the charging system:

https://www.limebug.com/how-to-guides/view/48/

It looks like those connections have been there for a long time. It is probably wired correctly; that D+ connection is going somewhere. If it goes to an alternator light and then to the ACC terminal on the key switch, or a fuse that is live when the key is ON, you can mark the charging circuit off your list.

Not really shown on that drawing is the importance of a good ground to the alternator. The easiest way to check for ground is with a test light. Clip it to the positive terminal on the battery. Probe the negative battery terminal and note the brightness of the test light. Now probe the alternator case. The light should be just as bright as it was going directly across the battery. In that case you are done with engine ground checks. If the test light does not light, you have to find the break. If the light illuminates but is dim, the ground circuit is resistive. In either case, probe the bike frame, the transmission, and the engine. A poor connection can be anywhere in the circuit, even right from the battery post. The goal is to clean, repair, or replace whatever is necessary to get a bright test light on the alternator case.
 
Stires Stallion Update

Finally got the wiring 95% done. Just got to plug the body in when I am ready to mount it. Getting sick and tired of polishing chrome. LOL. Got to figure out a good protectant for the chrome engine components. There are places that will never get polished again, when the body goes back on.

The next project is to look at the Springer front end. Rusted pretty bad. Will have to consider powder coating. Any Suggestions? Here are a few questions. Can the springs be powder coated or will the paint crack from flexing. The same with the front wheel. Strip it down, do the hub, rim, spokes and brake assembly. Reassemble and balance. I need also to track down the correct torques for reassembling the springer. Will post some pictures later of the springer.
 
I have read so much about bad chrome plating and than there is the good chrome work. Rust is not good anywhere, kinda sucks. Glad you got the wiring done and are moving along. I am doing a refinance, damn takes to long, but a must if I want to survive.

My set of springer forks were used and abused. Trikes do beat the crap out of forks, so springer's are suppose to be made for the Trike. That is the best way, but if one knows all that is needed one can hopefully find a set that is already made that will work for them. Need to build the jig and make sure all are straight and align correctly.

Biggest check point is the main rear bar, or down tube, just below the lower tree mount area, the tube or bar will start bending and thin a stress crack. Yes I did also find this on my set of forks, as trikes are know for wheelies and the slamming down on the road helps create the bend in the forks.

All sounds great, hope you have a good time finishing up the rest of it. Ride safe.
 
Stires Stallion Updates

yahoo done. :clapping:. Finally completed my Resto Mod restoration.. If it can be described as so. complete rewire to modern electronics. Dropped the body in back by 4 inches, when originaly assembled there was a piece of wood put under the passenger seat mounting location and 2 supports made for the engine cage to hold the body up in the rear. All because they wanted to run a 2 1/2 in. breather filter instead of the 1 1/4 in. one that was supposed to be used. It tucked the body right down to the frame and tires. Looks 100% better.

Full LED conversion. Dropped my full load draw on my battery to about 4.5A. Starting improved drastically with the electronic ignition conversion.

Repainted,buffed and polished as required.

Enough of the yacking here are some photos.

IMG_E0827.jpg

IMG_0821.jpg

IMG_E0823.jpg

IMG_0821.jpg

IMG_0831.jpg
 

Welcome to the Trike Talk Community

Join our vibrant online community dedicated to all things Trikes! Whether you're a seasoned rider or just starting out, this is the place to share experiences, tips, and stories about your three-wheeled adventures. Explore modifications, maintenance advice, and rides, all while connecting with fellow trike enthusiasts from around the globe

Forum statistics

Threads
55,519
Messages
838,664
Members
22,629
Latest member
Highwayman 90

Trike Talk Community

Welcome to a community dedicated to the most diverse and fastest growing powersports segment, Motorcycle Trikes. Come join the discussion about the best makes and models, popular modifications and proven performance hacks, trike touring and travel, maintenance, meetups and more!

Register Already a member? Login

Forum statistics

Threads
55,519
Messages
838,664
Members
22,629
Latest member
Highwayman 90
 photo 260e2760-d89e-45b2-8675-2bc26fb3d465.jpg

 photo Trike-Talk-150-x-200.gif

 photo DK Trike Talk Right side banner 19.jpg

Merziere Reverser

 photo 9796095c-0d4b-4a9b-88ed-efe4c498d084.png
 photo f9866e4e-75c5-471a-86f5-5e72a446ecc3.png
Back
Top