Looks great Kevin! I really like the solo seat and look so far.
Navigation
Install the app
How to install the app on iOS
Follow along with the video below to see how to install our site as a web app on your home screen.
Note: This feature may not be available in some browsers.
More options
You are using an out of date browser. It may not display this or other websites correctly.
You should upgrade or use an alternative browser.
You should upgrade or use an alternative browser.
SBS Project - Sportster Chop w/ Lots of Photo's
- Thread starter DK Custom Products
- Start date
DK Custom Products
Sponsor
- Thread starter
- #62
Looks great Kevin! I really like the solo seat and look so far.
Thank you!
")
Kevin
DK Custom Products
Sponsor
- Thread starter
- #63
Been a crazy busy week, but finally got a few hours to work on the chop today.
Will post an update of what we did tomorrow.
Kevin
Will post an update of what we did tomorrow.
Kevin
DK Custom Products
Sponsor
- Thread starter
- #64
Picking up where we left off a week ago!
We got the spacer for the caliper and the rotor, but we had to make one to go between the caliper bracket and the wheel.
Because there was no way to measure the distance between the two, it was trial and error. Took about 1.5 hours, just shaving a little off each time til we got it right.

Last time we worked on the bike it was to get the mounting points for the tank welded in and finished...
...but we never took a pic of it tightened all the way down with the leather washers between the frame and the tank tabs. Here's one.
Since I was a dumbass and did not have a shift lever, we could not get it into neutral to spin the wheel and get measurements for outside spacers for chain alignment.
I even went and pulled a shift lever off my Twin Cam I rode into work...no go, different spline pattern.
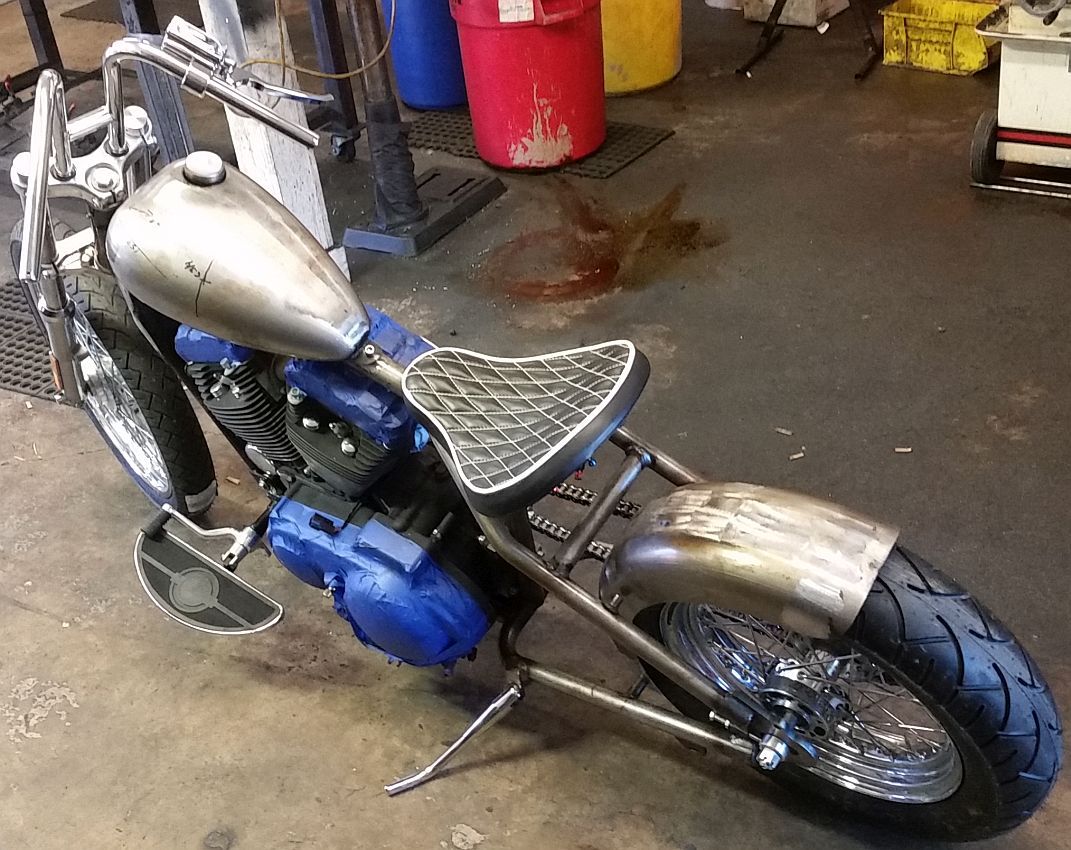
So we did a little work on the seat.
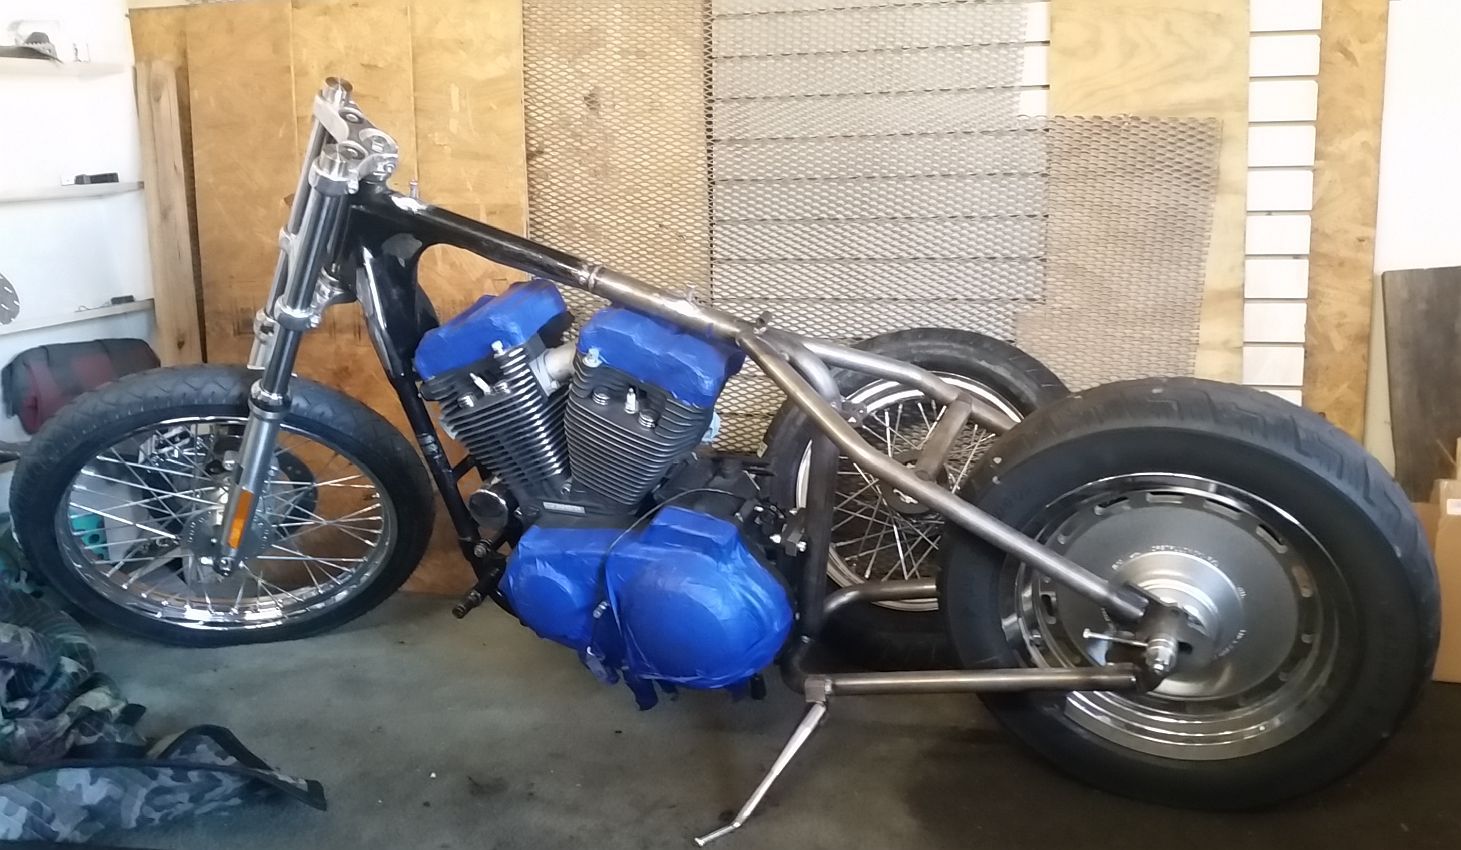
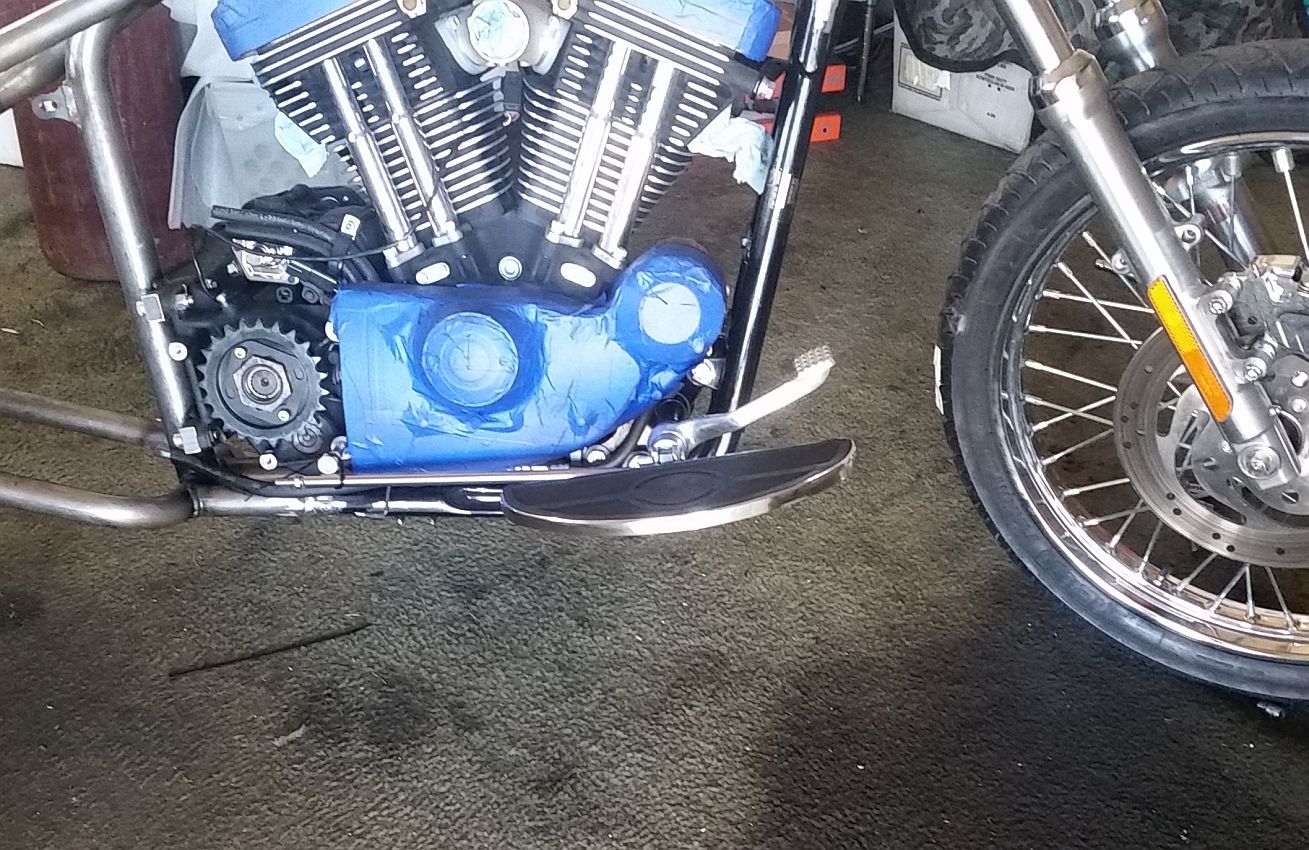
Then we took some new measurements for the oil tank. We were planning on using all the space between the frame rails for a rectangular oil tank that would sit down low.
BUT, as you can see, we won't be able to use all that room, because the chain passes thru part of that area.

So, not much visible progress made. But stuff that had to get done, got done. It is really good to have all three spacers finished up and installed. The two remaining spacers will be easy.
Next time we work on the bike we will be:
Shortening the chain to the proper length
Making the last two spacers that will keep the chain in a straight line.
Working on the brake caliper tab
Working on the rear fender, getting it cut to accommodate the chain, and then nailing down the mounting points
After working on the seat, I decided I wanted more travel in the shock. So I have a 1" longer shock on the way already. It will give an extra .75" of travel. But that means we will need to cut off the tabs we welded and weld some new ones on.
The next two projects after all the above, are the oil tank, and then figuring out how to mount some low profile floorboards.
Kevin
We got the spacer for the caliper and the rotor, but we had to make one to go between the caliper bracket and the wheel.
Because there was no way to measure the distance between the two, it was trial and error. Took about 1.5 hours, just shaving a little off each time til we got it right.
Last time we worked on the bike it was to get the mounting points for the tank welded in and finished...
...but we never took a pic of it tightened all the way down with the leather washers between the frame and the tank tabs. Here's one.
Since I was a dumbass and did not have a shift lever, we could not get it into neutral to spin the wheel and get measurements for outside spacers for chain alignment.
I even went and pulled a shift lever off my Twin Cam I rode into work...no go, different spline pattern.
So we did a little work on the seat.
Then we took some new measurements for the oil tank. We were planning on using all the space between the frame rails for a rectangular oil tank that would sit down low.
BUT, as you can see, we won't be able to use all that room, because the chain passes thru part of that area.
So, not much visible progress made. But stuff that had to get done, got done. It is really good to have all three spacers finished up and installed. The two remaining spacers will be easy.
Next time we work on the bike we will be:
Shortening the chain to the proper length
Making the last two spacers that will keep the chain in a straight line.
Working on the brake caliper tab
Working on the rear fender, getting it cut to accommodate the chain, and then nailing down the mounting points
After working on the seat, I decided I wanted more travel in the shock. So I have a 1" longer shock on the way already. It will give an extra .75" of travel. But that means we will need to cut off the tabs we welded and weld some new ones on.
The next two projects after all the above, are the oil tank, and then figuring out how to mount some low profile floorboards.
Kevin
Last edited:
DK Custom Products
Sponsor
- Thread starter
- #65
Spent a couple hours yesterday working on the bike...not much in the way of pics.
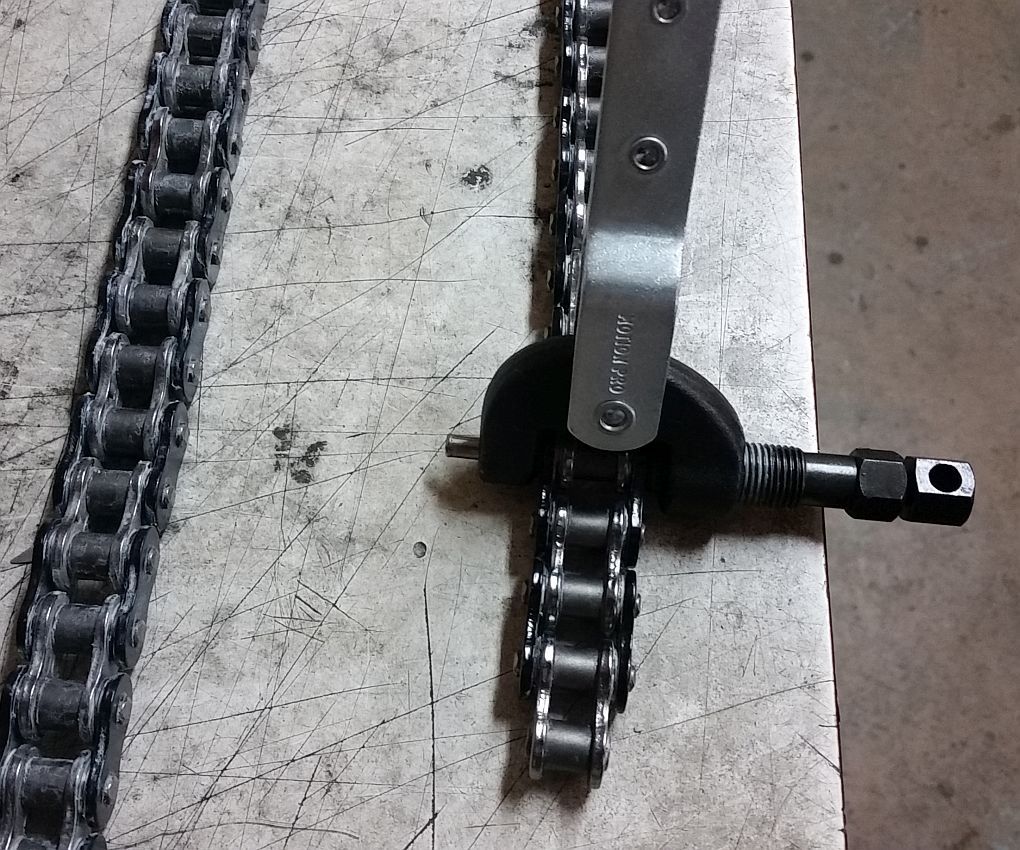
We shortened the chain-
Put it on the bike and then spent some time working on getting the outside spacers made so that....
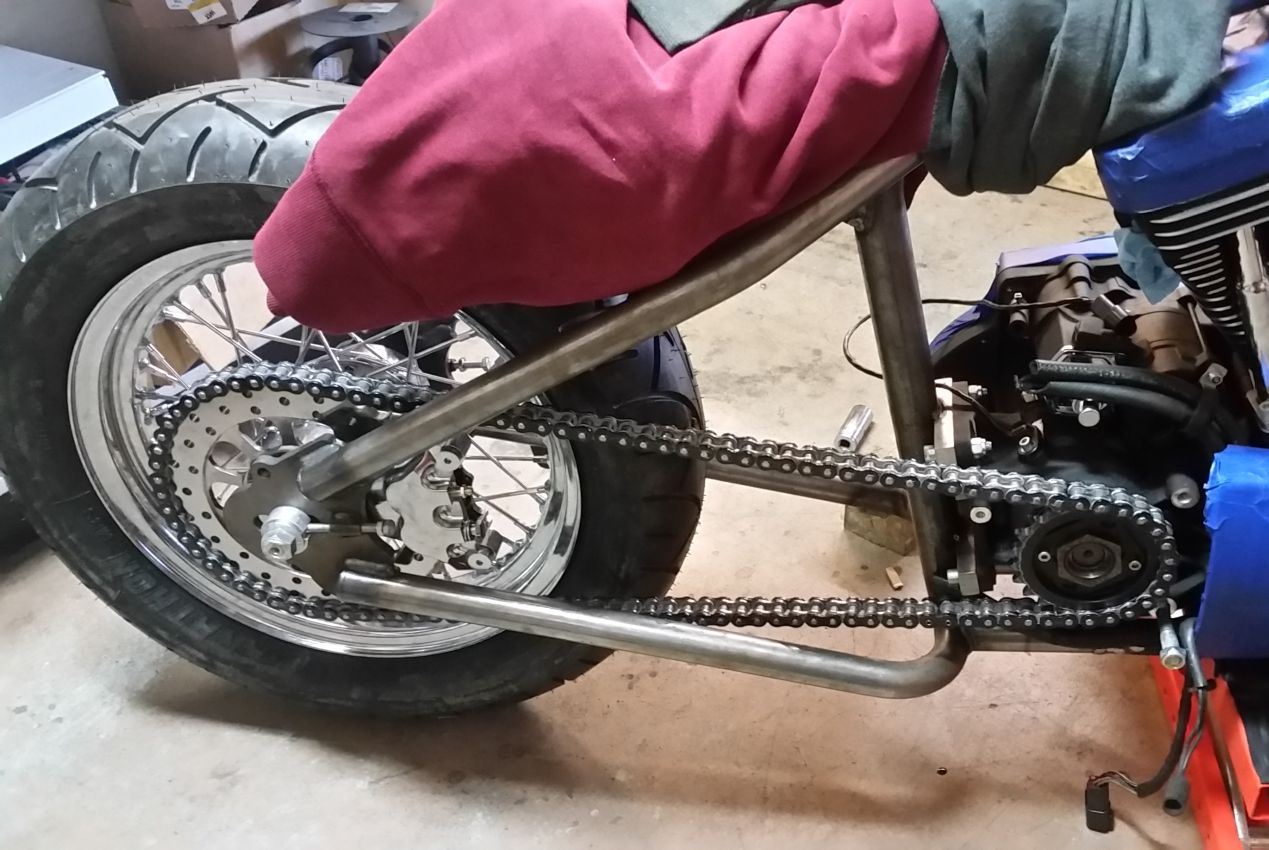
...the chain was lined up with the trans sprocket.
We then played with a few ideas for a low profile anchor tab for the rear brake caliper...one that will not require a bulky heim joint set-up. I think we came up with a good solution. We'll fab it up and have pics next time we work on it.
We then decided where to cut the rear fender for chain clearance...also planned out the reinforcement of the fender, and where/how we will mount it to the frame.
I'm hoping to have more time later this week to get some more done.
Kevin
We shortened the chain-
Put it on the bike and then spent some time working on getting the outside spacers made so that....
...the chain was lined up with the trans sprocket.
We then played with a few ideas for a low profile anchor tab for the rear brake caliper...one that will not require a bulky heim joint set-up. I think we came up with a good solution. We'll fab it up and have pics next time we work on it.
We then decided where to cut the rear fender for chain clearance...also planned out the reinforcement of the fender, and where/how we will mount it to the frame.
I'm hoping to have more time later this week to get some more done.
Kevin
peteg59
Meme Master
Lookin really sanitary & basic, all at the same time Kevin!
Are you planning on a modded horseshoe style oil bag of some type? That might be tough to fit in the limited space above the chain, but would really give it an old school chop look, in my opinion...
Keep up the good work, manThumbUpThumbUp
Are you planning on a modded horseshoe style oil bag of some type? That might be tough to fit in the limited space above the chain, but would really give it an old school chop look, in my opinion...
Keep up the good work, manThumbUpThumbUp
DK Custom Products
Sponsor
- Thread starter
- #67
Lookin really sanitary & basic, all at the same time Kevin!
Are you planning on a modded horseshoe style oil bag of some type? That might be tough to fit in the limited space above the chain, but would really give it an old school chop look, in my opinion...
Keep up the good work, manThumbUpThumbUp
Thanks!
We are planning on building a rectangular oil tank that will go down low, between the bottom rails...below where we put the battery. It should be pretty well hidden...certainly enough for folks to look twice, wondering where the oil tank is.
Kevin
peteg59
Meme Master
There looks like plenty of room on those bottom rails for your custom tank. That will leave people wondering for sure!
Looking forward to your progress pics on this build:clapping:...
Looking forward to your progress pics on this build:clapping:...
DK Custom Products
Sponsor
- Thread starter
- #69
There looks like plenty of room on those bottom rails for your custom tank. That will leave people wondering for sure!
Looking forward to your progress pics on this build:clapping:...
Kevin
DK Custom Products
Sponsor
- Thread starter
- #70
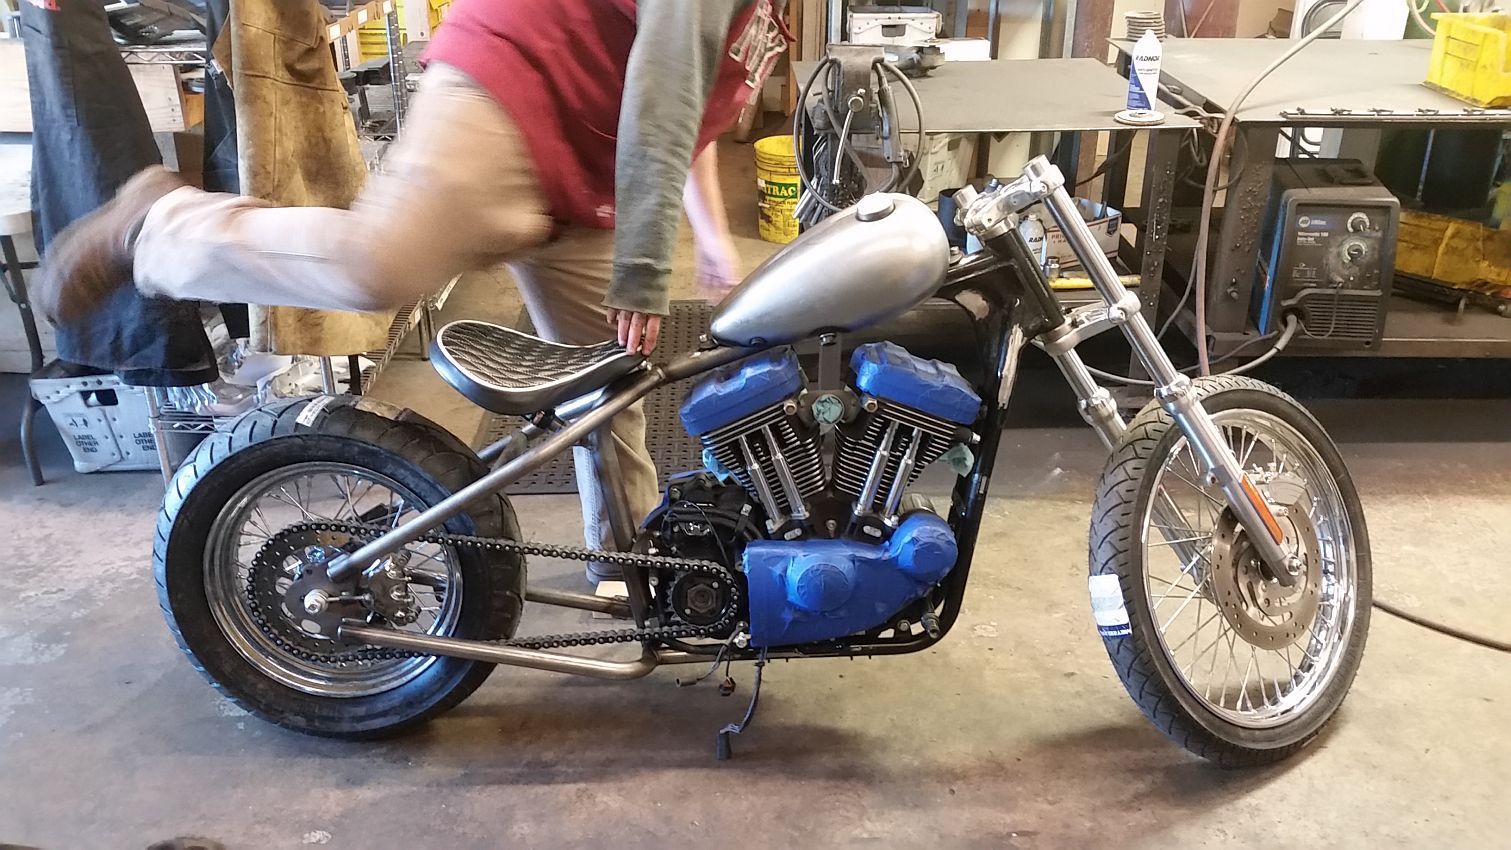
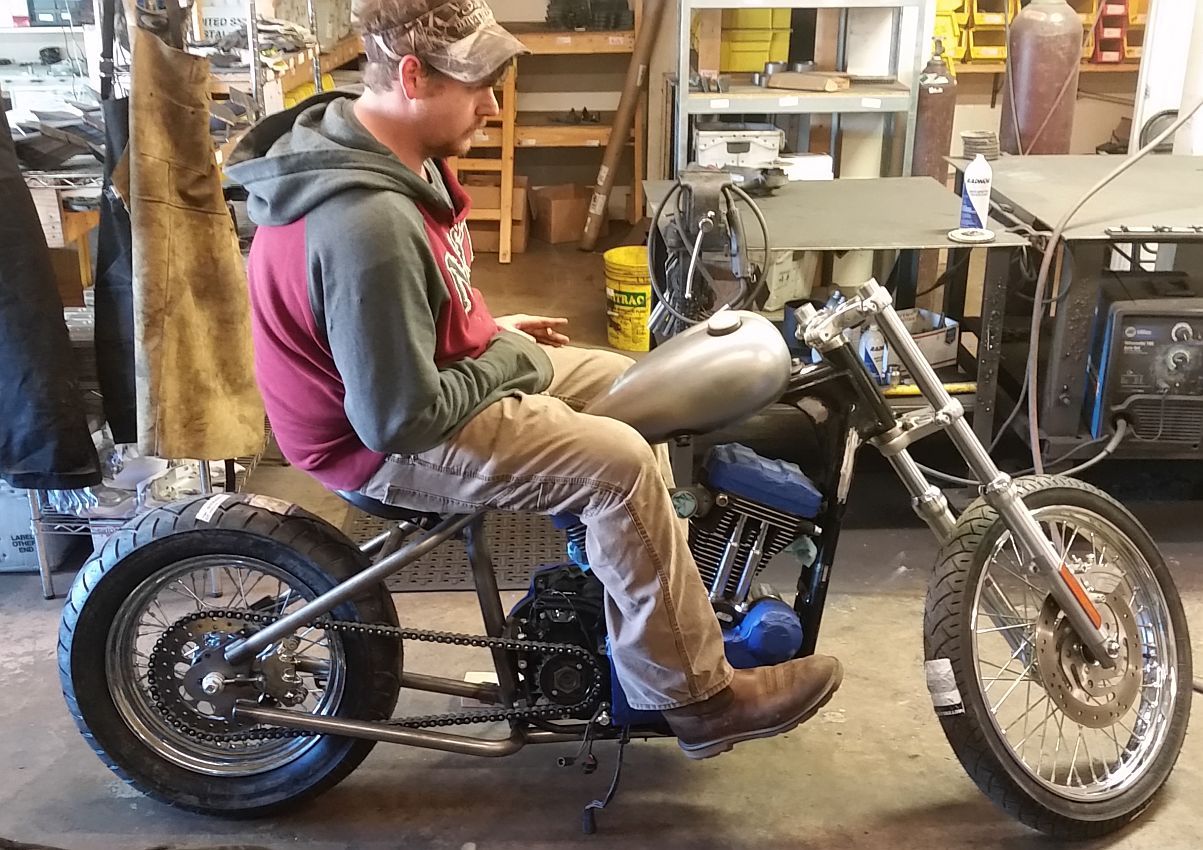
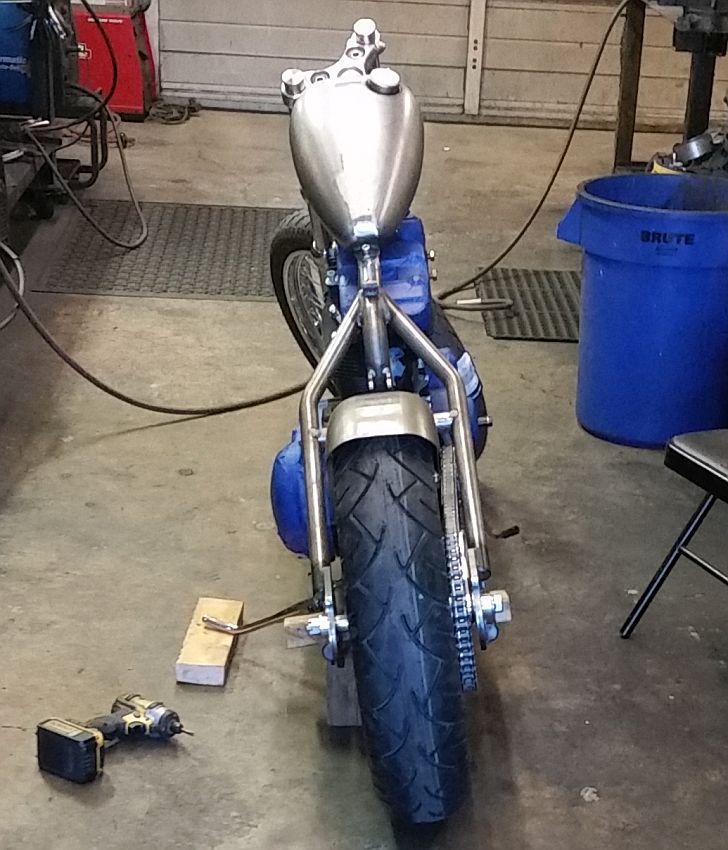
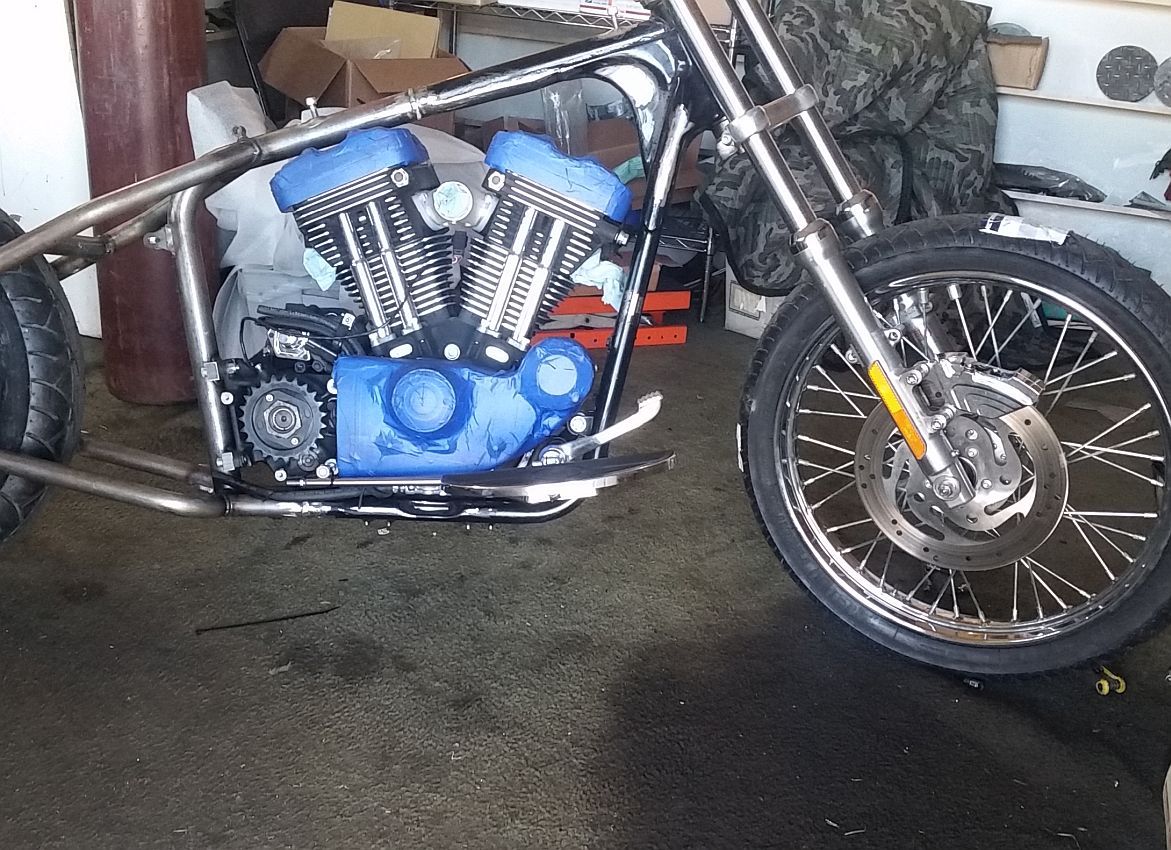
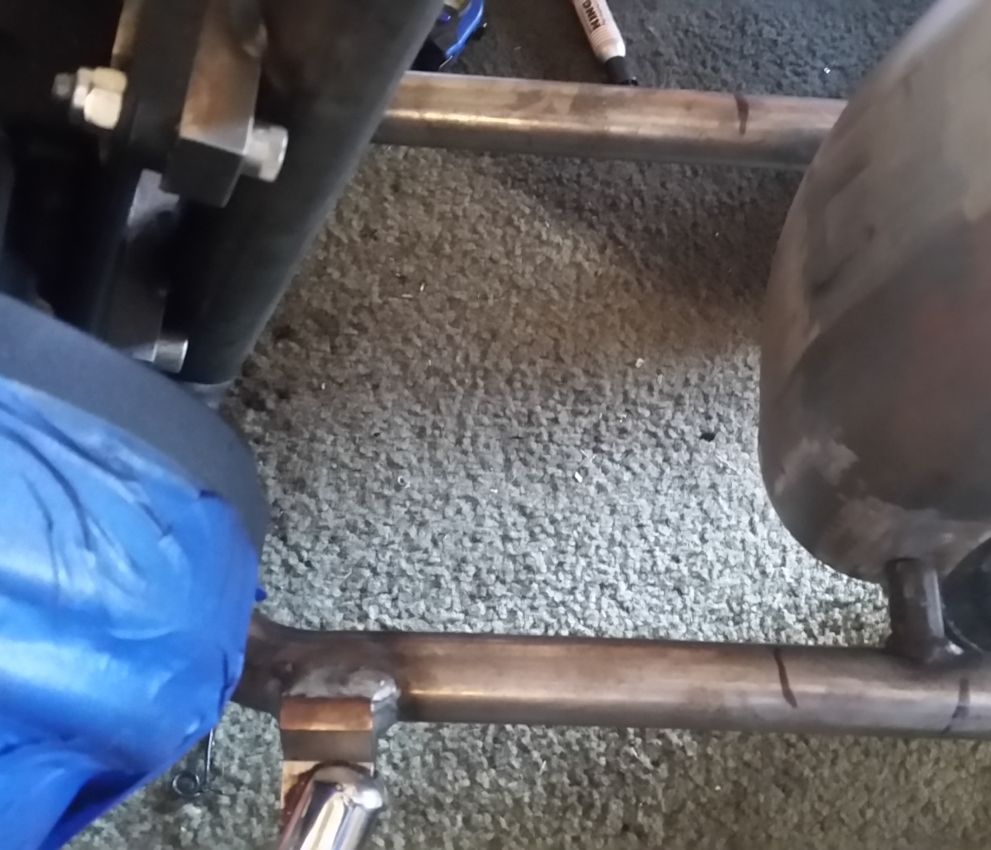
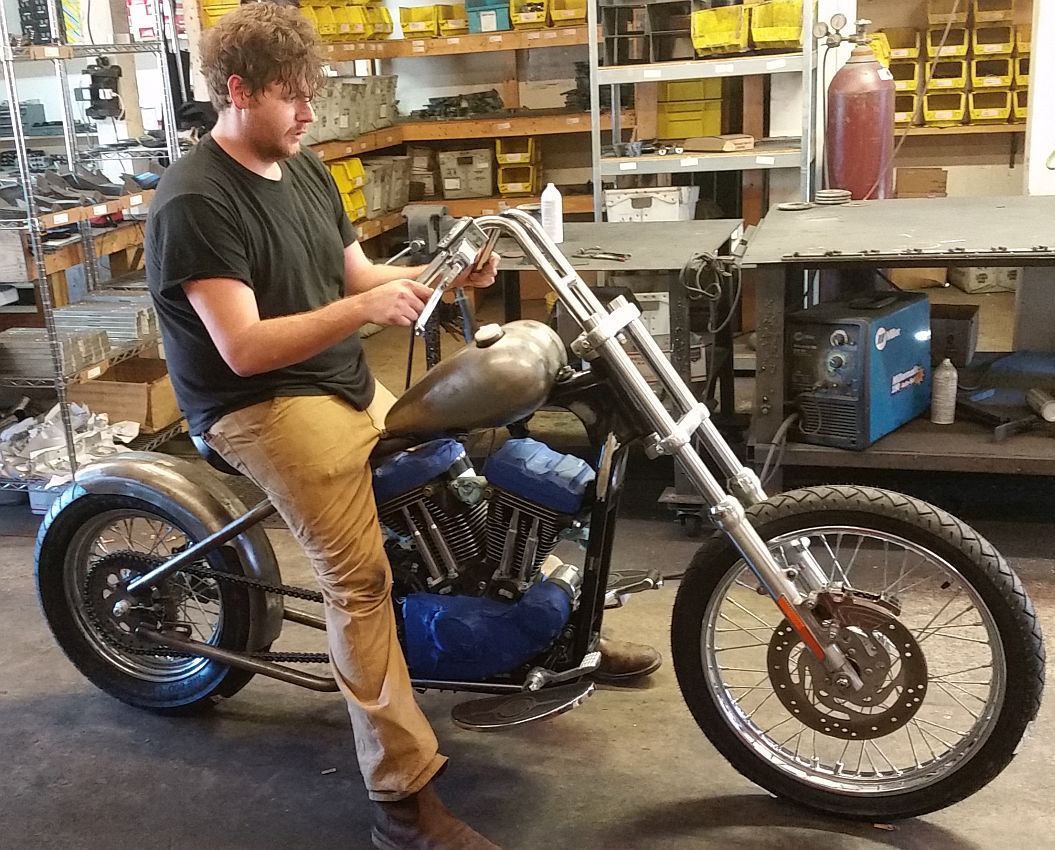
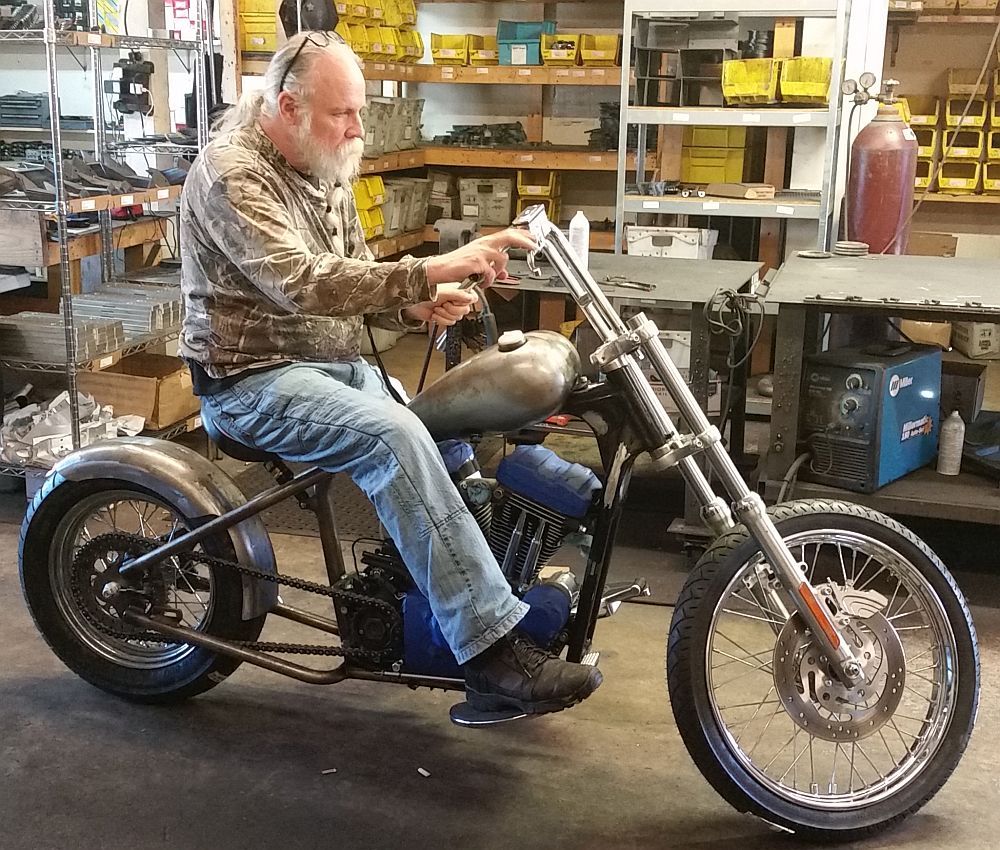
Matt and I had 3 hours yesterday to do some work on the chop.
Some folks have asked for pics of someone sitting on the bike...to get an idea of size. Pics below are of Matt. He is 6' 1". No bars or footpegs make it a bit weird, but these give an idea.
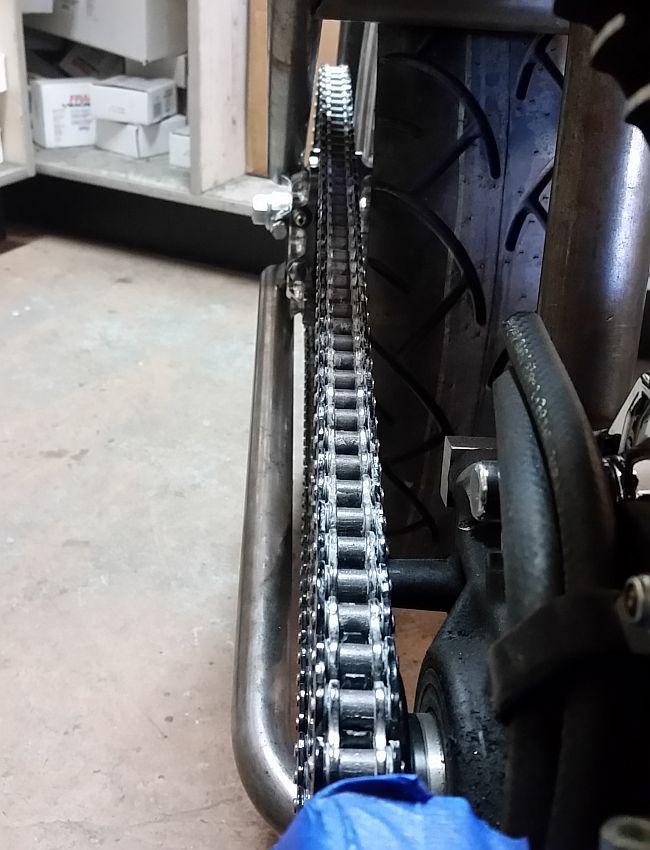
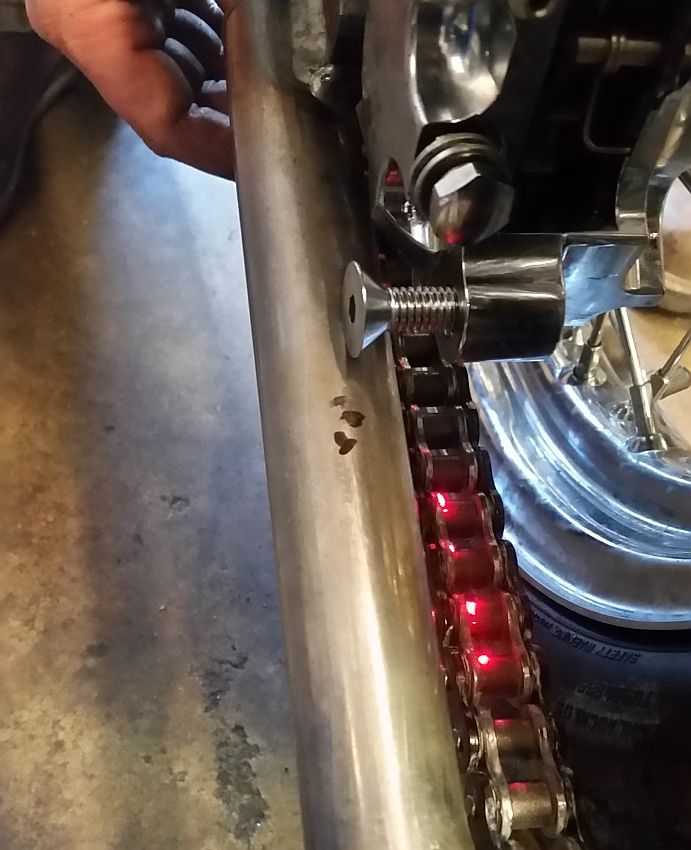
This photo shows a laser we used to check the sprocket/chain alignment. We had it pretty close from our eyeball alignment earlier...but you can see it is still a tad off. With the laser we will be able to get it dead on after we put it back together.
Photo also shows where we marked for the caliper anchor tab to go. (forgot to take a pic of the actual tab...again) We had to slide the wheel all the way forward in the axle plates to get the most forward position for the tab.
We also test fit the new, longer, shock and marked where we need to put the new tabs on the frame. Also realized we need to make a new seat tab bracket. Final thing on the seat was finalizing how we were going to reinforce the hinge. All little stuff, but important...and I did not get any pics. But when we actually do the welding (hopefully next week) we'll have a bunch of pics of the improved seat set-up.
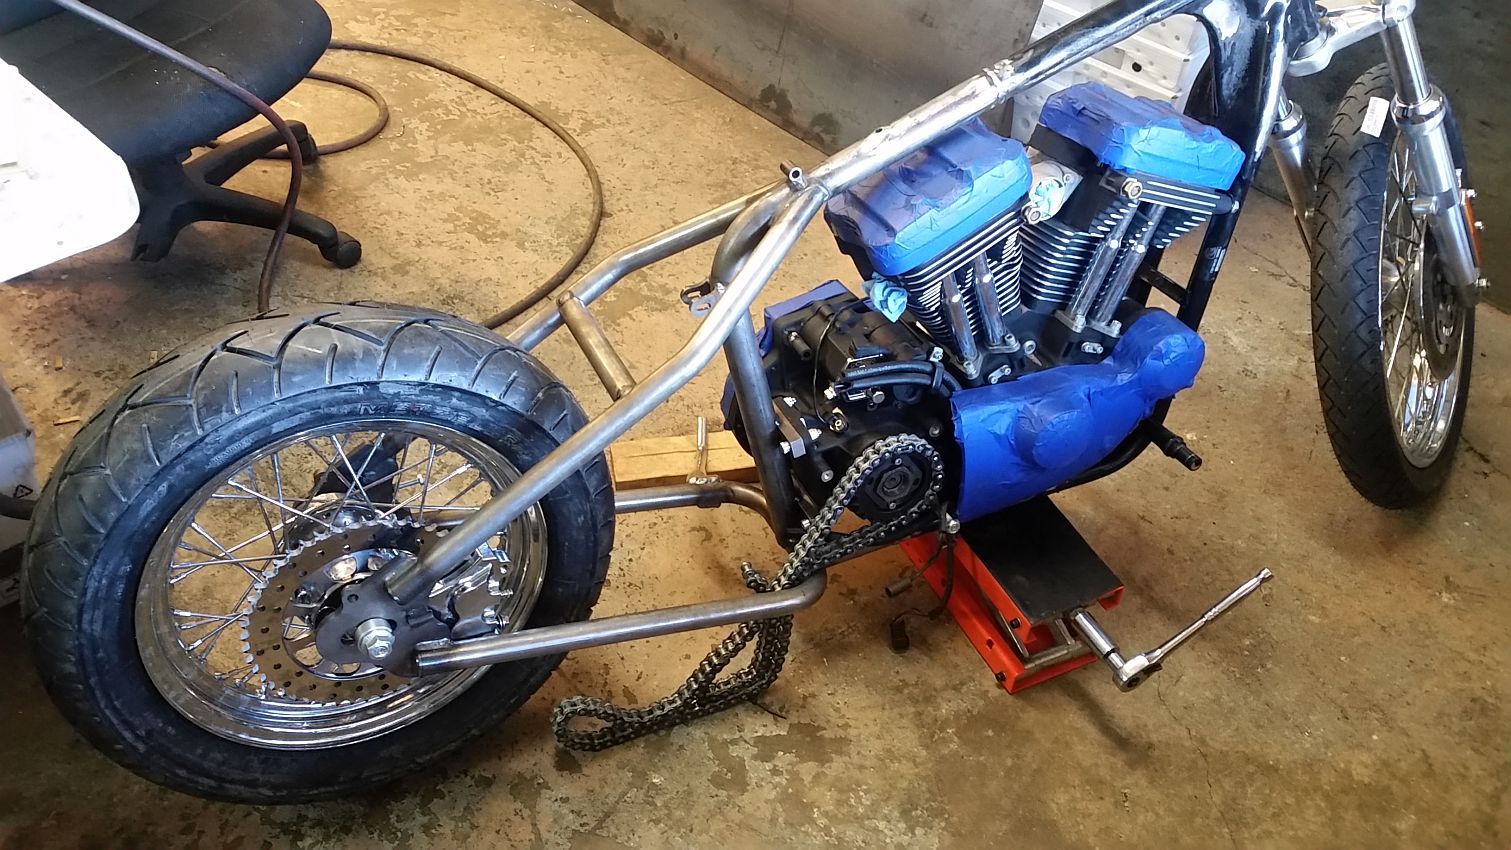
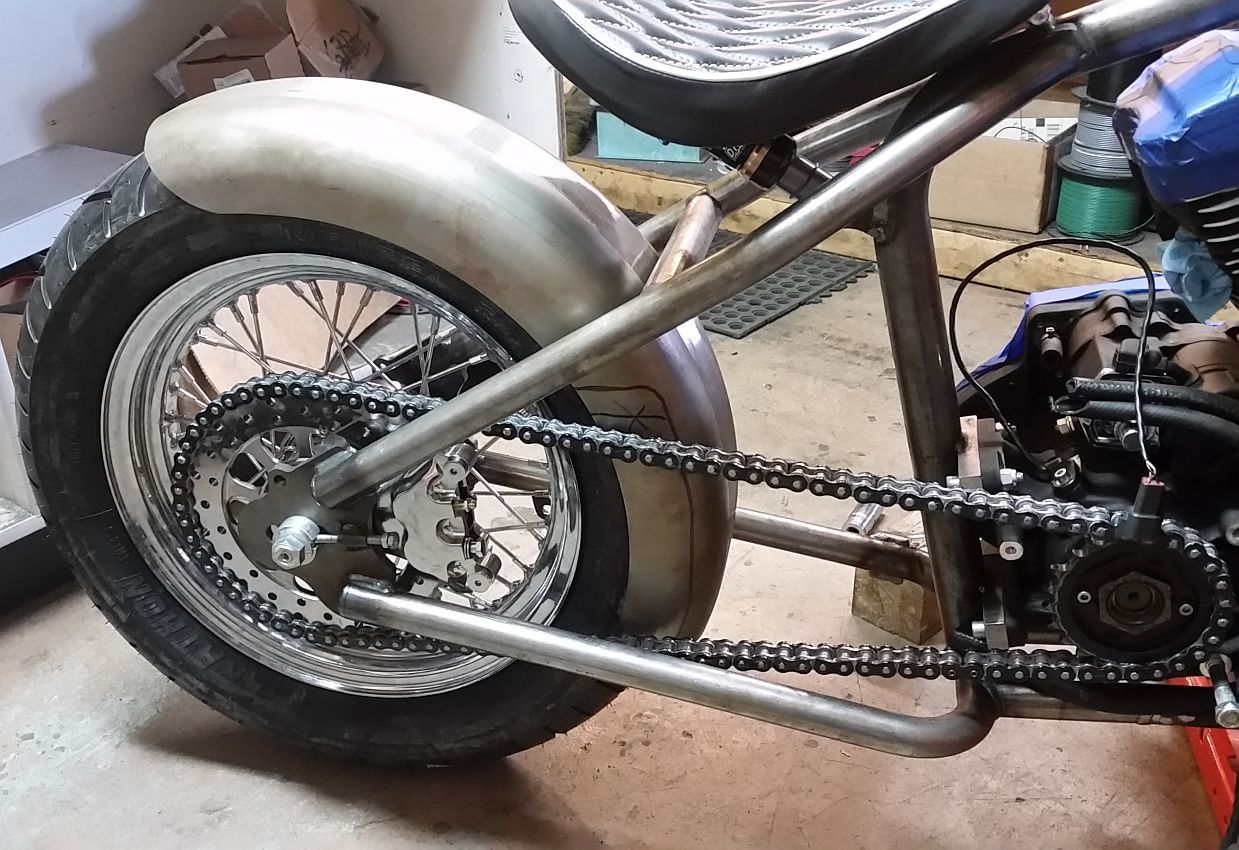
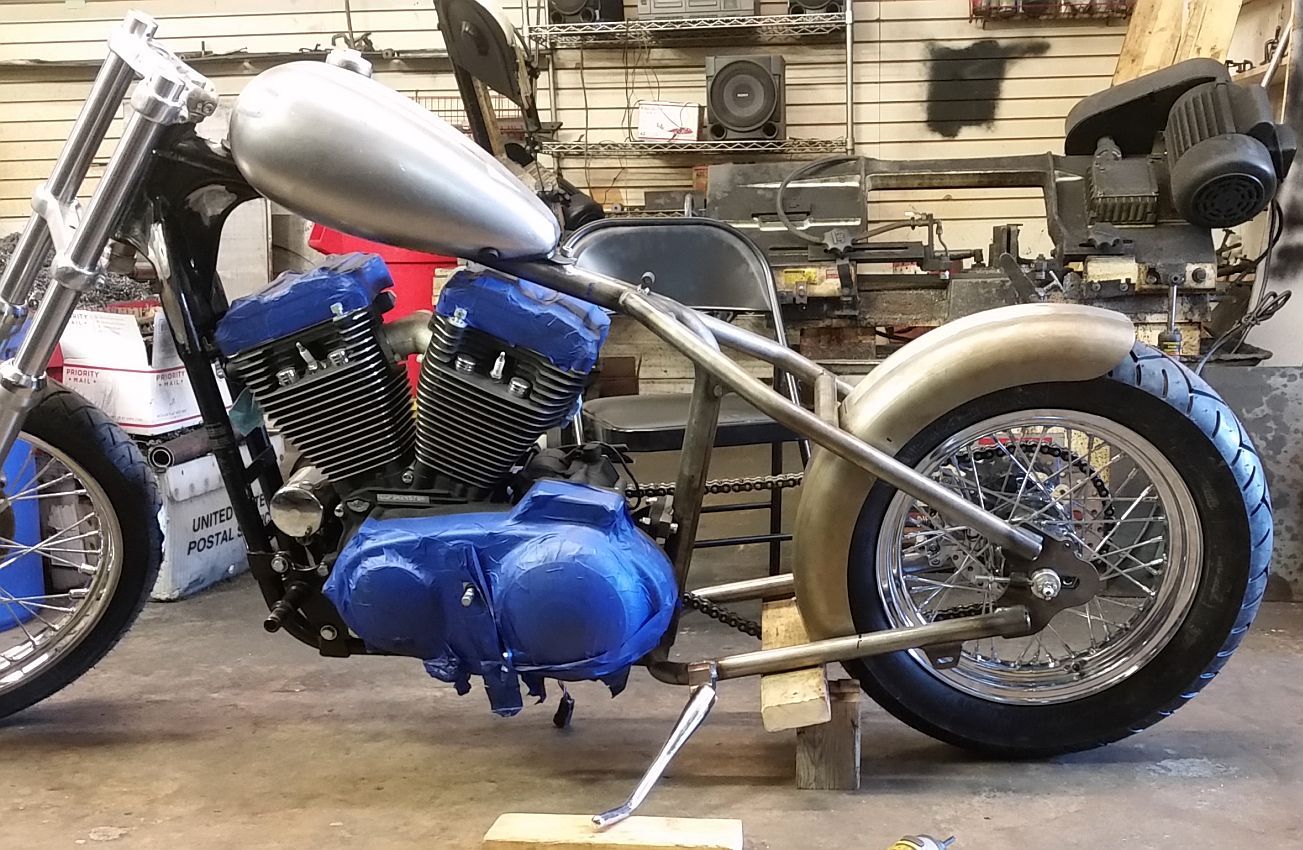
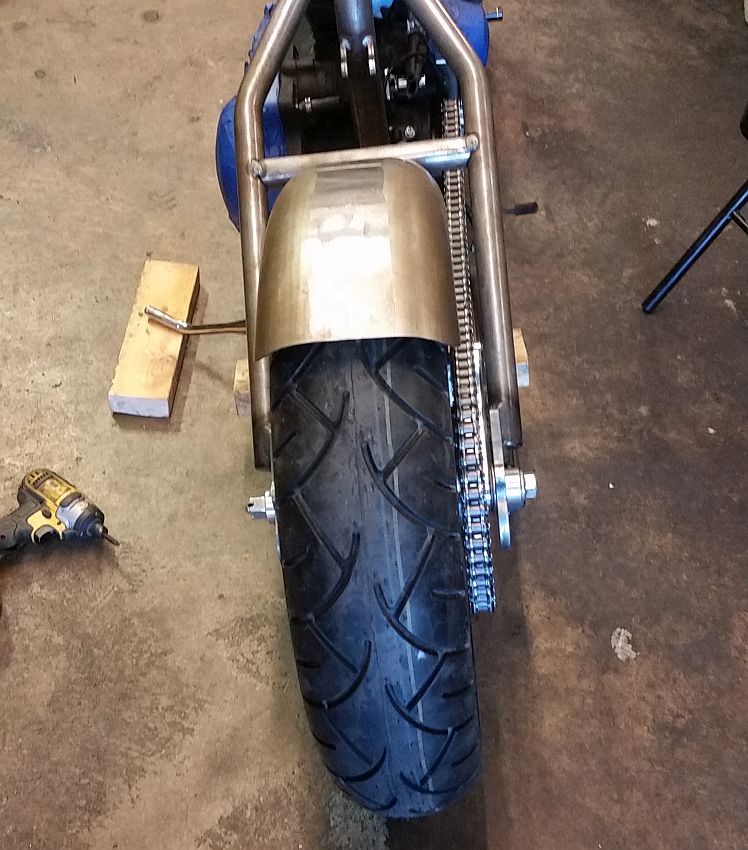
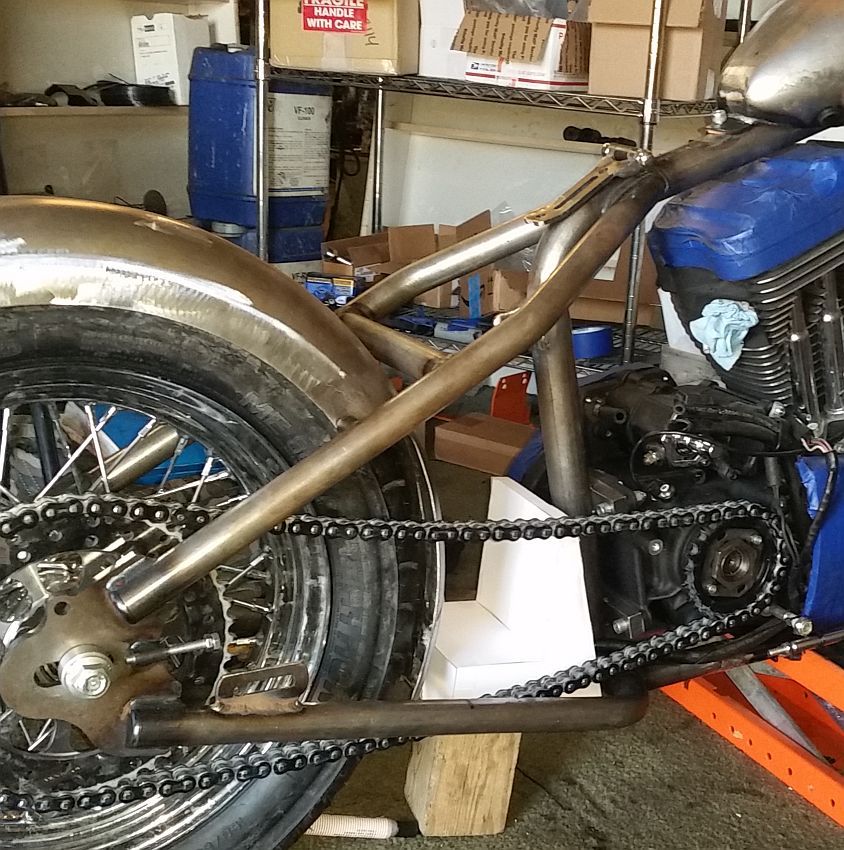
The rest of the time was spent getting the fender oriented...

...notice we cut out a good size piece of the fender for chain clearance. It has a nice radius (unlike what we did on the DK Sporty) to lessen the chance of any cracking from harmonic resonance.
We had to pull the wheel all the way forward, to make sure we had clearance in the tightest possible adjustment...
...we used wood and some set screws to hold the fender in place. We then had to pull the wheel all the way back, to make sure there was clearance in that position also.
Once we verified where we want the fender to sit on the frame, we marked all for mounting points on the frame.
Unrelated to this chop, next week we are finalizing our Milwaukee-Eight air cleaner prototypes, then on Saturday we are spending all day on the dyno testing them out.
Hopefully we will still be able to squeeze in some time next week to-
Weld the new seat set-up
Weld the anchor tab
Cut off the anchor tab that the hardtail frame came with
Weld in the the 4 fender mounting bungs
Complete the weld on the top cross-brace
Once all that is done, we will be able to begin on the oil tank and floorboards.
Kevin
Some folks have asked for pics of someone sitting on the bike...to get an idea of size. Pics below are of Matt. He is 6' 1". No bars or footpegs make it a bit weird, but these give an idea.
This photo shows a laser we used to check the sprocket/chain alignment. We had it pretty close from our eyeball alignment earlier...but you can see it is still a tad off. With the laser we will be able to get it dead on after we put it back together.
Photo also shows where we marked for the caliper anchor tab to go. (forgot to take a pic of the actual tab...again) We had to slide the wheel all the way forward in the axle plates to get the most forward position for the tab.
We also test fit the new, longer, shock and marked where we need to put the new tabs on the frame. Also realized we need to make a new seat tab bracket. Final thing on the seat was finalizing how we were going to reinforce the hinge. All little stuff, but important...and I did not get any pics. But when we actually do the welding (hopefully next week) we'll have a bunch of pics of the improved seat set-up.
The rest of the time was spent getting the fender oriented...
...notice we cut out a good size piece of the fender for chain clearance. It has a nice radius (unlike what we did on the DK Sporty) to lessen the chance of any cracking from harmonic resonance.
We had to pull the wheel all the way forward, to make sure we had clearance in the tightest possible adjustment...
...we used wood and some set screws to hold the fender in place. We then had to pull the wheel all the way back, to make sure there was clearance in that position also.
Once we verified where we want the fender to sit on the frame, we marked all for mounting points on the frame.
Unrelated to this chop, next week we are finalizing our Milwaukee-Eight air cleaner prototypes, then on Saturday we are spending all day on the dyno testing them out.
Hopefully we will still be able to squeeze in some time next week to-
Weld the new seat set-up
Weld the anchor tab
Cut off the anchor tab that the hardtail frame came with
Weld in the the 4 fender mounting bungs
Complete the weld on the top cross-brace
Once all that is done, we will be able to begin on the oil tank and floorboards.
Kevin
DK Custom Products
Sponsor
- Thread starter
- #71
I wasn't sure we were going to have any time this week to work on the bike...but we ended up having a good part of Friday afternoon to get some stuff done.
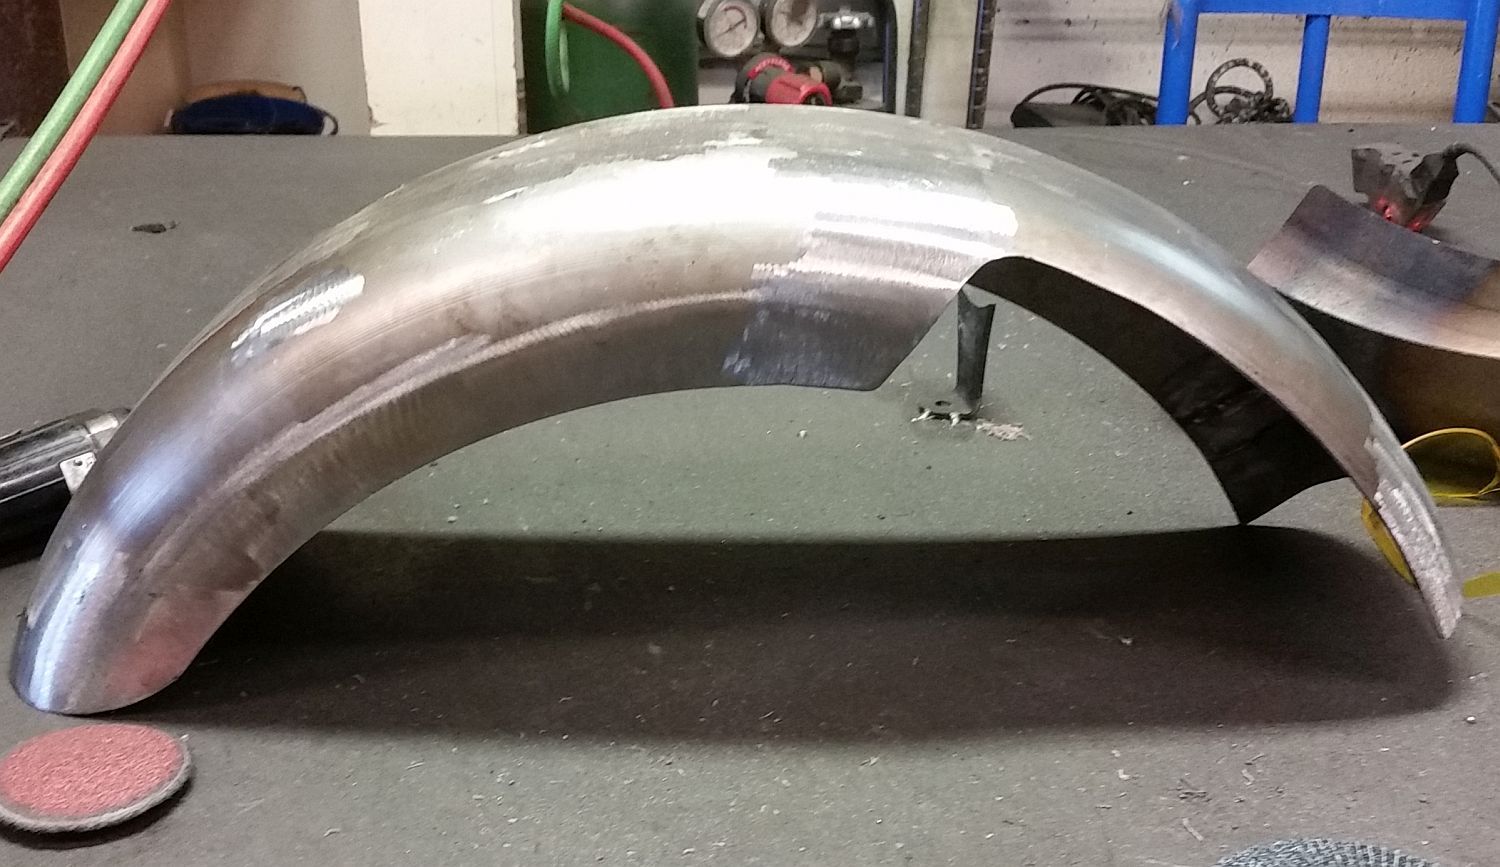
We braced the underside of the fender. It's not pretty, and probably not necessary. But this bike is going to be a rider, and I'd rather be safe than sorry.
The bracing corresponds with the four points that the fender will be mounted to the frame at.
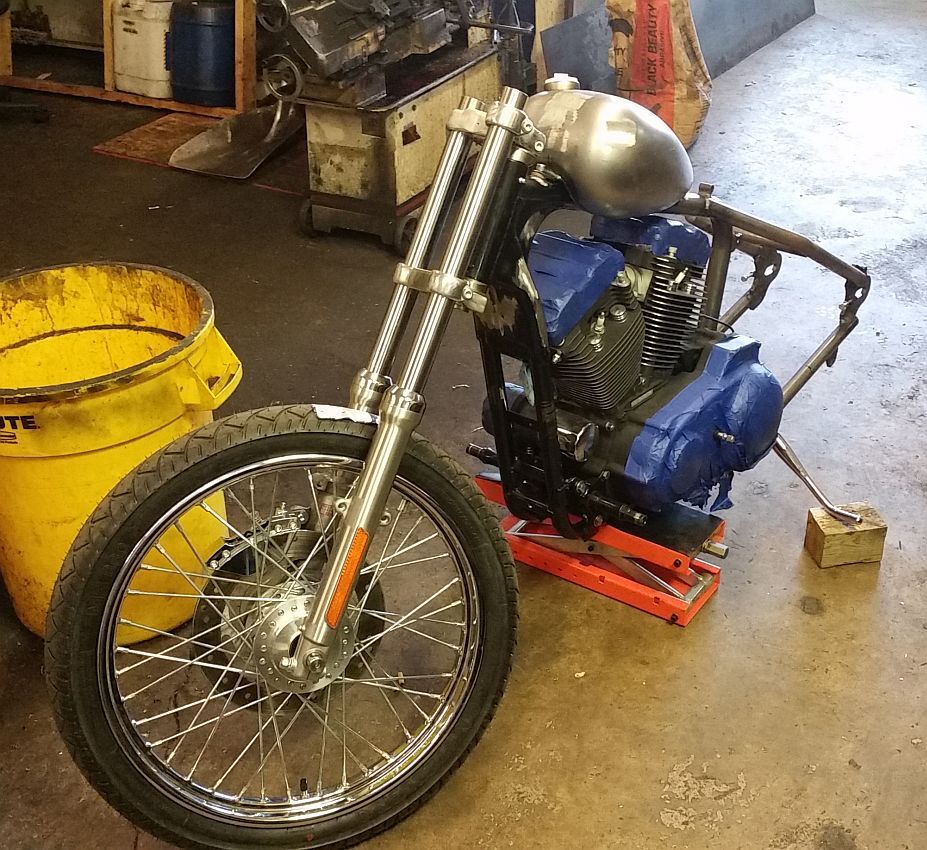
Everything that will be seen when on the bike still looks purty.
Uncovered for the first time in a week...ready to get some work done on it.

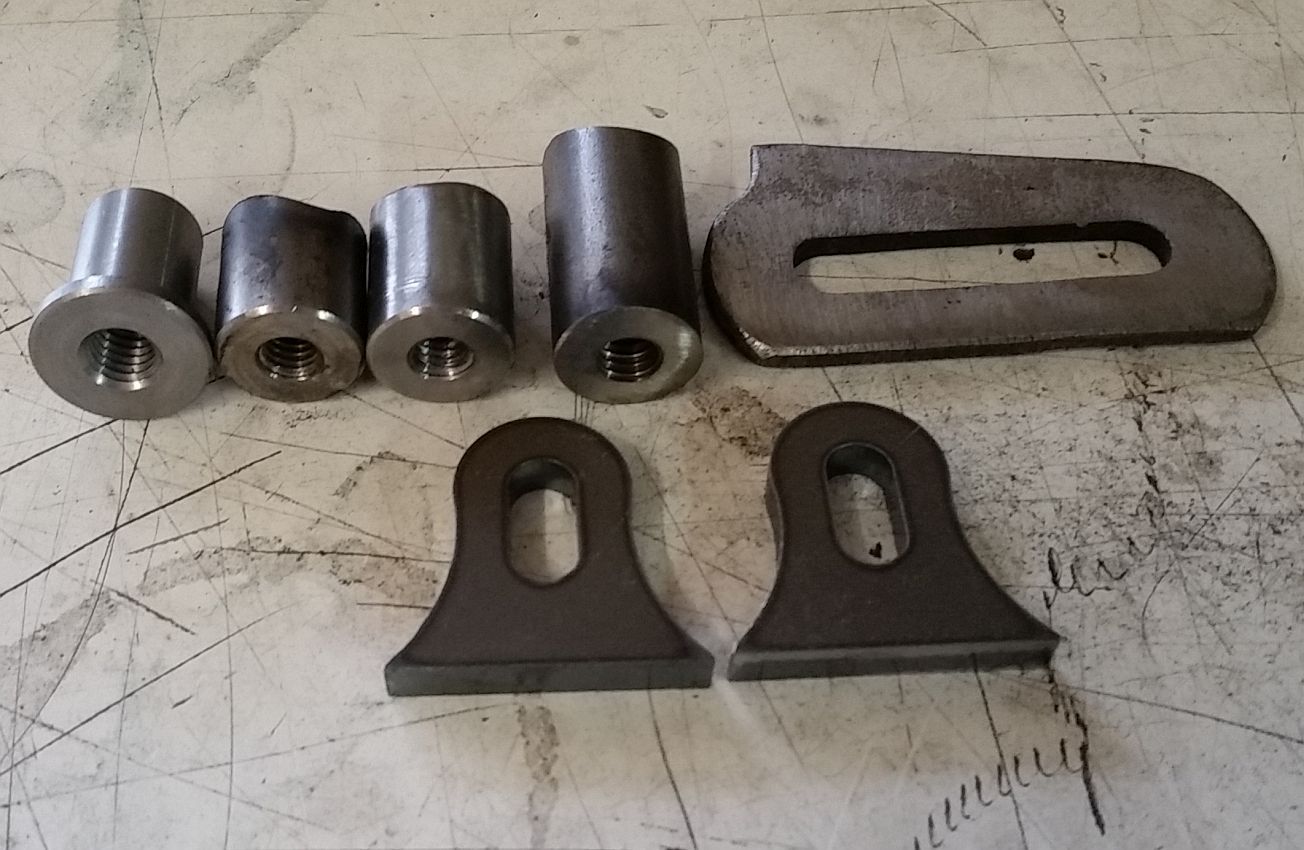
These are the brackets we want to get welded up...
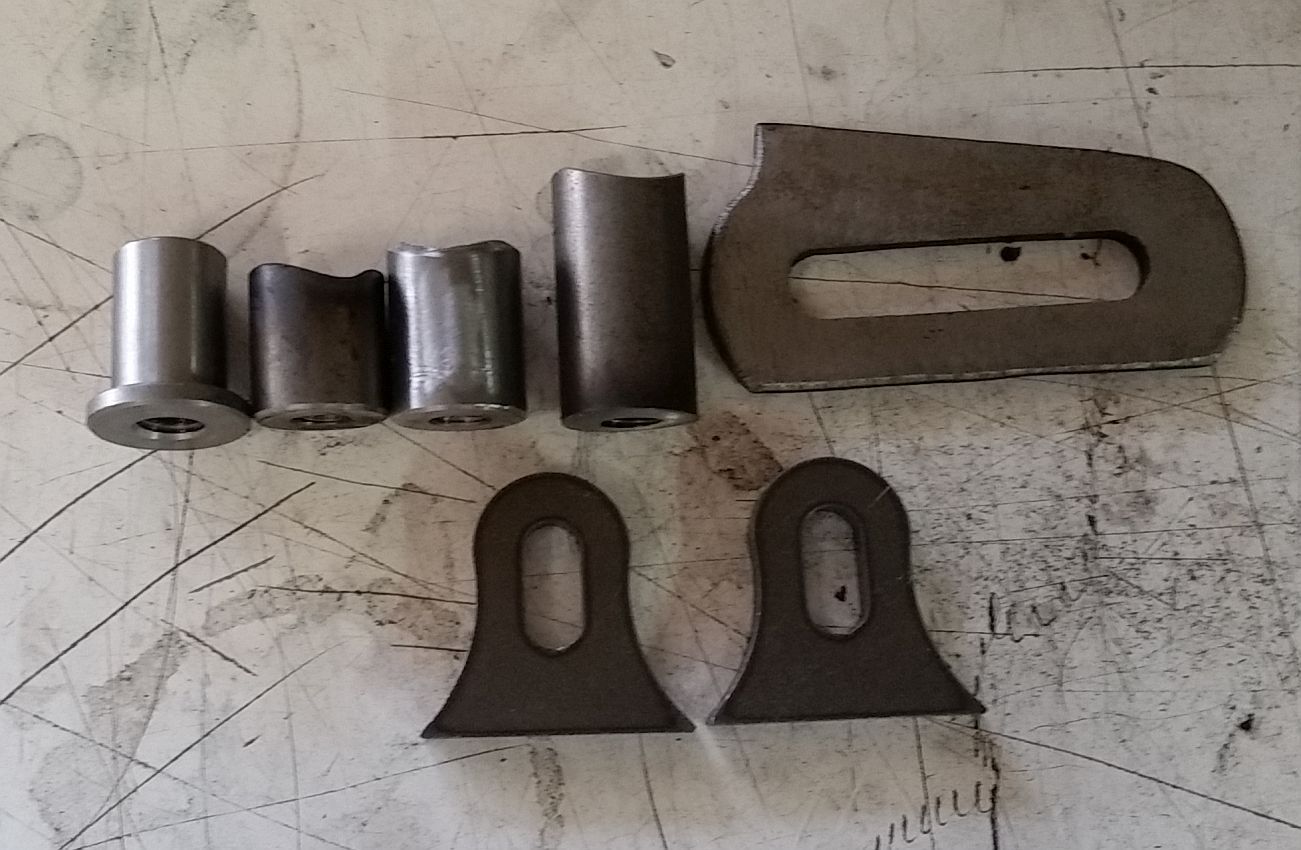
Top Hat bung to go into the crossmember to attach to the center of the rear fender.
3 bungs to go on the frame rails to attach sides of fender
Caliper anchor bracket
2 New Shock brackets (to replace the ones that need to be removed)
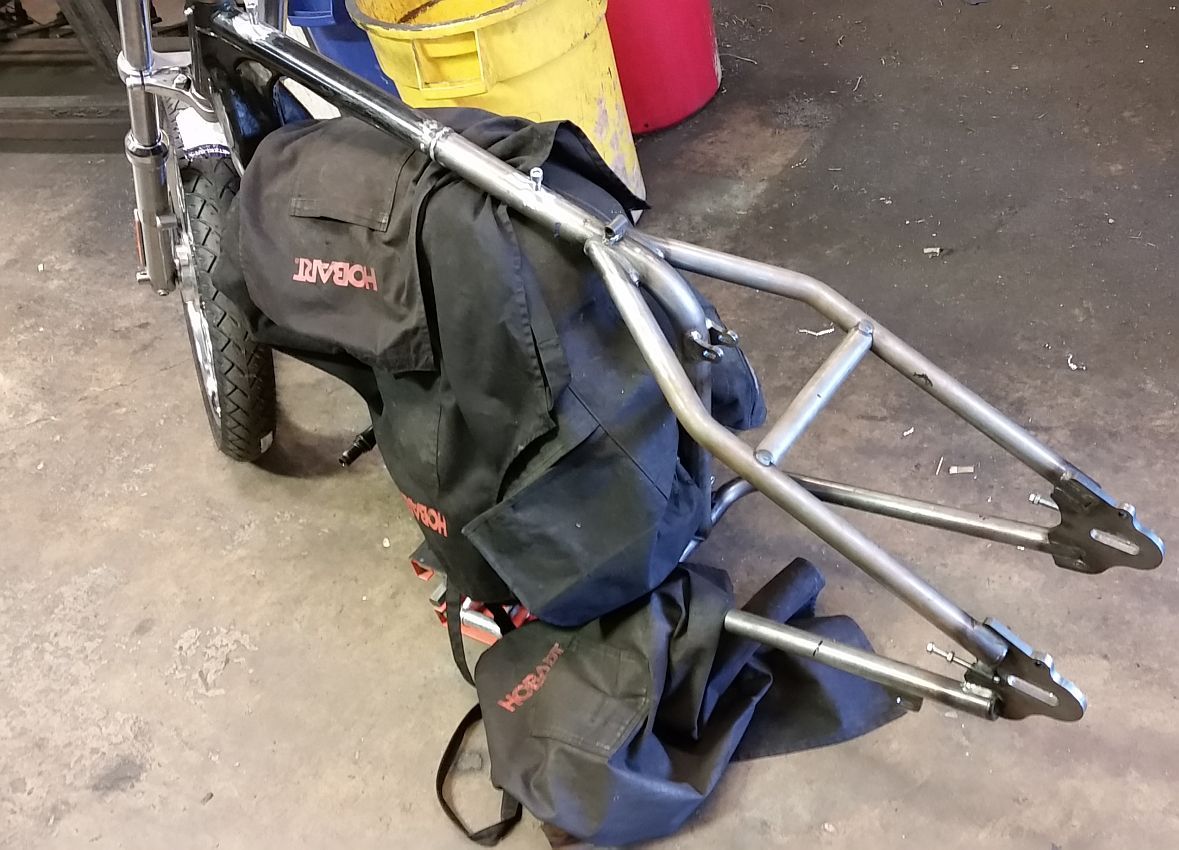
We had already measured everything last week...but we measured again this week, then removed the rear wheel.
Then removed the tank and covered up the powertrain and the chrome kickstand.
Ready to get started with the first side fender bung...
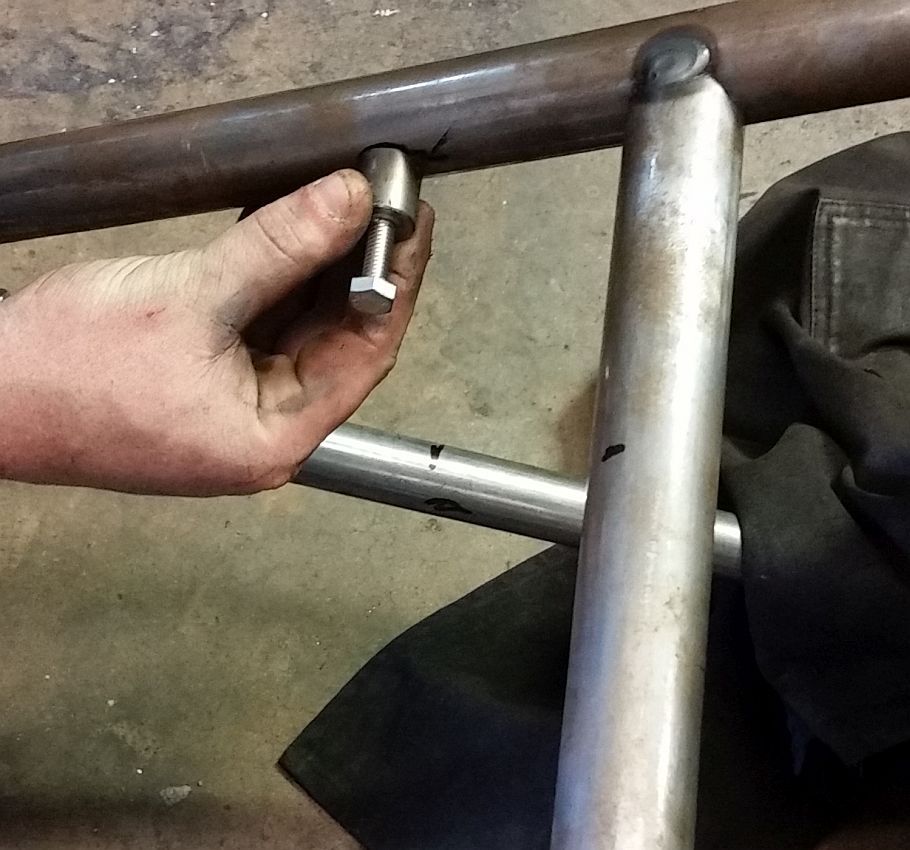
We put anti-seize on the threads of a bolt, and then thread it into the bung, so as it is welded the threads do not distort.
More in next post.
We braced the underside of the fender. It's not pretty, and probably not necessary. But this bike is going to be a rider, and I'd rather be safe than sorry.
The bracing corresponds with the four points that the fender will be mounted to the frame at.
Everything that will be seen when on the bike still looks purty.
Uncovered for the first time in a week...ready to get some work done on it.
These are the brackets we want to get welded up...
Top Hat bung to go into the crossmember to attach to the center of the rear fender.
3 bungs to go on the frame rails to attach sides of fender
Caliper anchor bracket
2 New Shock brackets (to replace the ones that need to be removed)
We had already measured everything last week...but we measured again this week, then removed the rear wheel.
Then removed the tank and covered up the powertrain and the chrome kickstand.
Ready to get started with the first side fender bung...
We put anti-seize on the threads of a bolt, and then thread it into the bung, so as it is welded the threads do not distort.
More in next post.
DK Custom Products
Sponsor
- Thread starter
- #72
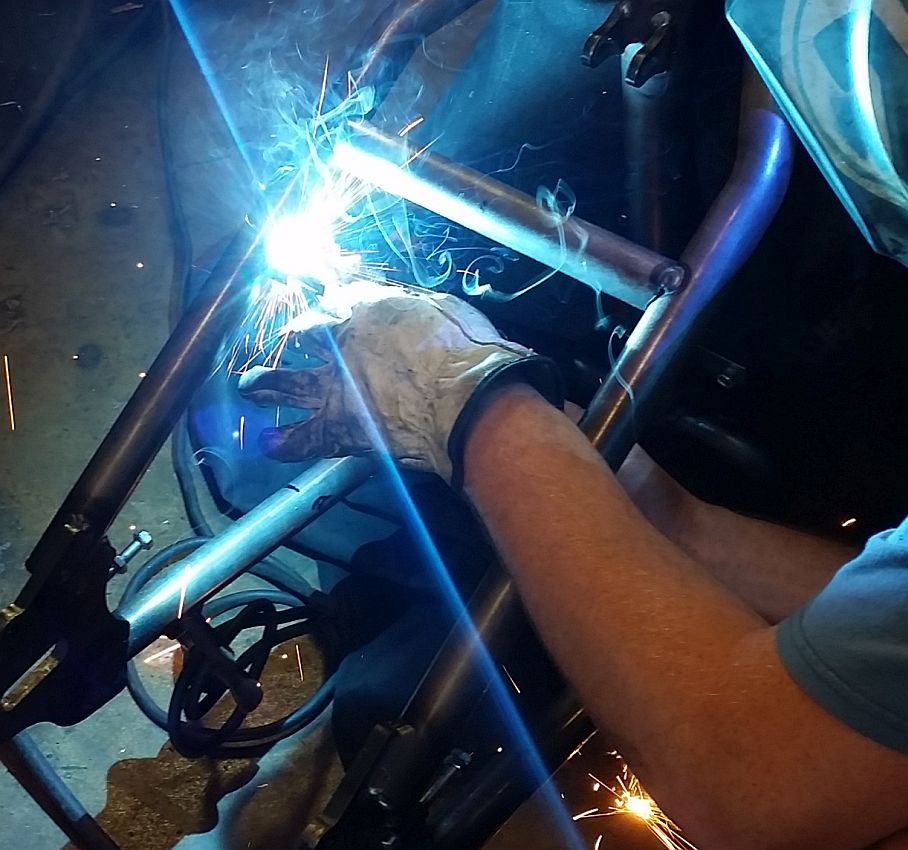
Getting the second mounting welded up...
...and the third.
Caliper anchor bracket.
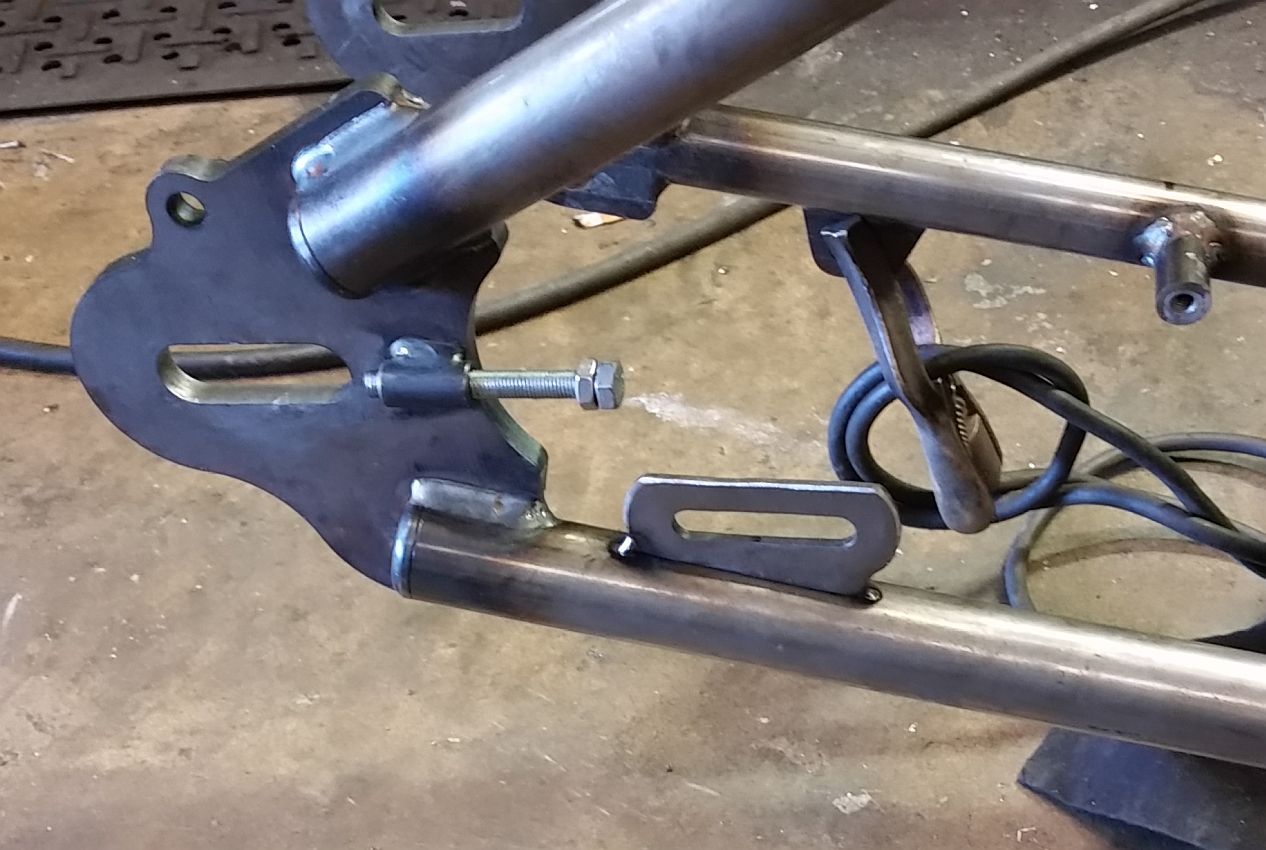
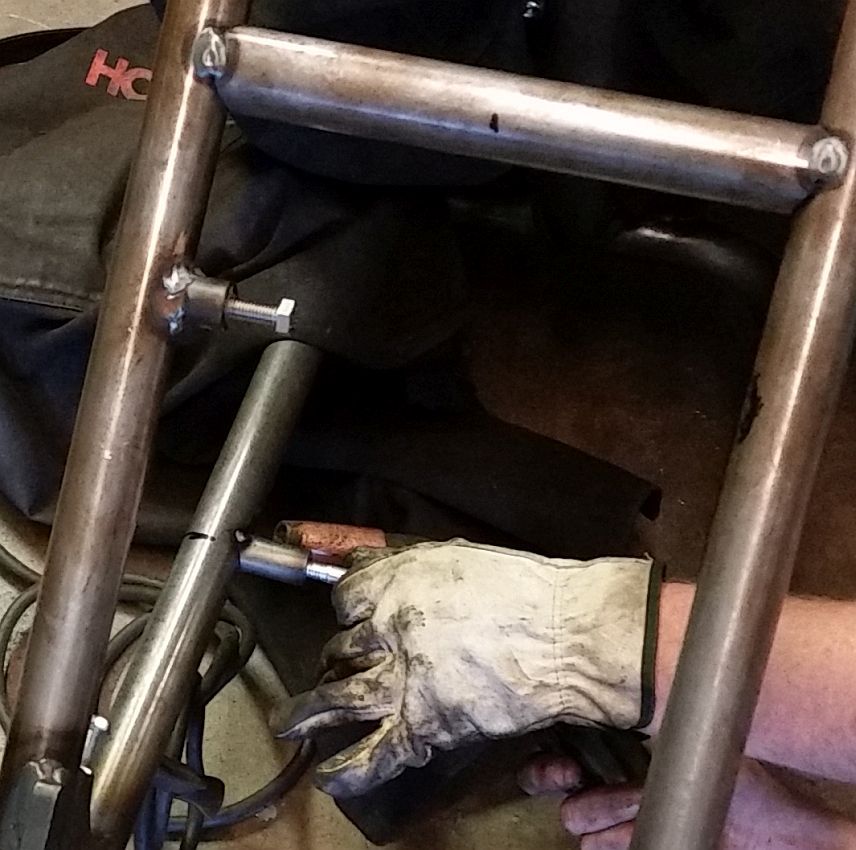
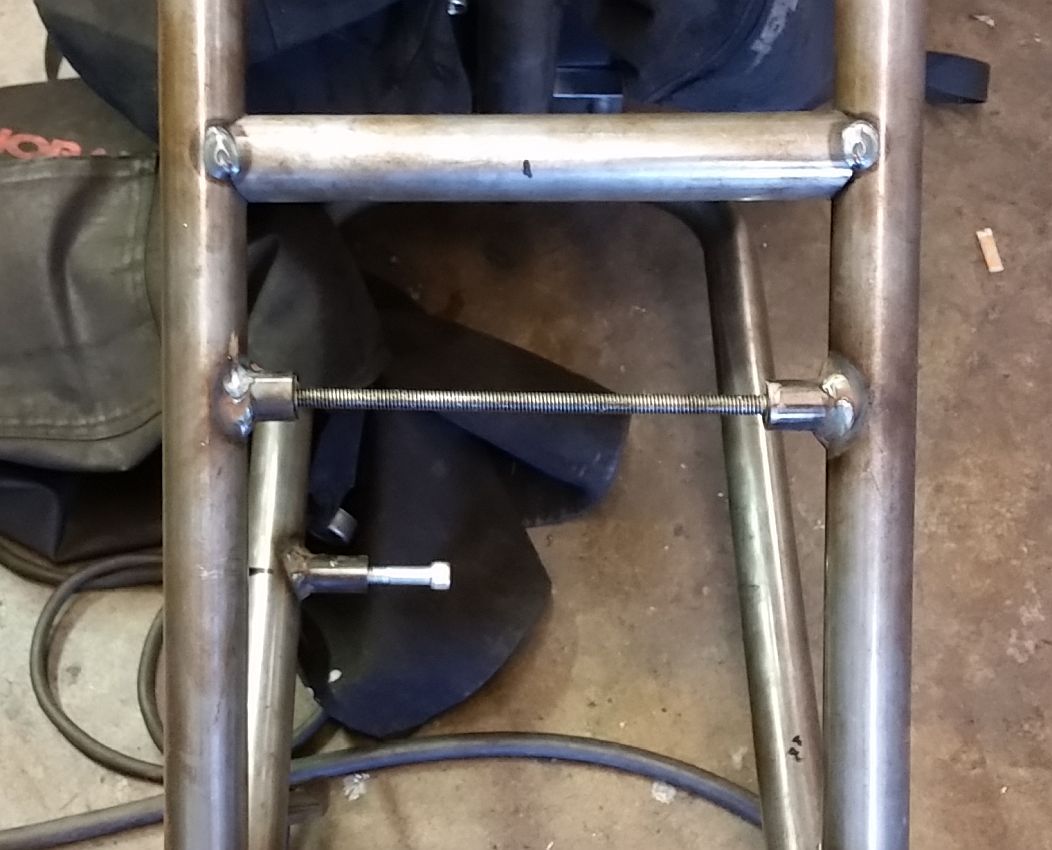
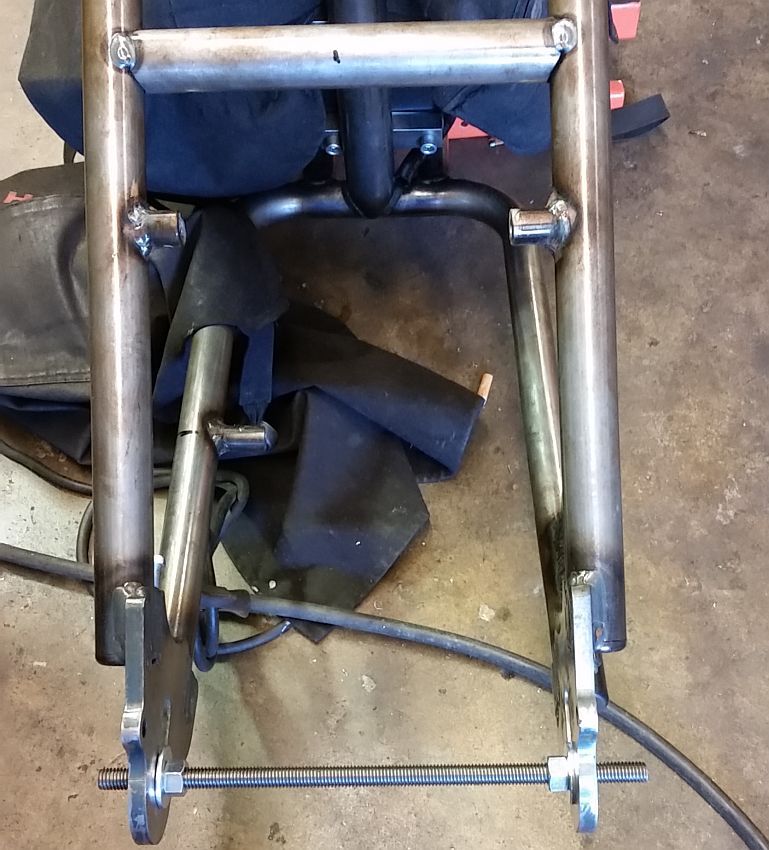
Time to get the cross-member welded in place. It comes from TC Bros. tacked in place, like you see in the photo below. This is so it is easy to move should you want to.
We like it where it is. But before welding it in place we need to spread the axle plates about 1/2" wider than we want them to end up at. Part of the TC Bros. Hardtail kit are the parts needed (thread-all, nuts, and heavy washers) to keep that plates at a static 9" while we're welding. Once welds are done on the crossmember we remove the spreader to let it spring back to the desired 8.5".
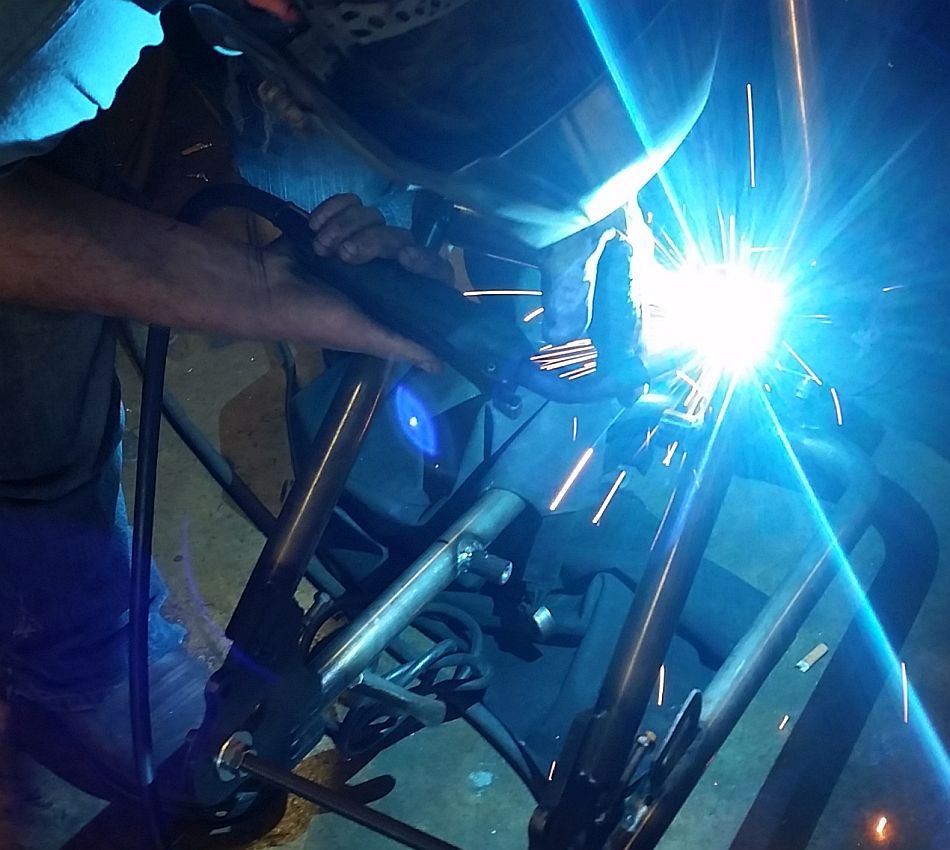
Matt, getting after it.
Since I went to a longer seat shock, we had to cut off the lower shock mount bracket...all back to new..like they were never there.
We put a spacer between the to new tabs to hold them in correct relation to each other as they are welded into their new spot for the longer shocks.
All done....
...for the day. We will do the top hat bung next time we have to work on the bike.
Next week is looking pretty busy...some prototype work and dyno work we were going to be doing Friday and Saturday of this week has been pushed to next week. So not sure if we'll have time next week to work on this bike or not.
Kevin
...and the third.
Caliper anchor bracket.
Time to get the cross-member welded in place. It comes from TC Bros. tacked in place, like you see in the photo below. This is so it is easy to move should you want to.
We like it where it is. But before welding it in place we need to spread the axle plates about 1/2" wider than we want them to end up at. Part of the TC Bros. Hardtail kit are the parts needed (thread-all, nuts, and heavy washers) to keep that plates at a static 9" while we're welding. Once welds are done on the crossmember we remove the spreader to let it spring back to the desired 8.5".
Matt, getting after it.
Since I went to a longer seat shock, we had to cut off the lower shock mount bracket...all back to new..like they were never there.
We put a spacer between the to new tabs to hold them in correct relation to each other as they are welded into their new spot for the longer shocks.
All done....
...for the day. We will do the top hat bung next time we have to work on the bike.
Next week is looking pretty busy...some prototype work and dyno work we were going to be doing Friday and Saturday of this week has been pushed to next week. So not sure if we'll have time next week to work on this bike or not.
Kevin
DK Custom Products
Sponsor
- Thread starter
- #73
We had zero time last week to even think about this bike, let alone get anything done on it.
Today we spent about an hour doing some finish work on the seat mounts. Much stronger now. Forgot to take any pics. Will do that soon and post them up.
Then we spent a couple of hours trying to figure out how to mount the floorboards high and tight, but still maintain the ability to:
Close to two hours of batting around different ideas, we had about come to the conclusion that it was not possible....then Matt had a good idea that looks like it will work.
We're going to cut/grind/weld together a prototype (it won't be pretty), then try and break it. If it holds up, then we'll get some nice looking ones machined.
Kevin
Today we spent about an hour doing some finish work on the seat mounts. Much stronger now. Forgot to take any pics. Will do that soon and post them up.
Then we spent a couple of hours trying to figure out how to mount the floorboards high and tight, but still maintain the ability to:
- Fold up when leaned over
- Have forward/rearward adjustment
- Have angle adjustment
Close to two hours of batting around different ideas, we had about come to the conclusion that it was not possible....then Matt had a good idea that looks like it will work.
We're going to cut/grind/weld together a prototype (it won't be pretty), then try and break it. If it holds up, then we'll get some nice looking ones machined.
Kevin
DK Custom Products
Sponsor
- Thread starter
- #74
Here are a couple of pics from earlier this week.
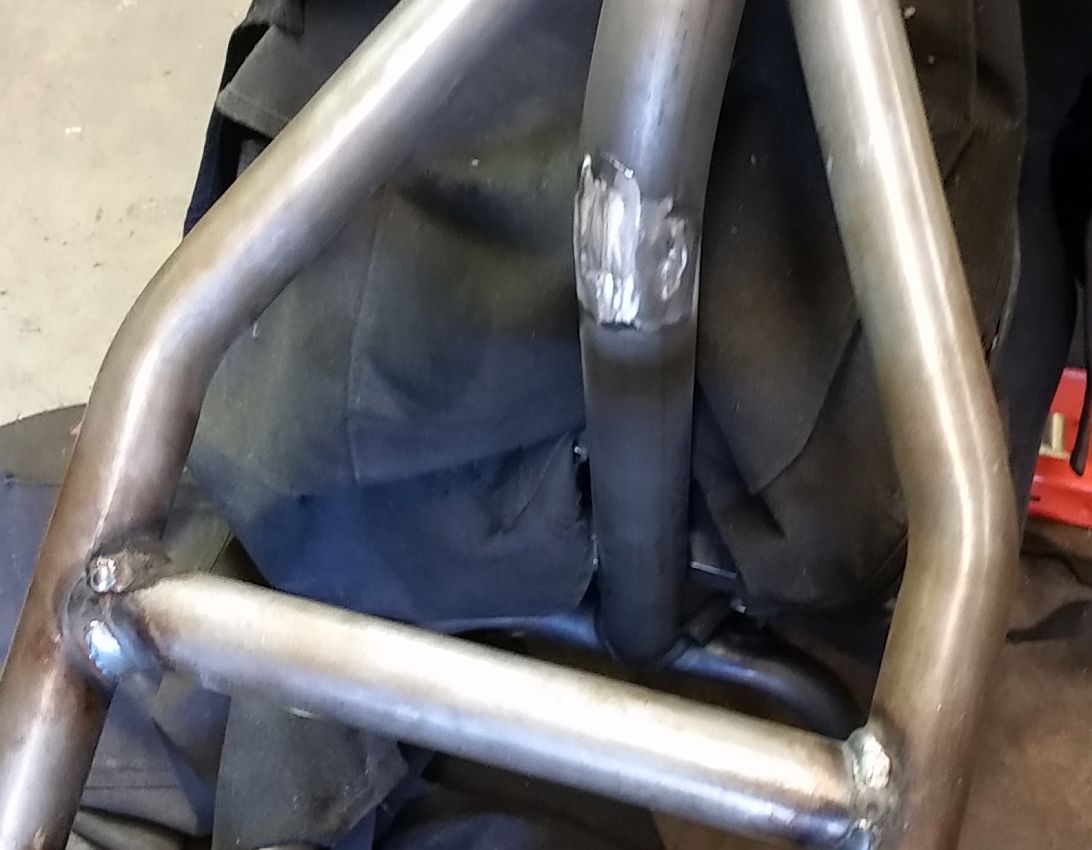
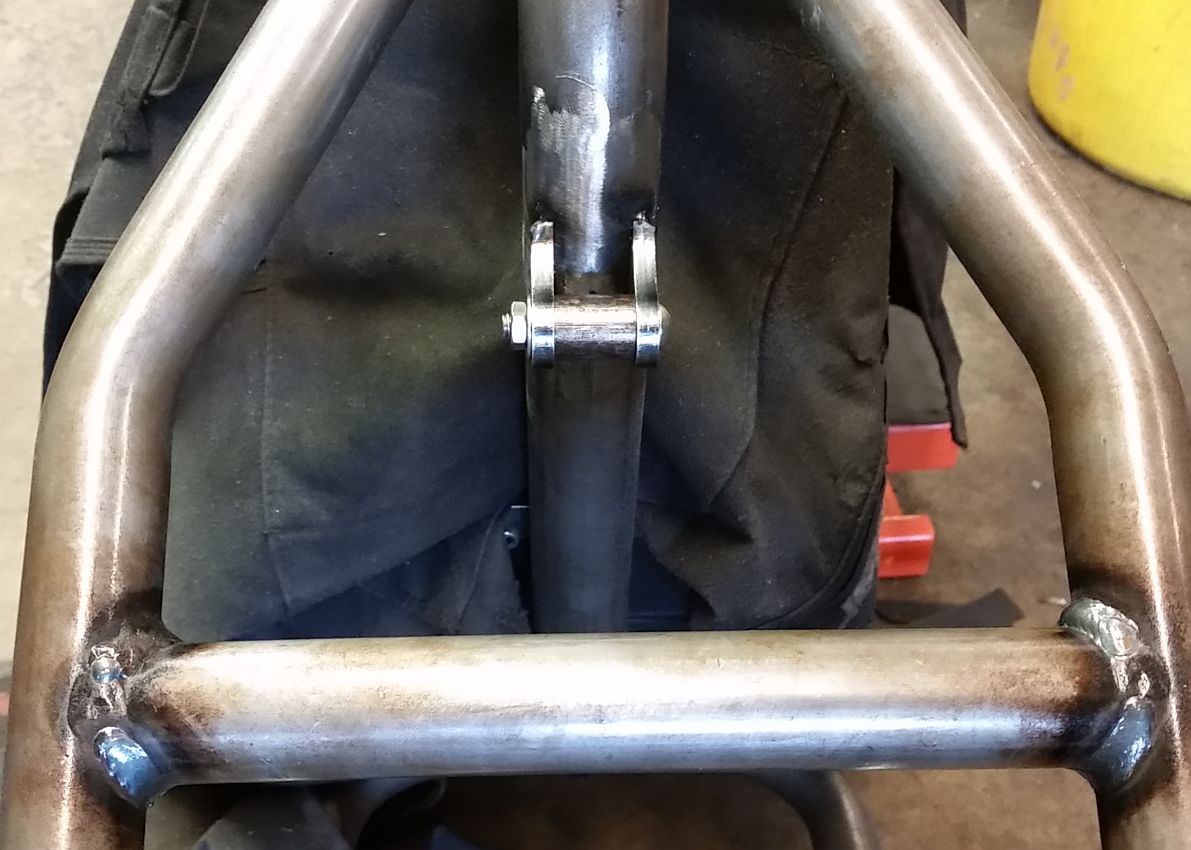
This is what the seat hinge originally looked like. I did not want to trust my ass (literally) to the two small weld points where the pivot bolt goes thru...
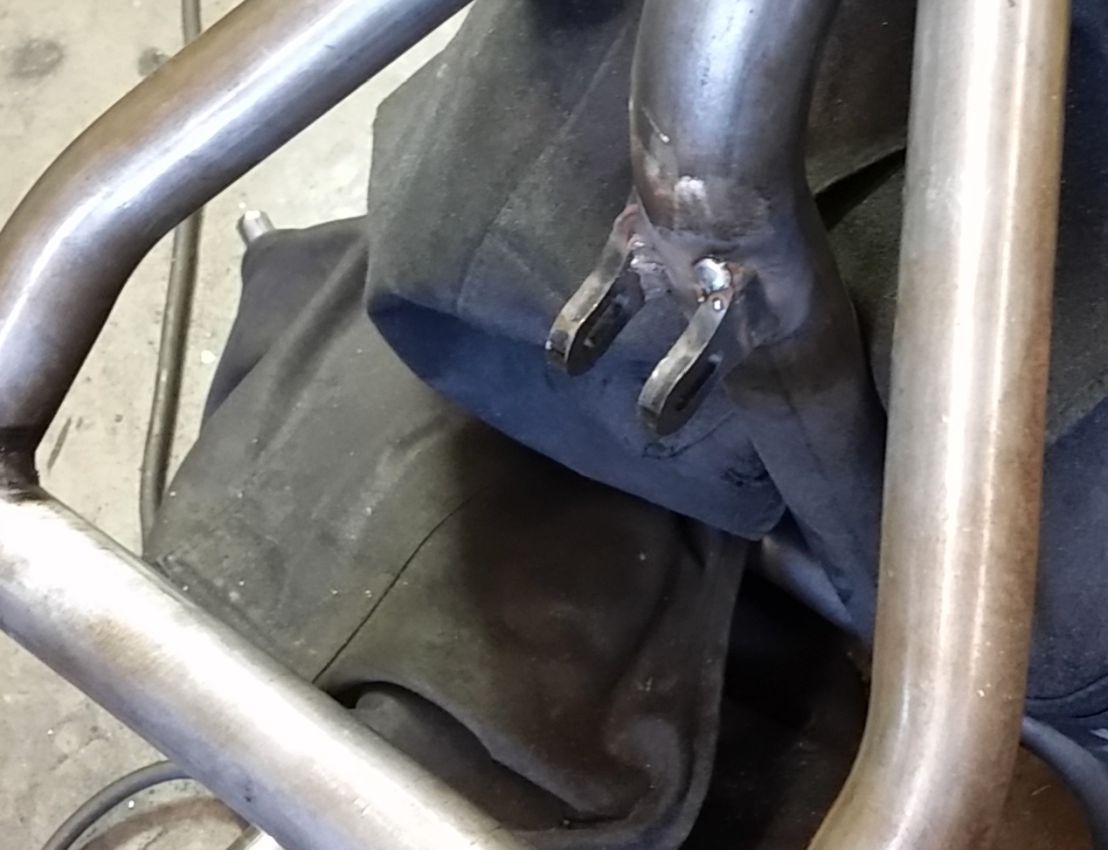
...so Matt beefed the connection up on one side. Still needs some shaping/finishing to get it nice, but I'm confident that the seat hinge is no longer a weak link in keeping the seat connected to the frame.
Doing some clearancing to the bottom seat shock mounting tabs. They shock needs to fit in between the tabs now AND after they are thicker from powder coating.
Matt finished up the prototype floorboard mount, right before I left the shop yesterday. Looks like it is going to work. Monday we will bolt it up (and I'll remember to take pics) and then proceed to try and break it!
Kevin
This is what the seat hinge originally looked like. I did not want to trust my ass (literally) to the two small weld points where the pivot bolt goes thru...
...so Matt beefed the connection up on one side. Still needs some shaping/finishing to get it nice, but I'm confident that the seat hinge is no longer a weak link in keeping the seat connected to the frame.
Doing some clearancing to the bottom seat shock mounting tabs. They shock needs to fit in between the tabs now AND after they are thicker from powder coating.
Matt finished up the prototype floorboard mount, right before I left the shop yesterday. Looks like it is going to work. Monday we will bolt it up (and I'll remember to take pics) and then proceed to try and break it!
Kevin
DK Custom Products
Sponsor
- Thread starter
- #75
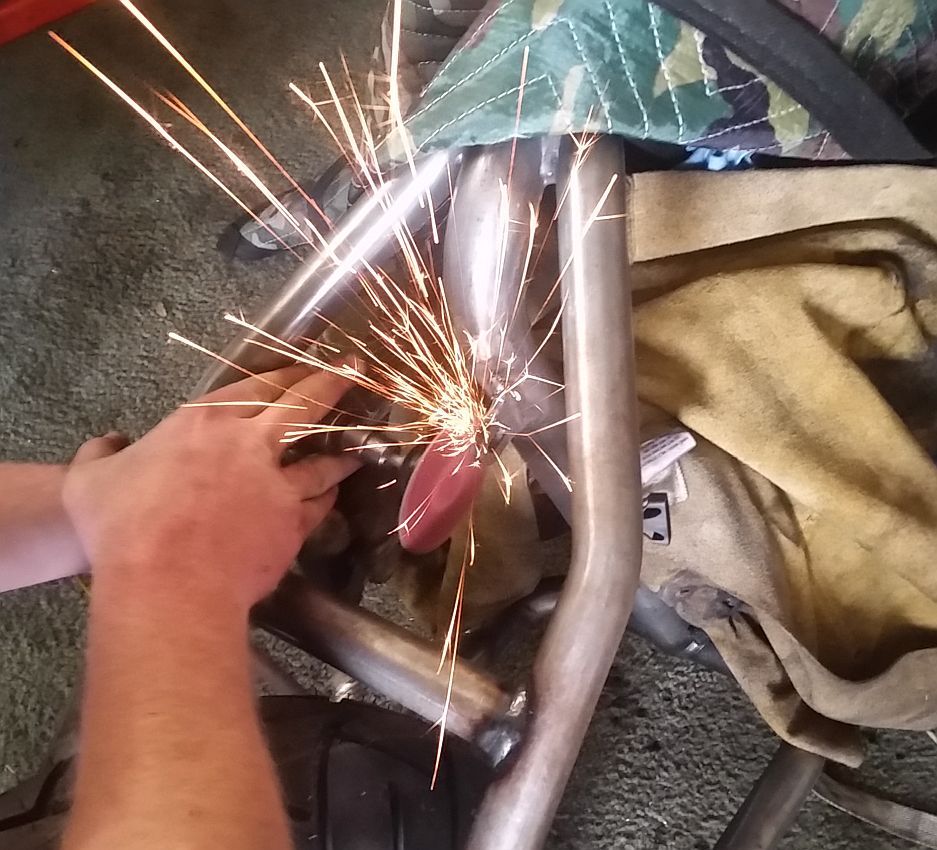
Had a bit of time yesterday to test out a couple of floorboard prototype mounts.
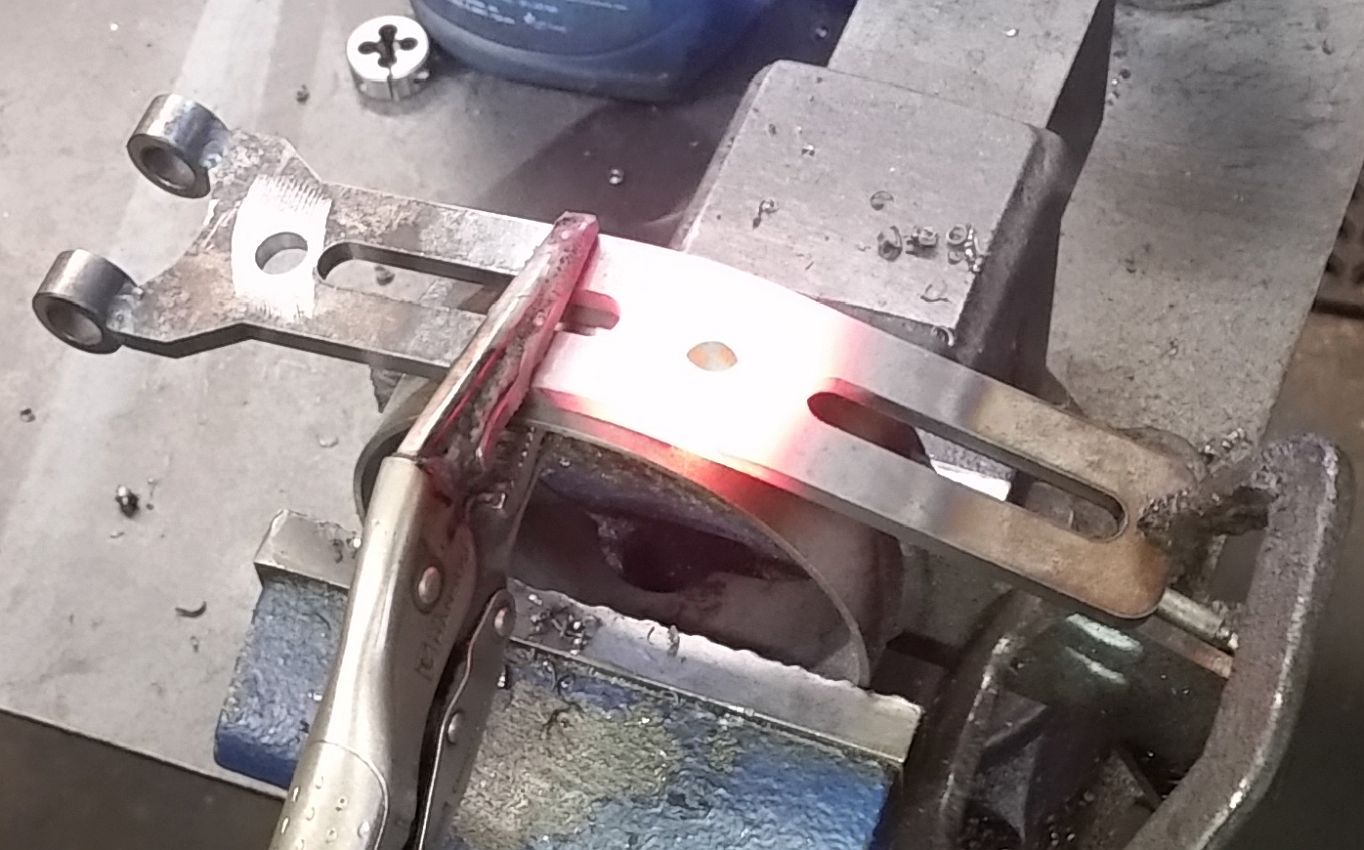
Here's a pic of the second one in the process of being made-
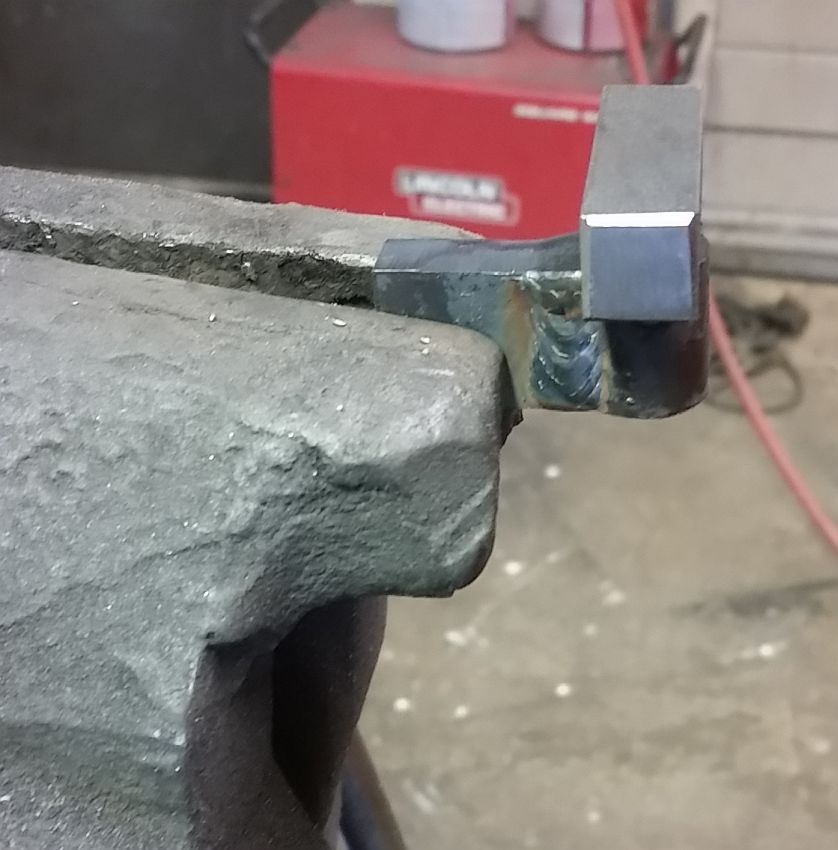
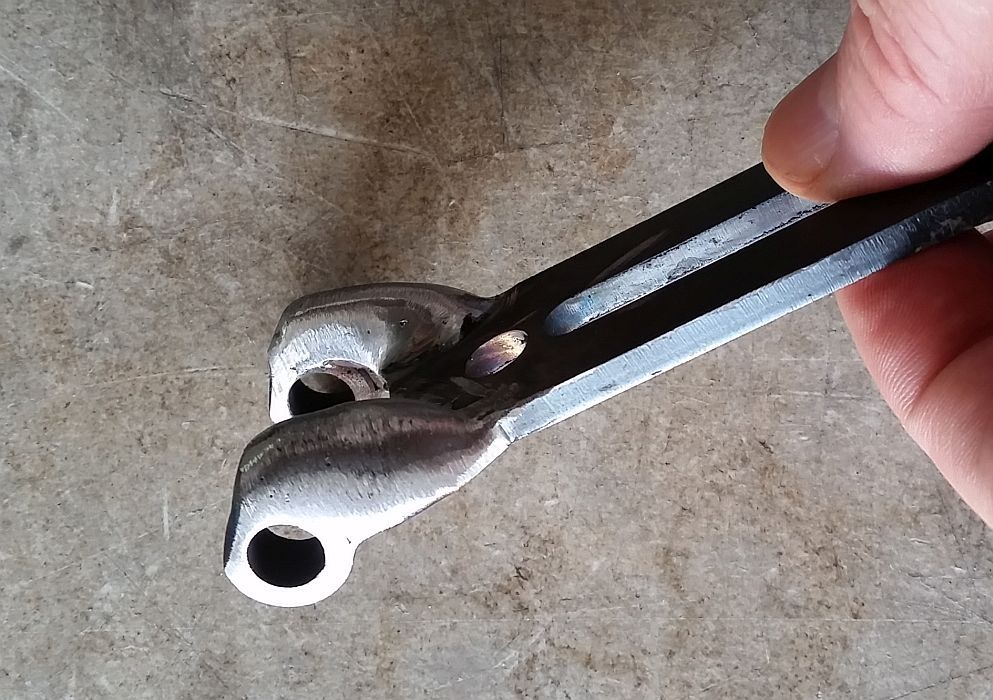
Here's a pic of the first one, next to the second one. The first one did not break, but it did not hold tight in the slot when Matt's 220 lbs jumped on it.
These are ugly prototypes, but all we were testing for is strength....
...and the second one held fine, no breaking or slipping.
We are going to go ahead and make some nice looking ones now.
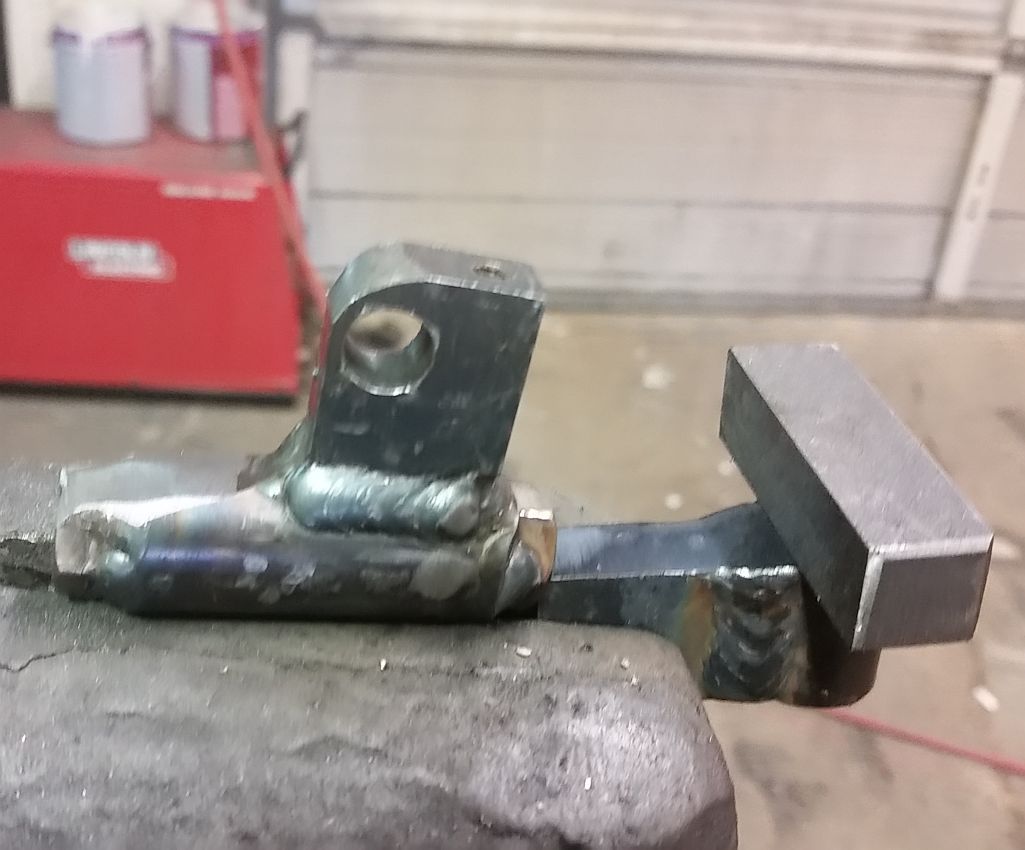
A couple of views from the side....
They are adjustable, both forward and rearward, as well as the angle of the board being adjustable...AND they will fold up.
Kevin
Here's a pic of the second one in the process of being made-
Here's a pic of the first one, next to the second one. The first one did not break, but it did not hold tight in the slot when Matt's 220 lbs jumped on it.
These are ugly prototypes, but all we were testing for is strength....
...and the second one held fine, no breaking or slipping.
We are going to go ahead and make some nice looking ones now.
A couple of views from the side....
They are adjustable, both forward and rearward, as well as the angle of the board being adjustable...AND they will fold up.
Kevin
DK Custom Products
Sponsor
- Thread starter
- #76
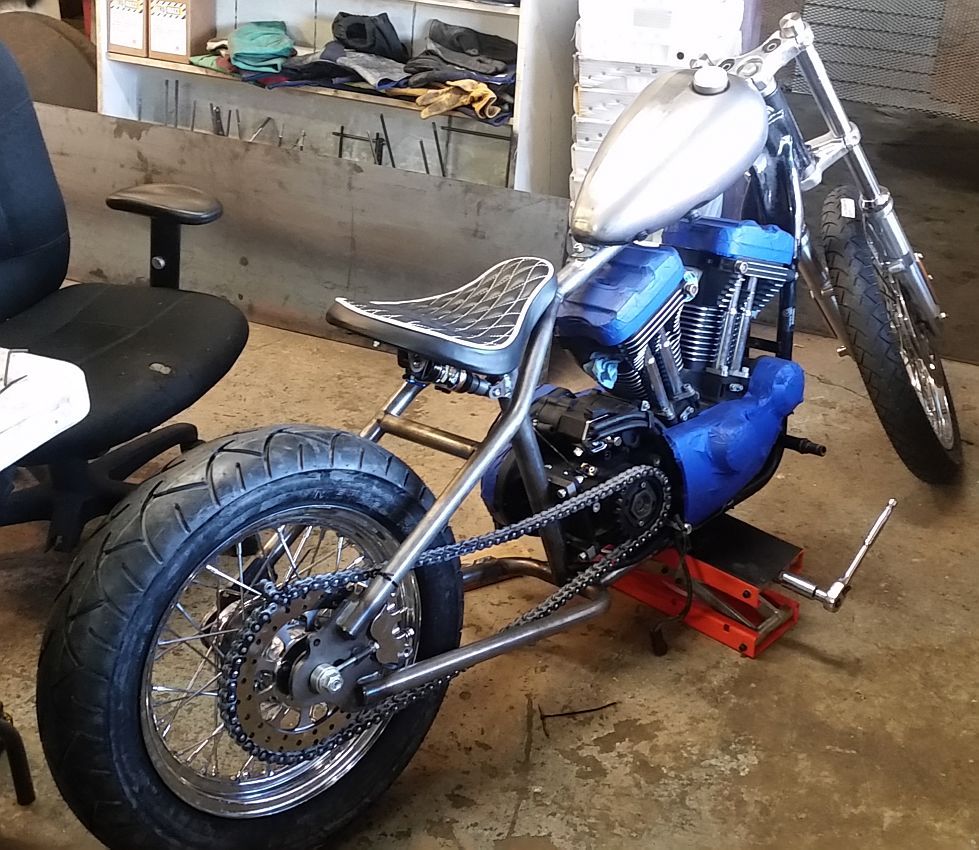
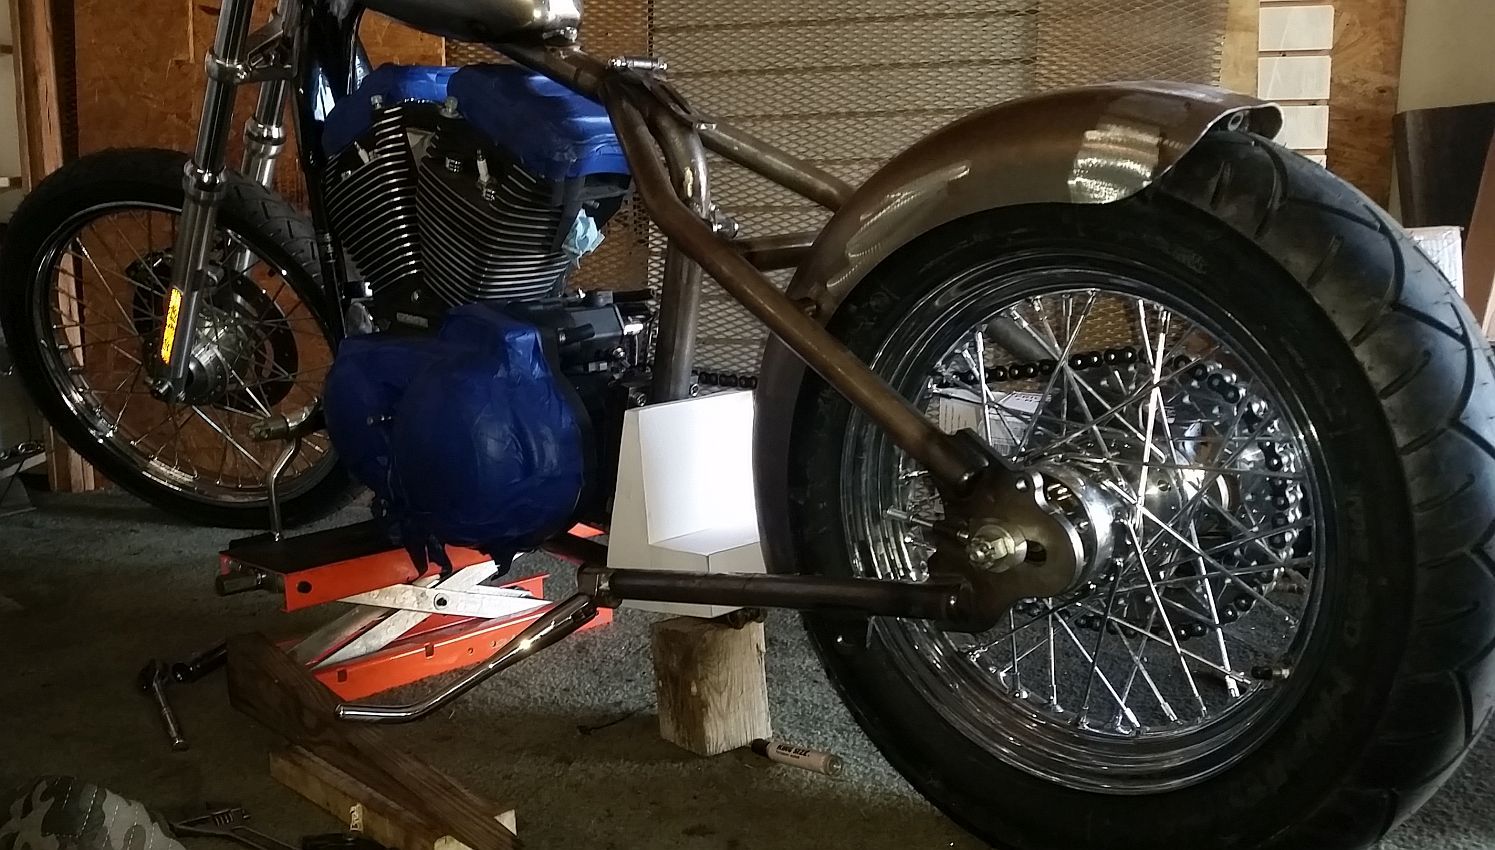
We put the seat on, put the floorboards and tank on, then took some measurements of where I want the grips to be on my handlebars.
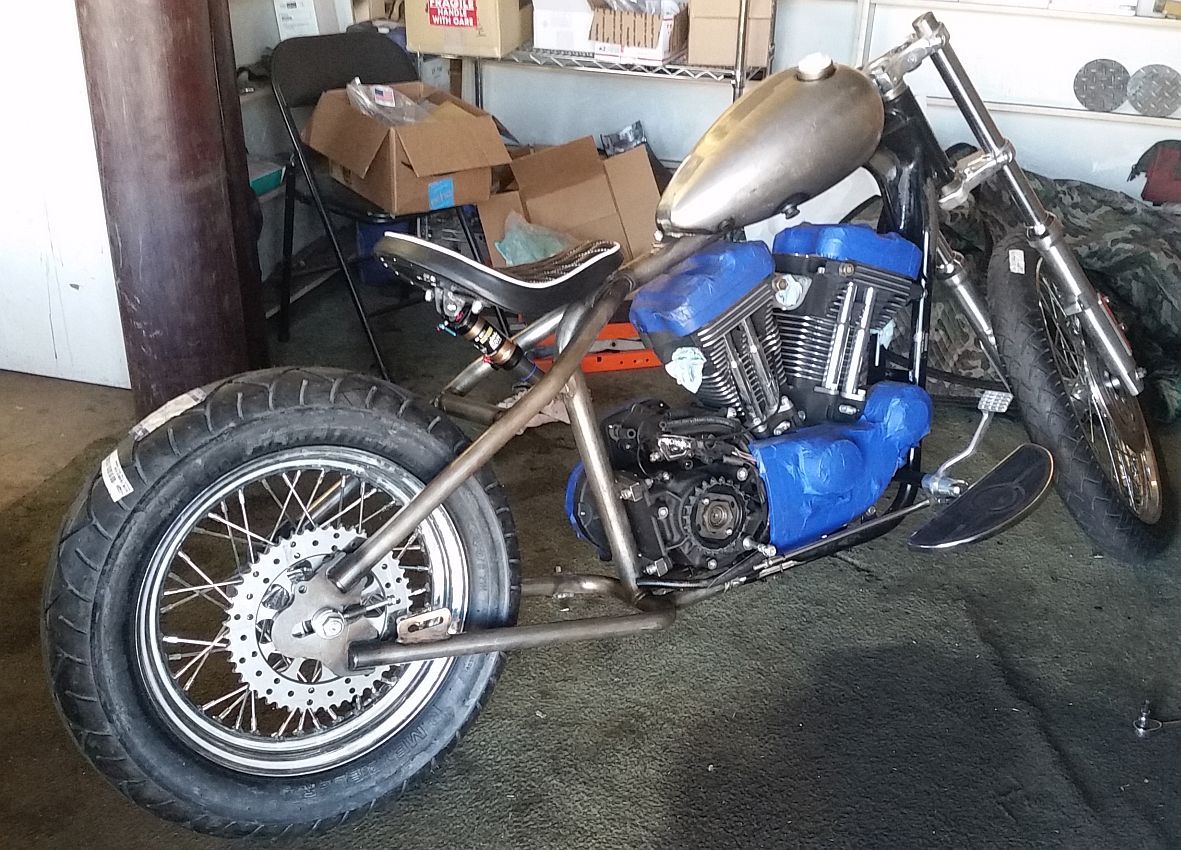
The above photo is at a weird angle...really makes the seat stick up like a sore thumb. Might be partly because the rear fender is not on too.
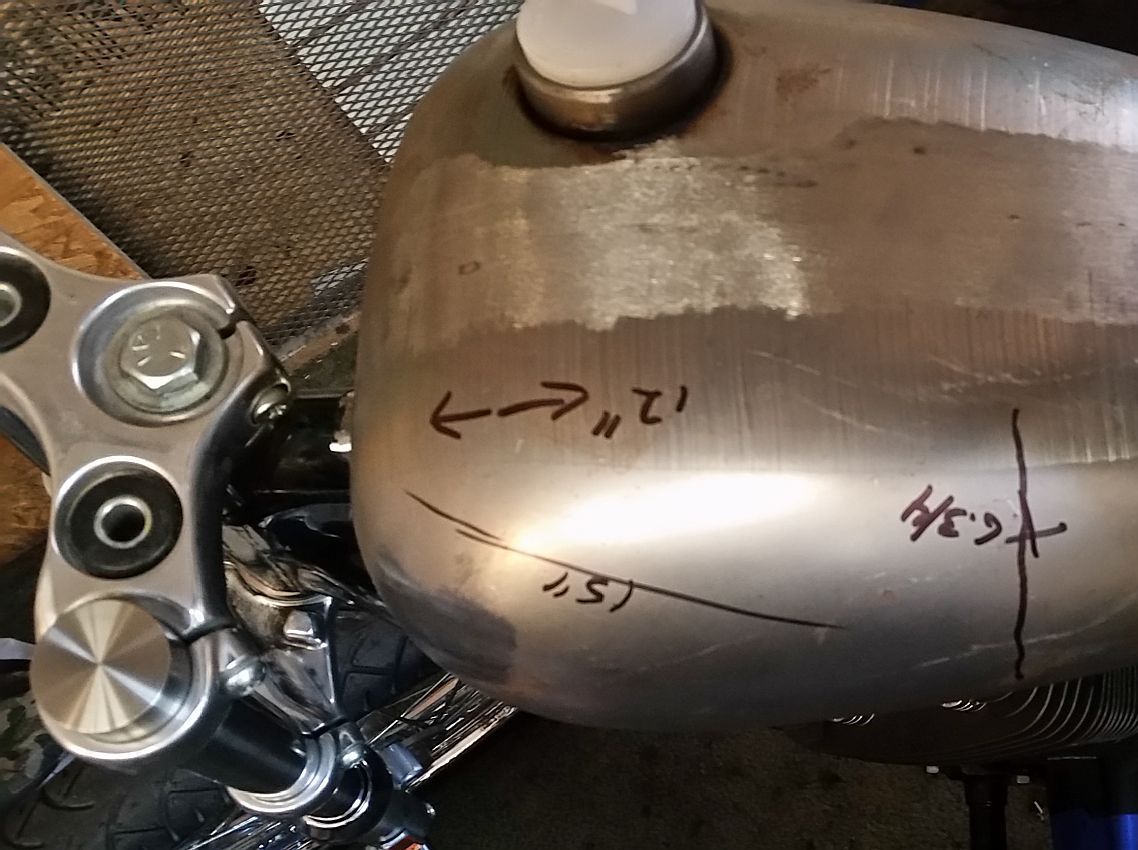
Wrote on the tank the different measurements for grip placement.
I'm not a whiz at geometry...gotta double check, but I think these handlebars from TC Bros. are going to work.


Kevin
The above photo is at a weird angle...really makes the seat stick up like a sore thumb. Might be partly because the rear fender is not on too.
Wrote on the tank the different measurements for grip placement.
I'm not a whiz at geometry...gotta double check, but I think these handlebars from TC Bros. are going to work.
Kevin
peteg59
Meme Master
Those handle bars have a true nostalgic chopper lookThumbUp
Are you planning on re~using the stock HD handlebar switches/controls?
I ask, as those bars might not accommodate the wiring from the switches without drilling & going internal?
Are you planning on re~using the stock HD handlebar switches/controls?
I ask, as those bars might not accommodate the wiring from the switches without drilling & going internal?
DK Custom Products
Sponsor
- Thread starter
- #78
Those handle bars have a true nostalgic chopper lookThumbUp
Are you planning on re~using the stock HD handlebar switches/controls?
I ask, as those bars might not accommodate the wiring from the switches without drilling & going internal?
Yeah, I think the look will be good, plus I'm hoping they will be comfortable too.
Not using anything off the stock bars, different grips, different levers, different front brake master cylinder and different switches. The wires for the switches will be internal, will be drilling a few holes.
Thought about doing an internal throttle, but pretty much decided against it.
Kevin
DK Custom Products
Sponsor
- Thread starter
- #79
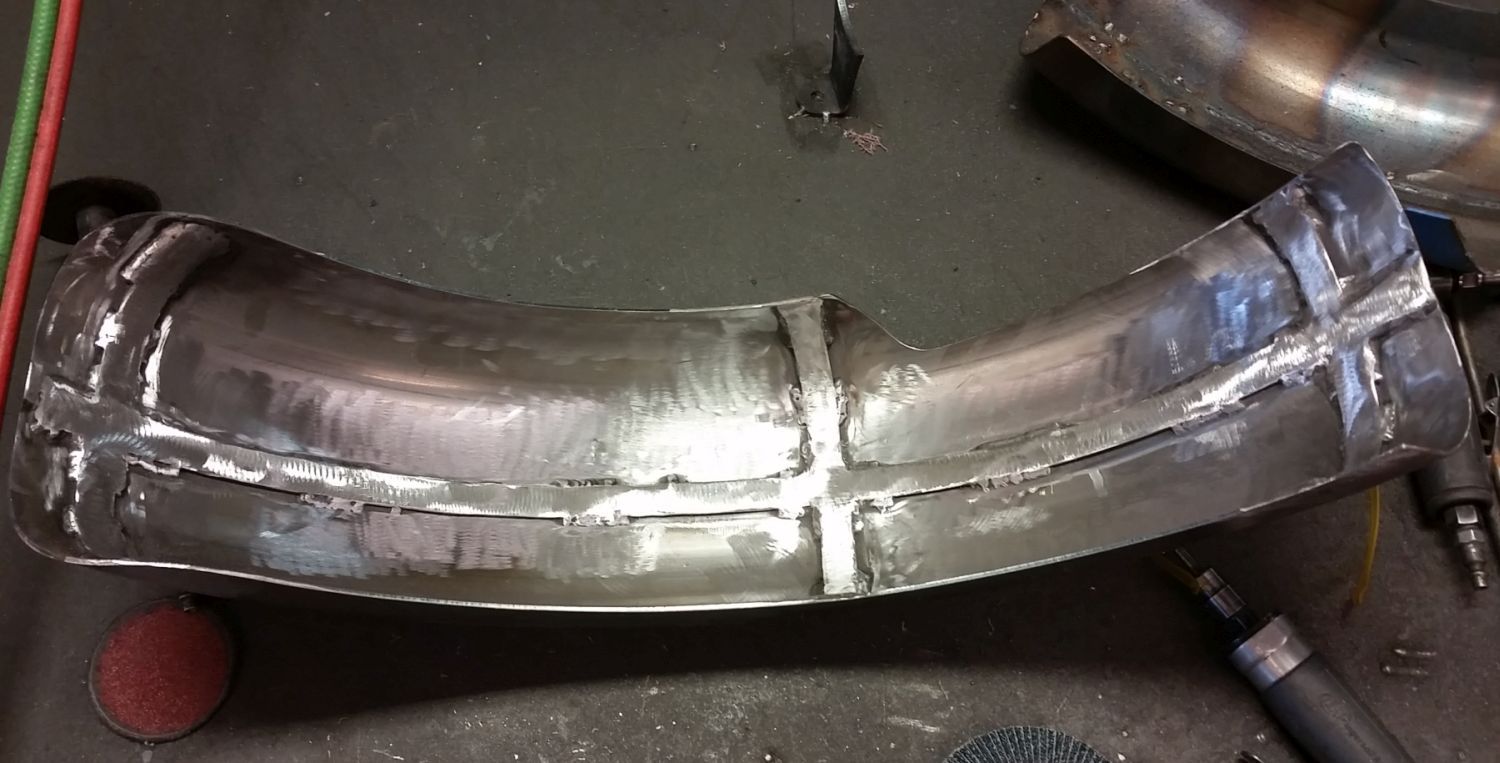
A couple of days ago Devin and I worked on the oil tank.
Here are a couple of photo's....
...of the space we have to work with.

We spent some time with a liquid capacity calculator, then with scissors and card stock...
...mocking up a tank that will fit in the space we have...
...and have room for 2.5 quarts of oil, plus .5 quarts of air space.
The tank will also be the place where the battery goes...
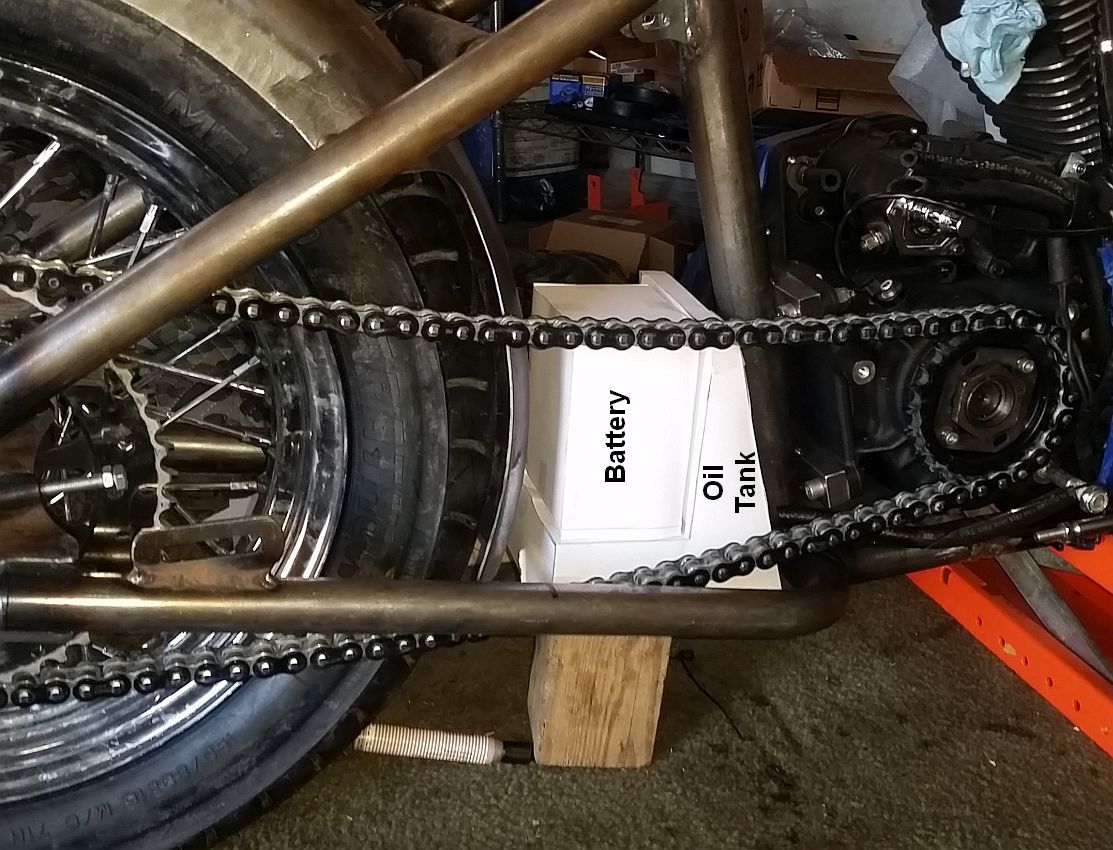
...there is going to be a .25" air gap between the bottom of the battery and the tank...
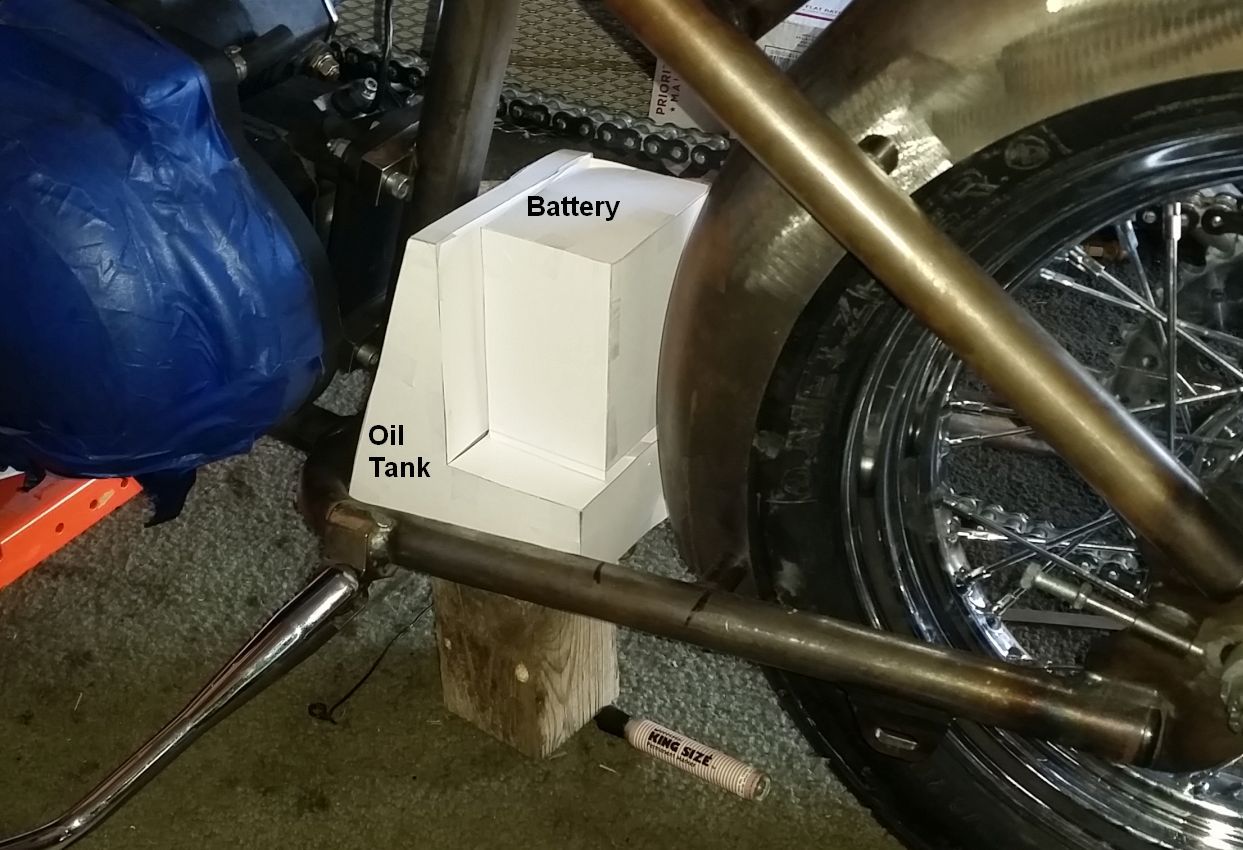
...also, decided to put some "wings" along the sides, just to make the look flow better.
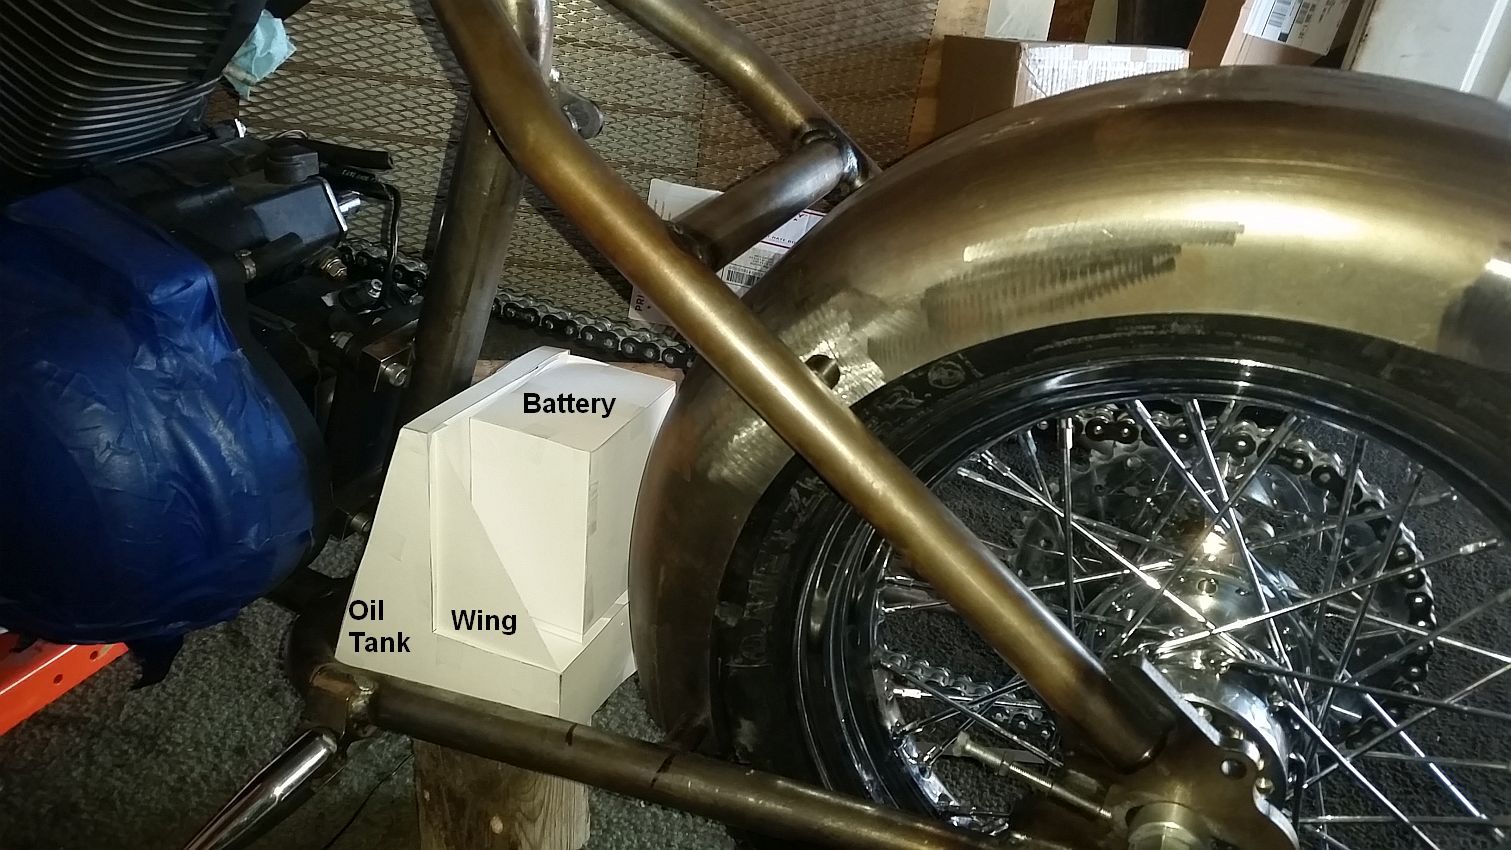
The bottom of the tank protrudes .75" below the bottom of the frame rails, but that is still .5" higher than the frame rails below the engine.
Just below the tank will be a skid plate, which will also double as the mounting for the oil tank. There will be some oblong holes at the front of the skid plate for plenty of air flow across the bottom of the tank.
Here are the drawing for the laser...
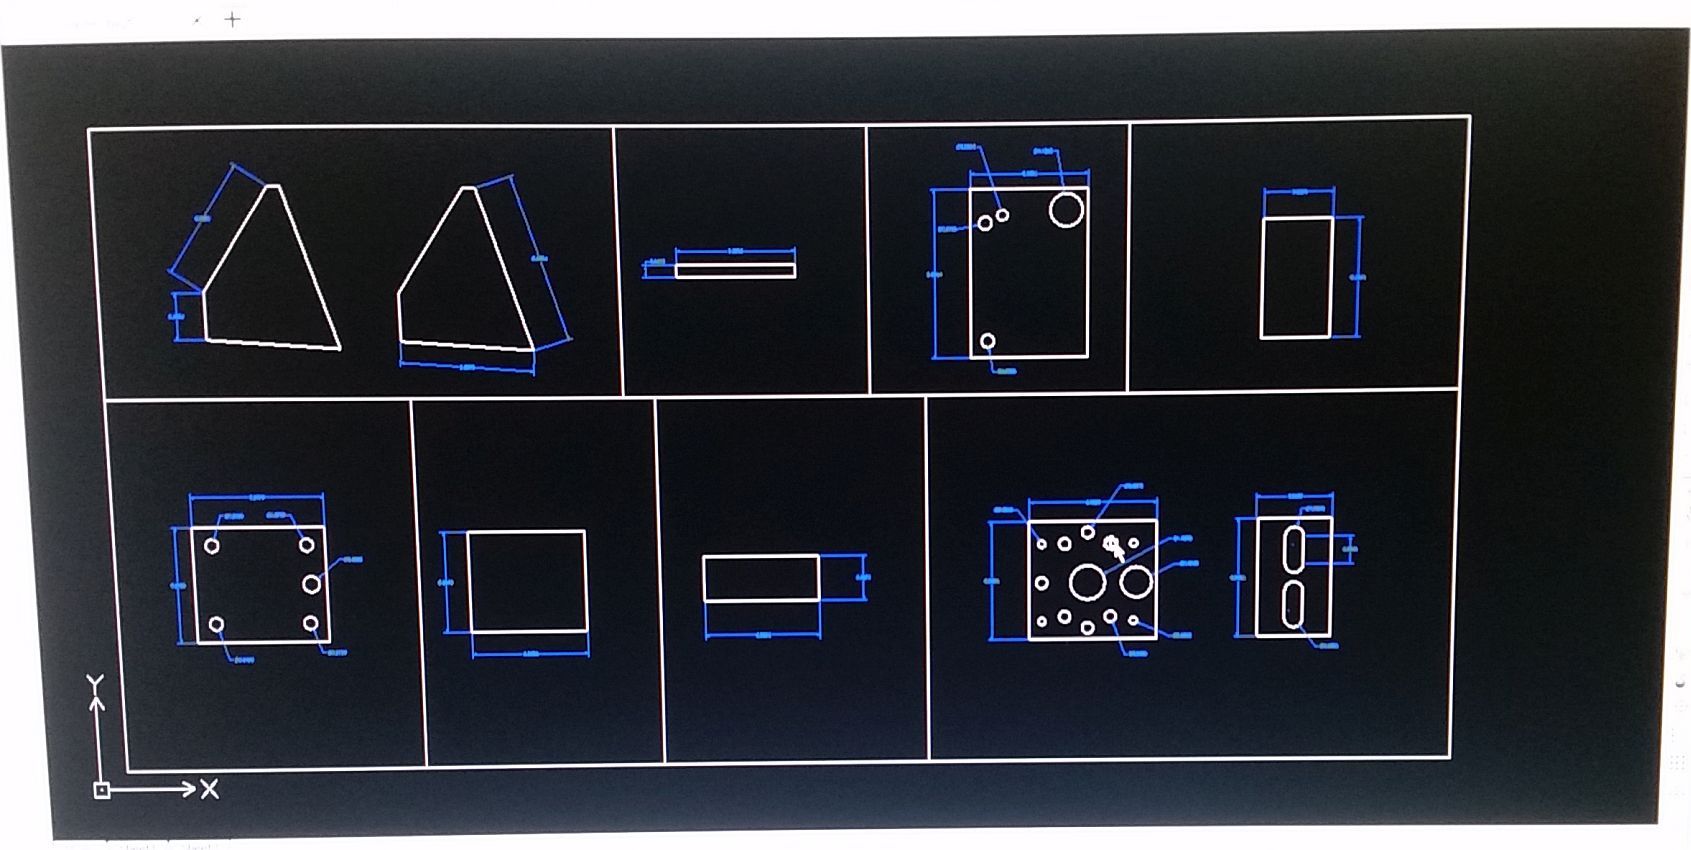
...we were going to cut this by hand, but after seeing all the angles & holes needed to make the tank, we decided to get the pieces laser cut.
The oil tank has turned into a much more complicated endeavor than originally anticipated....but I wanted to leave a lot of open space between the rear cylinder and the rear fender. Fingers crossed that it turns out looking good.
More coming soon.
Kevin
Here are a couple of photo's....
...of the space we have to work with.
We spent some time with a liquid capacity calculator, then with scissors and card stock...
...mocking up a tank that will fit in the space we have...
...and have room for 2.5 quarts of oil, plus .5 quarts of air space.
The tank will also be the place where the battery goes...
...there is going to be a .25" air gap between the bottom of the battery and the tank...
...also, decided to put some "wings" along the sides, just to make the look flow better.
The bottom of the tank protrudes .75" below the bottom of the frame rails, but that is still .5" higher than the frame rails below the engine.
Just below the tank will be a skid plate, which will also double as the mounting for the oil tank. There will be some oblong holes at the front of the skid plate for plenty of air flow across the bottom of the tank.
Here are the drawing for the laser...
...we were going to cut this by hand, but after seeing all the angles & holes needed to make the tank, we decided to get the pieces laser cut.
The oil tank has turned into a much more complicated endeavor than originally anticipated....but I wanted to leave a lot of open space between the rear cylinder and the rear fender. Fingers crossed that it turns out looking good.
More coming soon.
Kevin
DK Custom Products
Sponsor
- Thread starter
- #80
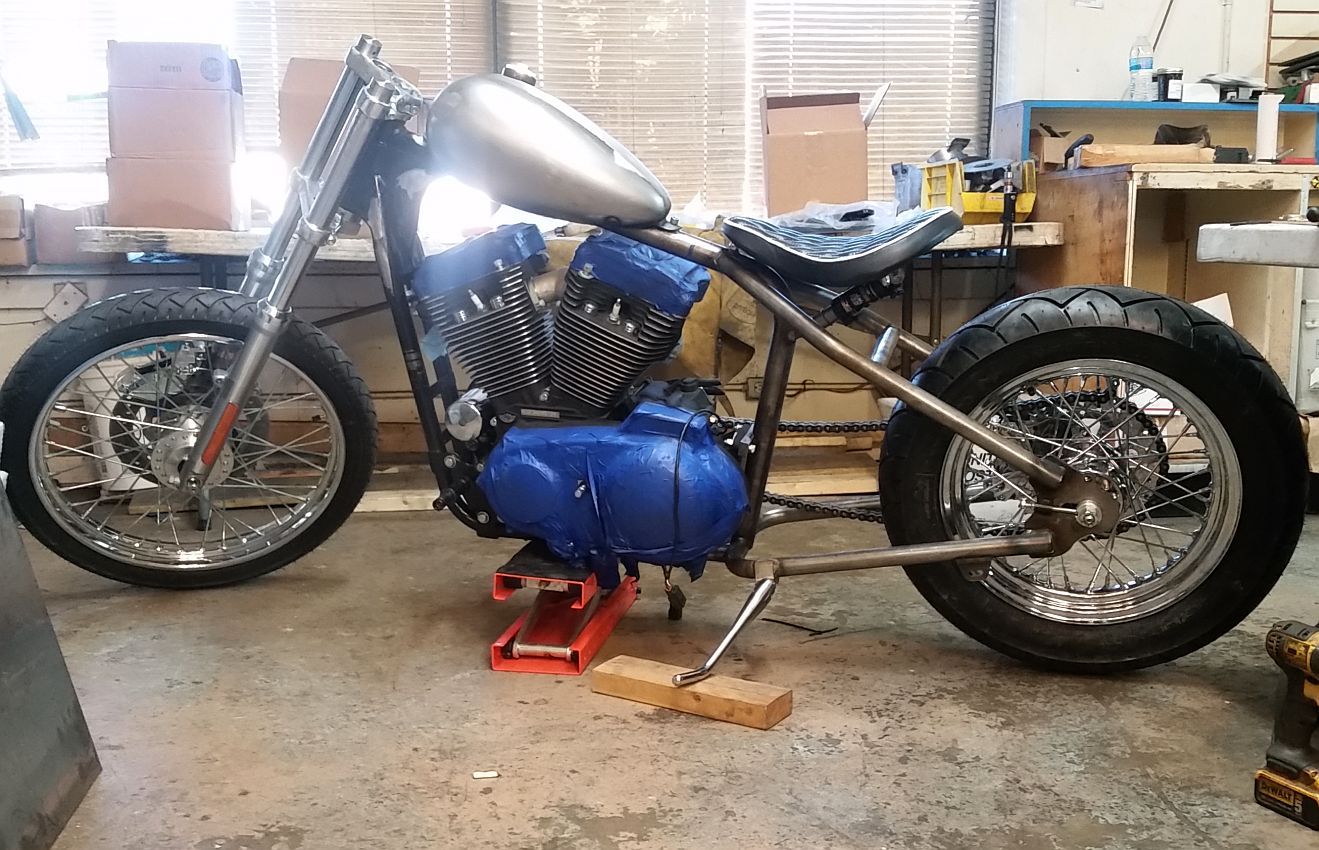
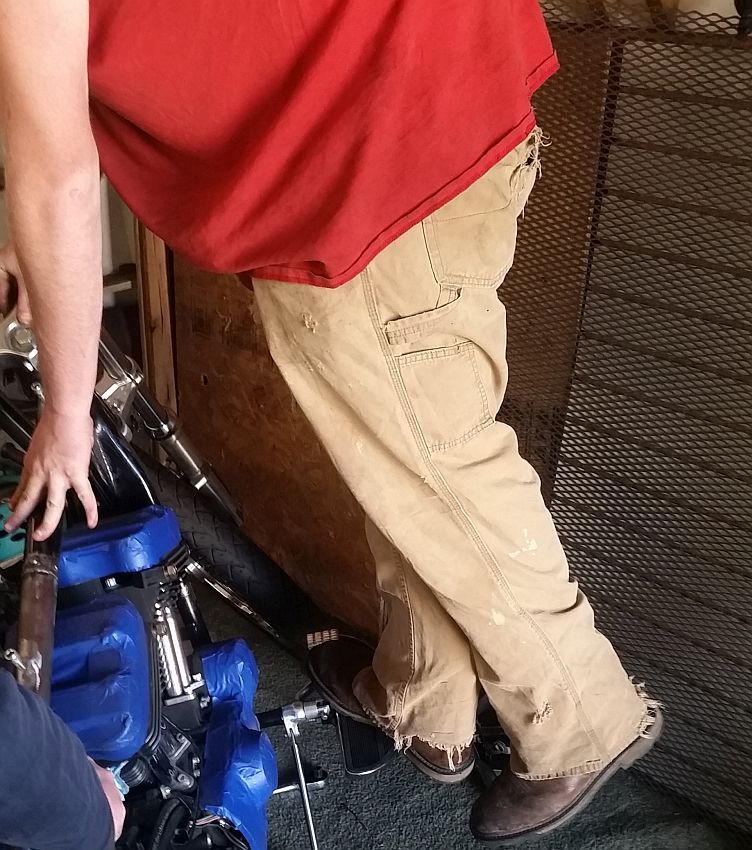
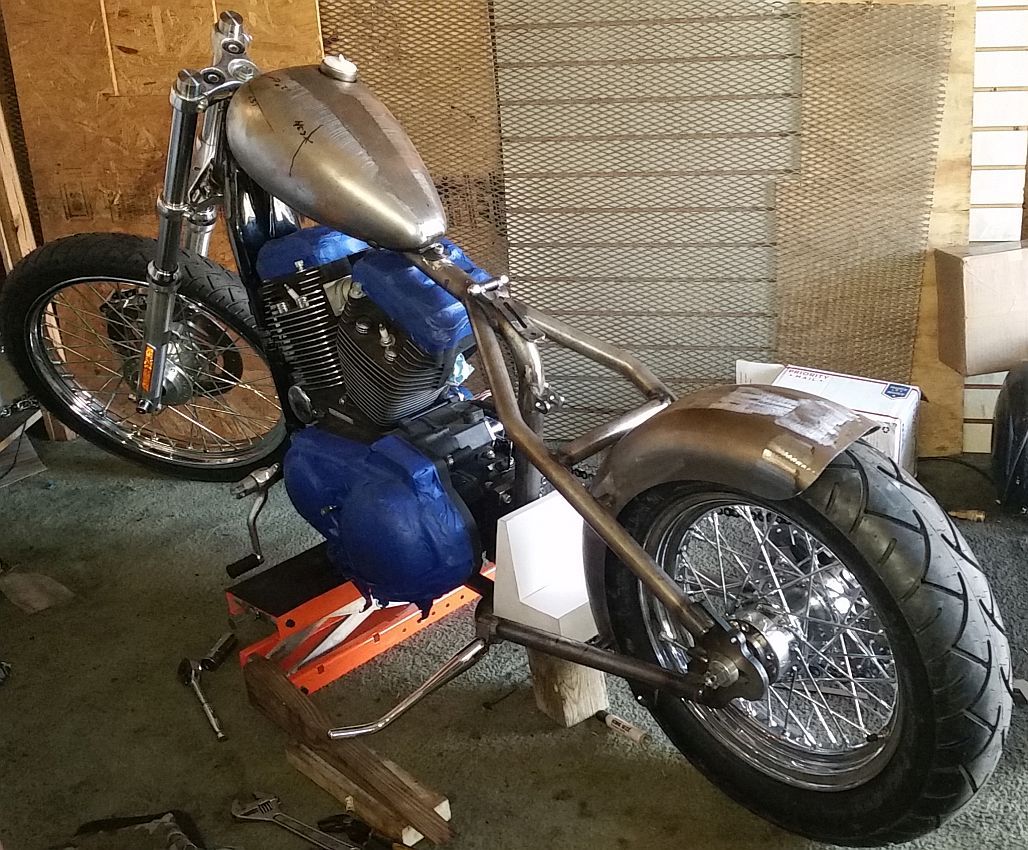
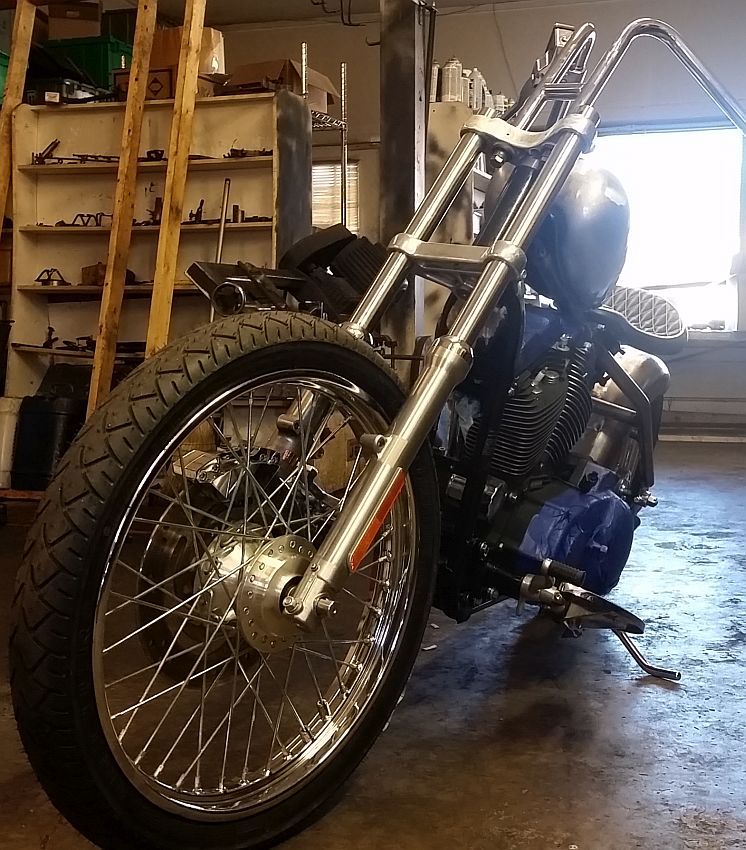
Today we bolted up the handlebars to see how they fit/felt.
Matt, checking them out...
...me seeing how they felt. I like them. Floorboards were comfortable too.
We still have so much to do...
...but it was nice to get it looking more like a bike.
Kevin
Matt, checking them out...
...me seeing how they felt. I like them. Floorboards were comfortable too.
We still have so much to do...
...but it was nice to get it looking more like a bike.
Kevin
Welcome to the Trike Talk Community
Join our vibrant online community dedicated to all things Trikes! Whether you're a seasoned rider or just starting out, this is the place to share experiences, tips, and stories about your three-wheeled adventures. Explore modifications, maintenance advice, and rides, all while connecting with fellow trike enthusiasts from around the globe
Trike Talk Community
Welcome to a community dedicated to the most diverse and fastest growing powersports segment, Motorcycle Trikes. Come join the discussion about the best makes and models, popular modifications and proven performance hacks, trike touring and travel, maintenance, meetups and more!
Register Already a member? Login


