I post in the VW Trike forum (it's for a friend of ours) but mainly ride have a 2007 Stratoliner. Two years ago I converted it to a trike (my design and build) putting approximately 15,000 miles on it. Couple months ago while on a trip to Peoria, IL, an axle bearing burned up causing the axle to move around and destroy the carried end. Now using a Chevy S-10 (8.5") I am back designing and fabricating another one. Actually three of them as the second one is for my wife's Road Star and the third for my father in law's Harley. He "volunteered" me to make one for him by dropping off a rear axle and said it's for me to convert his bike and left. Anyhow, I'll post pictures as I fabricate each part for everyone to follow along.
You are using an out of date browser. It may not display this or other websites correctly.
You should upgrade or use an alternative browser.
You should upgrade or use an alternative browser.
Stratoliner
- Thread starter Rickus Dickus
- Start date
I’ll be watching this thread,it sounds very interesting. I rode a Stratoliner for 7 years and thought about converting it to a trike but cost and very few kits changed my mind. I now have a RSV trike that I really like but I still miss the Strat. The Strat’s are torque monsters. Good luck with your project!
Progress Pictures
Funny thing about this. I joined this group for the VW Trike portion and here I am posting about progress on my Stratoliner Trike.
A bit on how I got to this point: Three years ago I was in a bet that I couldn't build a trike rear end assembly for my 2007 Stratoliner for under $500. I accepted and spent the next 9 months designing and building one. I did get it built and road tested for just under $300! Of course I had to fabricated some molds and fiberglassed a body with fenders to top it off.
Painting it myself, and wiring it up, along with new tires my wife calculated I spent between $800 to $900 total. The original rear axle was from a wrecked Ford Expedition which I got for $50, rims were free, paint was $150, 2" square tubing was $35, Sprocket for $45, Tires were around $200, bearings and seals under $100, air shocks I bartered for, and of course I put a butt load of time into it. The bet was just for getting the axle built and working so I won a case of Diet Caffeine Free Coke. PAYDAY!!!!
After putting around 15,000 miles on it a bearing blew out while on a very long road trip destroying the center assembly (six months ago). Of course going 80 MPH pulling a loaded bike trailer in the mountains didn't help any. Well now to present day, I have a new carrier unit from an old Chevy S10 and fabricating a new one with pillow block bearings. I did research the bearings for this use and I should not come close to their max RPM's nor load capacity.
So I will now shut up and begin posting pictures of what I've done. Oh yea, I'm adding reverse this time which explains the flexplate. Pictures will be posted one at a time with an explanation.
Sprocket adapter
I am using the belt sprocket from my first rear end assembly which is why it looks quite "used". I used 1/8" steel plate and cut the outer diameter to match sprocket diameter and the hole matches the ring gear inside diameter.

I am using the belt sprocket from my first rear end assembly which is why it looks quite "used". I used 1/8" steel plate and cut the outer diameter to match sprocket diameter and the hole matches the ring gear inside diameter.
Sprocket Adapter on Carrier
Test fit of sprocket adapter on carrier with belt sprocket.

Test fit of sprocket adapter on carrier with belt sprocket.
Flexplate Mount
Going to put a reverse on it this time and will use a starter with flexplate. Using 1/4" steel, I turned an adapter to be welded to the carrier and the flexplate bolted to. Got a bit carried away when drilling the holes and drilled the alignment hole which isn't needed. It will be welded and sanded smooth. The carrier has two gears held in position with a shaft and that is locked in with a bolt. I drilled a hole allowing access to to it once the mount is welded in position.

Going to put a reverse on it this time and will use a starter with flexplate. Using 1/4" steel, I turned an adapter to be welded to the carrier and the flexplate bolted to. Got a bit carried away when drilling the holes and drilled the alignment hole which isn't needed. It will be welded and sanded smooth. The carrier has two gears held in position with a shaft and that is locked in with a bolt. I drilled a hole allowing access to to it once the mount is welded in position.
Flexplate Mount
Test fitting the flexplate mount on the carrier. You can see where the pinion shaft bolt goes through. The carrier had to be turned down/back for the mount clearance. Can't figure out why the carrier has a huge "plate" formed on one side. While turning it on the lathe, the balance was horrible. I strapped some lead to the opposite side so my work bench would vibrate. Seems the off-balance would affect other components in the S10 rear axle. I'm considering balancing it by permanently attaching weights to it. Cutting off the "plate" might affect its strength.


Test fitting the flexplate mount on the carrier. You can see where the pinion shaft bolt goes through. The carrier had to be turned down/back for the mount clearance. Can't figure out why the carrier has a huge "plate" formed on one side. While turning it on the lathe, the balance was horrible. I strapped some lead to the opposite side so my work bench would vibrate. Seems the off-balance would affect other components in the S10 rear axle. I'm considering balancing it by permanently attaching weights to it. Cutting off the "plate" might affect its strength.
Mocked Up
Showing the mock-up with the Timken bearings, belts sprocket, and flexplate for reverse on the carrier.

Showing the mock-up with the Timken bearings, belts sprocket, and flexplate for reverse on the carrier.
Carrier Cover
Trying to buy a small piece of 5" diameter tubing around this area is impossible. Not next to it, it is! So I will use a 4" PVC coupling as a case to enclose the carrier gears. Why not? I used a plastic one gallon paint can on the first carrier and it worked. As you can see, sometimes a bit of luck is required as the length is dang near perfect (I turned the inside a bit to slide over the carrier).

Trying to buy a small piece of 5" diameter tubing around this area is impossible. Not next to it, it is! So I will use a 4" PVC coupling as a case to enclose the carrier gears. Why not? I used a plastic one gallon paint can on the first carrier and it worked. As you can see, sometimes a bit of luck is required as the length is dang near perfect (I turned the inside a bit to slide over the carrier).
First Rear Axle
Best guess from the autopsy:
I used the same size carrier bearings that are in the Expedition rear axle housing. Remember, I used the Ford the first time. The new bearings were single piece with internal races built in, but not sealed. On the right side bearing, I had a little space where oil could sit and flow into when turning left. Turning left only allowed so much oil to flow out while keeping some in the bearing area. Now for the left or sprocket side bearing which is the one that blowed up, blowed up real good!!!
I mounted the bearing right up against the carrier and put the seal smack up against it. Seems there was just enough oil getting past the axle gear that prevented it from going completely dry. On level ground and easy riding, enough oil was present to lubricate it, but in the mountains, higher speeds, and pulling extra weight, there wasn't enough oil to "cool" the bearing. Heat and poor lubrication caused it to fail allowing the axle shaft to vibrate enough where the "C" clip then failed allowing the axle to pull out of the carrier gear and bounce around destroying even more.
The disk brake caliper kept the axle from flying out!! The original design didn't have braces supporting the carrier section and was positioned simply by the axle tubes. Once the axle pulled out enough it allowed the center section to be pulled out of place by the drive belt twisting the right half into a pretzel. Upset about the failure while so far from home, pissed at the expense getting both me and the bike back to South Louisiana, but glad I didn't get into a wreck. Here is a picture of the old axle showing lack of center support. Live and learn.

Trikeoliner
Here is the Trikeoliner before the axle broke:
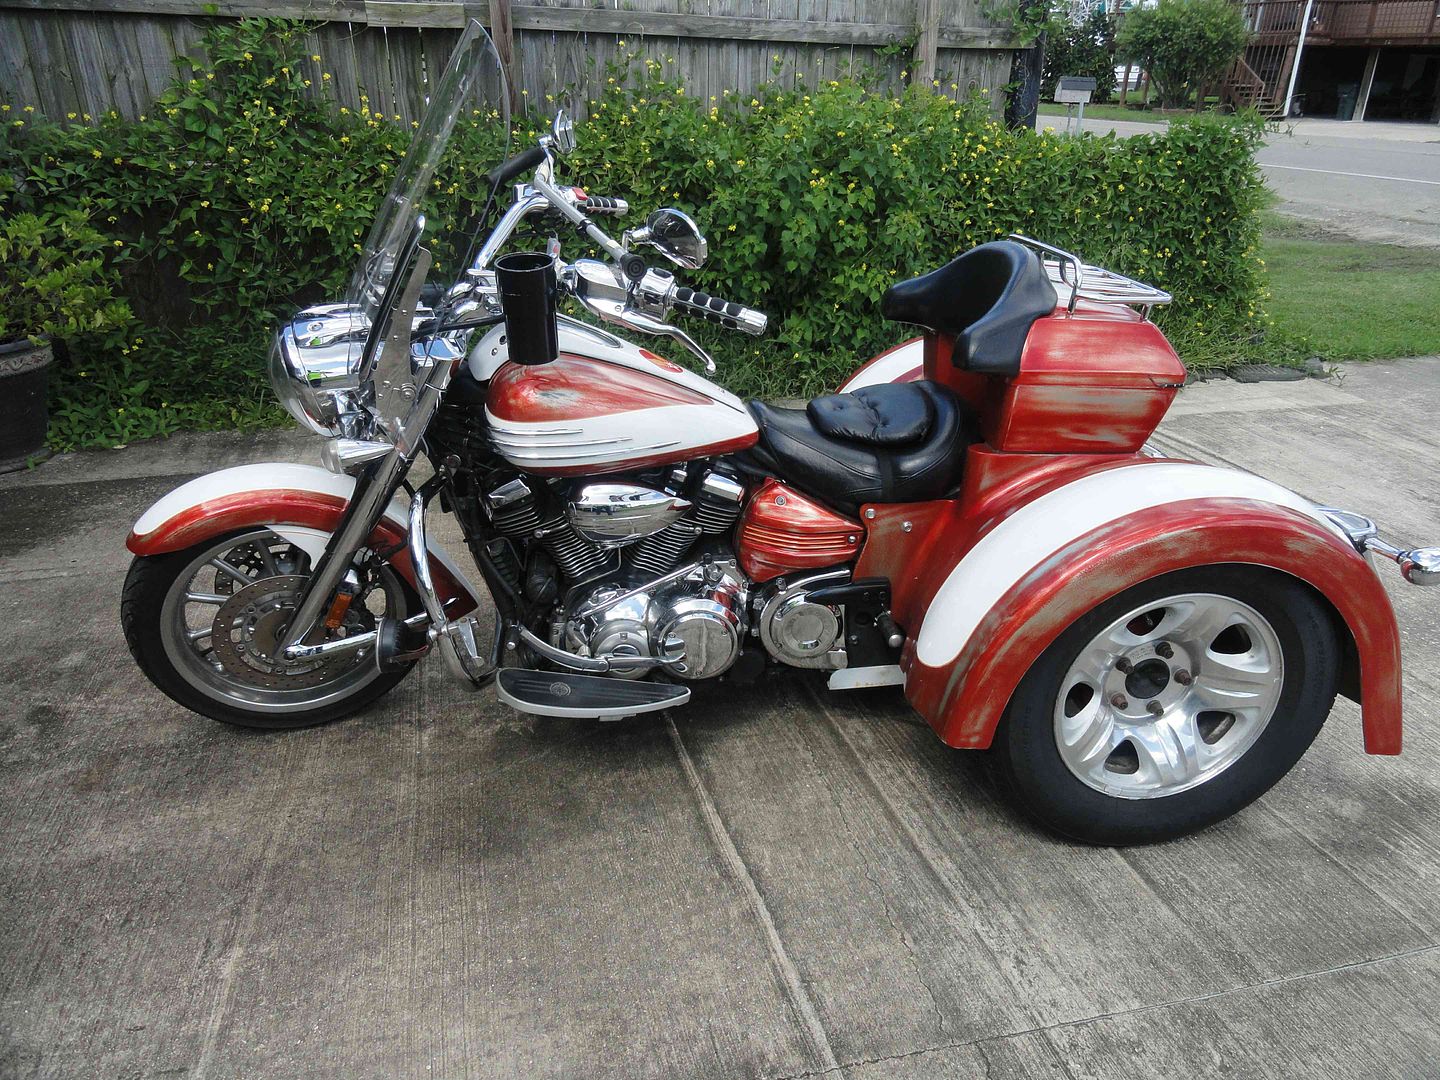
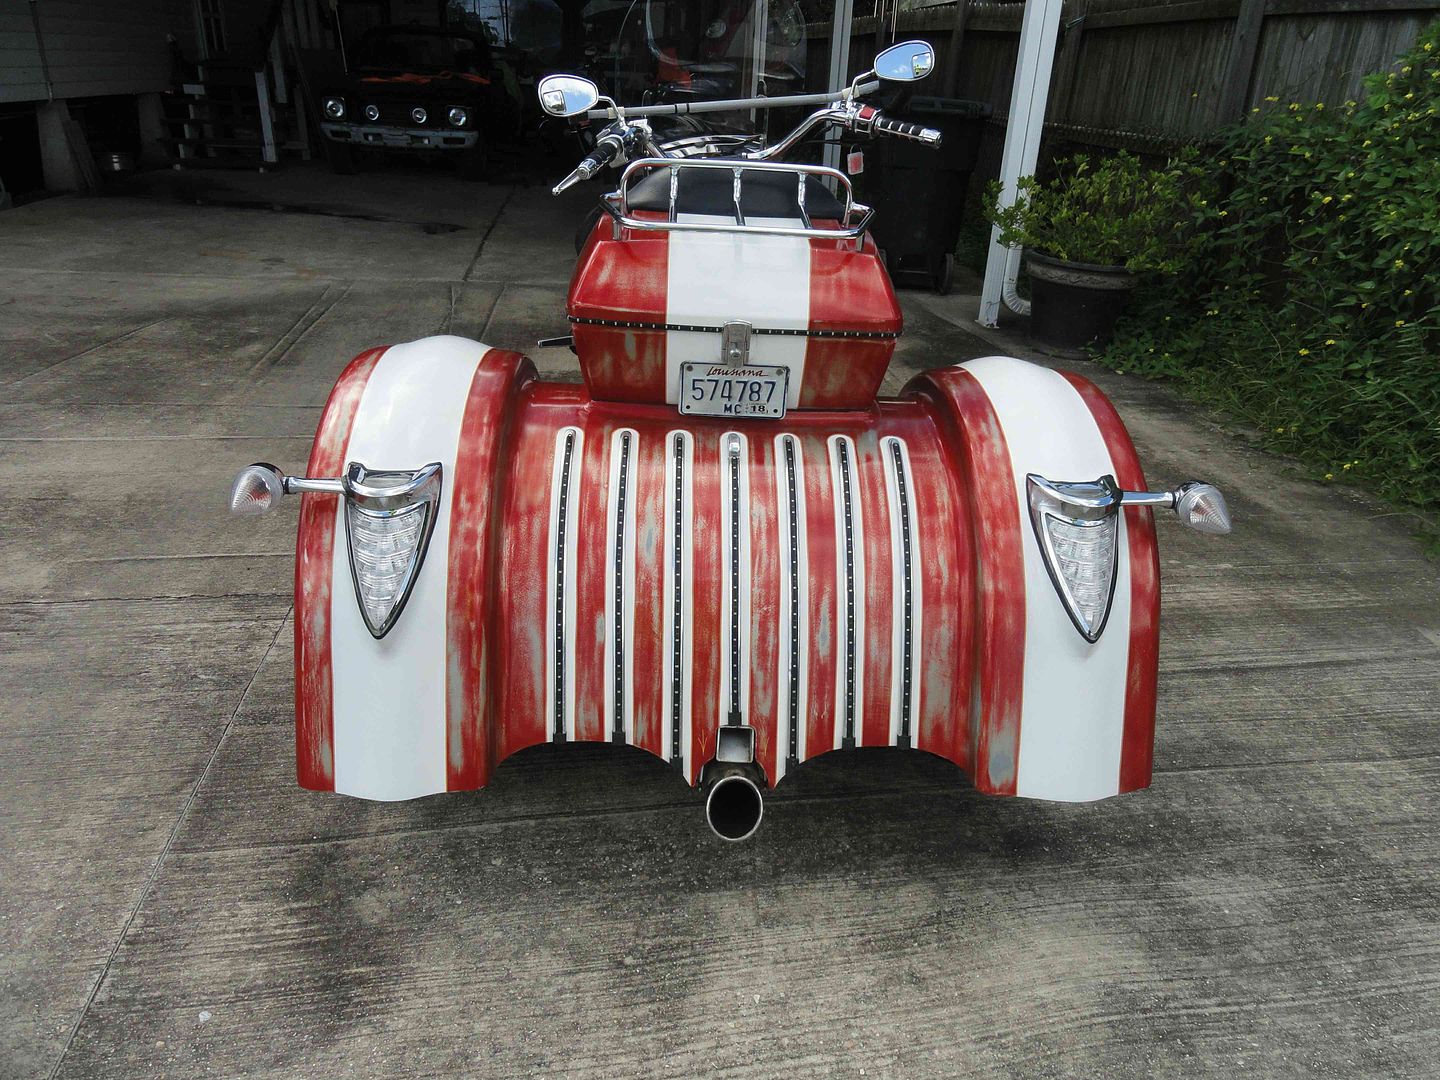
Here is the Trikeoliner before the axle broke:


Progress Today
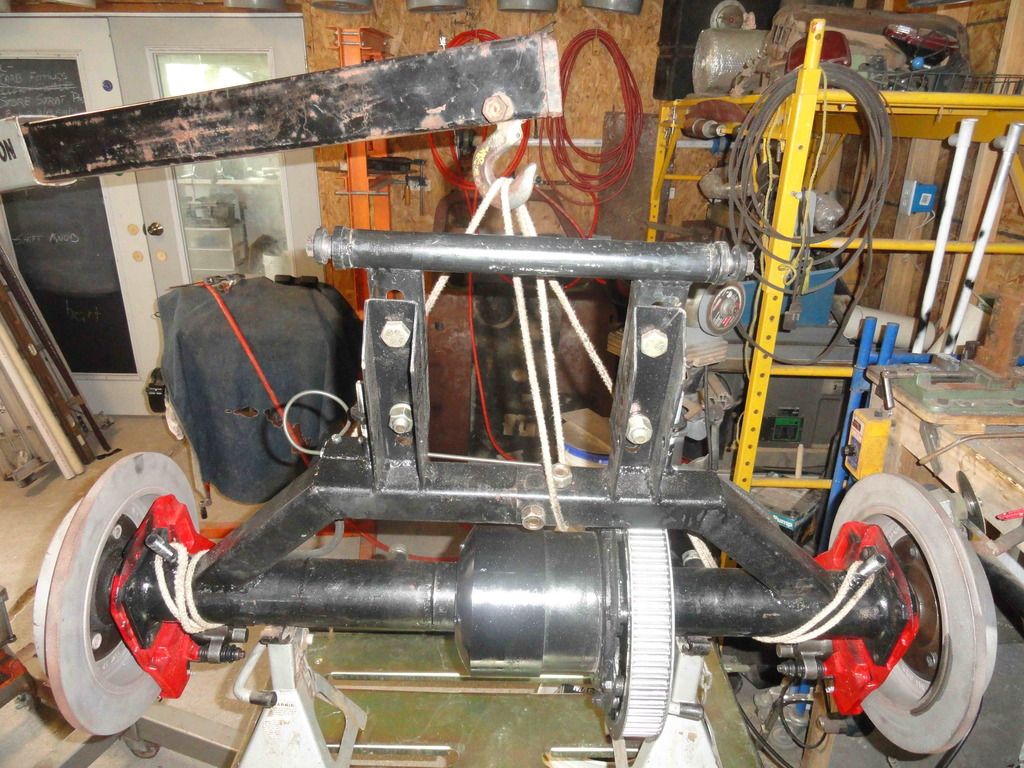
Got the axle brackets welded together and test fit on the swing arm. Before welding them in place I need to complete the axle housings so I can line everything up.


The swing arm assembly is being used from the first trike.


Got the axle brackets welded together and test fit on the swing arm. Before welding them in place I need to complete the axle housings so I can line everything up.
The swing arm assembly is being used from the first trike.
Progress
Here are images of where I got to on the rear axles. Still need to make a can to cover the gears on my carrier and weld the triangle brackets together on the Roadstar.


Here are images of where I got to on the rear axles. Still need to make a can to cover the gears on my carrier and weld the triangle brackets together on the Roadstar.
Finally Back
I'm back to work on the trike conversions for the Roadstar and Stratoliner. My father in law bought a Harley Trike so that's one I need not worry about. I stopped working on the trikes because my wife bought me an ultralight airplane which I just finished rebuilding from the ground up. Haven't flown it yet due to surgeries both my wife and I have recently undergone.
Nothing major, but surgery non the less. At the moment I'm picking up where I left off and began installing the disk brake calipers. The right side is in position and still need to machine and weld the left wheel hub on the axle. Once that is finished everything will be fitted and final welding done, sandblasting and painting. Then do the same for the Roadstar. The forms for the Stratoliner rear body have been dug out, need rebuilding in spots, and I'll be fiberglassing up a body for the Roadstar.
One thing I'm considering is raking the Roadstar forks for a chopper look. But that is expensive. I do have an idea for a modification and will attack it once the bike is road worthy. Anyway I did attach a few pictures of what I have.
Progress
Need to get a starter for my reverse and once mounted I can take the rear end completely down, media blast it, and paint. Then reassemble it to put it back on the Stratoliner. I have also begun building the rear axle for my wife's Roadstar.
Need to get a starter for my reverse and once mounted I can take the rear end completely down, media blast it, and paint. Then reassemble it to put it back on the Stratoliner. I have also begun building the rear axle for my wife's Roadstar.
Reverse
Spent today fitting a starter to give me reverse. Cut a bracket to hold it and positioned it next to the flex plate. I placed several layers of duct tape on the flex plate teeth for gear spacing. Adding a second vertical bracket holds the end of the starter shaft. I am turning a cap to house the brass sleeve snug with a grease fitting on the end for maintenance. I'll post that once I get it tuned down. The plate cross the front should prevent rock and crap from flying into the gear area. This needs to be repeated for my wife's Roadstar now.


Spent today fitting a starter to give me reverse. Cut a bracket to hold it and positioned it next to the flex plate. I placed several layers of duct tape on the flex plate teeth for gear spacing. Adding a second vertical bracket holds the end of the starter shaft. I am turning a cap to house the brass sleeve snug with a grease fitting on the end for maintenance. I'll post that once I get it tuned down. The plate cross the front should prevent rock and crap from flying into the gear area. This needs to be repeated for my wife's Roadstar now.
Starter Support
Fabricated the starter shaft support busing grease cap. The holes are larger than the mounting screws allowing the cap to move with the starter if I need to fine tune the gear mesh. Inside of it you can see the brass bushing. Next step is to mount the rear end on the bike, fit the drive belt guard, brake line mounting points, and air shock mounts, remove the assembly, final welding, sandblasting, and paint. It should be ready to put back on the bike permanently. I'm getting it done slowly, but getting it done. My wife will ride my bike while I finish hers.


Fabricated the starter shaft support busing grease cap. The holes are larger than the mounting screws allowing the cap to move with the starter if I need to fine tune the gear mesh. Inside of it you can see the brass bushing. Next step is to mount the rear end on the bike, fit the drive belt guard, brake line mounting points, and air shock mounts, remove the assembly, final welding, sandblasting, and paint. It should be ready to put back on the bike permanently. I'm getting it done slowly, but getting it done. My wife will ride my bike while I finish hers.
Similar threads
- Replies
- 7
- Views
- 9,490
- Replies
- 3
- Views
- 17,144
- Replies
- 9
- Views
- 18,250
- Replies
- 3
- Views
- 22,888


