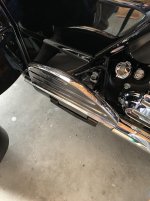
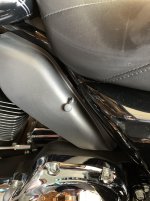
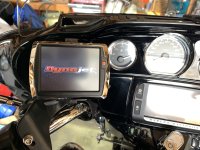
Making the Fat Bottom Girl an "AMG" Edition.

Rainy Days on Thursday's Always Get Me Down

So I had a window before it rained at 11, So I decided to put the second antenna on. In my local HD dealer's usual efficiency, they sent the wrong stud.

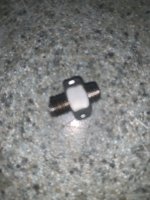
This is what they sent instead of a regular threaded all the way stud.
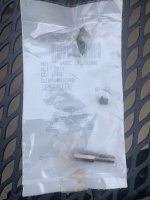
2019-03-21 08.29.46.jpg

What they sent was only $1.99, so I will just make my own. I dug in my screw bin and found a screw with the proper threads and a nut that fit it. Screwed the nut on and adjusted it to the length I needed. Then used an angle grinder to wack the rest off.
2019-03-21 09.02.35.jpg

I use the nut to "chase" the threads. I grab the good end with a rag and a vise grip gently and unscrew the nut. the threads are really pretty close after that. Just some gentle touch up with a jeweler's file.

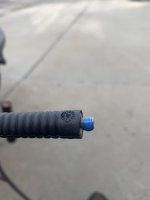
Little loc tite, screw it into the antenna, little more lock tite, and voila, an antenna mounting stud.
2019-03-21 09.09.33.jpg

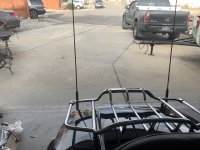
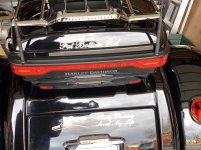
I could have put the stud into the tour pak first, but the antenna has more room for adjustment. Here's the finished product.
2019-03-21 09.11.00.jpg

2019-03-21 09.11.16.jpg

Getting a little guilty feeling about the garage ... LOL ... so took the pics to "hide" the shame. :D

Since I had the new darby cover gasket, I put the Calvary darby cover on.
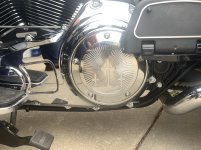
2019-03-21 08.30.02.jpg

Last and certainly not least, I made a few adjustments to the mirror and the drink holder. I'm afraid that may be all for the day .. If we get the rain predicted, I think I may remove the old double sticky tape on the AMG things and put new on. That way, I'll be ready after the ceramic stuff.
 
Hmmm ... This wouldn't be the first time ... I have been using the Honda Wax/Cleaner for decades ... Use it on cars, trucks, even boats and campers. What you didn't catch me on was using Harley tools when I did your trike's oil change ... hehehehe ... talk about diversity ... :D ... That's kind of like a cat kissing a dog ... :AGGHH:

So.. you used the oil filter wrench supplied with the Honda oil filter change kit, a 17mm wrench for the drain plug, and used what, a Phillips-head screwdriver, to get half the belly pan off to reach it all?
 
So.. you used the oil filter wrench supplied with the Honda oil filter change kit, a 17mm wrench for the drain plug, and used what, a Phillips-head screwdriver, to get half the belly pan off to reach it all?

Oil Pan 35.95.jpg

And the Harley Drain Pan ... that I hauled the oil back to Colorado in ... :D
 
Another Rainy Day in Paradise ....

You know ... considering I live in the "High Desert", we get a bushel full of rain ... or may be it just seems that way cause I wanna go ride ... hmmmmm.

Okay ... so was pouring this am ... supposed to have a window after 1pm where the sun is actually supposed to make an appearance. To that end, I thought, I'd do some prep before routing the Power Vision Cable.

I got the handle bar mount onto the left hand control and adjusted everything to match, right and left.

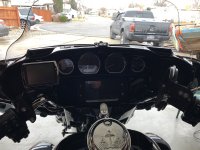
Next was to mount the Power Vision Holder onto the Handlebar mount and adjust the angle for my eyes to easily see the Power Vision.

Power Vision.jpg

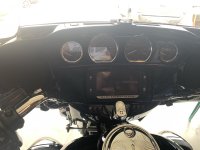
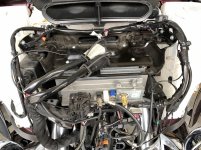
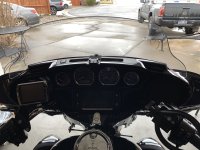
Since it was warmish, mid 40's and I was dry in the garage, I decided to put the SiriusXM Module in ... kind of a pain, but, not too bad, just remove the outer faring and the plate on the radio, mount the antenna and voila. Test. The module is the thing with the tan plug and the antenna is mounted upper right just above the opaque white speaker cover.

Sirius 1.jpg

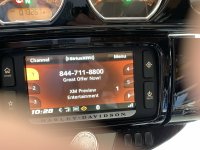
Test

Sirius 2.jpg

While I had the windshield and outer faring off, I decided this was a prime opportunity to install the Wind Splitter Windshield. I wiped it down well with lemon pledge before I put it on ... :D ... starting to look like my girl.

Wind Spliter.jpg

i would of taken a picture of the windshield from the front with the faring back on, but, that nasty garage would of been in the pic ... LOL.
 
Still spitting rain

Anyone who followed my Jessica threads knows I have always wanted one of the Kuryakyn Trunk Lid Organizers ... finally got one and a couple days later traded her ... but I kept the organizer.

So ... since I'm waiting for my window, I had a brain storm. Modify the Gold Wing organizer to fit the Harley lid. The problem is the clips that hold the organizer in the Gold Wing screw on and I'm not putting holes in the Harley lid .... hmmm. My initial thought was to mount the clips with Gorilla double sided tape (I love that stuff, almost as good as duct tape ... LOL), but, the clips are not flat on the back side. I could just velcro the organizer to the lid, but, the brain was engaged and wouldn't let it go. Yea, I know, Kury makes a nice organizer for the Harley lid, but, if I can modify this one to work on either platform ... hmmm

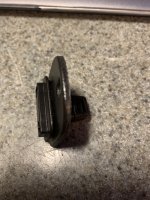
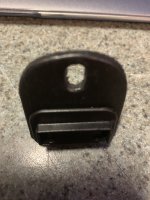
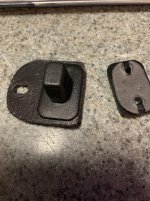
Here's the clip as made by Kuryakyn

Clip 1.jpg

Clip 2.jpg

If I could get rid of the bulge on the back, still make the clip swivel, I could use the Gorilla tape on the Harley and the holes would still be there for a Gold Wing.

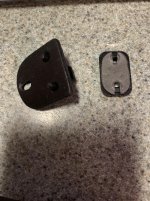
What I did was "Pop" the bulge off.

Clip 3.jpg

I still had a problem ... there were little posts where the bulge attached that wouldn't allow the Gorilla tape to lay flat and the swivel part would just fall out of the backing. My solution, glue the swivel part on the flat part then cut the posts flush.

Clip 4.jpg

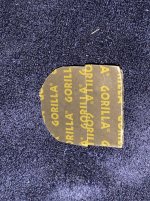
Next I added the Gorilla tape and clamped two together to get a great bond of the tape, later when it warms up I'll mount them in the trunk.

Clip 6.jpg

Since I had the Gorilla Tape out, I thought I'd clean up the old tape off the "AMG Edition", "AMG" letters, and the anchor and put new Gorilla Tape on them. A little more work than I thought ... LOL ... getting tape on the anchor and trimmed was a big job, but, I persisted ... I'll post pics when I mount them ... just teasing now. LOL.
 
No Window for Alan

Not gonna happen.

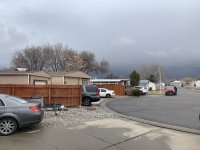
This is the view to the West ... and what's in the West will be here soon.

2019-03-22 11.49.05.jpg

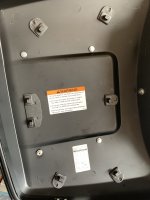
So ... what's a guy to do??? Of Course .. install the trunk organizer ... LOL ... well ... Mostly.

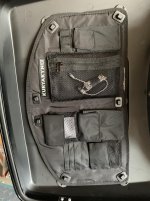
First I wiped the entire trunk lid inside with alcohol (helps the tape stick). Next I test fit the organizer with the clips installed and figured where I wanted it. Then the hard part ... getting all the plastic protection of the tape without touching the tape area. I use a razor knife to peel it back.

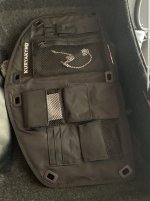
After that, stick it where you want it. I mounted it backwards so the zipper compartment wouldn't dump it's contents when I unzipped it. Also mounted it towards the bottom of the lid so it wouldn't be so hard to reach the top stuff.

2019-03-22 11.47.52.jpg

Next I undid the swivel thingies and pulled the organizer off. Pushed real hard on all the clips for 60 seconds each. I will leave the organizer off for at least 4 hours to let the tape get familiar with the lid.

2019-03-22 11.48.39.jpg

2019-03-22 11.48.41.jpg

I may get a couple of the cheapo eye glass cases and Gorilla tape them towards the front of the lid between the organizer and the rim ... one for regular glasses and one for the spare. We'll see.

Since the weather isn't playing nice, I'm gonna go watch mom and my buddy Don bowl and get some lunch there ... More later.
 
Anyone who followed my Jessica threads knows I have always wanted one of the Kuryakyn Trunk Lid Organizers ... finally got one and a couple days later traded her ... but I kept the organizer.

Yea, I know, Kury makes a nice organizer for the Harley lid, but, if I can modify this one to work on either platform ... hmmm

If I could get rid of the bulge on the back, still make the clip swivel, I could use the Gorilla tape on the Harley and the holes would still be there for a Gold Wing.

I thought this latest Harley trike was your last and forever....you just alluded to another possible Gold Wing in the future..3 times above... like I said you ought to start doing a few customizing jobs for other people - probably in the winter-time so you’ll have summer for Alan-time riding. You are making me dizzy trying to keep up with all of your vehicles. Glad you can keep up with them all.
 
So I had a window before it rained at 11, So I decided to put the second antenna on. In my local HD dealer's usual efficiency, they sent the wrong stud.

This is what they sent instead of a regular threaded all the way stud.

View attachment 69293

What they sent was only $1.99, so I will just make my own. I dug in my screw bin and found a screw with the proper threads and a nut that fit it. Screwed the nut on and adjusted it to the length I needed. Then used an angle grinder to wack the rest off.

View attachment 69294

I use the nut to "chase" the threads. I grab the good end with a rag and a vise grip gently and unscrew the nut. the threads are really pretty close after that. Just some gentle touch up with a jeweler's file.

Little loc tite, screw it into the antenna, little more lock tite, and voila, an antenna mounting stud.

View attachment 69295

I could have put the stud into the tour pak first, but the antenna has more room for adjustment. Here's the finished product.

View attachment 69296

View attachment 69297

Getting a little guilty feeling about the garage ... LOL ... so took the pics to "hide" the shame. :D

Since I had the new darby cover gasket, I put the Calvary darby cover on.

View attachment 69298

Last and certainly not least, I made a few adjustments to the mirror and the drink holder. I'm afraid that may be all for the day .. If we get the rain predicted, I think I may remove the old double sticky tape on the AMG things and put new on. That way, I'll be ready after the ceramic stuff.

Nice job Fuzzy. Adapt and overcome.
 
Old Geezers again.

Nice job Fuzzy. Adapt and overcome.

Thanks ... I guess the twenty years in the Navy have paid off ... :D

Okay .. so if this is Saturday ... it's old geezer day. I really going to the VA and I really enjoy their stories and that they cheat at monopoly ... LOL. Yep ... got my b$tt kicked again. And I always have to be the banker.

When I got home around 2pm, it was 55* and sort of sunny, so, I pulled the FBG out of the garage, removed the tank, routed the cable for the power vision. Then I installed the heated gear connection, and rerouted the battery tender cable. I started putting everything back together and saw the fitting to air up the shocks. All of a sudden, I realized that with all I've done, I hadn't checked the shock pressure. Got use to just pushing a button and the suspension sets itself. That is a nice feature on the Gold Wings. Anyway, I rooted around in my Harley stuff and finally found my suspension pump. The shocks were at 20 psi, I like to run them at 30# so I pumped them up. Kind of a waste of time, since I'll be putting the lift on Tuesday and I'll be letting the air out again.

Then I went for a ride and filled the tank. Only got 35.62 mpg ... I can live with that. :D
 
Dang ... I am getting old ... forgot.

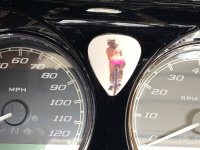
I did mount the "Official Queen Fat Bottom Girl Tour" guitar pic too. I did spray its with Verathane with UV protection. Then I mounted some Gorilla Tape and headed out to the bike ... hmmmm ... where to mount it???

Found a spot where I can see it and it is somewhat protected from the sun.

2019-03-23 17.07.41.jpg
 
Rainy Sunday

:gah: I know spring is when it rains most ... I know the farmers need the rain ... I know it's God's Plan ... not mine ... doesn't mean I have to like it ... :D

So, I started playing in the garage with what pegs, and boards I'm gonna use (the boxes of this stuff were in the shed, but the garage has more room to look at them) ... I looked at the streamliners (these made the short list), i looked at the Nostalgic (Too stock looking), I looked at the slipstream (I don't have a full set), I even considered the stock look (Nope ... not AMG Edition at all).

In the end I decided on the Kuryakyn ISO collection. The reason was pretty obvious to me. The reason I have to other styles is I bought them, then figured out maybe not on this bike ... LOL. I have in the past tried to sell the ones I'm not in love with at a swap meet ... just couldn't bring myself to do it.

Apparently when the auctioneer notified me he was coming for the original FBG, I just pulled the ISO's and put them in bubble bags for storage. They were pretty filthy ... and the dirt was pretty used to being there. I cleaned them with soap and water, then isopropyl alcohol and finally dried them really well.

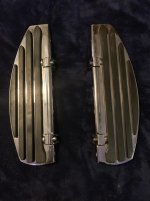
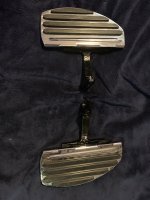
Here's the rider boards:

2019-03-24 09.35.00.jpg

The thing I like about these boards is you can mount the narrow end front or back, depending on your leg length, not sure it's designed to be that way, but if you put the narrow end back, you get more leg room.

Here's the passenger boards:

2019-03-24 09.35.15.jpg

The same principle applies to these except backwards, narrow end forward gives the passenger less reach to the board and more room for the rider between the two sets. Not as big a deal on the trike since I don't put my feet down "much". The more space between the two sets of bars does show off more of the engine and gives you more room for oil and tranny fill/check. Since my co rider will be riding in a pet palace, he don't need much reach ... LOL. I also like the look having the big ends toward front and back.

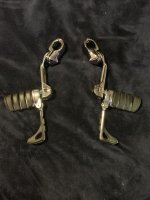
Here is the ISO Dually highway Pegs with the Switch Blade option ... nice to put the heal on.

2019-03-24 09.35.32.jpg

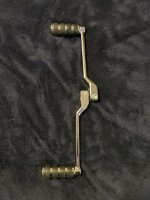
Here's the ISO Longhorn Shift Pegs .. these work great with the DK board relocation kit.

2019-03-24 09.36.07.jpg

I think the thing that made these my favorites is the ability to get longer reach on the rider boards, More room between the boards, the switchblades, and the Longhorn Shift Pegs.

I am still looking for the two brake pedal covers ... hoping I didn't leave them on the trike ... I don't think so, If I can't find them, I'll have to get new ones ... not gonna panic and order them yet ... you've seen pics of my garage, so there's still lots of hope ... :blush:
 
I am still looking for the two brake pedal covers ... hoping I didn't leave them on the trike ... I don't think so, If I can't find them, I'll have to get new ones ... not gonna panic and order them yet ... you've seen pics of my garage, so there's still lots of hope ... :blush:

Hah, hah. That's a hoot. Nice to see you don't take yourself too seriously. Good luck in finding the covers.
 
Hah, hah. That's a hoot. Nice to see you don't take yourself too seriously. Good luck in finding the covers.

Never take myself too seriously ... I leave that to my Lord.

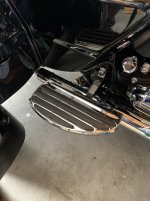
So ... still raining ... I was able to get the passenger boards mounted .. I can do that from my chair. Here is one side ... the other is the same.

2019-03-24 13.21.21.jpg

2019-03-24 13.21.25.jpg

I also realized I did not show where I mounted the heated gear connection, left side heat shield, I have 3 or 4 of them I've removed for people, so just drilled a hole in one and mounted it.

2019-03-24 13.27.00.jpg

Or the Power Vision mounted with power ...

2019-03-24 13.27.16.jpg

I don't have much hope of the rain stopping ... if it does, I'll do some digging to find the brake covers ... I think I remember where I put them ... was 3 years ago, so I had a chance ... if it was yesterday ... not so much.
 
Great minds think alike. That's exactly where I mounted the connection for my heated gear. Works great. BTW the footboards look great. I may have to score a set.
 
Great minds think alike. That's exactly where I mounted the connection for my heated gear. Works great. BTW the footboards look great. I may have to score a set.

They are pricey to say the least ... rider and passenger are like between $400-$500, add the brake covers, shift pegs and highway pegs ... it can get to the thin air range ... well maybe not HD thin air ... LOL.
 
Brake Pedals

Well I looked for several hours for the brake pedals ... nada ... but I figured out how to find them ... went to eBay ... found a deal on both from the same seller ... pretty sure I will find them in the next day or so :Shrug:
 

Welcome to the Trike Talk Community

Join our vibrant online community dedicated to all things Trikes! Whether you're a seasoned rider or just starting out, this is the place to share experiences, tips, and stories about your three-wheeled adventures. Explore modifications, maintenance advice, and rides, all while connecting with fellow trike enthusiasts from around the globe

Forum statistics

Threads
55,527
Messages
838,768
Members
22,631
Latest member
Sylvester

Trike Talk Community

Welcome to a community dedicated to the most diverse and fastest growing powersports segment, Motorcycle Trikes. Come join the discussion about the best makes and models, popular modifications and proven performance hacks, trike touring and travel, maintenance, meetups and more!

Register Already a member? Login

Forum statistics

Threads
55,527
Messages
838,768
Members
22,631
Latest member
Sylvester
 photo 260e2760-d89e-45b2-8675-2bc26fb3d465.jpg

 photo Trike-Talk-150-x-200.gif

 photo DK Trike Talk Right side banner 19.jpg

Merziere Reverser

 photo 9796095c-0d4b-4a9b-88ed-efe4c498d084.png
 photo f9866e4e-75c5-471a-86f5-5e72a446ecc3.png
Back
Top