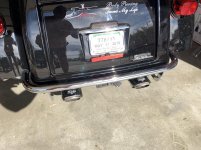
Making the Fat Bottom Girl an "AMG" Edition.

Taking shape there Fuzzy, I have a question for you, I noticed a few pages back that you put on the iso shift pegs and then you took them off, hard to keep up with you on this LOL:D I plan on putting the iso shift pegs on mine to match the freeway pegs that I took off of my softail. Are those iso pegs the same size as the factory harley shift peg or a little bigger, have to buy the iso pegs and just curious if they are bigger or not, plan on the longer one for the front so I don't have to move foot a little to the right

All for now Trampas
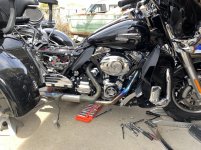
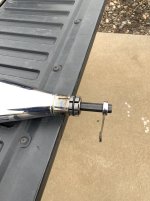
They make two or three sizes ... depending on the application. I did put them back on ... mine are called the ISO Longhorns. They are a little longer and work well with the DK floorboard relocators.
 
Harley Called

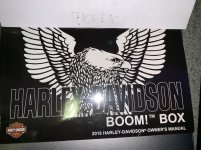
My Infotainment Owners Manual was in, According to the parts guy, the owners manual is the only one for radios in 2014-2018's:

2019-04-03 15.30.02.jpg

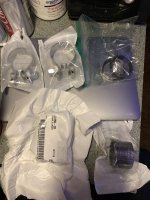
While I had the parts guy on the line I ordered the parts for the exhaust swap. Head Gaskets, Muffler Clamps, Cross Over Pipe Gasket, Crossover Pipe Clamps. The actually had everything which is odd. So he pulled them and I picked them up too.

2019-04-03 15.32.02.jpg

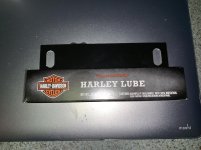
I also picked up a tube of Harley lube ... stuff works well on the trunk lock:

2019-04-03 15.29.34.jpg

I am all ready to do the exhaust swap next week ... Don wants to do it Tuesday which works for me. He bowls Monday, Wednesday, and Friday.

Not much else happening. Mufflers should be here tomorrow according to USPS. I may go get a can of VHT Paint and paint the head pipe again. Might do black this time ... the grey looked terrible where the heat shields didn't cover. If I could find silver that would be the best. Maybe not.
 
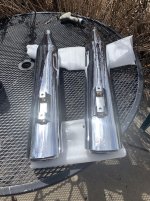
The mufflers are here ... Whoooo Hooooo.

Mufflers.jpg

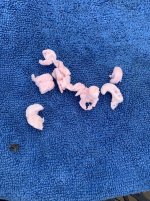
Vance and Hines Twin Slash Cut Ovals ... they actually look better than the eBay pics. There is a small issue ... LOL ... the seller packed them in pink peanuts ... guess where lots of the pink peanuts ended up ... yep ... in the mufflers. I may have to remove the baffles to get them all out ... only two screws each ... oh well ... that's what happens when you buy used.
 
Vacuum cleaner won’t get it?

There are baffles ... I got what I could with the shop vac ... blew compressed air in both sides and got some more ... If I tilt the mufflers up and down ... something is sliding around ... could be some dirt or maybe dead bugs ... but if it's a pink peanut or two ... they will melt and ruin the baffles ... so ... guess I'll pull them and see what i see. If the matting is bad ... I'll replace that too.
 
Over Cast Day

So ... I got the baffles out of the mufflers and this is what I found:

Pink Peanuts.jpg

They probably would of burnt off, but, might have clogged some of the channels ... glad they are gone.

Since it was overcast ... decided to tackle the Ceramic Stuff ... all that was left was the rear ... but ... what a rear. I'll post about that in the Ceramic Thread.
 
Crossover Gasket

FuzzyWasHe, that exhaust crossover gasket was a bear for me when I installed my Fuelmoto ceramic head pipe and exhaust. I ruined one and had to go buy another one at the HD dealer.

I then went to Harbor Freight and bought an "expander" for exhaust pipes and used it to spread the end open a little. I did just a little at a time until it felt like I could slide the two pieces together without crushing another gasket.

Needless to say, I didn't want to split the pipe. However, I still had about 1/8 inch of the gasket exposed, but it has worked fine and doesn't leak.

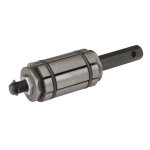
I have a 1.5" to 2" expander ... I use it every install ... best $4 I ever spent .. they have really gone up .. like $14 now ...

Expander.jpg

You need to get the expander into the pipe all the way ... do that and it very hard to split the pipe ... you can do it ... but it's hard ... LOL ... I do all the connections ... except the head ... cross over, mufflers ... little tail piece if it needs it.
 
I have a 1.5" to 2" expander ... I use it every install ... best $4 I ever spent .. they have really gone up .. like $14 now ...

View attachment 70057

You need to get the expander into the pipe all the way ... do that and it very hard to split the pipe ... you can do it ... but it's hard ... LOL ... I do all the connections ... except the head ... cross over, mufflers ... little tail piece if it needs it.

Hey! That tool is light years better than channel locks or a screwdriver, both of which I have used more times than I can count! :laugh:

Kevin
 
Loving Garage Diving

So the God Dog was napping ... usually does after her meds. So I did some garage diving.

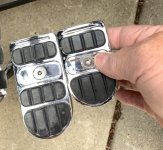
Found the ISO small extended brake pedal cover.

Here is the difference:

Parking Compared.jpg

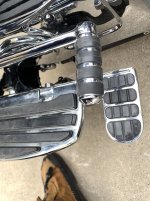
Here's the extended installed:

Parking Brake Installed.jpg

As you can see, the extended one "sticks out" a little more making it much easier to put your foot on.I ordered new rubber pads .. these are worn a tad. This is Kuryakyn #8044, Longhorn Brake Pedal Pad.

After that, I spent a little time "adjusting" the highway pegs.
 
Whooooo Hooooo

I think I have solved the mystery of the decent power production and lack of heat coming from the CAT. It is my belief that Fat Bottom Girl doesn't have one ... :D

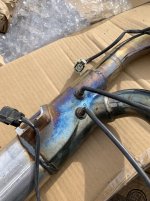
I was playing around in the garage (God Puppy taking a nap) and decided to start taking off the heat shields on the exhaust system ... while on the floor (not the best place for me ... LOL) I started with the heat shield around the CAT ... I barely got the first clamp loose, when I looked at the weld on the CAT chamber. You tell me ... but this doesn't look like a machine weld ... and it definitely wasn't cleaned after welding like the OEM's are. Not the best picture, but, I'm not taking it all apart to get a good one.

OEM Headpipe.jpg

I will know for sure when we pull the mufflers and I'll pull the tail piece on the right side ... a quick look with a flash light will tell the tail.

I suppose I'm just "lucky enough" to get the OEM head pipe that has a sorta sloppy weld, but I'm really hoping not to have to replace it. If I do, it's not that big a job, I just worry about snapping a head bolt ... LOL ... that would be my luck. :D
 
Sure sounds like someone cut the header, removed the cat material and repaired the incision - but maybe not too good looking but hopefully well. Can't think of why this would be there from the factory. If it is functional who cares how it looks as it is hidden by the heat shield.
 
Sure sounds like someone cut the header, removed the cat material and repaired the incision - but maybe not too good looking but hopefully well. Can't think of why this would be there from the factory. If it is functional who cares how it looks as it is hidden by the heat shield.

We'll find out Tuesday ... once the mufflers are off ... I'll know for sure.
 
Great Day, warm, not too sunny, not too windy and very Loooong.

Started early with prep for the de catted head pipe. I didn't do much except get the trike on the python and jack stands.

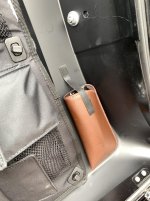
After that, I did a quick fix of the glasses case, added some velcro to keep them in the case.:

Glasses 1.jpg

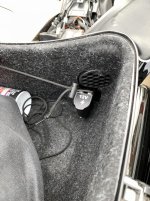
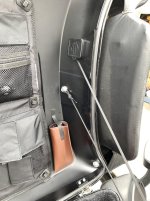
Next I installed my safety tether for the tour pak ... it isn't fancy, but I have had a tour pak replaced under warranty because the tether didn't stop it quick enough. I made this awhile ago out of a boot lace. It has a little stretch, so it acts like a shock absorber:

Safety Therther 1.jpg

Safety Therther 2.jpg

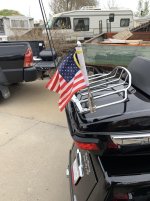
Then when taking out some of the trash in the garage, I found this in a box.

Flag.jpg

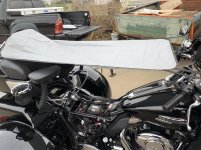
Next I test fit the cycle shade, never put it on a Harley, fit well:

Cycle Shade 1.jpg

Next I test fit my long seat screw, basically a 3.5" SS 1/4"x20 cap screw with a 1/4"x20 nut that I glued about 1/2" up the threads ... no more digging for the screw:

Seat Screw.jpg

The shop manual said to remove the seat ... for the head pipe, not sure why, but, since I had it off, did the test fit.

About this time my buddy Don showed up. We discussed the plan of attack. My plan was that we would pull the right muffler and the "Z" pipe, shine a light in the head pipe and "see" if it was de catted. Of course not. So .. the new plan was to remove the other muffler, the cross over pipe and then the head pipe. Don worked on the mufflers (on the ground work), and I did the unplugging of the O2 sensors, removal of the heat shields and removal of the right floorboard. Next I undid the cross over screw at the bottom of the head pipe. The mufflers were kicking Don's b$tt, LOL, I even gave him the "special wrench" to get the bolts out.

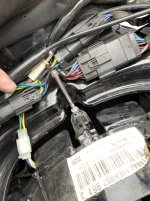
We got them off and loosened the head bolts ... this IMHO is the scariest part, if some one has gone nuts tightening these, you can easily bust one and now your drilling heads. God was on our side and no issues getting them off. Next came getting the O2 sensors off and getting them in the right hole in the de catted pipe. Here's where they plug in:

O2 Sensor.jpg

Here's them in the de catted pipe, notice the B and G, HD mechanics must be a tad simple ... B is for black plug and back cylinder, G is for grey plug and front cylinder. In the plug picture you can see you just put the black in the black and grey in the grey. All kidding aside, it's really nice to be set up that way, before putting the O2 sensors in the de catted pipe, I wiped them with alcohol and let them dry:

O2 in Pipe.jpg

You need to transfer the flanges and clips to the de catted pipe too:

Head clamps.jpg

Next was putting, new gaskets in the heads and putting the de catted pipe in. You start by gently seating the front pipe, then roll the pipe into the rear. Put the head screws on just loose and get the crossover screw back on loosely:

New Pipe in 2.jpg

More in next post.
 
Continued

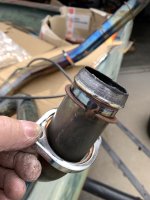
Next was the time when I do some prep. I use the expander on all the pipes that will go together. As someone stated, the cross over gasket can be a bugger. The way I tackle these is to ensure the gasket will slide onto the cross over connection on the head pipe. Then I expand (carefully) the cross over pipe so the gasket will slide into the pipe as well. Then I slide the gasket into the cross over pipe and slip it over the head pipe connection, hook up the hanger and move to the mufflers. Again, any pipe that slides over another pipe gets expanded until it fits easily. Here's how the expander works:

Expander.jpg

This thing is not rocket science, you stick it in, turn the shaft and it expands the pipe. I like to make sure the expander is a little out of the pipe and a little past the split in the pipe, kind of centered.

From there you just work your way with the mufflers and pipes back to the head pipe. Remember, everything gets assembled loosely, until now when you align it and tighten everything until you are at the head pipe. Next you do the torquing the head clamps. Kind of a weird sequence, but, it works really well to "pull" the pipe ends into the new gasket. You start at the rear cylinder bottom screw, then go to top, then back to bottom. Next you go to the front top, then the bottom, then the top. Consult your shop manual for torque values. If you don't have one, don't attempt anything this big.

I'm not gonna lie ... LOL ... getting the correct torque on the front cylinder is rough, getting a torque wrench on the front cylinder bolts is rough. Good news, it's only inch pounds, so you can find pretty small wrenches to get them in there.

Once that is done, you torque the crossover screw at the bottom of the head pipe. Route the cables for the O2 sensors and plug them in and start the 3 piece jigsaw puzzle that is the heat shields. LOL ... if you don't get these right, you will either scratch some chrome up or you will have a rattle. Then remount the right floorboard.

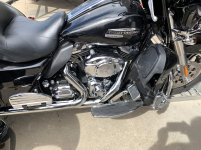
Here's what it should look like:

Exhaust Done.jpg

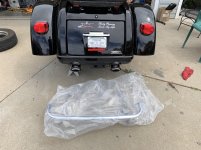
Now as much as I wanted to fire this thing up and hear the girl scream, the fedex guy showed up with the bumper, while I was putting the right floorboard on. The trike was still jacked up with the wheels off, so I looked at Don ... and he said .. sure .. it's only 4 bolts.

Mufflers done.jpg

Of course my good deal bumper did not come with any hardware. Don and I grabbed a soda and went and got some grade 8 hardware and mounted the dang thing.

Bumper Done.jpg

I like how the mufflers aren't sticking out too much. Wheels on and torqued.

Next came downloading the starting map for the current configuration. Finally, I fired her up .. she rumbles, not gonna lie to you. I did decide to go with the Vance and Hines twin slash cut ovals. Reason being, I checked with Vance and Hines and I can get a new set of quiet baffles for them for $45. So if it's too much ... I can quiet it down. But the benefit in performance will out weigh the increased noise.

Another interesting thing was after it ran a couple seconds .. a single piece of pink peanut came flying out of the left muffler .... LOL ... guess I missed a piece.

After 6 hours, I was a tad beat, hot, sweaty and frankly, tired of looking at the Fat Bottom Girl ... LOL. Don and I finished our sodas, I gave him some $$, which he didn't want, but, told him to take his wife to dinner and he went home. I will do some tuning runs next decent day. And yes, re torque the wheels a couple times over the next 50-100 miles.

So that is a wrap.
 
Very good Fuzzy . . . and great photos. Thanks for sharing. I've changed out a couple full exhaust systems and it can be a bear. Never done it on a TG and I bet the muffler rear hangers are fun, fun, fun, lol.
 

Welcome to the Trike Talk Community

Join our vibrant online community dedicated to all things Trikes! Whether you're a seasoned rider or just starting out, this is the place to share experiences, tips, and stories about your three-wheeled adventures. Explore modifications, maintenance advice, and rides, all while connecting with fellow trike enthusiasts from around the globe

Forum statistics

Threads
55,545
Messages
902,010
Members
22,605
Latest member
jb2024Free

Trike Talk Community

Welcome to a community dedicated to the most diverse and fastest growing powersports segment, Motorcycle Trikes. Come join the discussion about the best makes and models, popular modifications and proven performance hacks, trike touring and travel, maintenance, meetups and more!

Register Already a member? Login

Forum statistics

Threads
55,545
Messages
902,010
Members
22,605
Latest member
jb2024Free
 photo 260e2760-d89e-45b2-8675-2bc26fb3d465.jpg

 photo Trike-Talk-150-x-200.gif

 photo DK Trike Talk Right side banner 19.jpg

Merziere Reverser

 photo 9796095c-0d4b-4a9b-88ed-efe4c498d084.png
 photo f9866e4e-75c5-471a-86f5-5e72a446ecc3.png
Back
Top