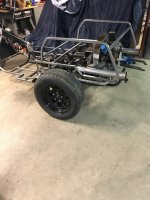
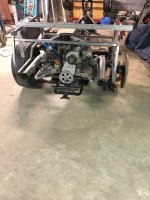
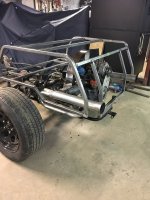
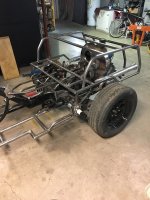
4th generation of my trike

Still waiting on body metal and a snow storm is on the way. I have been working on small stuff that needs done but not very interesting.

The bearings and ball joints came in for the shifter. Just like the reality shows we've got to have some drama. When I tried to put the shift box together I found out that someone had welded the one end on upside down. No one would admit it but I think I narrowed it down to who did it.

Notice the bearing support is towards the top.
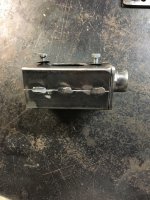
IMG_0208.jpg

Just a couple snips on the welds and a reweld and everything is fine.
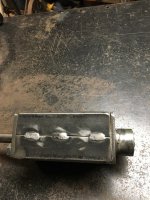
IMG_0210.jpg

Trying to get the shifter box to work in all the gears is tricky. I had trouble going into reverse. A little grinding here and there on the socket in the box fixed things.
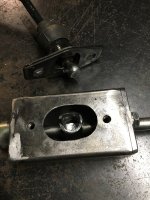
IMG_0209.jpg

Now I have to mount it to the frame and hook up to the trans. That's tricky because it has to be aligned in a couple different directions. Once it's fastened down it should be good to go.
 
The shifter is all done. Mounting it went fairly easy just had to make sure everything was lined up before final tightening.

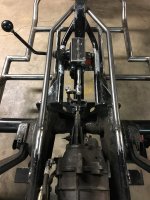
This is looking from the back to front.

IMG_0212.jpg

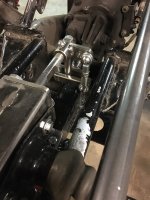
And here is from front to back.

IMG_0213.jpg

I moved the shifter up 3 1/2". As the top shaft rotates the ball joints rotate the trans. shaft. The hanging down shaft can move side to side in the slotted piece. As the top shaft moves in and out the hanging shaft moves the trans. shaft in and out. Just sitting still it seems to shift a lot more smoothly and positive than the stock set up. The old set up was only supported by a plastic bushing that has a habit of wearing out. When it dose there is lots of slop and shifting is a guessing game.

Now I can move on to something else. I guess I'll have to call and find out where my body metal is. That's the next big thing I need to do.
 
I think most of the snow hit North of us. We got just a skim, barely enough to cover the ground. Kind of cold though.

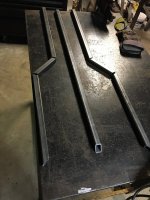
I picked up the body metal this morning and I thought Woo Hoo let the games begin. I started cutting tube for the base of the body frame. My brain hurts from trying to keep it straight which way the angles go and the degree of angle. 45*s for a 90* and 22.5*s for a 45*. Then throw in a left and right side.

IMG_0214.jpg

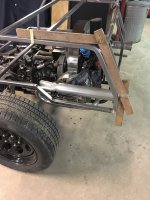
These tubes will make sense in a day or so. The sides will drop down after they clear the shocks so the body covers more of the engine.
 
I did some welding today. I got the base started. Two center mounts are on, there will be two on each side where the original VW body bolted. The back will be supported by the mount on the trailer hitch.

IMG_0215.jpg

After the base mounts are done I can start the upper frame work. The body will come down a little below the mufflers on the sides and farther down at the back. The sides will hide a lot of the engine but still give me room to adjust the valves.
 
Thanks everyone for the likes and watching this madness.

I got to use my square tube die to do some bending today. It worked really well but it took me hours to get two sides to be exactly the same. Bend a little check it, bend a little pinch my finger and bleed all over, bend a little and check again. This gives you an idea of what the body is shaping up to look like.

IMG_0217.jpg

From the back you can see the top will clear the engine by 2 1/2".

IMG_0216.jpg

I have to build the rear support next. From that cross bar down will be a lid to get to the engine. The fenders will be 5" above the tires so not quite halfway up the body.
 
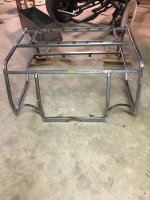
I have the frame work close to done. I think I'm just about ready to start putting a skin on it. I used almost 40' of tubing. I can still lift it on the main frame of the trike by hand but it's awkward by myself. Even with the 18 ga. on it will still be a lot lighter than a stock beetle body.

IMG_0218.jpg

I have to put some loops around the exhaust pipes.

IMG_0219.jpg

This is an adjustable tool I made to figure out what angles I needed.

IMG_0220.jpg

There will be storage behind the passenger seat but not as big as I would like. I don't want to shorten the seat and squeeze the passenger. I have a little trailer I pull behind for camping stuff. I might have to redo it to look like an Army trailer.
 
I put the loops around the exhaust to support the body metal. I also put a raised lip around where the storage lid will be to try to keep water out.

IMG_0223.jpg

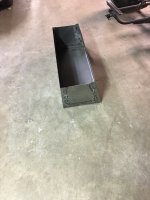
Then I started working on the storage trunk . I think I should have made the body out of 3/8" boiler plate. I'm a lot more comfortable welding thick stuff. It went OK but I need to get some gas for my mig welder. The flux core wire is kind of horrible. The flux likes to bubble up through the weld. The ends of the box will be hidden so I can live with ugly welds there but I have to do better on the welds that will show.

IMG_0222.jpg
 
View attachment 77422

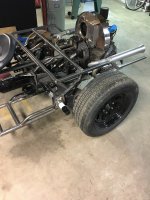
Yes there is room. I might be changing the frame anyway to get the look I want. I finished the lower links and have it setting on the wheel. It will settle a little once all the weight is put back on. The front is stiffer now because I moved the shock mount forward so have less leverage. I'll be putting a dual sport tire on to give a more off-road look. Next on the front is a high mount fender and brace. I'm thinking along the lines of a Ural.

View attachment 77423

This is what it used to look like. You can see the difference in lower shock position. That fender I pounded out of 18ga. metal but it looks too skinny mounted high.

I think next is to sit and stare at the main frame to figure out what I need to do to add the body.

didnt pay much atten to other piks,,, is the bend

welded or bent?
 
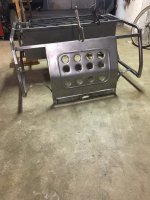
Some pretty exciting stuff today, at least for me. It was a rainy day so I stayed in the basement and made an engine hood. I got to use some 1/2" dies I made for my beader and I got to use a dimple die i had made.

IMG_0224.jpg

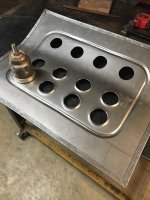
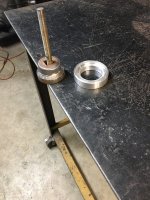
You can see I folded the edges over to give it strength and eliminate the sharp edge. I curved it next to fit the back of the body. I wasn't sure if you can bead on a curve but it worked fine. It didn't even change the curve much. Next I cut a dozen 2" holes then used the dimple die. That gives it even more strength.

The die I made out of an old cracked socket. It had a nice taper on it for the male part. I used piece of aluminum I had to make the female part. You just squeeze the metal between the two. I made a die for 1" holes too.

IMG_0226.jpg

Here is the hood roughly in place. I have to make some hinges for it. I was pretty pleased with how it turned out. It doesn't take much to please me anymore.

IMG_0225.jpg

Things will slow down now. I have family stuff to do over the holiday.
 
Some pretty exciting stuff today, at least for me. It was a rainy day so I stayed in the basement and made an engine hood. I got to use some 1/2" dies I made for my beader and I got to use a dimple die i had made.

View attachment 79120

You can see I folded the edges over to give it strength and eliminate the sharp edge. I curved it next to fit the back of the body. I wasn't sure if you can bead on a curve but it worked fine. It didn't even change the curve much. Next I cut a dozen 2" holes then used the dimple die. That gives it even more strength.

The die I made out of an old cracked socket. It had a nice taper on it for the male part. I used piece of aluminum I had to make the female part. You just squeeze the metal between the two. I made a die for 1" holes too.

View attachment 79121

Here is the hood roughly in place. I have to make some hinges for it. I was pretty pleased with how it turned out. It doesn't take much to please me anymore.

View attachment 79122

Things will slow down now. I have family stuff to do over the holiday.

Have a great holiday ... will be looking forward to updates later.
 
nice work on that hood, really like seeing parts made with homemade tooling, or no tooling at all.

I can't stand to watch the build shows on tv where every tool used, turns into a commercial, and you need to "highfive" after drilling a hole or making a weld.
 
Thanks

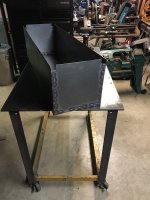
I got some gas for my mig and I decided to do the storage box over. It's amazing what a difference there is between flux core and solid wire with gas. I changed the shape a little. I can cut up the old box for pieces for other places.

IMG_0245.jpg
 
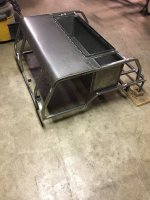
I got the storage box all welded in and the back panel almost done. I didn't do anything fancy with the back panel because there will be hinges for the storage lid bolted on there and I have another idea for something on it.

IMG_0246.jpg

I will soon have to order fenders because I have to figure out how to brace them off the body frame before I put the sides on.
 

Welcome to the Trike Talk Community

Join our vibrant online community dedicated to all things Trikes! Whether you're a seasoned rider or just starting out, this is the place to share experiences, tips, and stories about your three-wheeled adventures. Explore modifications, maintenance advice, and rides, all while connecting with fellow trike enthusiasts from around the globe

Forum statistics

Threads
55,546
Messages
902,034
Members
22,609
Latest member
2011Case

Trike Talk Community

Welcome to a community dedicated to the most diverse and fastest growing powersports segment, Motorcycle Trikes. Come join the discussion about the best makes and models, popular modifications and proven performance hacks, trike touring and travel, maintenance, meetups and more!

Register Already a member? Login

Forum statistics

Threads
55,546
Messages
902,034
Members
22,609
Latest member
2011Case
 photo 260e2760-d89e-45b2-8675-2bc26fb3d465.jpg

 photo Trike-Talk-150-x-200.gif

 photo DK Trike Talk Right side banner 19.jpg

Merziere Reverser

 photo 9796095c-0d4b-4a9b-88ed-efe4c498d084.png
 photo f9866e4e-75c5-471a-86f5-5e72a446ecc3.png
Back
Top