So I have now spent two hours trying to line up the back right seat screw.
I never had a problem before on the old bike.
Am I missing a secret??
Frustrated
I never had a problem before on the old bike.
Am I missing a secret??
Frustrated

Follow along with the video below to see how to install our site as a web app on your home screen.
Note: This feature may not be available in some browsers.
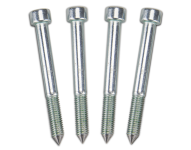
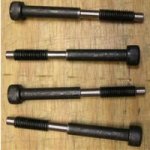
All of the above, and you might modify your seat bolts to make them easier to hit the hole. These are on an aftermarket parts site for about $15.
WHERE??View attachment 19371
Oh, and just start the bolts and leave them loose until all 4 are started. Tightening one side or even just 1 bolt can pull the seat askew, and that can end up adding to the vocabulary of any child within earshot.
My seat goes on without any problems. You just need to take your time and make sure of a few things:
1. All wires, cables and other obstructions are clear.
2. Remove the passenger backrest-It's only two screws accessed in the trunk and makes it easier to replace the seat.
3. Use something (duct tape, silicone, gorilla glue, etc) to secure the rubber grommets onto the seat pan so they don't fall off.
4. When replacing the seat, make sure the tab in front fits into the slot.
5. Sometimes it helps to have someone sit on the passenger seat to get the holes lined up.
6. Get one bolt started but don't tighten any of them until all 4 are started.
Welcome to a community dedicated to the most diverse and fastest growing powersports segment, Motorcycle Trikes. Come join the discussion about the best makes and models, popular modifications and proven performance hacks, trike touring and travel, maintenance, meetups and more!
Register Already a member? Login