Front brake switch?

pcombe

New member
Joined
Feb 25, 2013
Messages
2,949
Reaction score
1,443
Location
casper,wy. usa
Let me run something past you ok?

When I converted my old 1989 tour glide to a trike I found that I started burning out rear pressure brake switches in a real short time.
What I finally discovered is that the stock switches didn't have a high enough amp rating to handle the extra lights on the rear of the trike.
You wouldn't think that adding an extra brake light would make any big difference?
I solved the issue by going to the auto parts store and buying a switch made for a car.
The problem I have now is the front brake switch, It evidently isn't rated with enough amps either.
It would seem that the tri glide must have heavier switches?
Are the switches in the tri glide heavier than say a stock electra glide?

I need to find a front switch with enough amps, Im not real sure if they would work in my old handle bar electrical housing.

How did you get around the problem?
 
I can't see what would be changed in HD TriGlides to up the amperage ratings, but I'll defer that to our HD gurus waiting to help with some better info. However, the easiest and most cost-effective solution that I see would be to pick up a hi-amp relay from most any parts store near you. These relays are sold to add hi-amp lighting to most low-amp vehicles and cost only a few bucks (under $10), and I think are even available from Wal-Mart. The little 1" cube relay just wires inline (not inside your switch housing) and will add a higher power source line (i.e., direct from battery) to your power need that's down on its luck.

I always keep a couple of these tucked into my emergency tool kit. Good luck!!


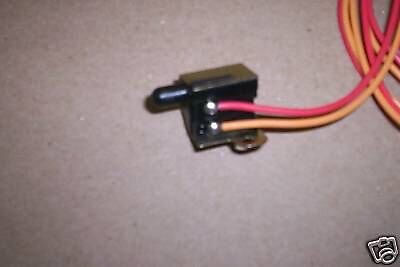
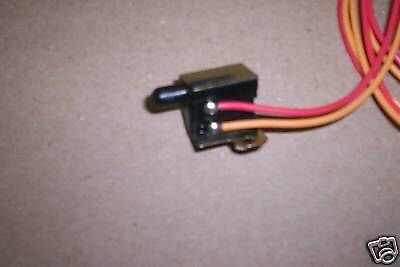
light swith.jpg This would be the switch inside the handle bars, am I guessing correctly that the hi amp switch could be directly wired only into the switch wires themselves?
I just tried to google a hi amp switch and didn't see what you might be talking about? do you have a link you could show this dummy?
 
View attachment 20895 This would be the switch inside the handle bars, am I guessing correctly that the hi amp switch could be directly wired only into the switch wires themselves?
I just tried to google a hi amp switch and didn't see what you might be talking about? do you have a link you could show this dummy?

I'd go with the relay suggestion from Loner, I don't think the newer style switch will work, a relay would solve it just as well.

This is the style of relay Loner is talking about, you should be able to get one at the Auto Parts store.

images
 
I'd go with the relay suggestion from Loner, I don't think the newer style switch will work, a relay would solve it just as well.

This is the style of relay Loner is talking about, you should be able to get one at the Auto Parts store.

images

thanks guys, please eddicate dis iggerent farm boy.

(Question?)
How do I marry it to the switch you see in the picture?
I have two wires on the switch and three on the relay.
 
http://www.mgexp.com/article/brake-light-relay.html

I don't have much time right now, but look at the attached page. Forget the diode he talks about soldering on - it isn't necessary. The relay wires are installed downstream of the handlebar switch, not directly into it. The relay will simply take the lower amp power sent by the current switch and close the new relay with it, which in turn makes contact between a higher amp power line (from the battery perhaps) to the brake light wires themselves. The handlebar switch is never disturbed and never even opened unless you are tracing wires.

I'll follow-up to this when I have more time.
 
Have you checked the connections for the new rear section that was put on??
Was this doing this since you installed the trike kit??
 
http://www.mgexp.com/article/brake-light-relay.html

I don't have much time right now, but look at the attached page. Forget the diode he talks about soldering on - it isn't necessary. The relay wires are installed downstream of the handlebar switch, not directly into it. The relay will simply take the lower amp power sent by the current switch and close the new relay with it, which in turn makes contact between a higher amp power line (from the battery perhaps) to the brake light wires themselves. The handlebar switch is never disturbed and never even opened unless you are tracing wires.

I'll follow-up to this when I have more time.

Thanks amigo, I will add to you reputation
 
Have you checked the connections for the new rear section that was put on??
Was this doing this since you installed the trike kit??


Yep my friend I went over it with a fine tooth comb. I started having this problem shortly after I built it.

It seemed worse after I put the new motor in it with a higher output stator.

I take my scoot down each winter and go over all my electric system cleaning and lubricating connections and looking for possible problems. with a 25 yr. old bike it's just part of what I do?:Shrug:

Thanks for your help.

Interesting..The stator should help keep the battery and other things at the proper level .. Increasing the amperage with take its toll on contacts not rated for the load..

Well good luck..
 
http://www.mgexp.com/article/brake-light-relay.html

I don't have much time right now, but look at the attached page. Forget the diode he talks about soldering on - it isn't necessary. The relay wires are installed downstream of the handlebar switch, not directly into it. The relay will simply take the lower amp power sent by the current switch and close the new relay with it, which in turn makes contact between a higher amp power line (from the battery perhaps) to the brake light wires themselves. The handlebar switch is never disturbed and never even opened unless you are tracing wires.

I'll follow-up to this when I have more time.

Ok, thank you.
I ordered a new handle bar switch and will give this a try.
 
One more consideration - check (or have a friend check) the output from your regulator. Is the voltage varying (meaning is the voltage moving beyond 12.8 volts or so)? A quick check of this is to run the engine at night with your headlight(s) on and watch to see if the lights brighten and dim as the engine is revved and released. That would put the regulator under heavy suspicion to me. Small switches don't like current fluctuations, particularly to the high side.

Remember the early Triumphs that had the fluctuating light problems due to the early wiring harnesses that relied on zener diodes to act a the bike's regulator system? Similar circumstances may be biting you.

Again, good luck!
 
http://www.mgexp.com/article/brake-light-relay.html

I don't have much time right now, but look at the attached page. Forget the diode he talks about soldering on - it isn't necessary. The relay wires are installed downstream of the handlebar switch, not directly into it. The relay will simply take the lower amp power sent by the current switch and close the new relay with it, which in turn makes contact between a higher amp power line (from the battery perhaps) to the brake light wires themselves. The handlebar switch is never disturbed and never even opened unless you are tracing wires.

I'll follow-up to this when I have more time.


light swith.jpg Handle bar brake light switch

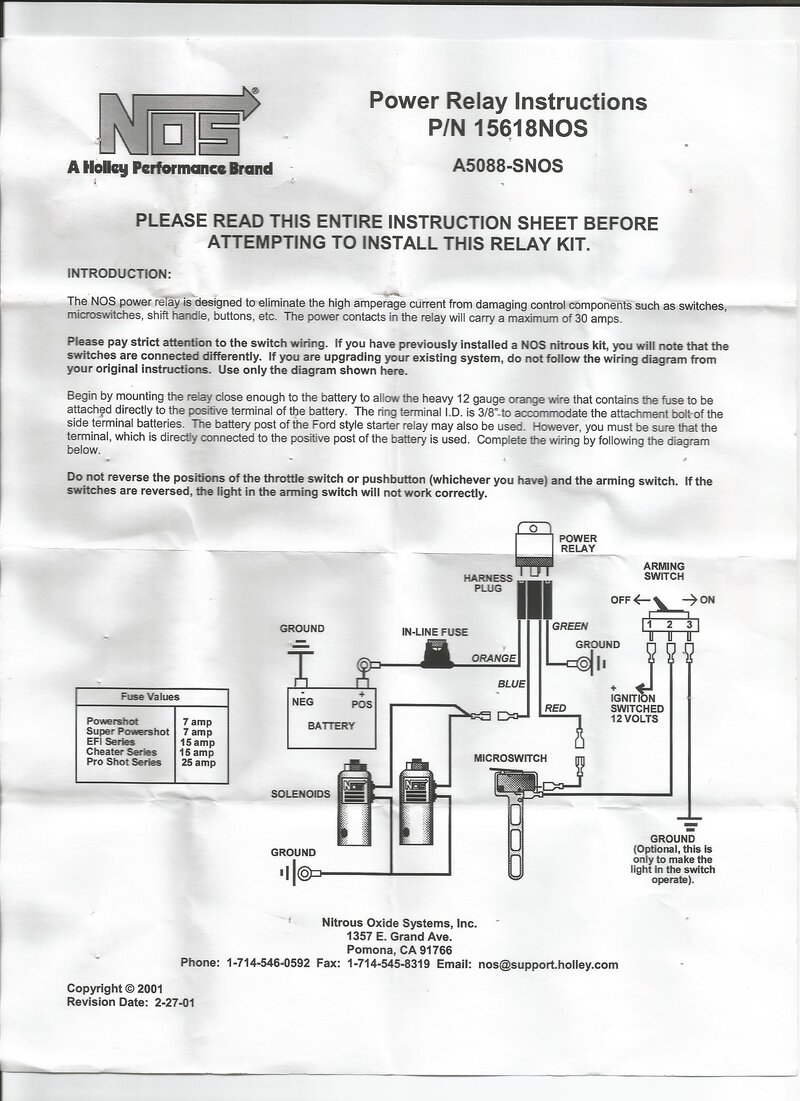
Scan.jpg Power relay switch (Click image to enlarge)

I would like your input please.

The orange fused wire goes to the battery?

The green wire is ground?

The red wire goes into which side of the above handlebar switch? hot side or the downstream side?

The blue wire will go Where? or is it necessary?

If the red wire goes down stream of the handlebar switch? why would I need the blue wire ?
 
This is what I see:
The red wire goes to the load side of the switch. It is what powers the relay. The blue wire is your new high amperage wire, which will go to your lights.

When you close the switch, the red wire turns the relay on, which closes the contacts, allowing your new source of power (orange wire) to go out on the blue wire to your load.

smiles%20slap%20head.gif Im still somewhat confused because I had not planned on including an arming switch.
I had planned to marry it directly into the brake light switch. Should do the same thing?
Maybe I need a diagram?:Shrug:
 
Same thing. Your original switch will have power on it already, the other side goes to the lights. Remove that wire, put the red one on your switch. Now the red one powers the relay instead of your lights. Then connect the blue wire to your lights. Away you go!
 
I agree with the previous poster (RcSuD - maybe sometimes you might share the origin of your user name?). Your handlebar switch has power in through the orange wire, and power out (to the brake lights) through the red wire. Find the red wire downstream from the handlebar switch and once you've selected a point in the wire where you want to tie in your relay, cut the red wire entirely. Now tie your handlebar switch's red wire to the red on your new relay. Tie the other end of the freshly cut wire (red) to the blue wire from the new relay. Send your high amp power (from the battery or similar hi-load source) to the orange input on your new relay. Ground the relay's green wire and you're done.

Red from handlebar switch --> red on relay
Red going to lights --> blue on relay
Battery or hi-amp power source --> orange on relay
Chassis ground the relay green wire

Relay box itslef does not need to be mounted in a grounded position, just somewhere to protect, even floating or attached to a wire bundle.
With that, when your handlebat switch closes, it sends +12v to the relay's low amperage coil. That coil, with +12v on one input and a grounded backend wire (Green) closes and joins orange (hi-amp +12v) to blue output now going to your lights. Instantaneous, quiet and usually good for a bike's lifetime.

Hope it all works as planned here, but again my recommendations are guaranteed or your money back!
 
Same thing. Your original switch will have power on it already, the other side goes to the lights. Remove that wire, put the red one on your switch. Now the red one powers the relay instead of your lights. Then connect the blue wire to your lights. Away you go!

Same thing. Your original switch will have power on it already, the other side goes to the lights.
"
Kinda what I thought but was looking for assurance.
Thank you!

- - - Updated - - -

I agree with the previous poster (RcSuD - maybe sometimes you might share the origin of your user name?). Your handlebar switch has power in through the orange wire, and power out (to the brake lights) through the red wire. Find the red wire downstream from the handlebar switch and once you've selected a point in the wire where you want to tie in your relay, cut the red wire entirely. Now tie your handlebar switch's red wire to the red on your new relay. Tie the other end of the freshly cut wire (red) to the blue wire from the new relay. Send your high amp power (from the battery or similar hi-load source) to the orange input on your new relay. Ground the relay's green wire and you're done.

Red from handlebar switch --> red on relay
Red going to lights --> blue on relay
Battery or hi-amp power source --> orange on relay
Chassis ground the relay green wire

Relay box itslef does not need to be mounted in a grounded position, just somewhere to protect, even floating or attached to a wire bundle.
With that, when your handlebat switch closes, it sends +12v to the relay's low amperage coil. That coil, with +12v on one input and a grounded backend wire (Green) closes and joins orange (hi-amp +12v) to blue output now going to your lights. Instantaneous, quiet and usually good for a bike's lifetime.

Hope it all works as planned here, but again my recommendations are guaranteed or your money back!


You guys are the best!
 
I have been feeling kinda puny lately (ticker don't like me) so I haven't had the chance to do this work yet.
I will let you know how it turns out.
 

Trike Talk Community

Welcome to a community dedicated to the most diverse and fastest growing powersports segment, Motorcycle Trikes. Come join the discussion about the best makes and models, popular modifications and proven performance hacks, trike touring and travel, maintenance, meetups and more!

Register Already a member? Login

Forum statistics

Threads
55,570
Messages
901,970
Members
22,550
Latest member
stag man
 photo 260e2760-d89e-45b2-8675-2bc26fb3d465.jpg

 photo Trike-Talk-150-x-200.gif

 photo DK Trike Talk Right side banner 19.jpg

Merziere Reverser

 photo 9796095c-0d4b-4a9b-88ed-efe4c498d084.png
 photo f9866e4e-75c5-471a-86f5-5e72a446ecc3.png
Back
Top