SBS Project - Sportster Chop w/ Lots of Photo's

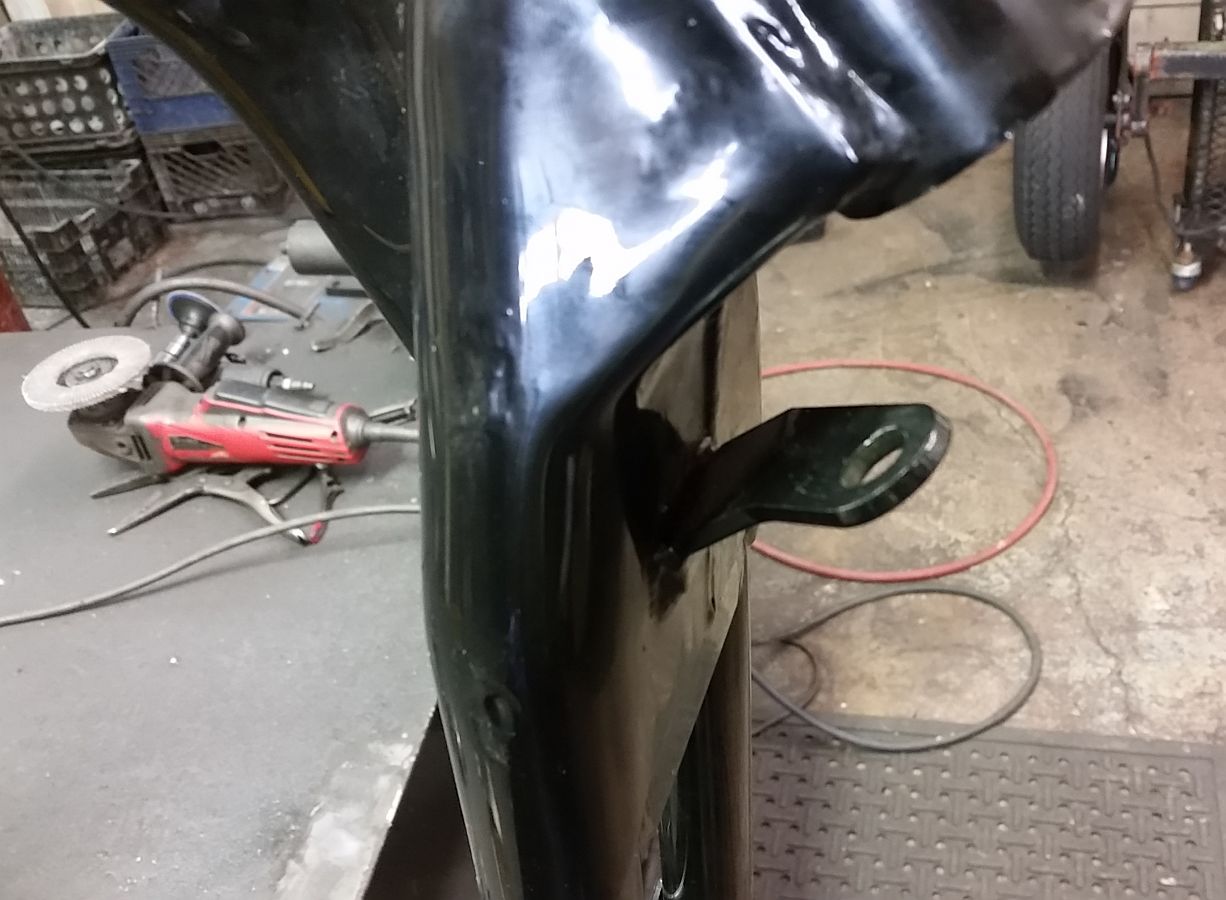
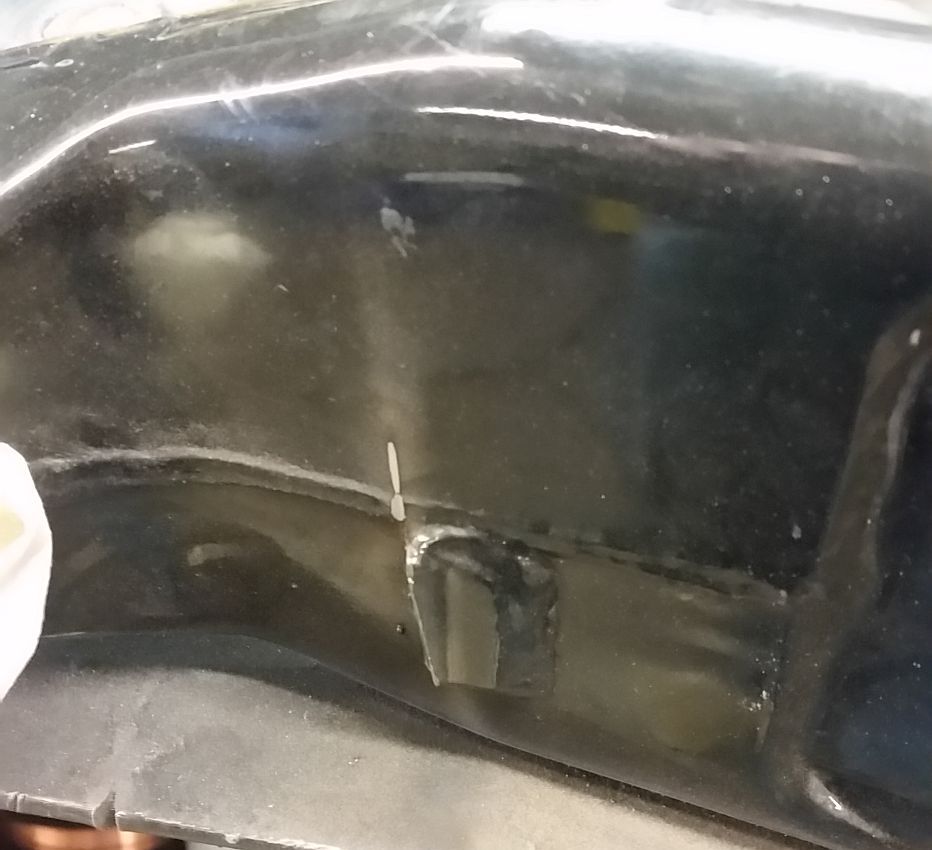
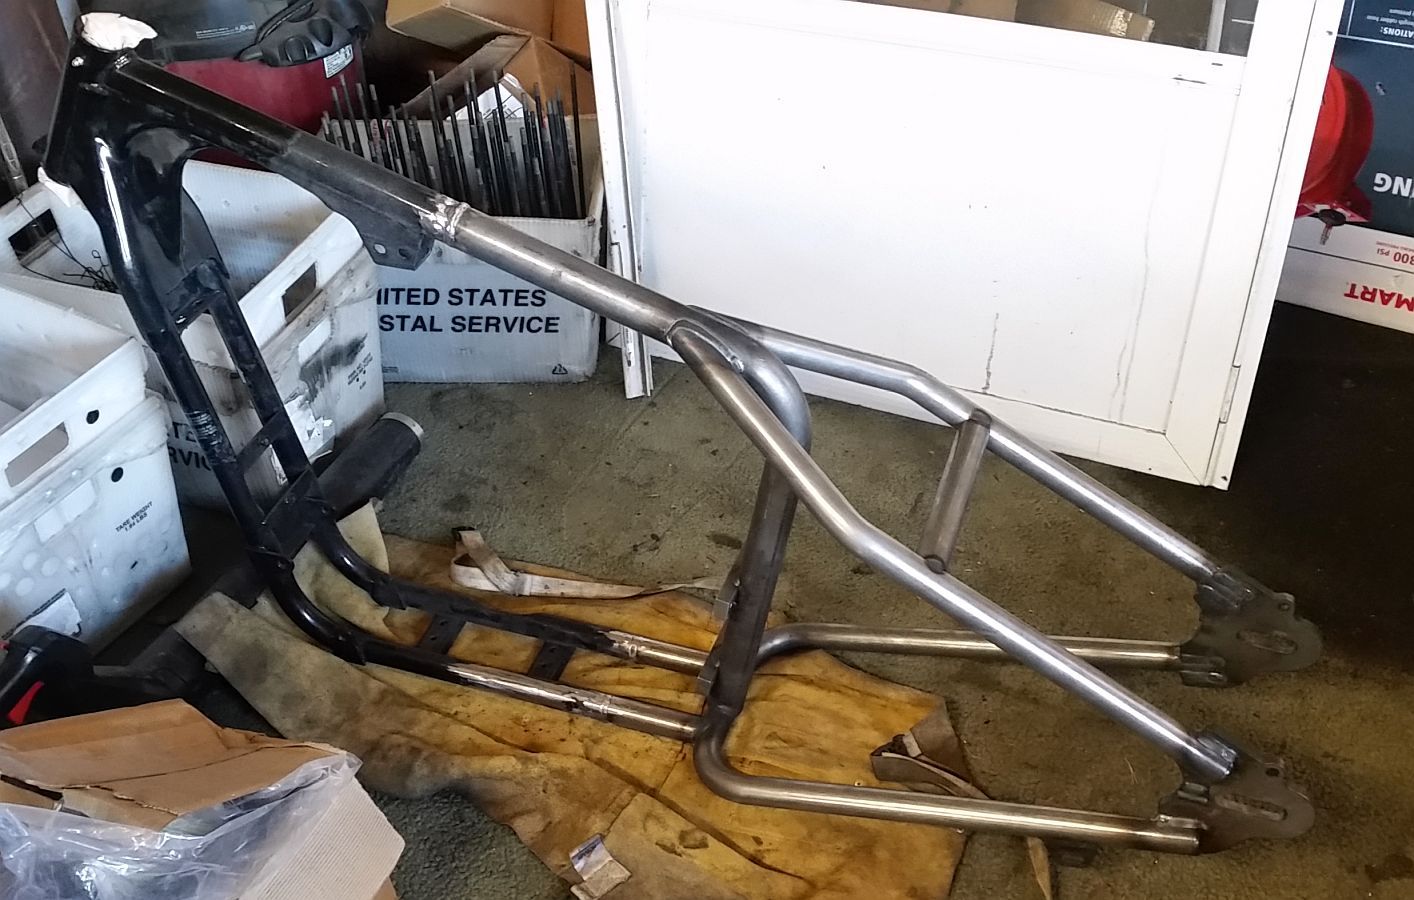
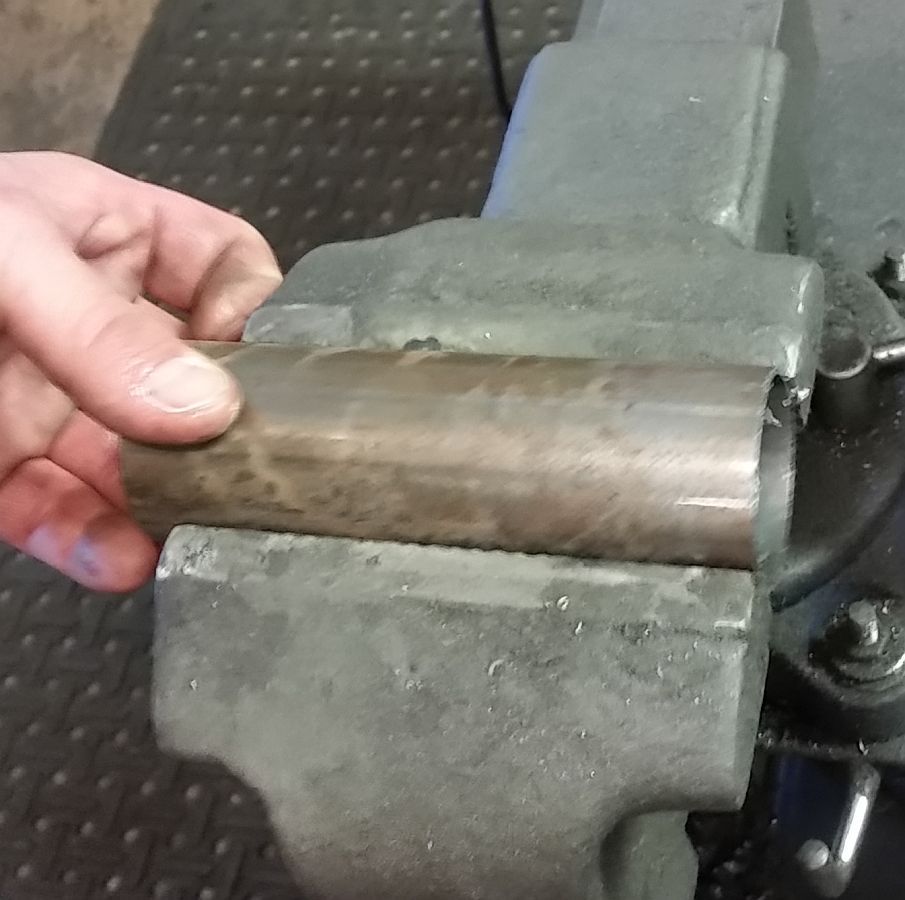
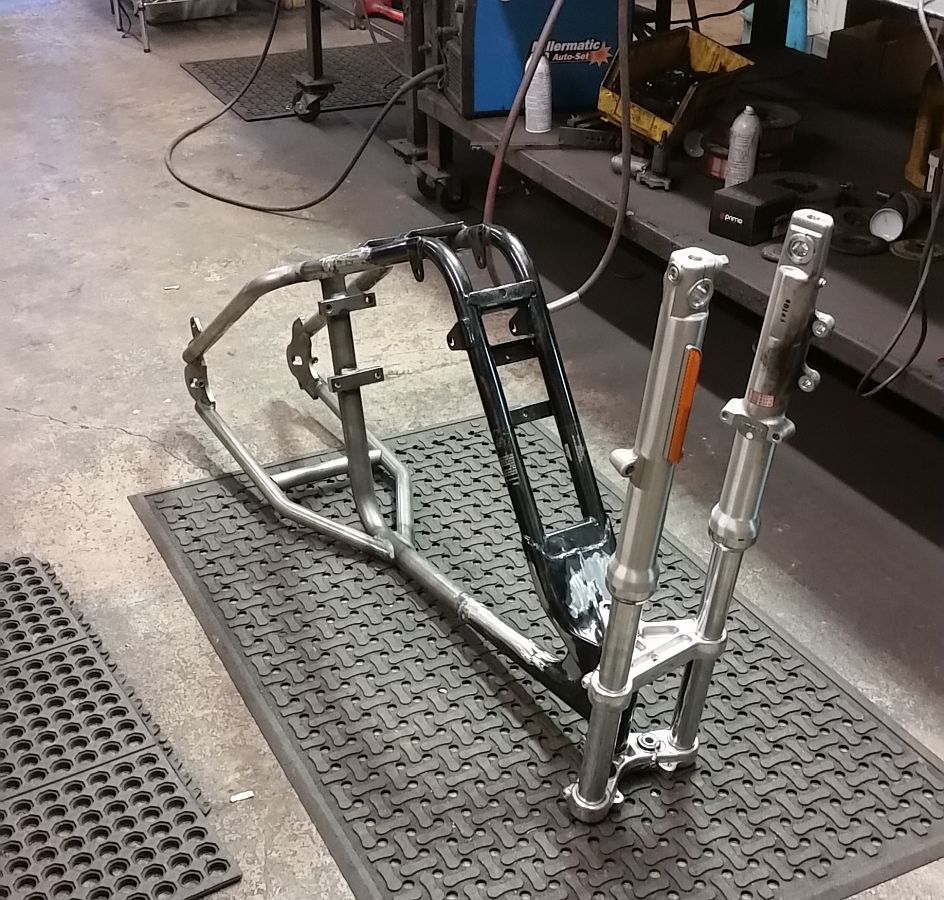
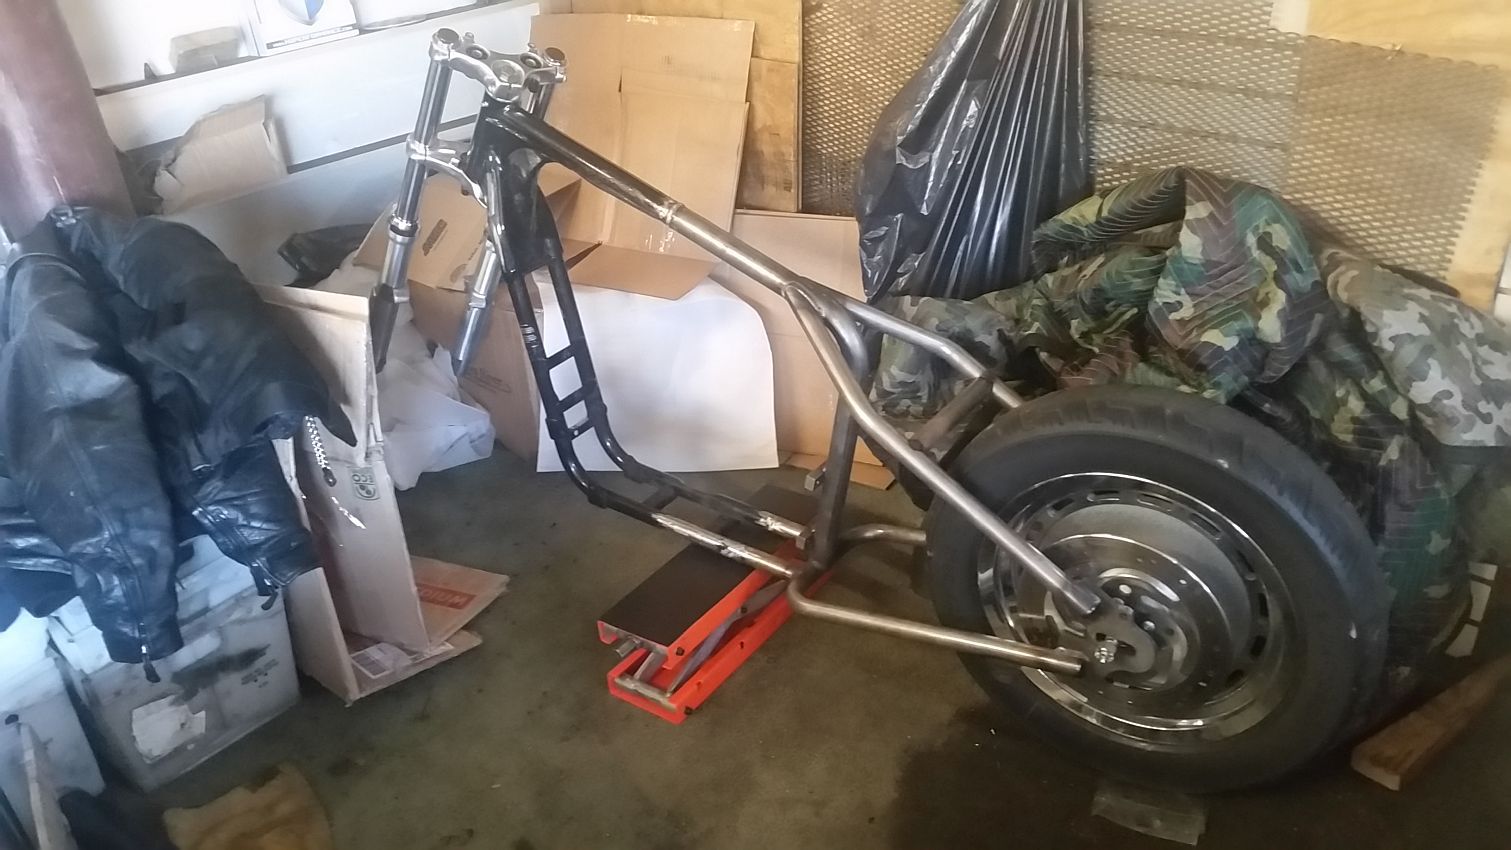
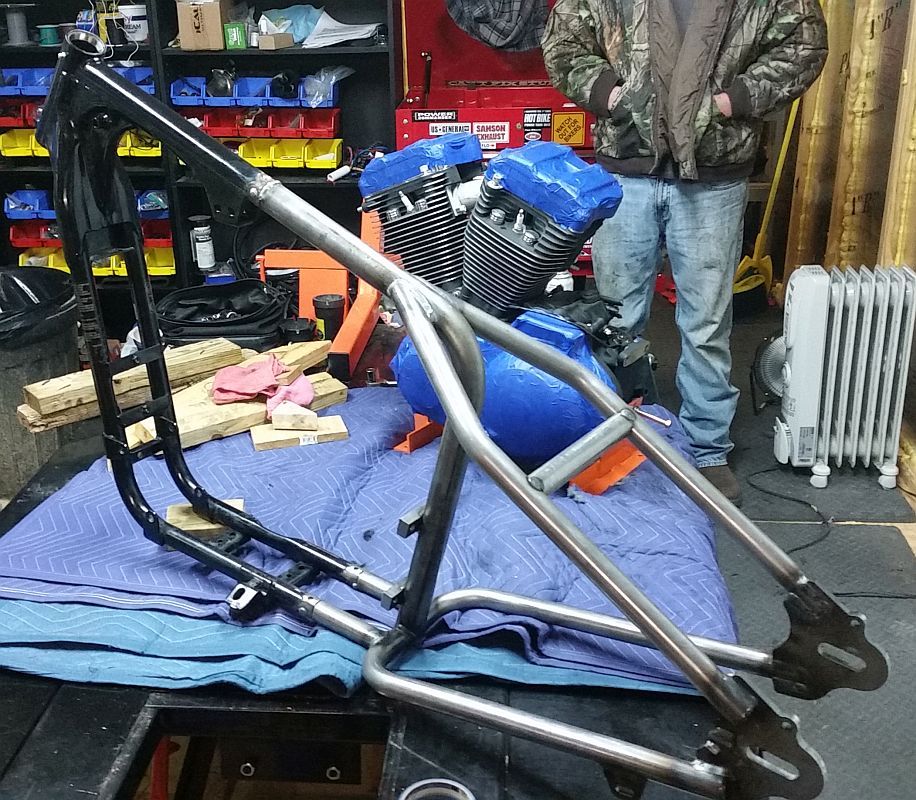
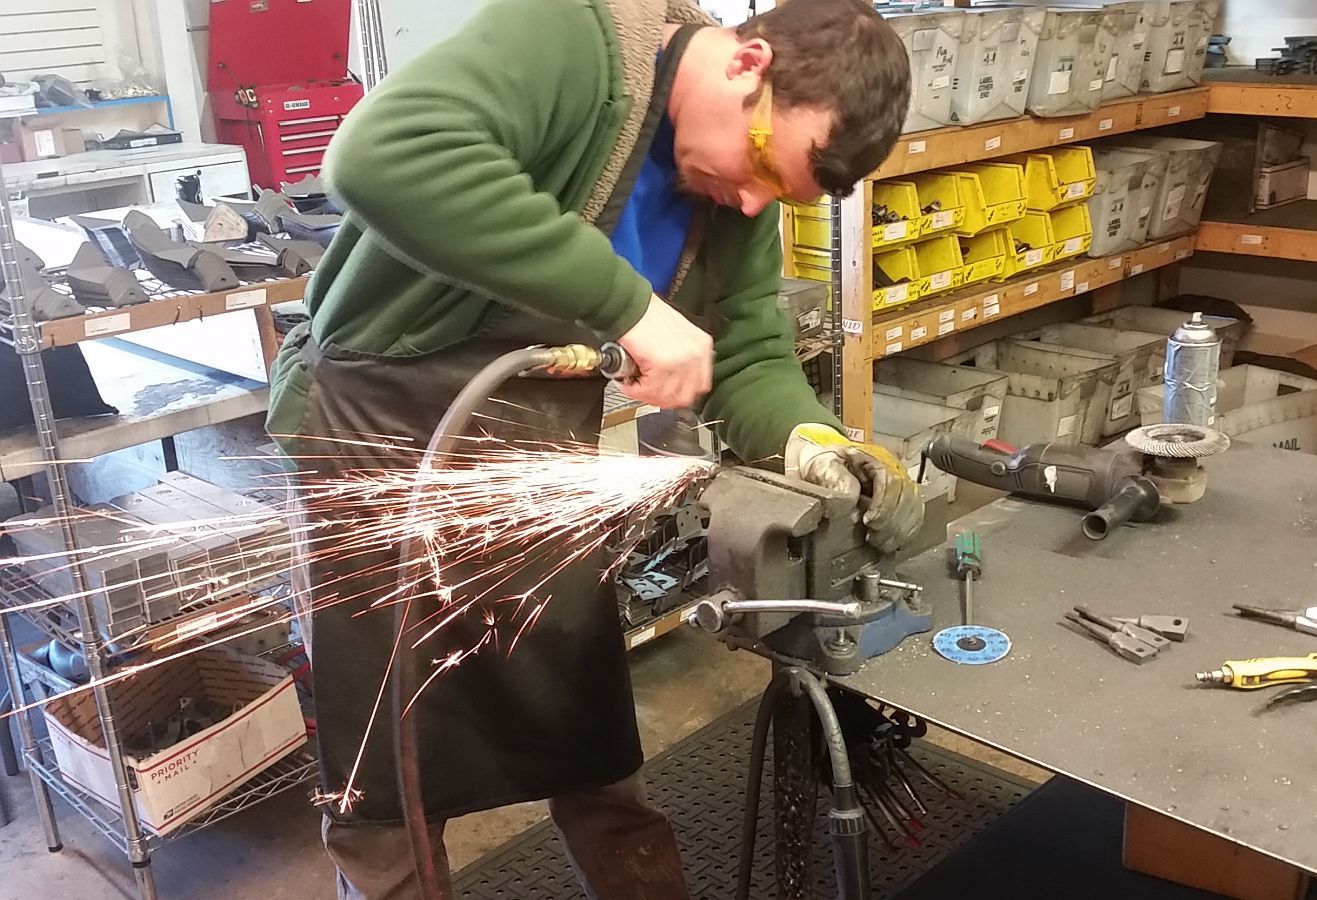
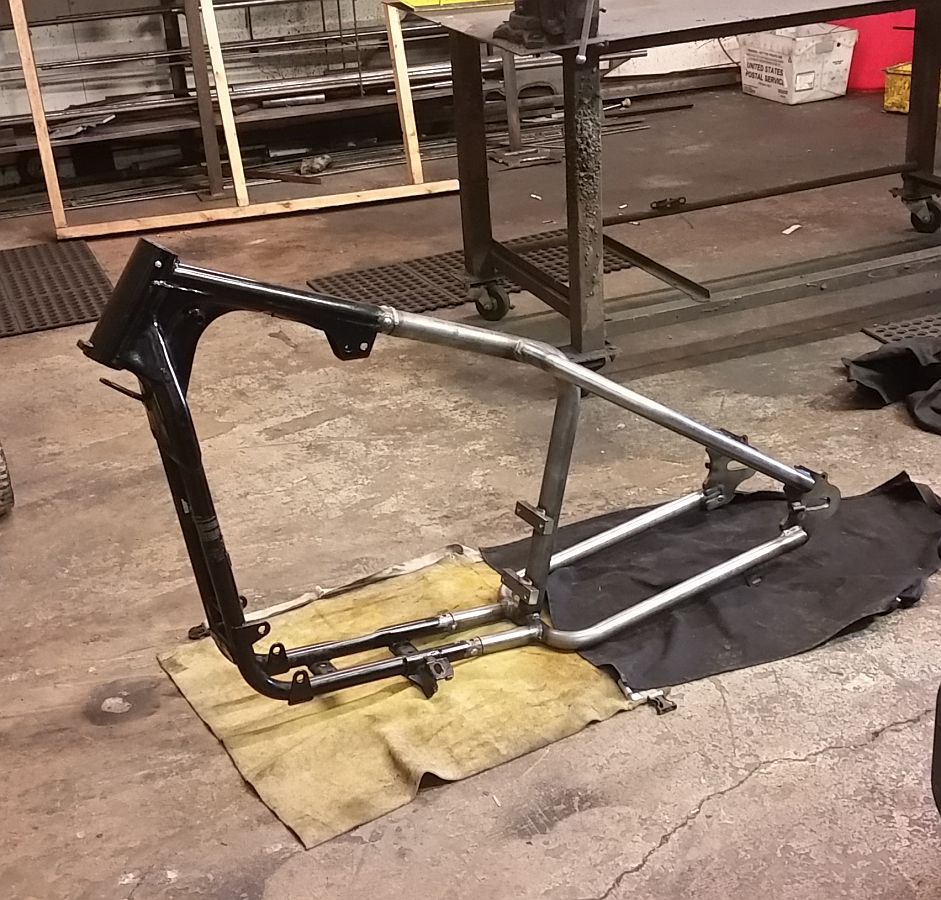
Test fitting the hardtail to the cut & prepped stock frame.
Test%20Fit_zpsroozgkvu.jpg


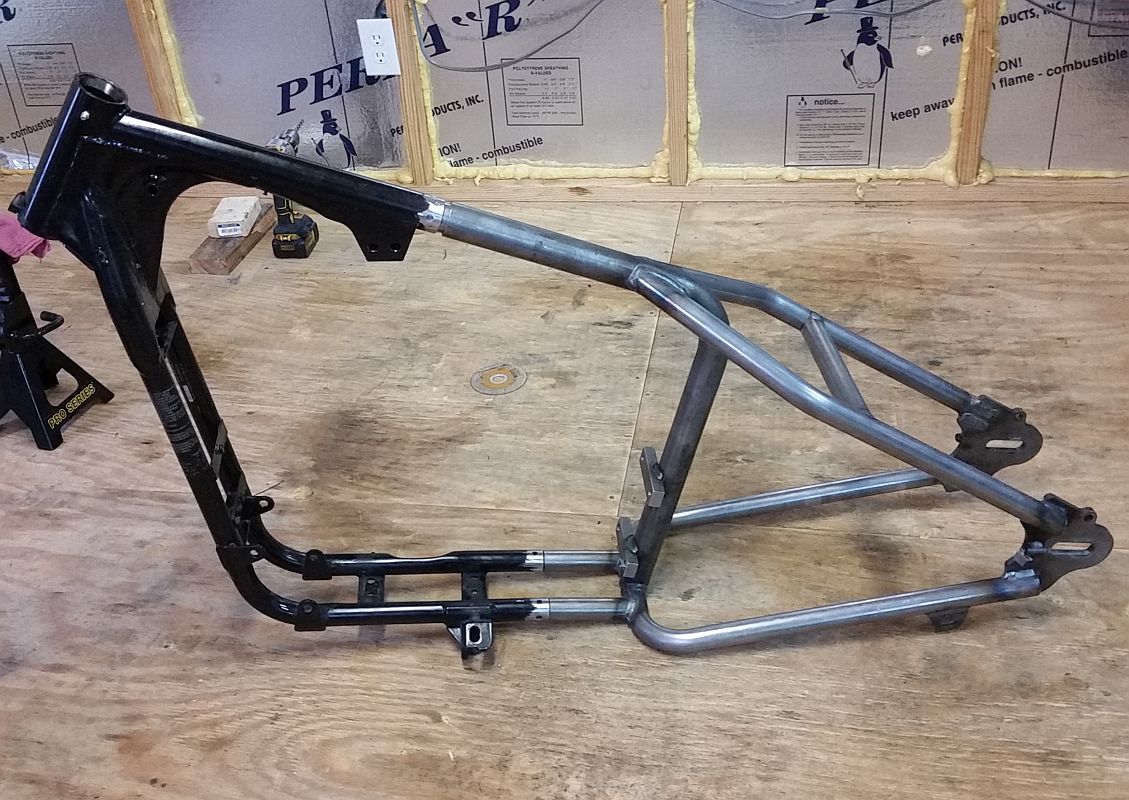
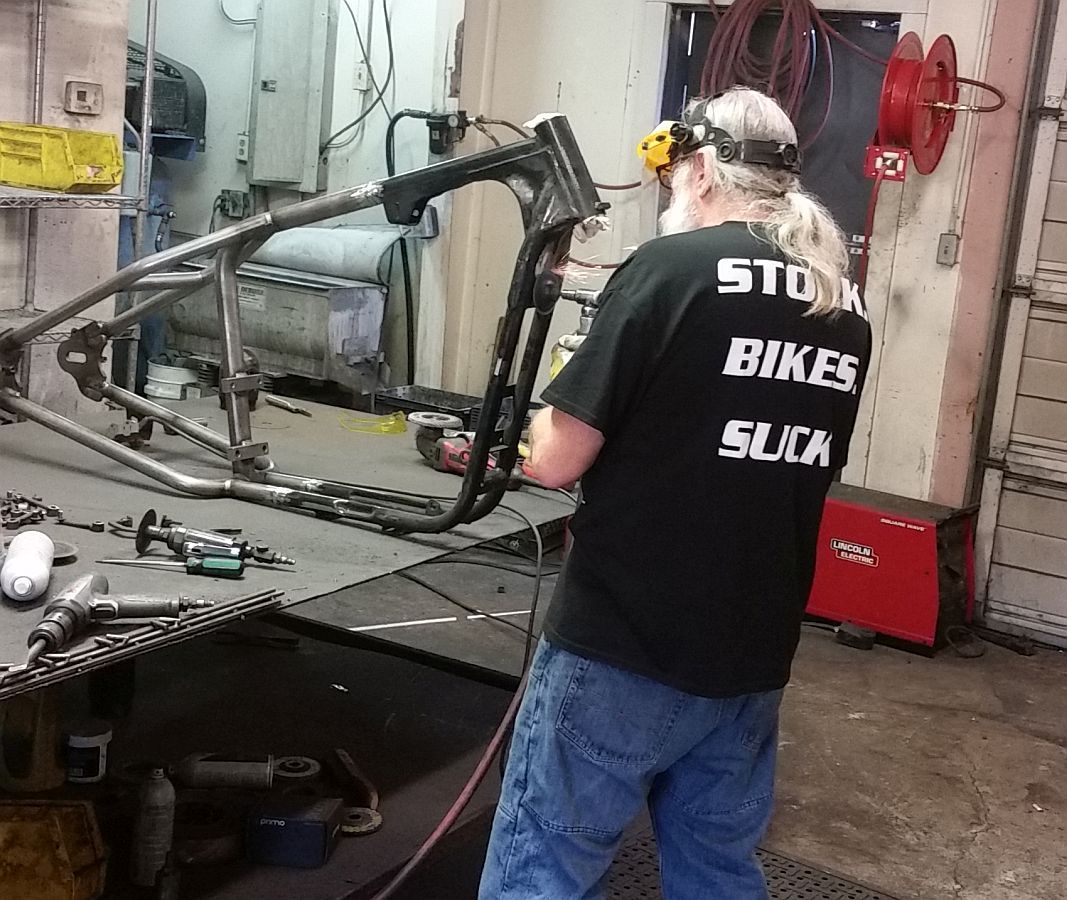
Everything looks good, so it's time to bolt the motor in to use it as a "jig" to get the frame perfectly aligned before welding.
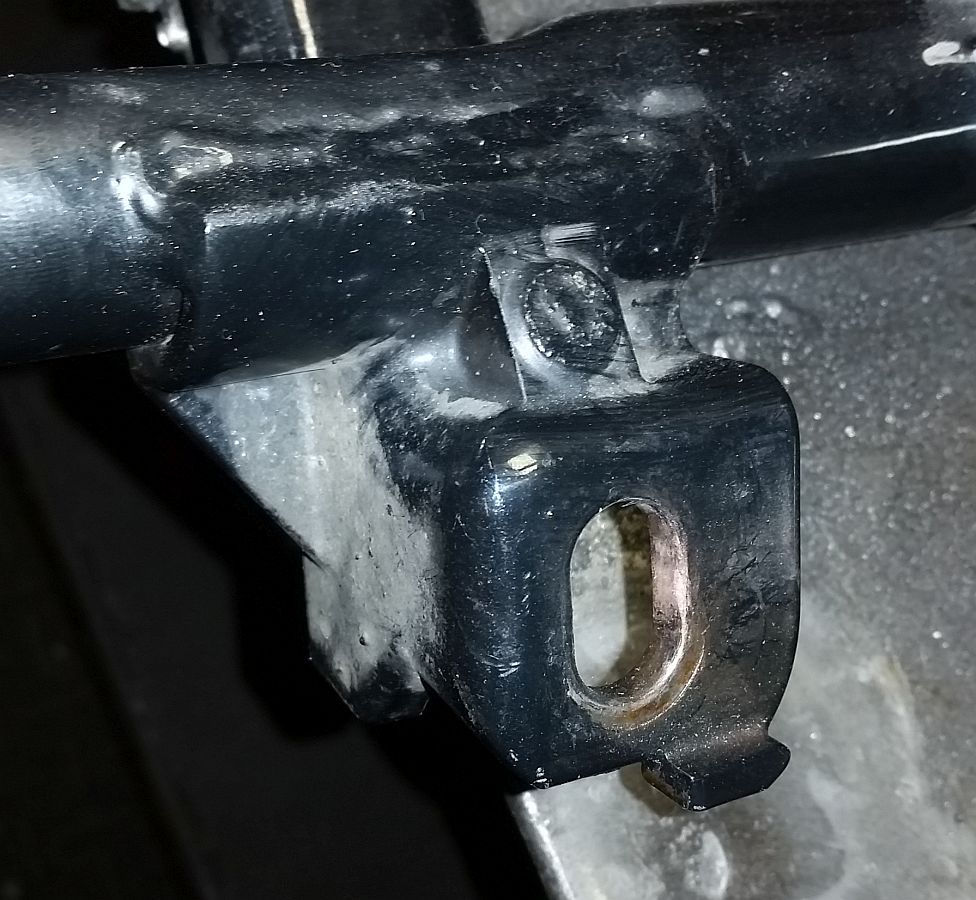
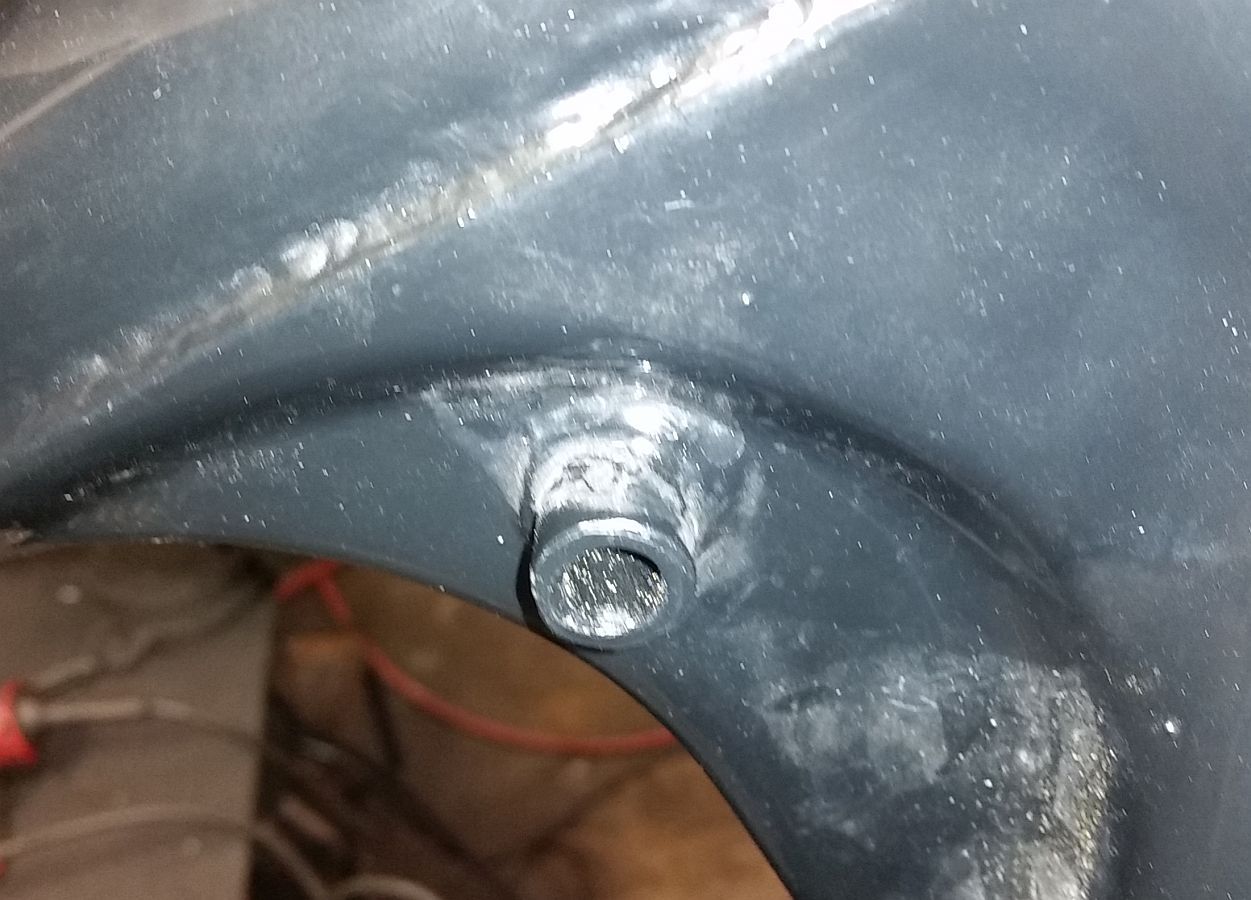
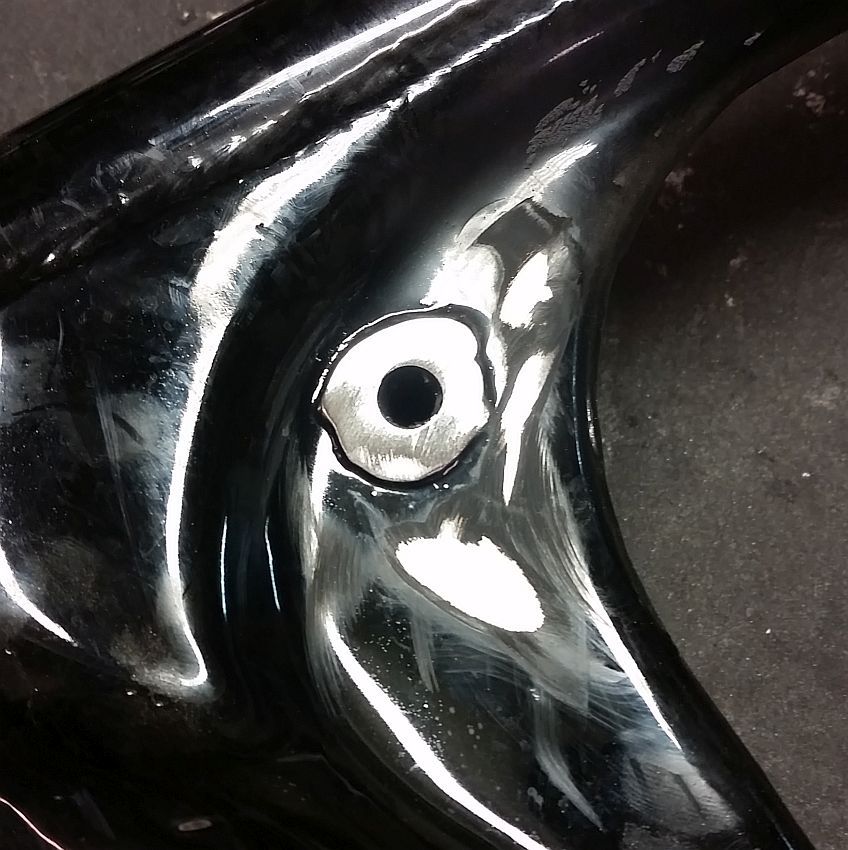
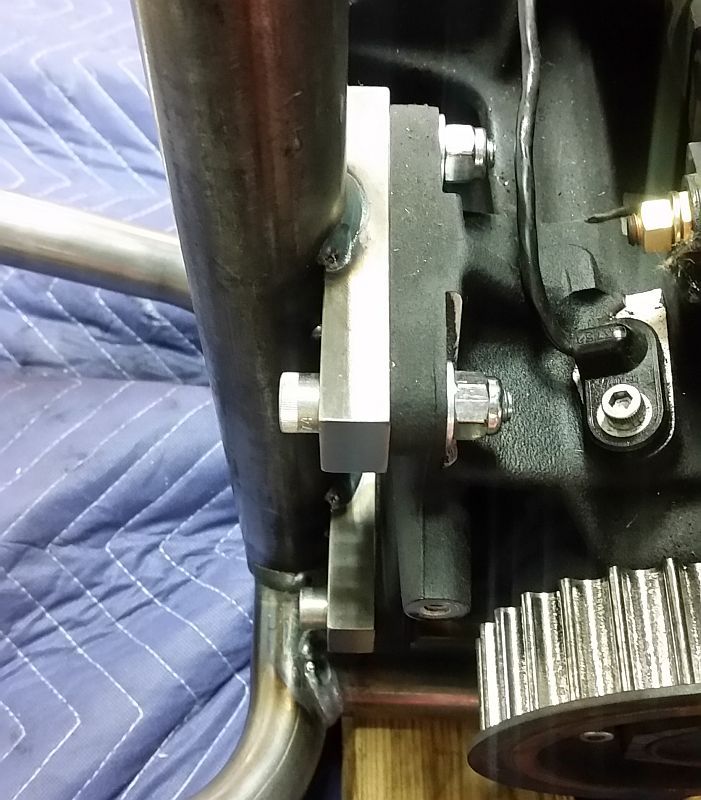
10 bolts attach the engine to the original section of the frame...
Bolting%20engine%20in%20to%20get%20frame%20lined%20up_zpswbmdcifz.jpg

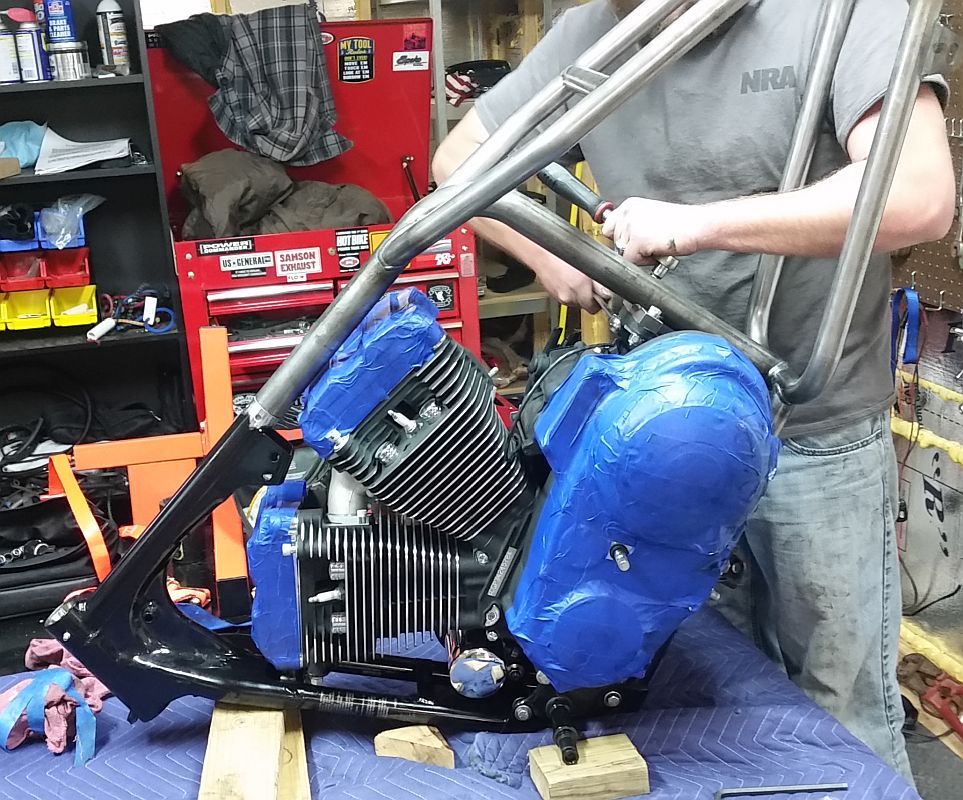
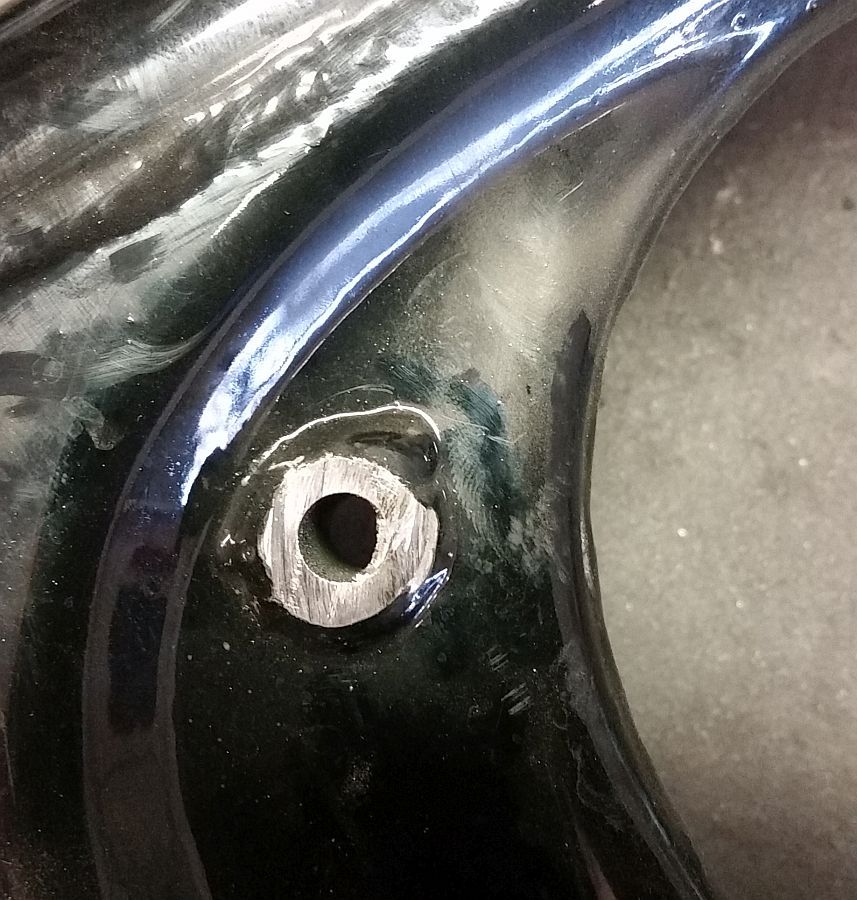
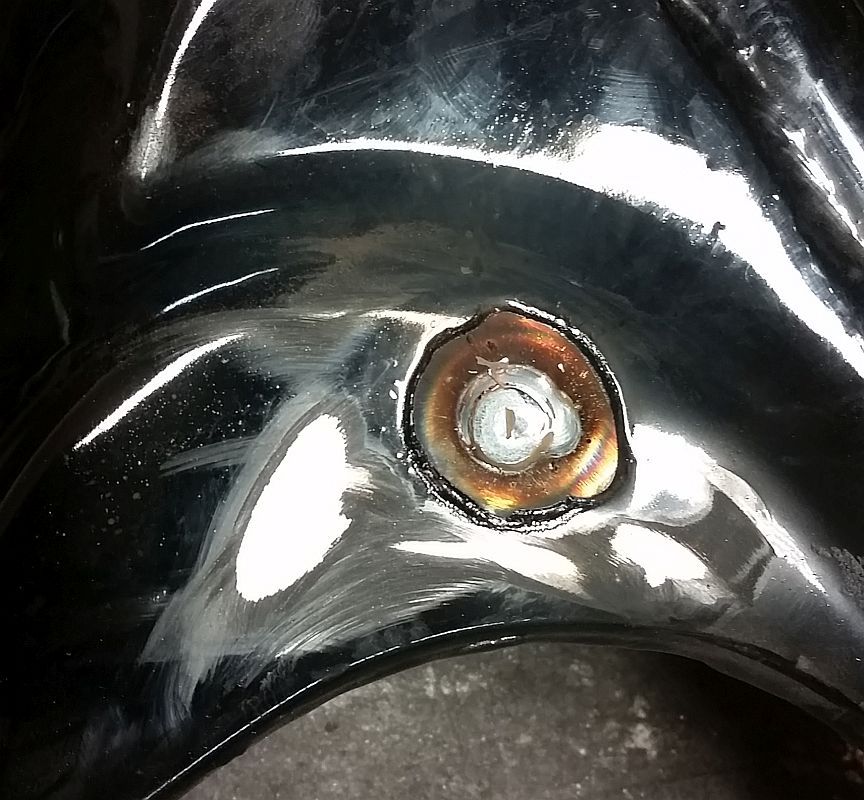
...and 4 more bolts (with 2 dowel pins) line up the hardtail section to the original perfectly.
Trans%20bolted%20to%20hardtail_zpsjrhauvo0.jpg

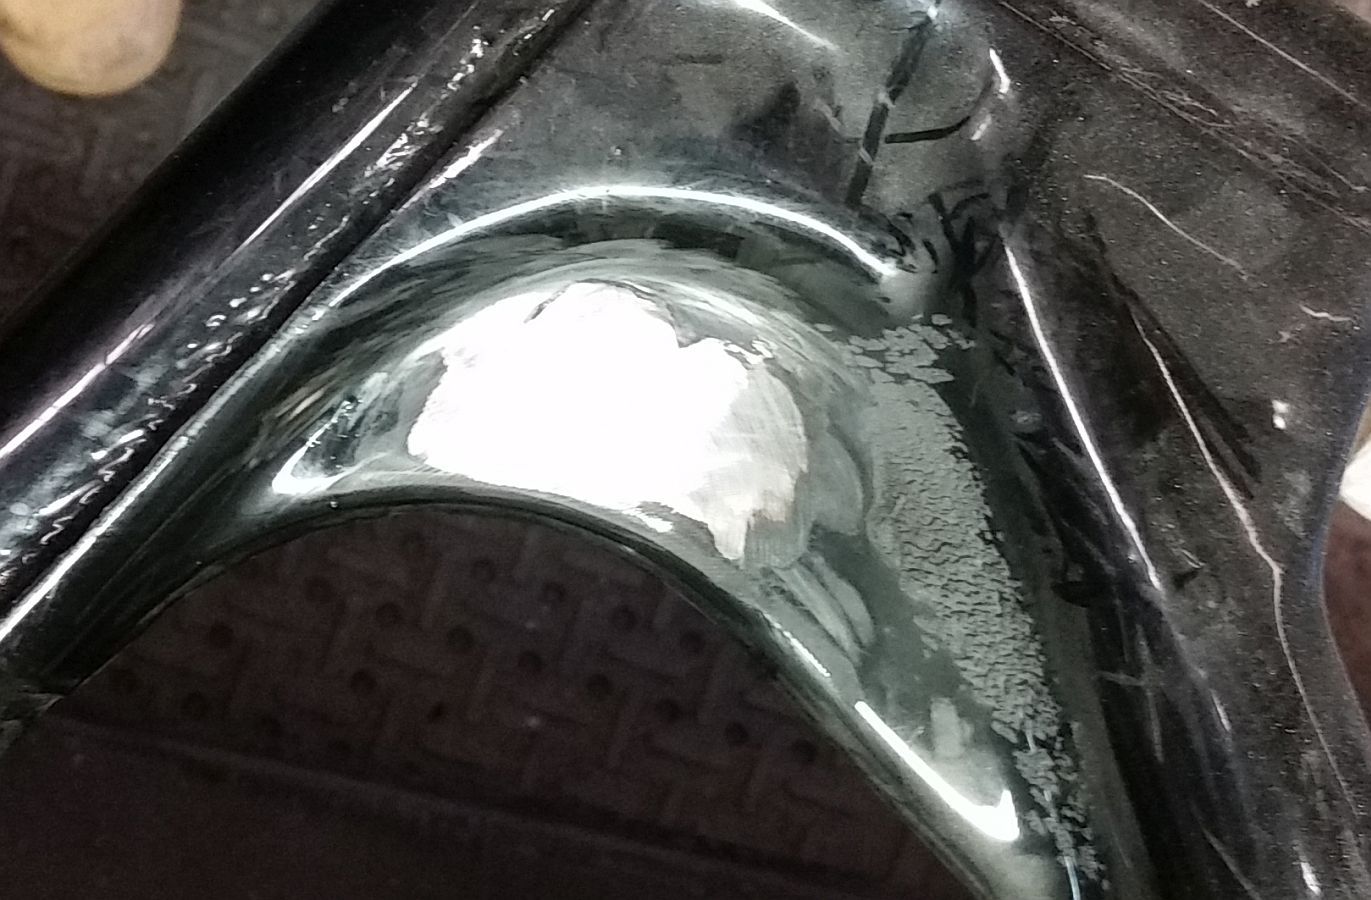
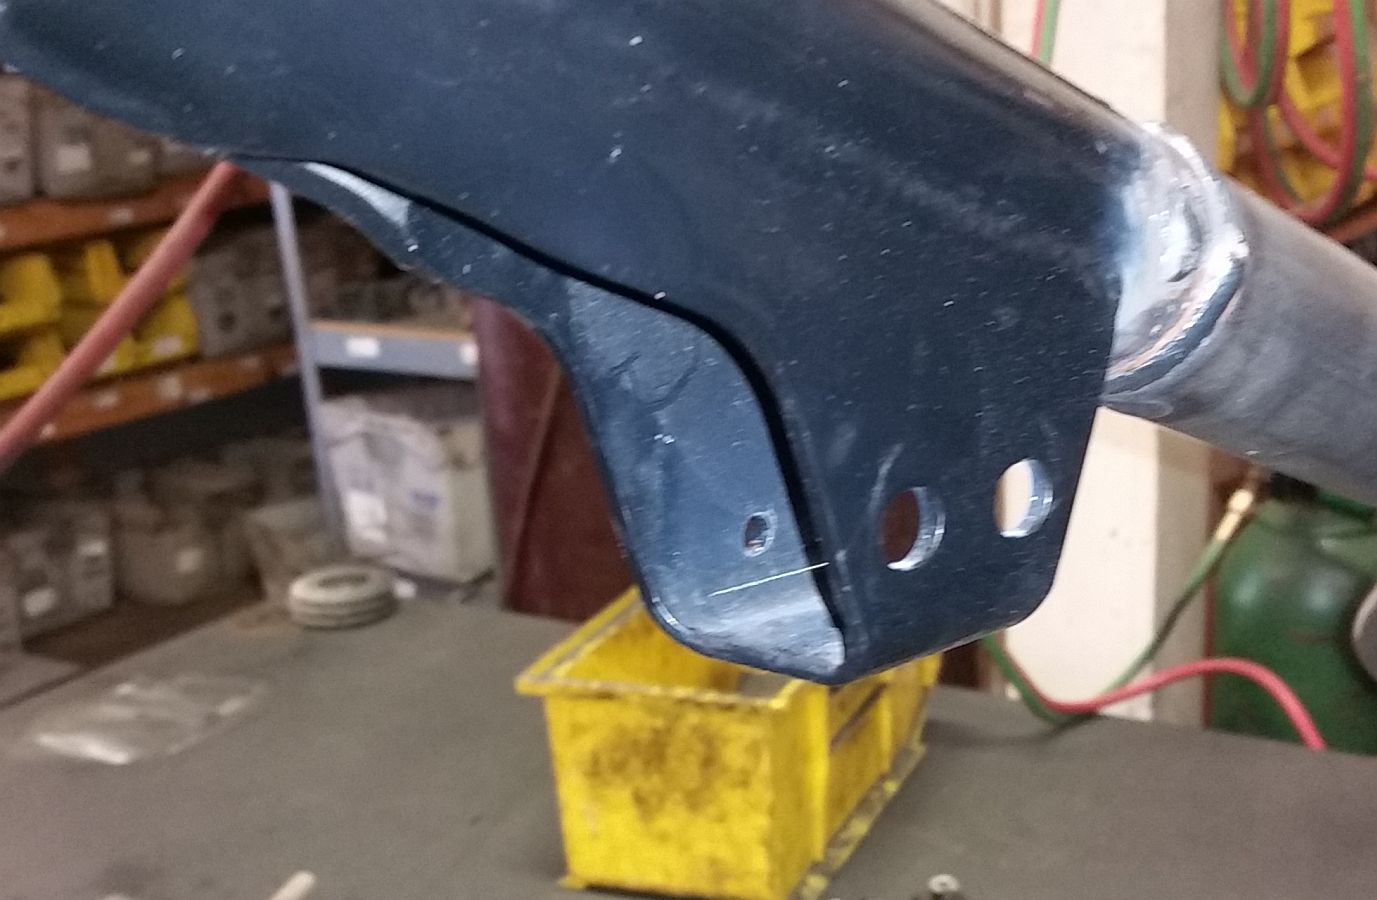
Checking everything out...
Ready%20to%20Weld_zpsl0qe0aww.jpg

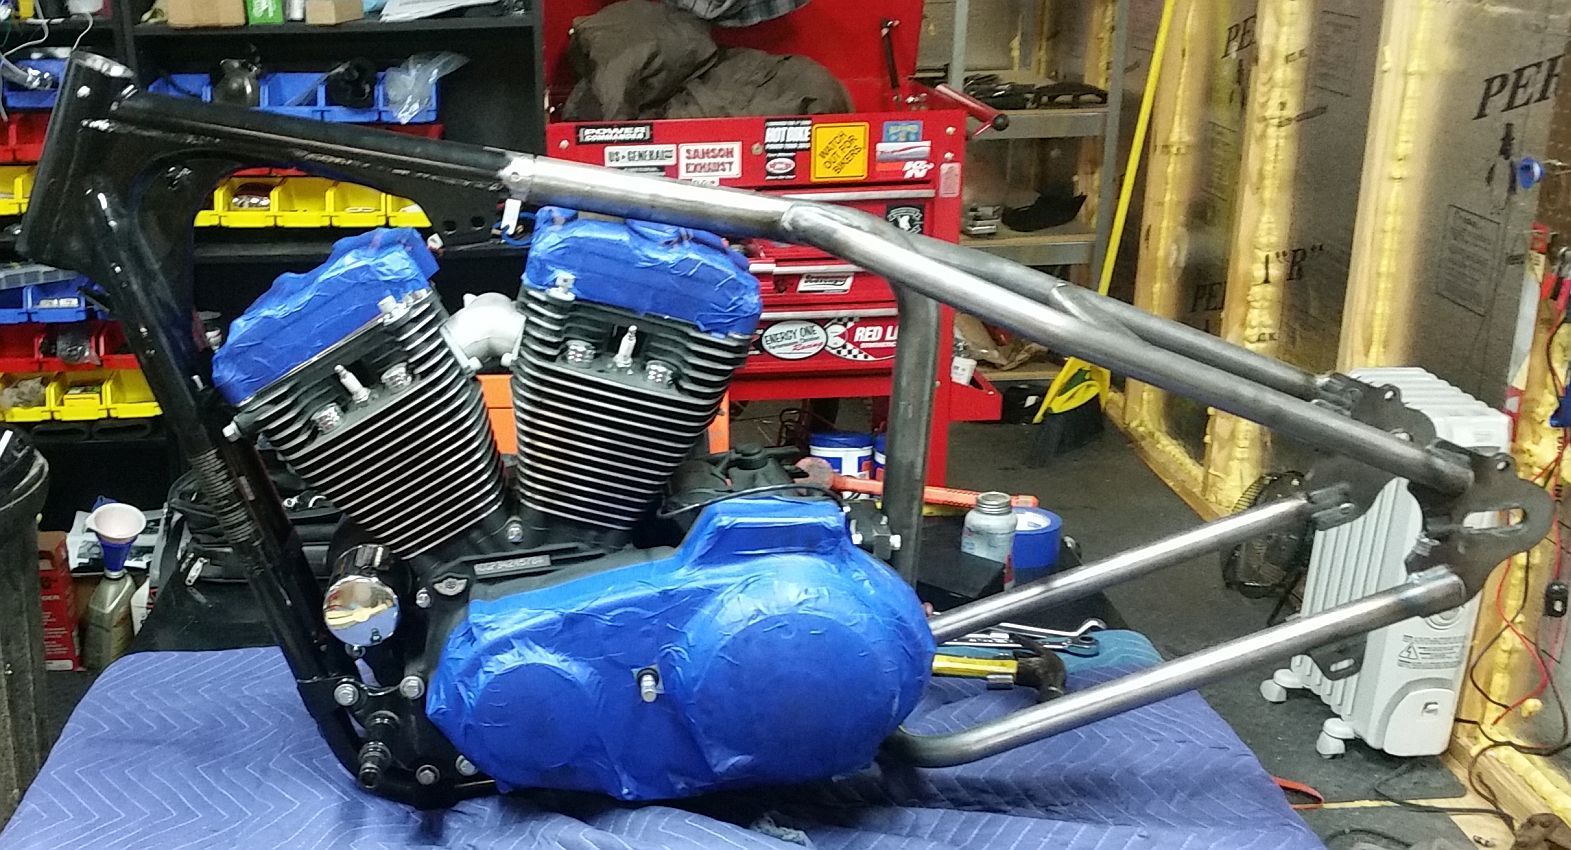
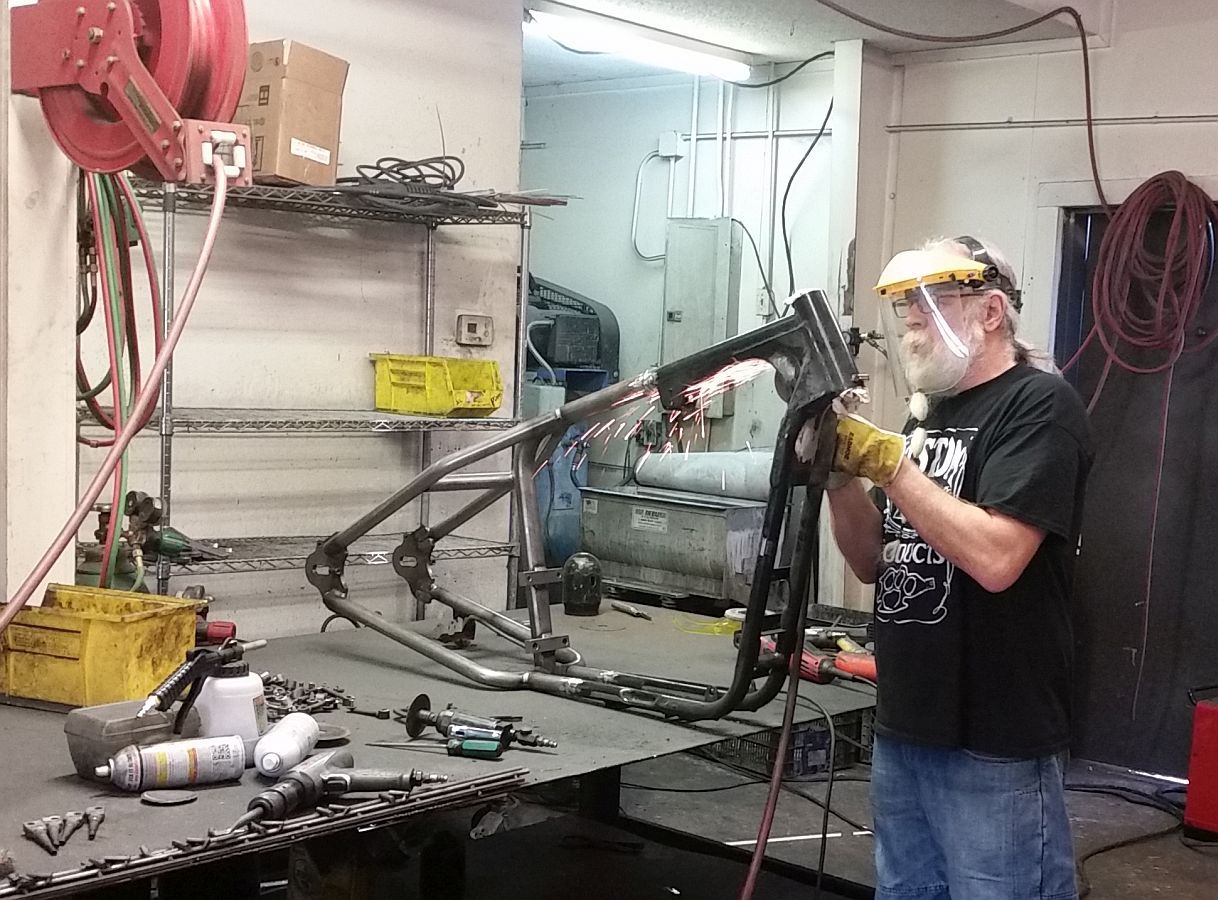
...before we cover everything up and start welding.
Ready%20to%20Weld%202_zpsyya7on7h.jpg

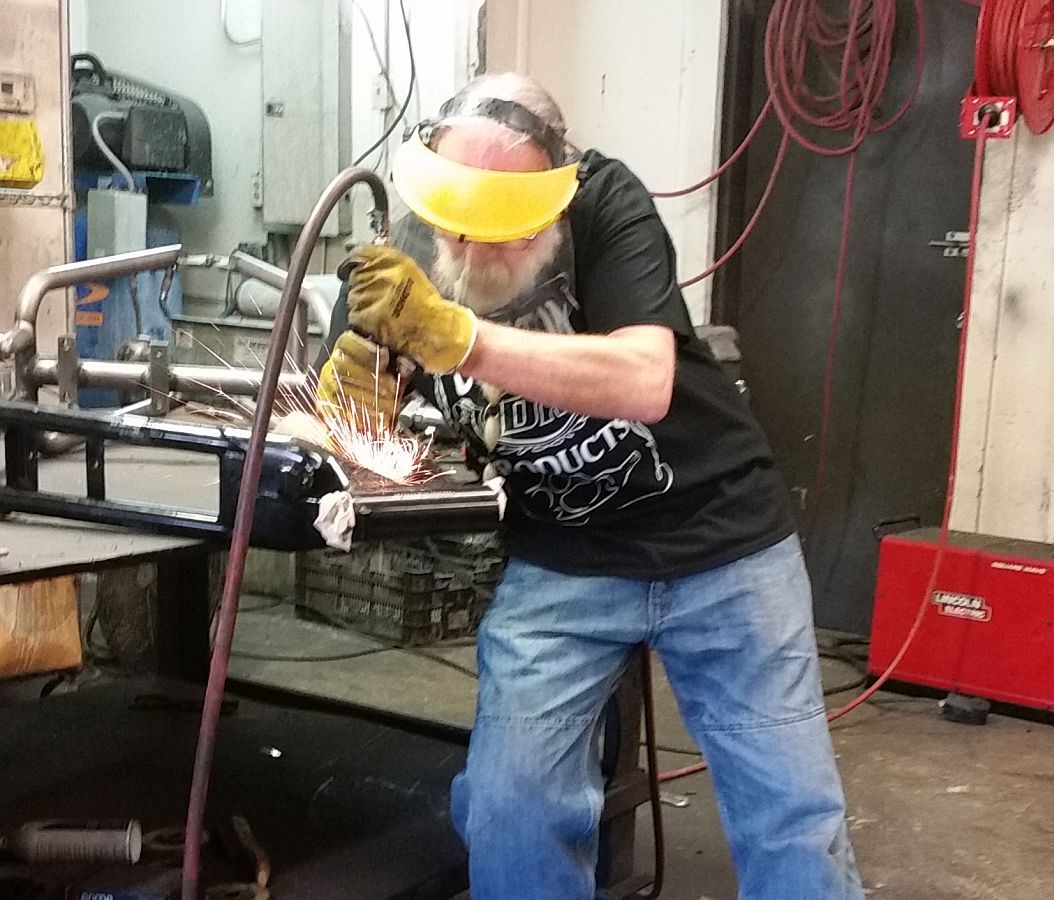
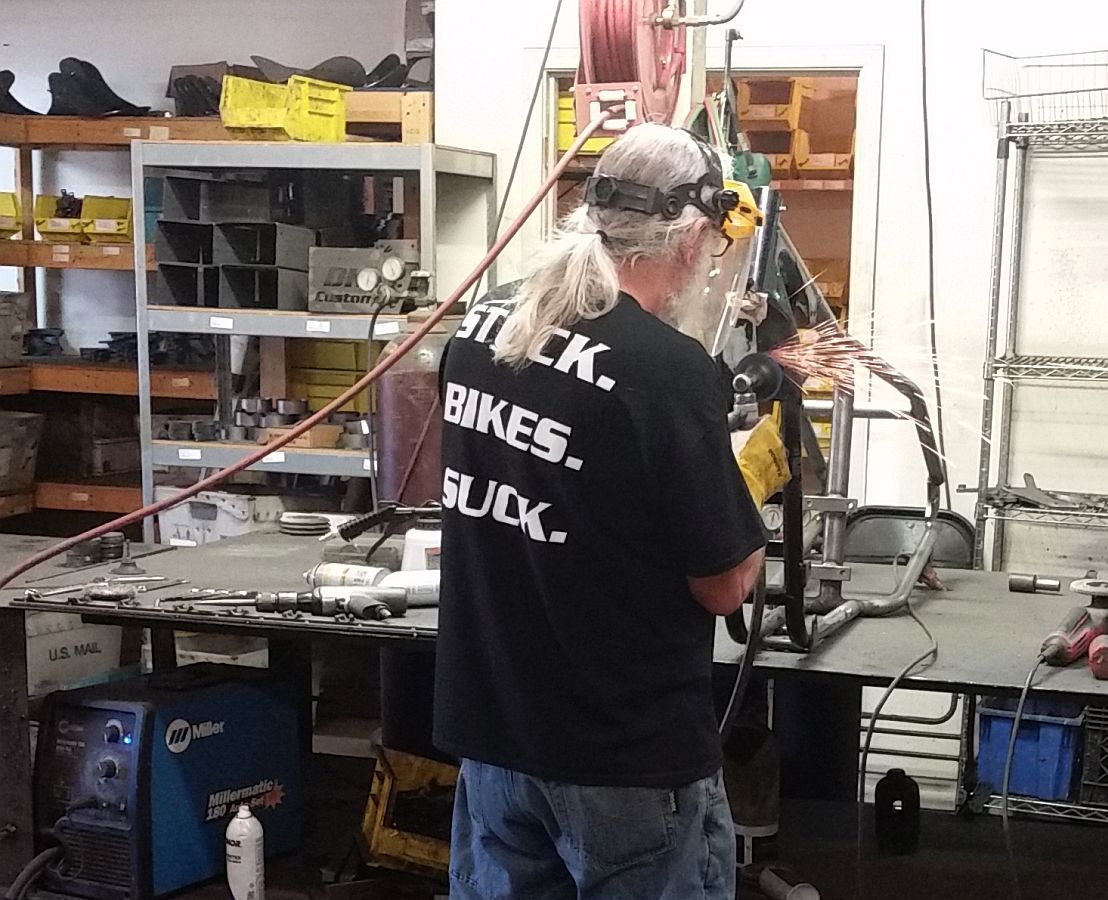
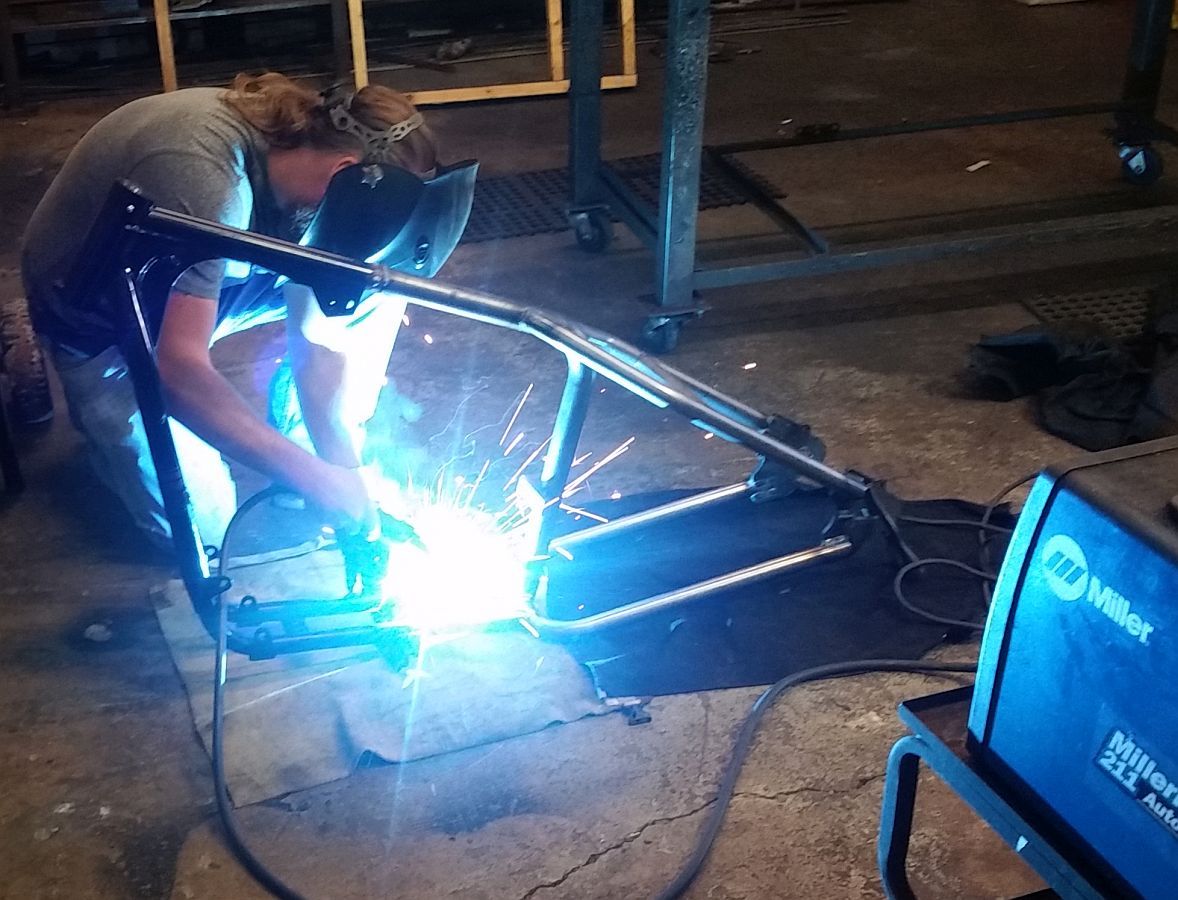
Engine and trans are covered by 3 welding aprons...
Welding%201_zpsijpltx6m.jpg

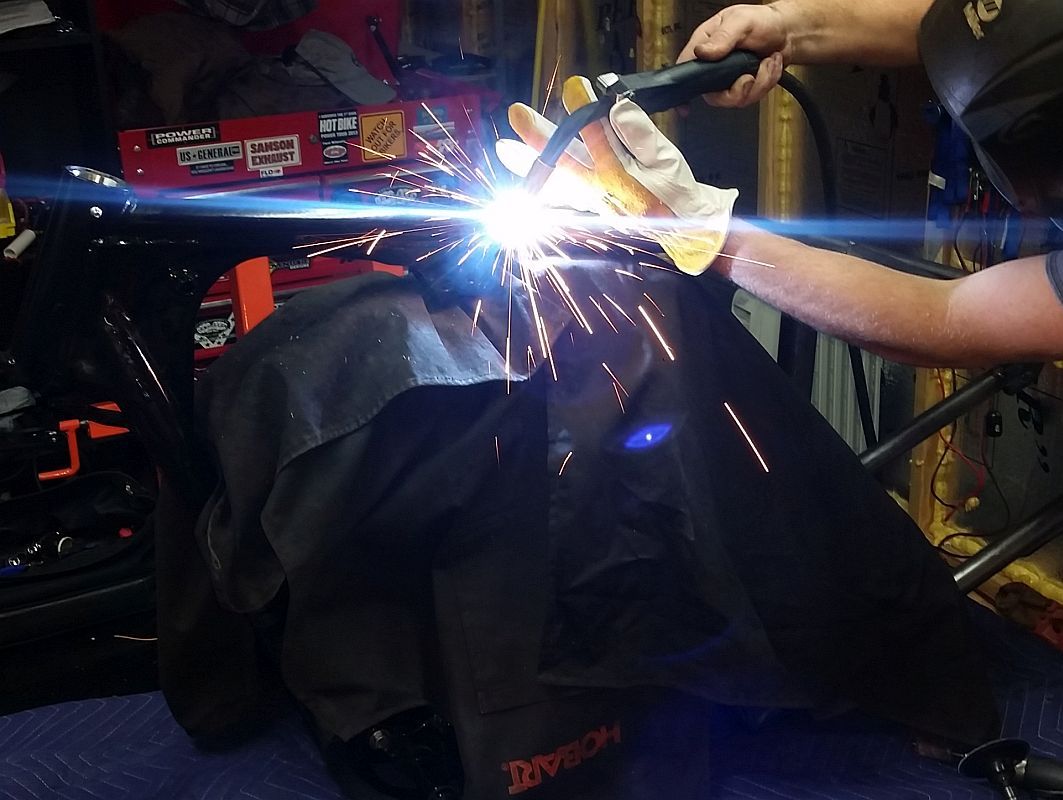
...to protect them while welding.
Welding%202_zps4rhwqbws.jpg

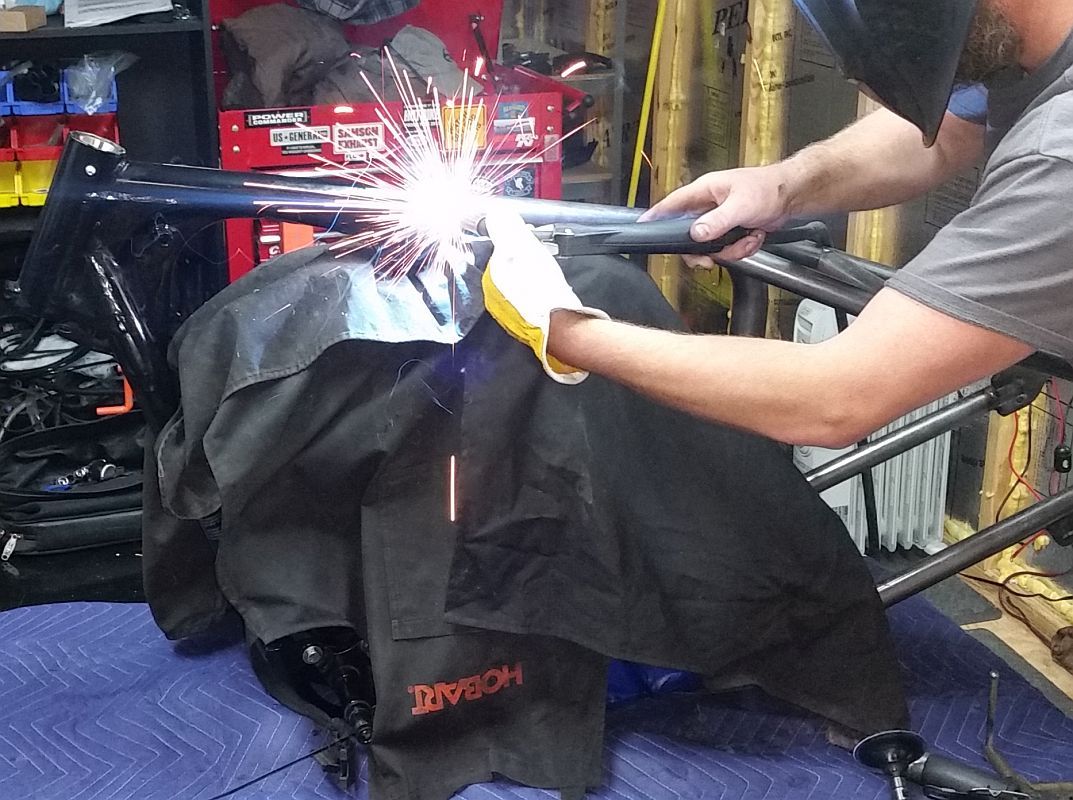
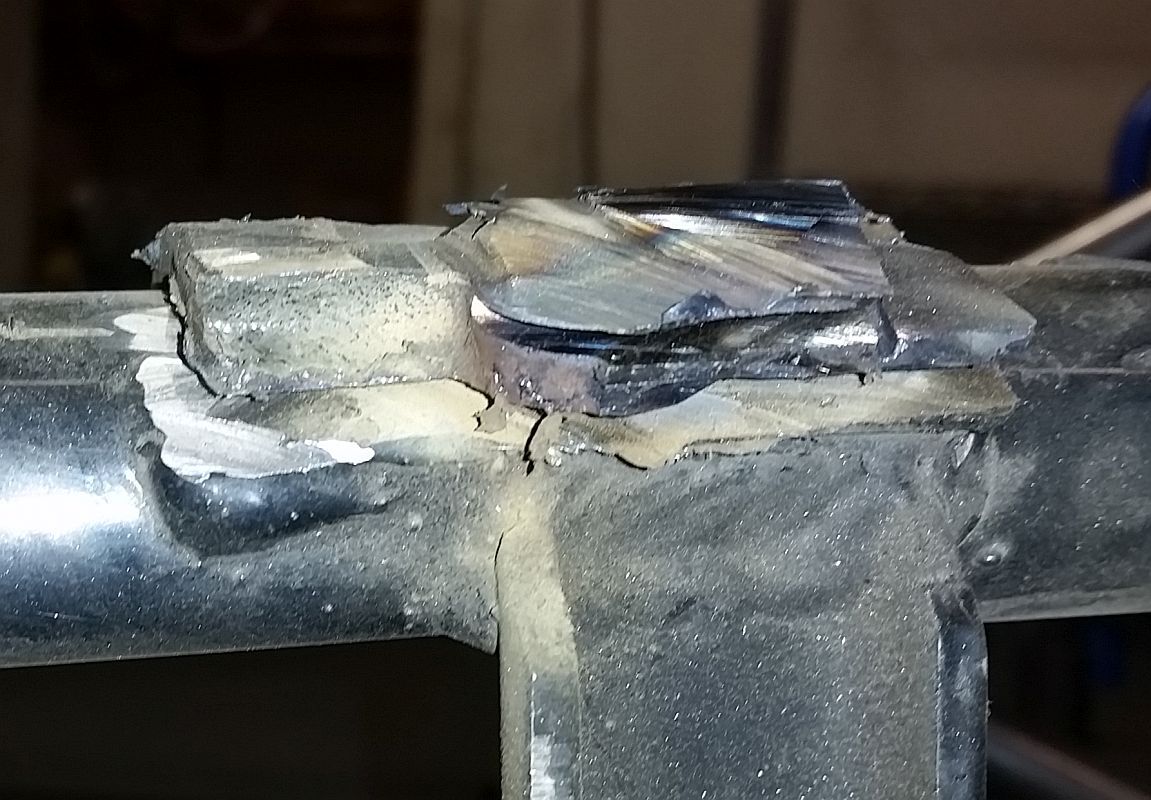
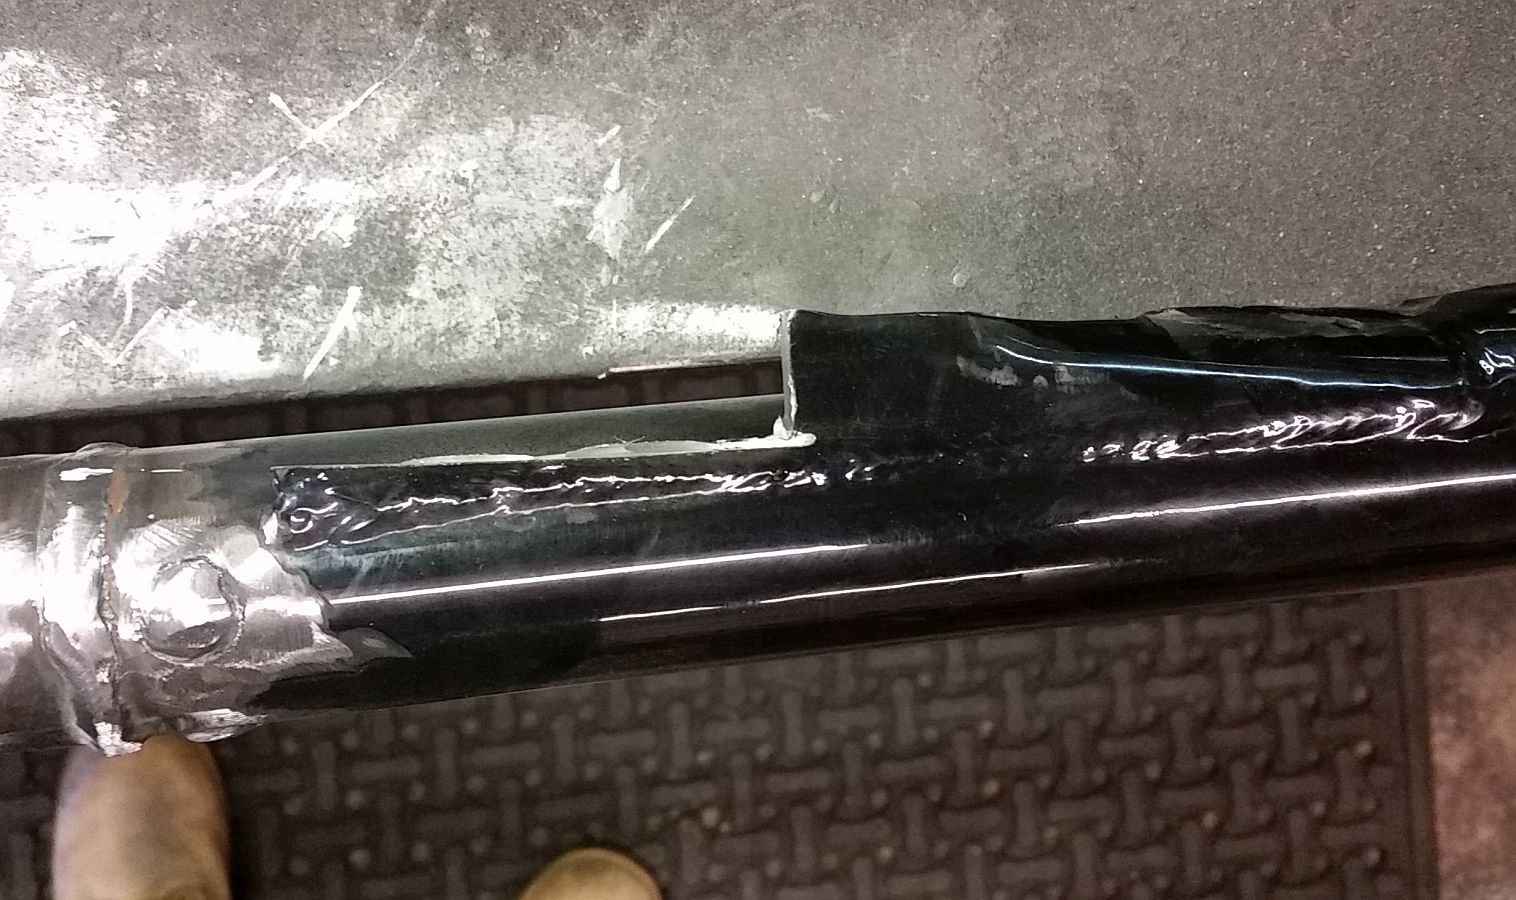
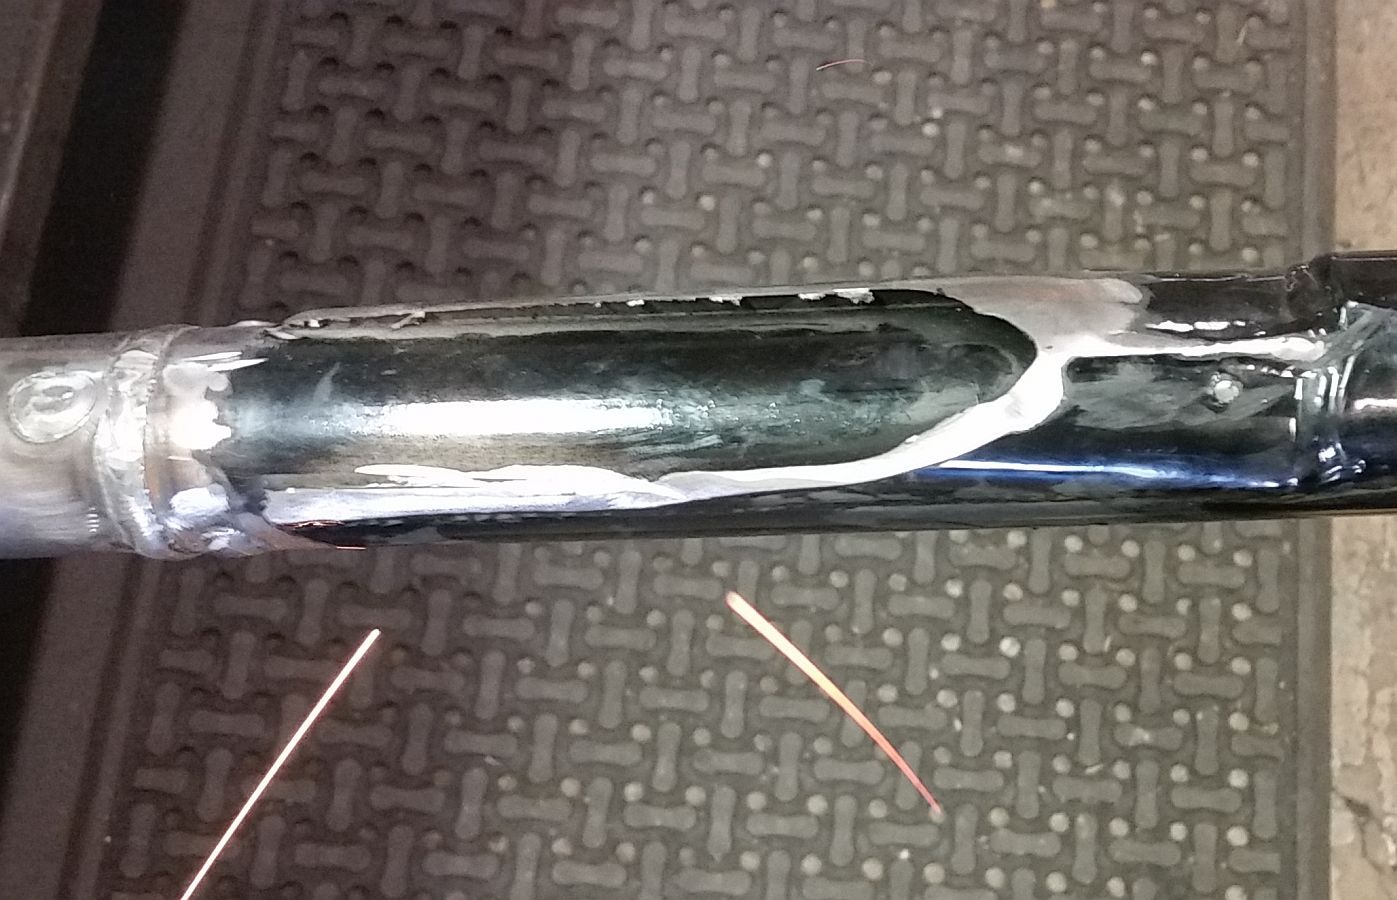
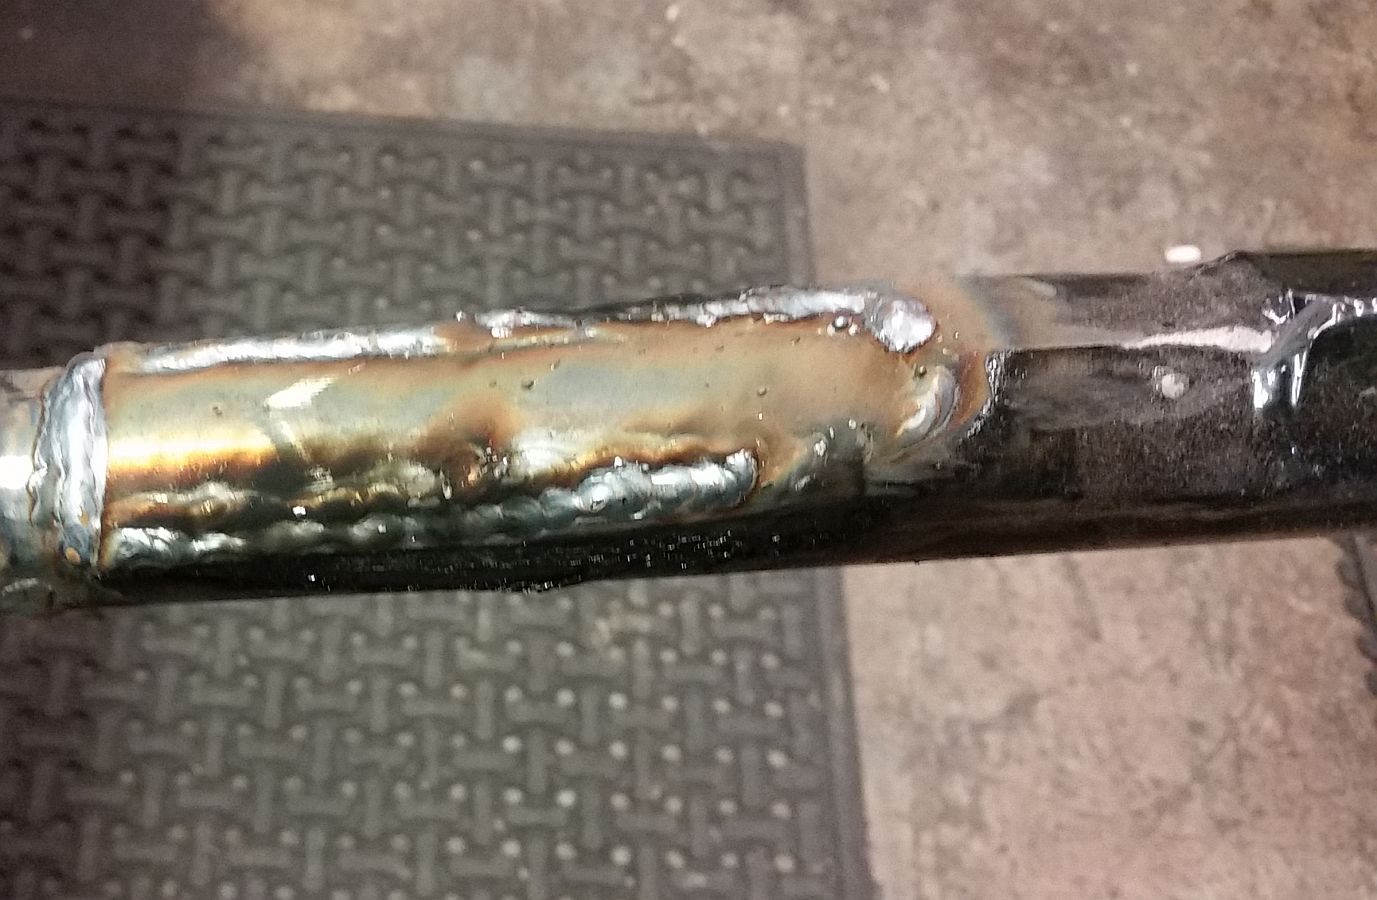
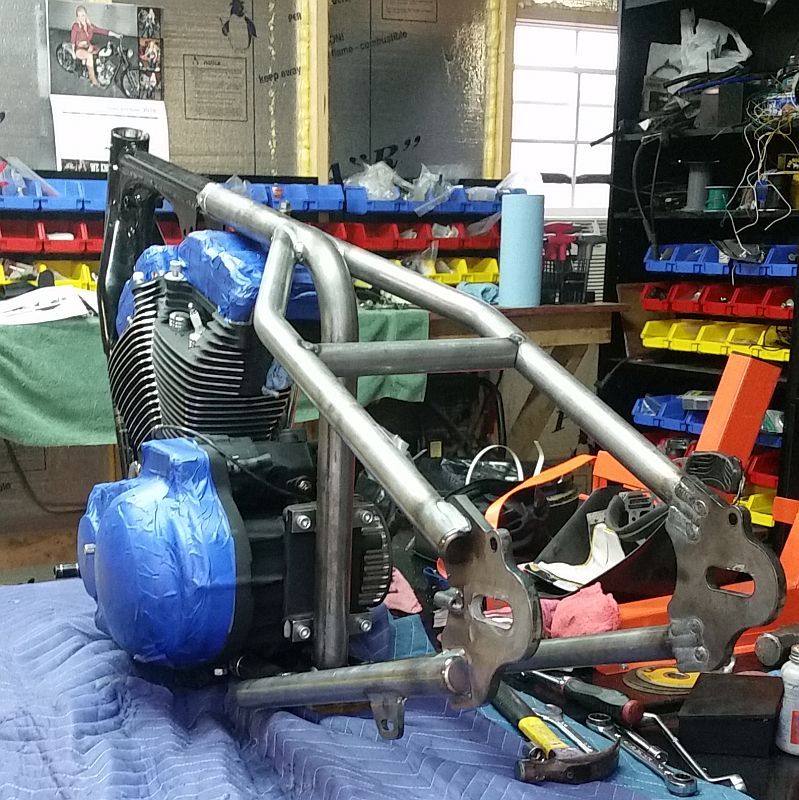
Got as much welded as we could with the engine in...enough to hold everything in place.
Welded%201_zpskzgiib2a.jpg

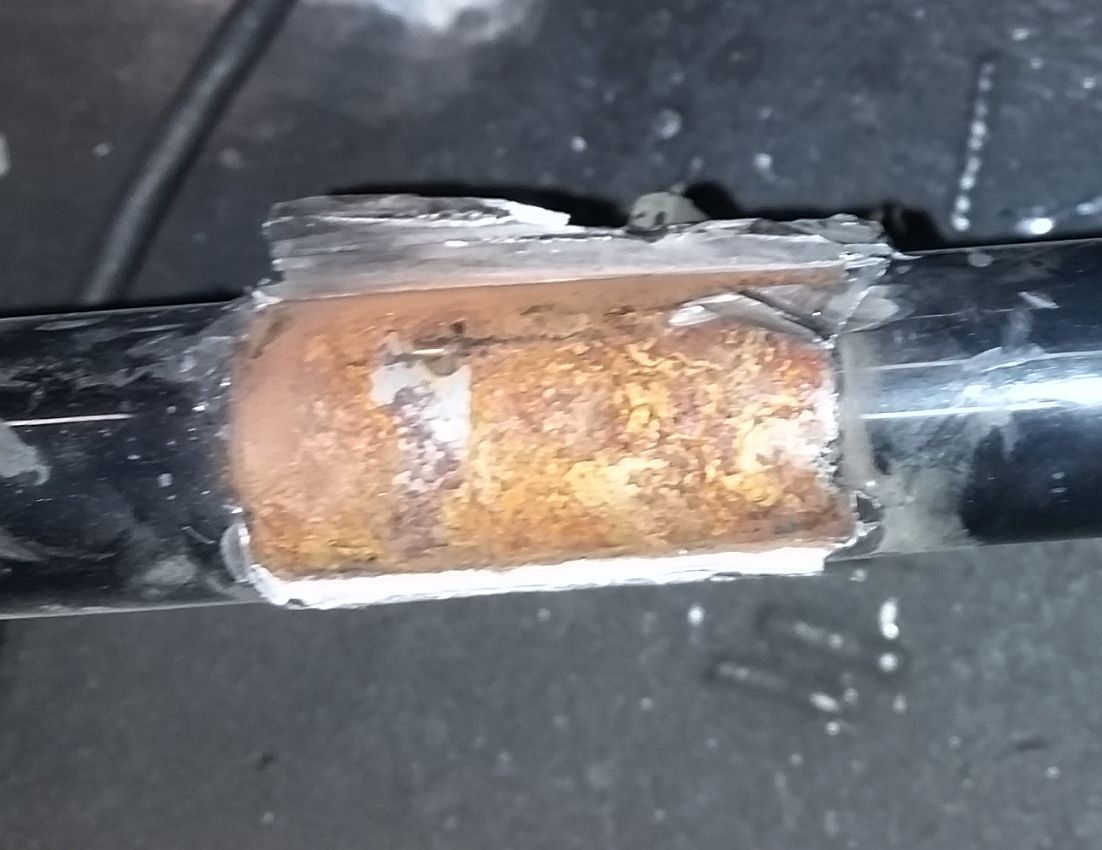
Took the engine back out.
Engine%20back%20out_zpsiyzk8z2y.jpg

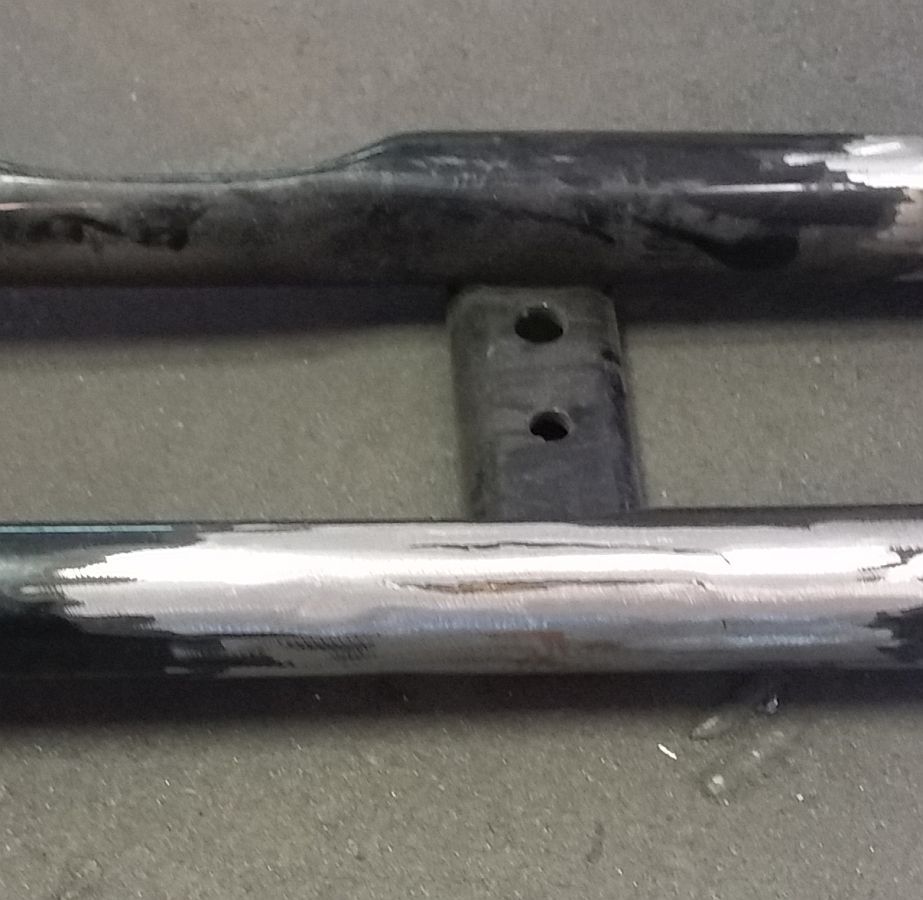
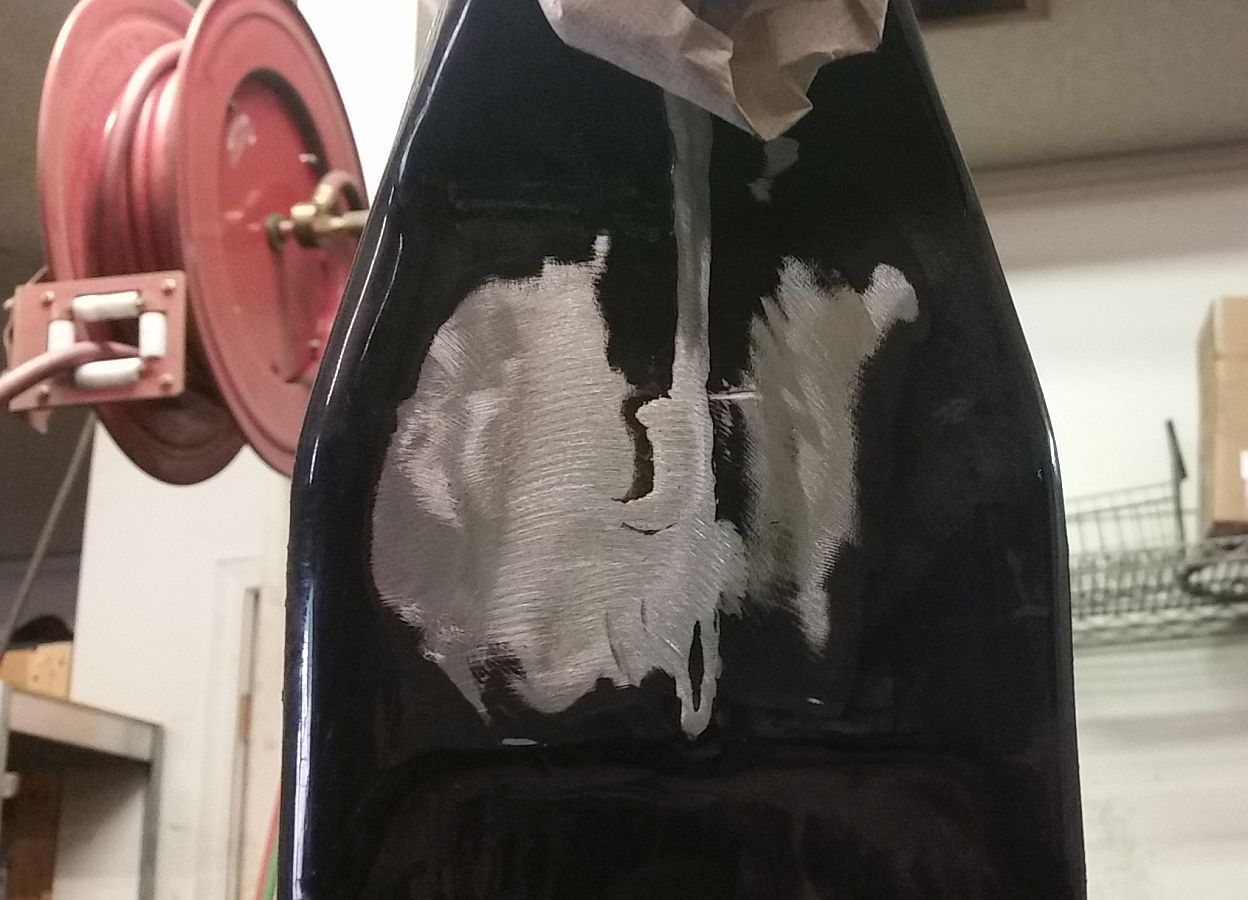
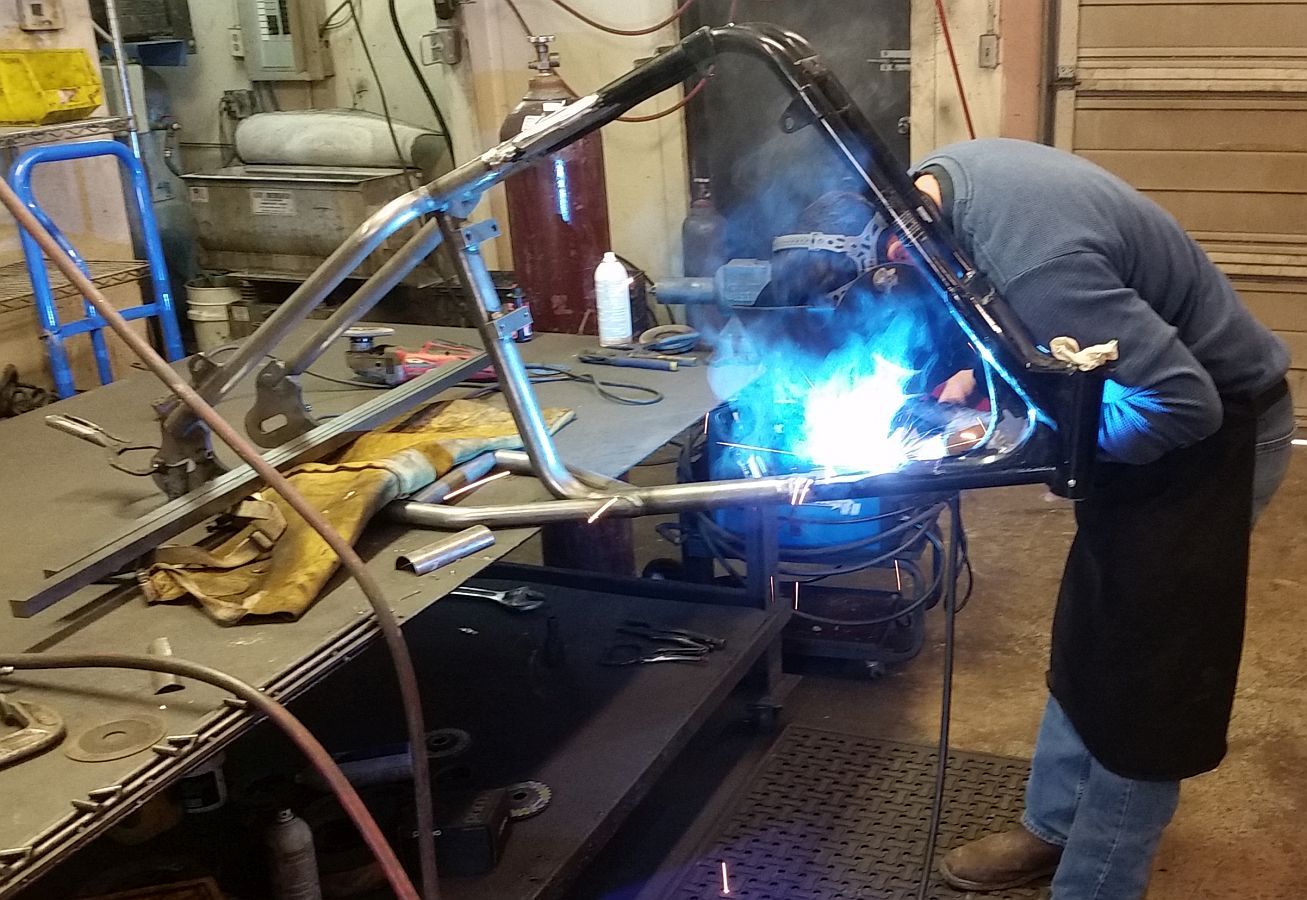
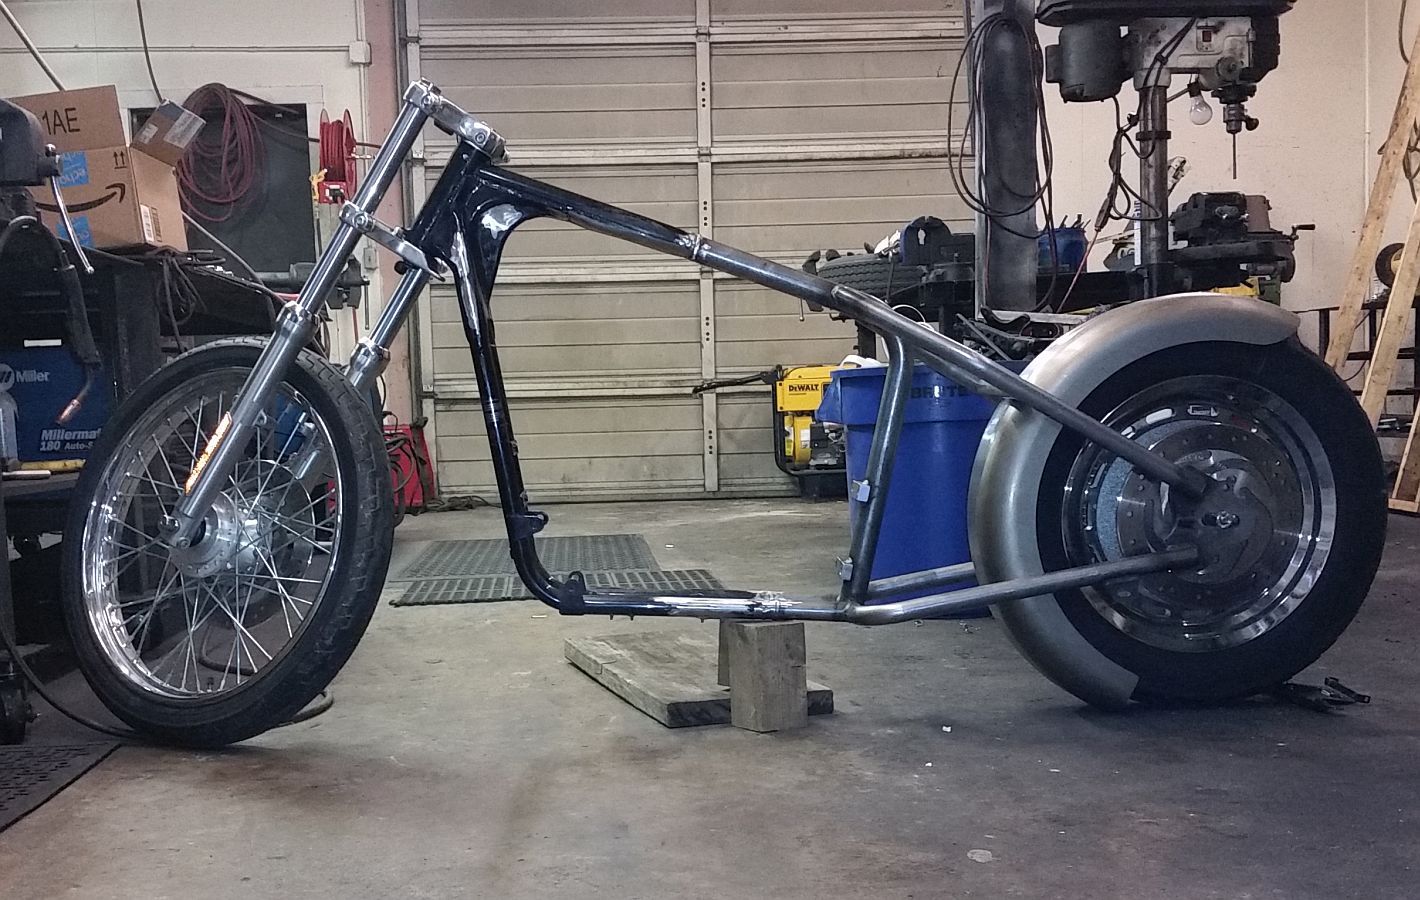
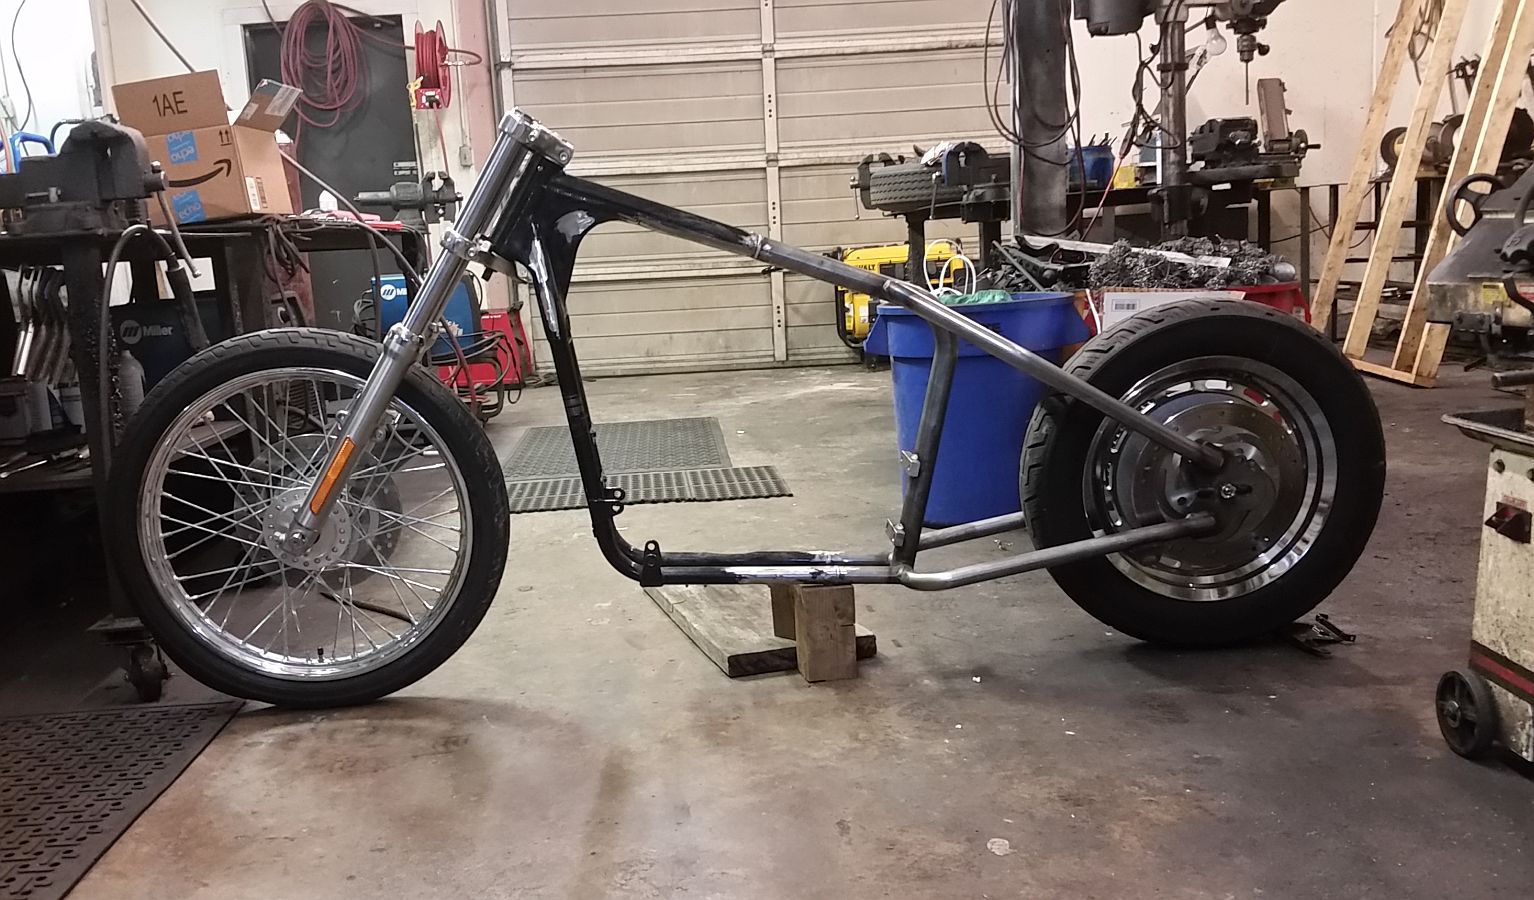
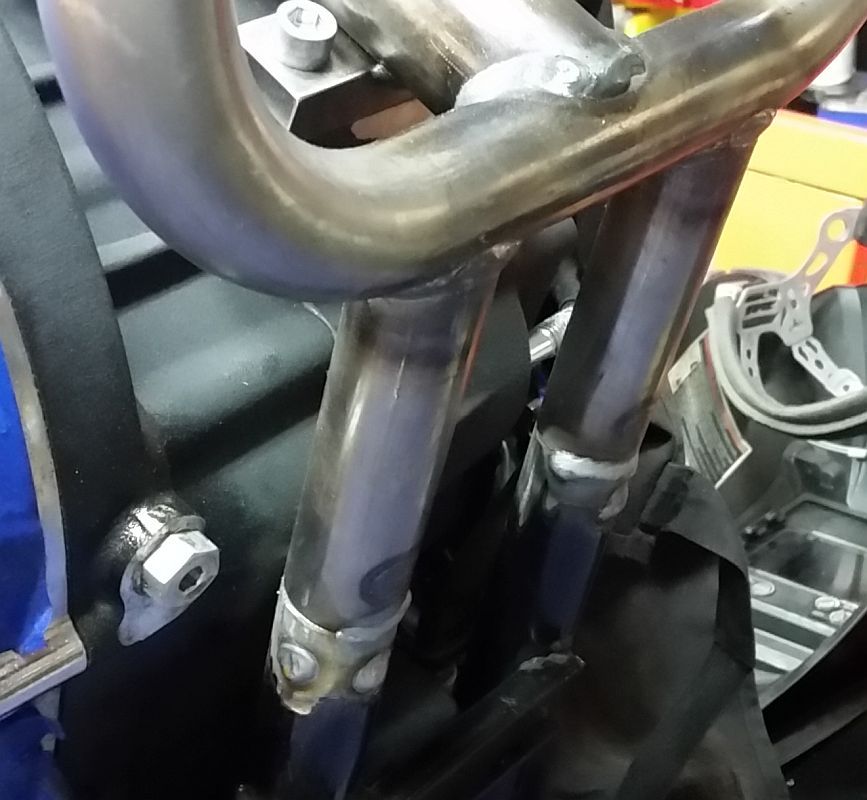
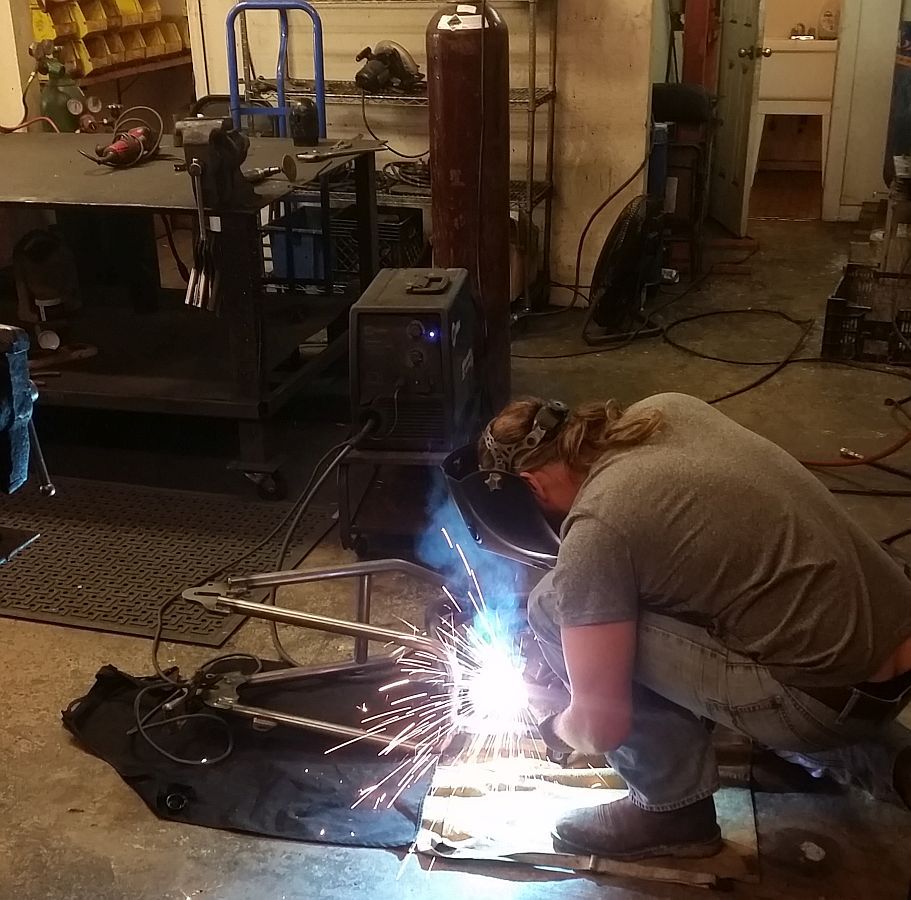
Monday I'll take the frame to the shop and will finish welding the 3 joints.
After that, the cutting, grinding, smoothing will start, along with mocking up a bunch of various components...some bought, some we have to design and build.

Kevin
 
Today has been a busy Monday, as they usually are.

Marc working on some footpegs-


Marc%20in%20Shop%2012-19-16_zpspawptfc9.jpg


But we made some time to finish up welding the frame!Ready to go-

Finish%20Welding%201_zpsrr3l5fes.jpg


A few minutes...

Finish%20Welding%202_zpsubqug9ni.jpg


...finishing up the welds we started with the engine still in the frame...

Finish%20Welding%203_zpsbq45uiwp.jpg


...and she's done!

Finish%20Welding%204_zpssi1sdbbr.jpg


Depending on how things roll, either tomorrow or Wednesday I will start cutting tabs, filling in holes, and smoothing everything out.


A word about the TC Bros. Hardtail-These guys rock. The Hardtail fit perfectly, the workmanship is great, and the instructions that accompanied it were complete and easy to understand.

It's encouraging to see another USA based company putting out good products, made in the USA, and for a fair price!

I've already ordered a few other items from them for this build. :)

Kevin
 
Today I spent a few hours getting started on cleaning up the frame.First up was removing the stock jiffy stand tab-
Kickstand%20Tab_zpskdngms2v.jpg
This thing was a nightmare....I don't remember how many cuts I made trying to get this thing off of there. lol
Kickstand%20Tab%20Partially%20gone_zpsrc1glnjx.jpg
But I finally got it removed!
Kickstand%20Tab%20gone_zpsnlgxciwu.jpg
Got everything cleaned up...this is where it used to be. :)
Kickstand%20area%20cleaned%20up_zpsmjyydbp4.jpg
Next up are the front tank mount stand offs-
Tank%20Mount%20Taps_zpsjrvczl7y.jpg
Cutting them off...
Tank%20Mount%20Tab%20Cutting%201_zpssc03ex4k.jpg
Like this.
Tank%20Mount%20tab%20cut%20off_zpszrmvad94.jpg
There's one on each side.
Tank%20Mount%20Tab%20Cutting%202_zpskfxyop5a.jpg
Next step was to grind them down close to the frame...
Tank%20Mount%20Tab%20ground%20down_zpsg6wisa3i.jpg
Continued in next post
 
Cleaning up the frame continued...Next step was to fill in the holes...
Tank%20Mount%20Tab%20Hole%20filled_zpsr9vag2cy.jpg
...Then more grinding to get it smooth like this.
Tank%20Mount%20Tab%20GONE_zpsglo2wzzy.jpg
Got both sides done.


All the smoothing out today is still with coarse media. Will come back later with a finer grit and get it finished out.

Next up was the fork lock tab.
Fork%20Lock%20Tab_zpsqzsedxfk.jpg
Cut that puppy off, no need for it.
Fork%20Lock%20Tab%20Cut%20off_zpss2xc0is3.jpg
Spent a little time...
Fork%20Lock%20Tab%20Smoothing%20out%202_zps47o6xr1p.jpg
...smoothing it out, along with the factory seam that was sticking up...
Fork%20Lock%20Tab%20Smoothing%20out%201_zpsjum57ekn.jpg
...til it looked like this, where that big tab used to be.
Fork%20Tab%20Gone_zpsdnvh2aan.jpg
Doing a little more touch up...
Some%20Final%20Finishing%20with%20rough_zpsf1hzbuf0.jpg
...before putting it back in the corner until I have some more time to get the rest of the tabs cut off, and do some finish work.
Back%20in%20Corner%20til%20next%20time_zpsnlgbrfac.jpg


It won't be long til I get the wheels back on it and can start mocking up the fender, gas tank, seat, oil tank, etc. :)

Kevin
 
Yesterday I had some time and got to work on the bike a bit...did not have time to post an update til just now.


The stock top motor mount is a monstrosity. It extends all the way up to where the neck is welded to the backbone.
Top%20Motor%20Mount_zpsuuojcgzy.jpg


I've cut away most of it here...
TMM%20Cut%201_zpsojbernqh.jpg


...and even more of it here.

However, if I take it all the way down to the backbone, then there is going to be an abrupt increase in diameter of the frame where the neck gusset is welded to the backbone...
TMM%20Cut%202_zpsst9euoxj.jpg


...So we cut out a small piece of pipe to fit into the backbone, so that we could have a sloping change from just the backbone to where the gusset makes the backbone larger in diameter.
Cutting%20a%20section%20out_zpsk11pqrw0.jpg


Marc welding it in...
Welding%20piece%20in_zpsibbhaxrm.jpg


...I cut, drill, tap, grind, work on engines, assemble, but I don't weld.

While Marc was welding it in place, I took some photos of some knuckle pegs Matt was working on.
Knuckles%20in%20the%20works_zpsp8mpawwr.jpg


Sort of a mess...time to get to work smoothing it out.
Ready%20to%20be%20shaped_zpsgk0gjlf9.jpg


By the time I finished smoothing it out I was so focused on getting the forks and wheels on, I forgot to take pics of my work!

Next week I'll grab a few shots.

Forks going on...
Forks%20on_zpsqlwuwgpp.jpg


Rear fender needs cutting down...will be doing that next week.
Fender%20needs%20cutting_zpsspgzerzk.jpg


I just sat and looked at it for about 30 minutes.

Still betwixt and between on what I'm going to do for an oil tank.

btw, that is not the rear wheel I will be using. It will be a spoked wheel with a Sproter.

Also, going to have different fork legs, and probably 1-2 inches longer.
How%20it%20sits_zps6gugkcy0.jpg


Kevin


:clapping::goodjob: You can take a Christmas Break now Kevin!! You and Mary have a great Christmas!!

Roger
 
I spent a good number of hours this weekend looking at the peanut tank I have, figuring what work I would have to do to it to get it how I want it.

In the end, I decided to get a different tank...one that will require very little work to get the look I'm after.This is a pic of the shape tank I am going for-

shape%20tank_zpsy1620sin.jpg


Another thing I did this weekend was get close to 95% sure I am going to build my own oil tank...one that sits between the frame rails, behind the transmission and in front of the rear fender.

It will be, hopefully, very inconspicuous. The battery will be mounted above it.

I don't think I can get the look I am going for with an oil tank in the traditional location behind the rear cylinder, and the major amount of work at putting the oil in the frame is more than I want to do. Will probably build the tank in the first or second week of January.


The Brown truck came on Friday with a bunch of parts-

Wheel%20Rotor%20Sproter%20Tire%20Starter_zpswxfox04m.jpg


Metzler 880 rear tirePolished Front Brake Rotor
Polished Sprotor with 4 piston caliper
Chrome spoke rear wheel
Starter Button

Nice part is that all these parts were paid for with funds that came from the sale of parts that came off the donor that I am not needing. :)


I am currently looking at a couple of different handlebar switch options...
BZU4ME1TU8RGOKD5-product-primary.jpg
s-l500.jpg


Both styles are low profile...still exploring other options.

That's it for this long weekend. More later this week.

Kevin
 
New parts are always fun to receive!
What brand/model is the 2 button switch you are showing on the handlebar?
I'm looking for some similar type of 2 button momentary on switch to control up & down shifting on my ride. (it looks a lot more sanitary than a toggle!)
BZU4ME1TU8RGOKD5-product-primary.jpg

It's a Drag Specialties Part #370494 or 0616-0204

Smallest switches I've found so far. Can't attest to how they work. Still looking.

Kevin
 
...it's now ready for some wet sanding too.

Readt%20to%20wet%20sand_zpsjfjmuhqk.jpg


Wow, posting the pics was a lot quicker than doing all that cutting and grinding! :)

But it is cleaned up, and saved a bundle on not having to purchase some trees.

Still waiting on the tank and the chain to arrive. Also I've ordered some 2" fork extensions.

Might have some time tomorrow to do some work on it.

Next week I hope to get the wheels on, & get the tank, seat, seat shock mount, and rear fender mocked up.

Kevin
 
Been doing a lot of planning & ordering, not much actual work on the bike.


Here are the 2" fork extensions...

2%20inch%20Extensions%202_zpsinnxwxdm.jpg


...they replace the OEM fork caps. Heavy stainless steel, made in the USA. Saw some exact knock-offs of these out of China, they were $17 less. I paid the extra $17 to get some made in the USA.

With these I can let a bit stick out the top of the top tree if I don't want the full 2" extension.

2%20Inch%20Extensions%201_zpsccvvmiab.jpg


Got the front and rear tire mounted, dyna beads in the tubes...

Front%20Tire%20Mounted_zpspynuqbrc.jpg


Still need to remove the wheel weights on the front wheel.

Rear%20Tire%20Mounted_zpskldmf8os.jpg


Got the front sprocket in...went to install it, but realized I need a longer breaker bar to get the OEM pulley nut broken loose.

Front%20Sprocket_zpsf1aotrg1.jpg


Installed the starter button (will not need the wires, nor the switch on the handlebars). It came with chrome screws...BUT, they were the wrong size, so I used the OEM black fasteners for now. Gotta pick up some chrome fasteners to replace them.

Starter%20Button_zpssd9gsqw6.jpg


Between regular work & some building expansion we're doing at the shop, I hope to make some nice progress this next week. :)

Kevin
 
sporty project

every thing looks great but didn't slugs for the front end cause a lot of deaths back in the 70s. I know I lost a friend caused by them turning out
 
every thing looks great but didn't slugs for the front end cause a lot of deaths back in the 70s. I know I lost a friend caused by them turning out

Yup wouldn't ride around the block with them. New tubes for me.

The slugs that were used in days gone by we not nearly as strong, BUT more importantly, they were often times so long that the threaded junction was down near the bottom tree, or even below the bottom tree.

These were very dangerous/prone to catastrophic failure.

The 2" fork extension pictured above are really just 2" caps, they cannot turn-out/un-thread, & the possibility of the threads failing due to fork flex are the same as every touring model produced by HD from the 90's thru 2013....which is slim & none.

If you look at how the touring models (including the 2009-2013 Tri-Glides) front forks are, from the factory, up until 2014...they utilize about a 2" long fork cap. The top section of the cap is pinched in the top tree, and the part of the cap that threads into the fork tubes is below the bottom of the top tree by about 1".

The fork extensions I have work exactly the same as the ones that were OEM on touring forks for over two decades.

I appreciate your concern, and believe me, I double checked everything I thought I knew after reading your posts.

Thank you!

Kevin
 

Trike Talk Community

Welcome to a community dedicated to the most diverse and fastest growing powersports segment, Motorcycle Trikes. Come join the discussion about the best makes and models, popular modifications and proven performance hacks, trike touring and travel, maintenance, meetups and more!

Register Already a member? Login

Forum statistics

Threads
55,577
Messages
902,095
Members
22,555
Latest member
wheeza
 photo 260e2760-d89e-45b2-8675-2bc26fb3d465.jpg

 photo Trike-Talk-150-x-200.gif

 photo DK Trike Talk Right side banner 19.jpg

Merziere Reverser

 photo 9796095c-0d4b-4a9b-88ed-efe4c498d084.png
 photo f9866e4e-75c5-471a-86f5-5e72a446ecc3.png
Back
Top