Navigation
Install the app
How to install the app on iOS
Follow along with the video below to see how to install our site as a web app on your home screen.
Note: This feature may not be available in some browsers.
More options
You are using an out of date browser. It may not display this or other websites correctly.
You should upgrade or use an alternative browser.
You should upgrade or use an alternative browser.
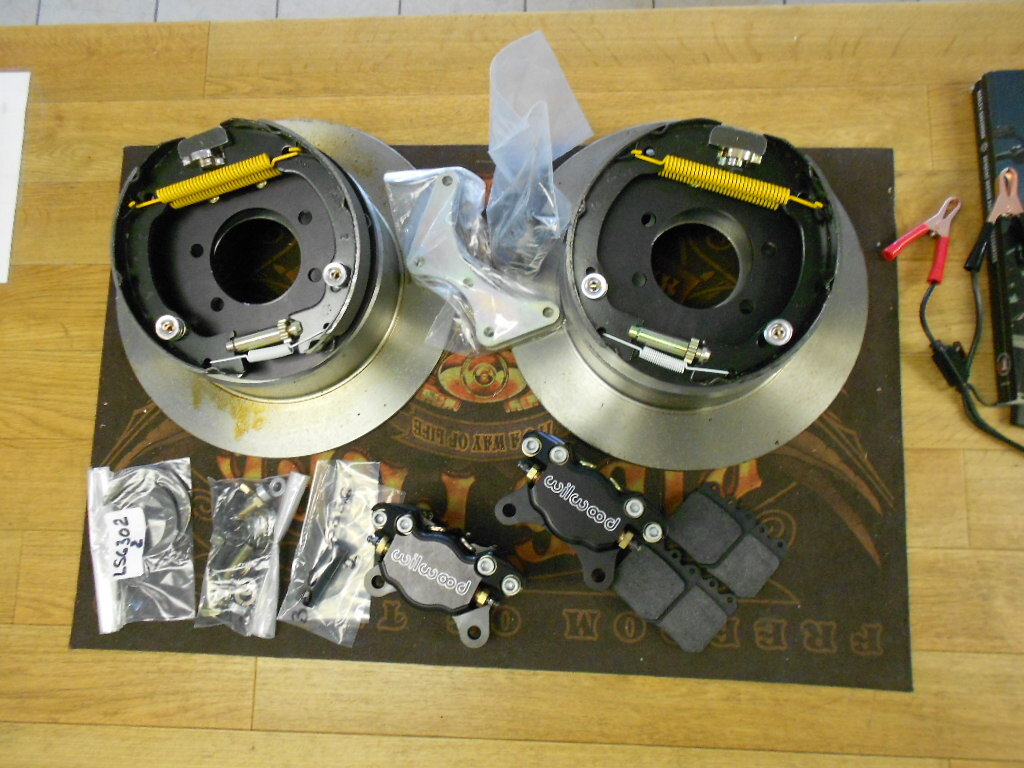
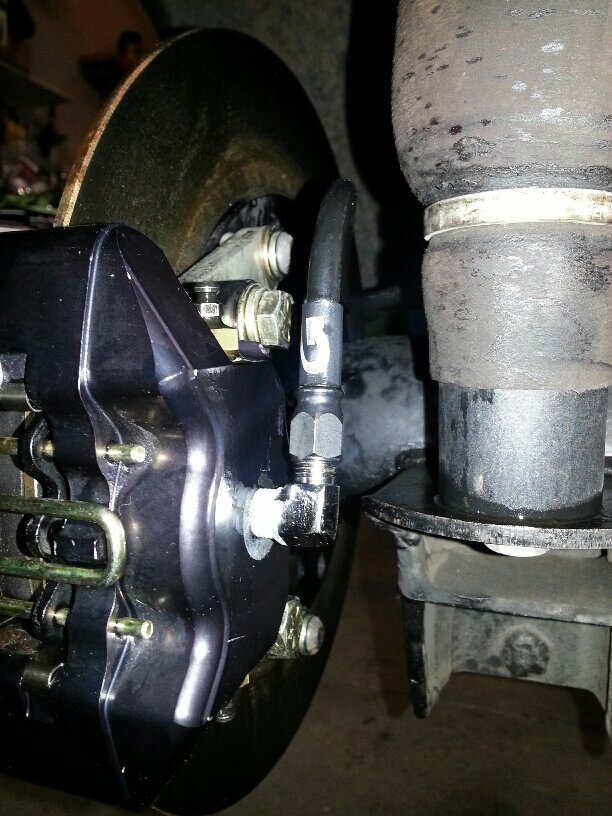
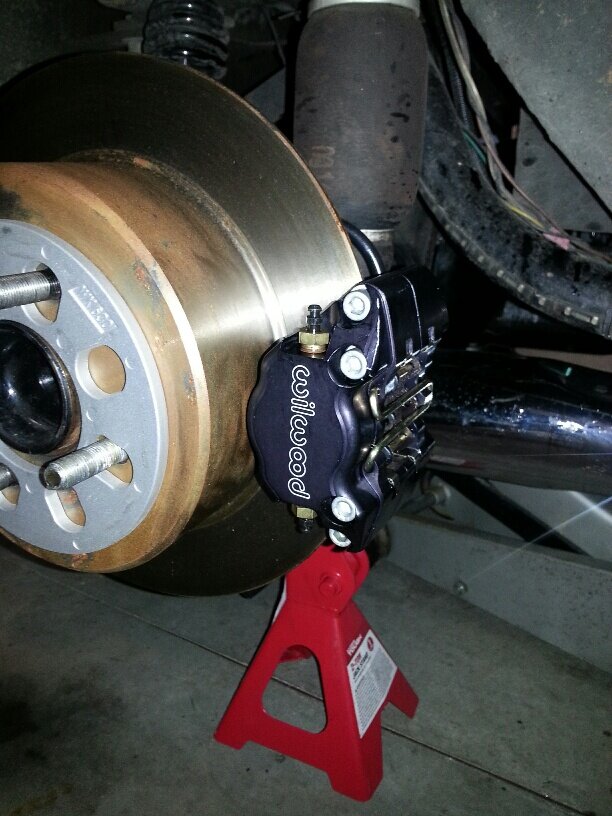
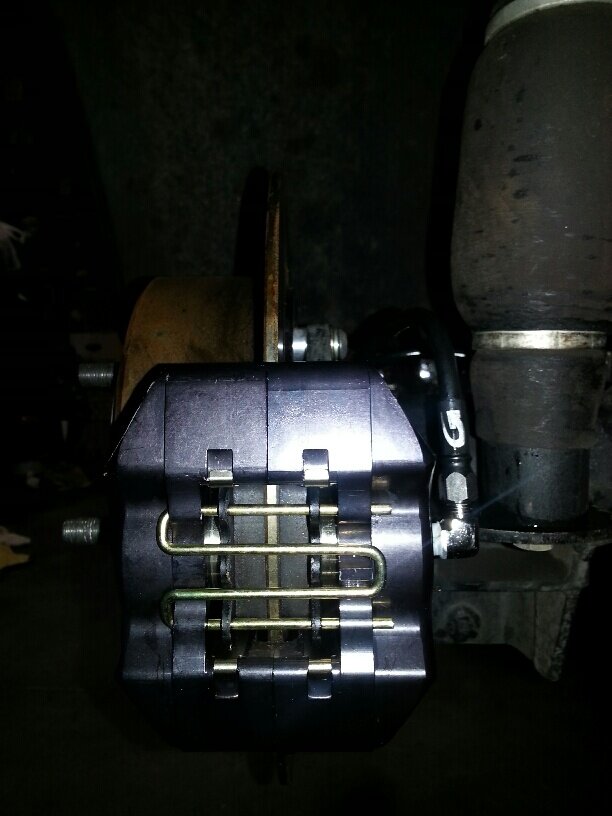
Drum to Disc Conversion for Motortrike 9" drum brake system
- Thread starter Lee H. Mann
- Start date
Jack Klarich
18000+ Posts
Good stopping power
Jack Klarich
18000+ Posts
In automotive school I was told to never use teflon tape on brake systems and that all brake fittings must use flared fittings as brake fluid dissolves teflon tape. Other than that your kit looks wonderful.
Me too, but times have changed in the industry Too many law suits IMO
Wildwood does in fact want teflon tape on the brass adapter elbow on the caliper
Read instructions below
When I taught brake class if a guy told me this I would have freaked on him
Not any more, albeit, be careful NOT to contaminate any passages internally when using the teflon
Instruction Sheet for part 17
-
1213:
Wilwood Front Brake Caliper Conversion, MKII
Parts Supplied:
Two alloy caliper adapter brackets
Two Wilwood calipers with high performance street brake pads
Four grade eight 3/4
′′
x 1
¼′′
course
-
thread bolts.
Four har
dened 3/8
′′
flat washers
Four hardened 3/8
′′
lock washers
Four 3/8
′′
shim washers
Two brass caliper
-
to
-
brake
-
tube fittings
Two stainless steel brake inlet tubes
Installation Instructions:
1)
Raise the front of the car off the ground and support with jack stands
.
2)
Remove front wheels.
3)
Starting with the right side, turn steering wheel to full left lock.
4)
Find a container suitable for used brake fluid. Disconnect the solid brake hose
from the flexible brake hose at the front inside, behind the rotor.
5)
Remove the two c
aliper retaining bolts.
6)
Remove caliper and tube.
7)
Remove the sheet metal splash guard from the inside of the rotor (this will not be
reused with the Wilwood brake system.)
8)
Mount aluminum caliper adapter bracket on the inside of the spindle/upright using
the
original
½′′
fine bolts with flat and lock washers.
9)
Install brass fitting in caliper using Teflon tape or sealer on the threads so that the
female inverted flare end faces down. (Do not over
-
tighten; we will not replace a
stripped caliper on warranty).
10)
Mou
nt caliper with bleed screws pointing up and connection ports facing the
inside of the aluminum adapter bracket. If required, center the caliper parting line
on the center of the rotor using the 3/8
′′
shim washers provided under each of the
top and bottom 3
/8
′′
mounting bolts.
11)
Tighten all mounting bolts using a good anti
-
seize compound such as Copaslip.
Do not over
-
tighten.
12)
Connect the metal brake tube provided between the brass inlet fitting installed in
the caliper and the flex hose. Do not over
-
tighten or
crimp the lines.
13)
Clean the rotors with a high
-
quality brake cleaner.
14)
Install brake pads and secure with the lock pin. Spread ends of lock pin to retain.
15)
Repeat steps 4 to 14 on left side of car with wheels turned to full right lock.
16)
Fill brake fluid reserv
oir with high
-
quality brake fluid per the vehicle
manufacturer’s recommendations. Silicone brake fluid is not recommended. Be
careful not to spill brake fluid on any painted surfaces.
17)
Bleed both halves of each caliper until a solid pedal is obtained, makin
g sure that
the reservoir is kept full during bleeding.
18)
Clean any spilled brake fluid with brake cleaner, firmly press on the brake pedal
several times and inspect all connections for leaks.
19)
Re
-
mount wheels and set car back on ground.
20)
Test drive, inspect f
or leaks and repair as necessary.
Lee H. Mann
Gone But Not Forgotten
In automotive school I was told to never use teflon tape on brake systems and that all brake fittings must use flared fittings as brake fluid dissolves teflon tape. Other than that your kit looks wonderful.
Can you imagine how much it will cost to change all of the banjo fittings on motorcycles and cars to accommodate flared fittings !:facepalm:
Jack Klarich
18000+ Posts
Can you imagine how much it will cost to change all of the banjo fittings on motorcycles and cars to accommodate flared fittings !:facepalm:
With HD and ABS it is getting much better
IMO, the aftermarket will NOT take chances with law suits
No leaks = happy and safer riders JMO
Too much Teflon just like too much of anything can be a bad thing JMO
Where can this conversion be found and bought.
THANKS
THANKS
Lee H. Mann
Gone But Not Forgotten
Where can this conversion be found and bought.
THANKS
www.mjtrikes.com
http://mjtrikes.com/shop/index.php?main_page=product_info&cPath=89_93&products_id=229
Trike Talk Community
Welcome to a community dedicated to the most diverse and fastest growing powersports segment, Motorcycle Trikes. Come join the discussion about the best makes and models, popular modifications and proven performance hacks, trike touring and travel, maintenance, meetups and more!
Register Already a member? LoginForum statistics


