DK Custom Products
Sponsor
DK Custom Billet Tank Lifts - New Sizes & Finish - Q&A
The New Style Billet Tanks Lifts are still the same shape, & covered by the same patent. But instead of being 3 pieces of steel, with 4 welds, they are precision cut from 6061 Billet Aluminum with a Stainless Steel Thread & Hardware.
We've been making Tank Lift Kits for well over a decade now. Ours have been different than the various flat metal designs. They are purpose-made, matching the lines of the bike, and have a Lifetime Warranty.
Over a million welds later, we've kept the same sleek design, while evolving the look & function further.
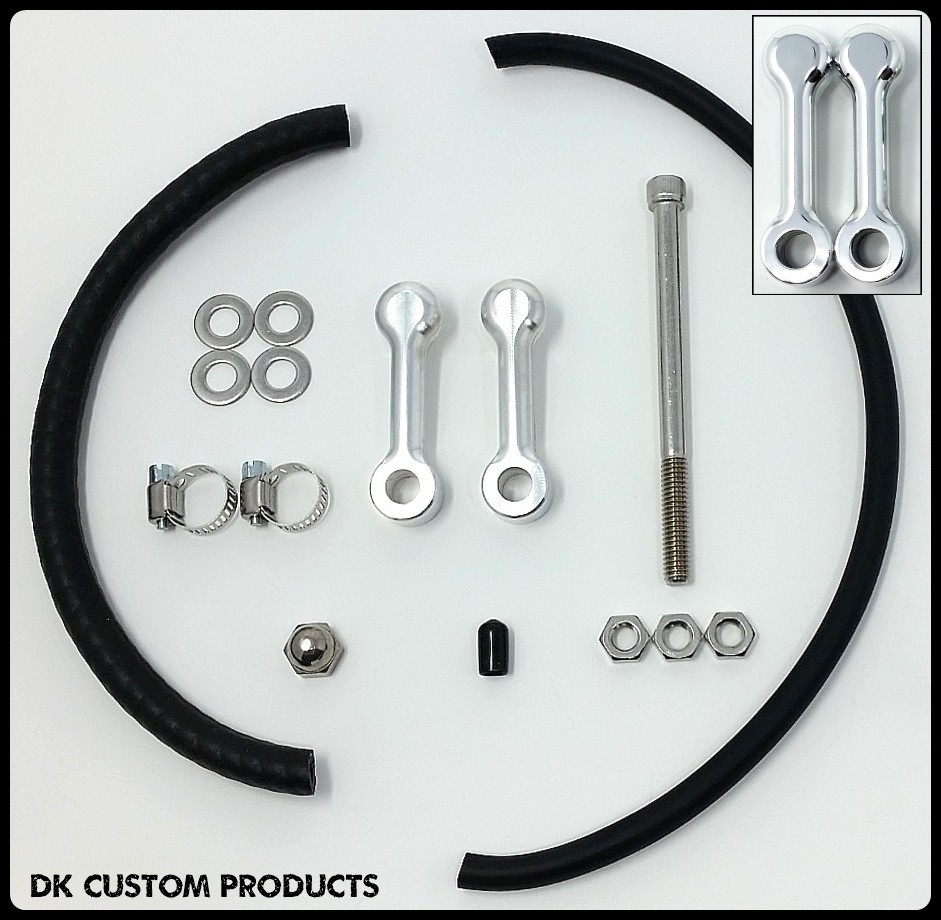
We've also added a 1" option And a Machine Cut Finish, which can be polished to a Mirror, or Chrome-like, finish. Of course, the Gloss Black Powder Coat finish is still available too.
We've been able to keep the price the same, while making a better looking, easier to install, & better fitting, design.
We hope you like them, and they meet your needs. We'll be posting photos, Q&A and general info in this thread.
LINK to the Billet Tank Lift Kits.
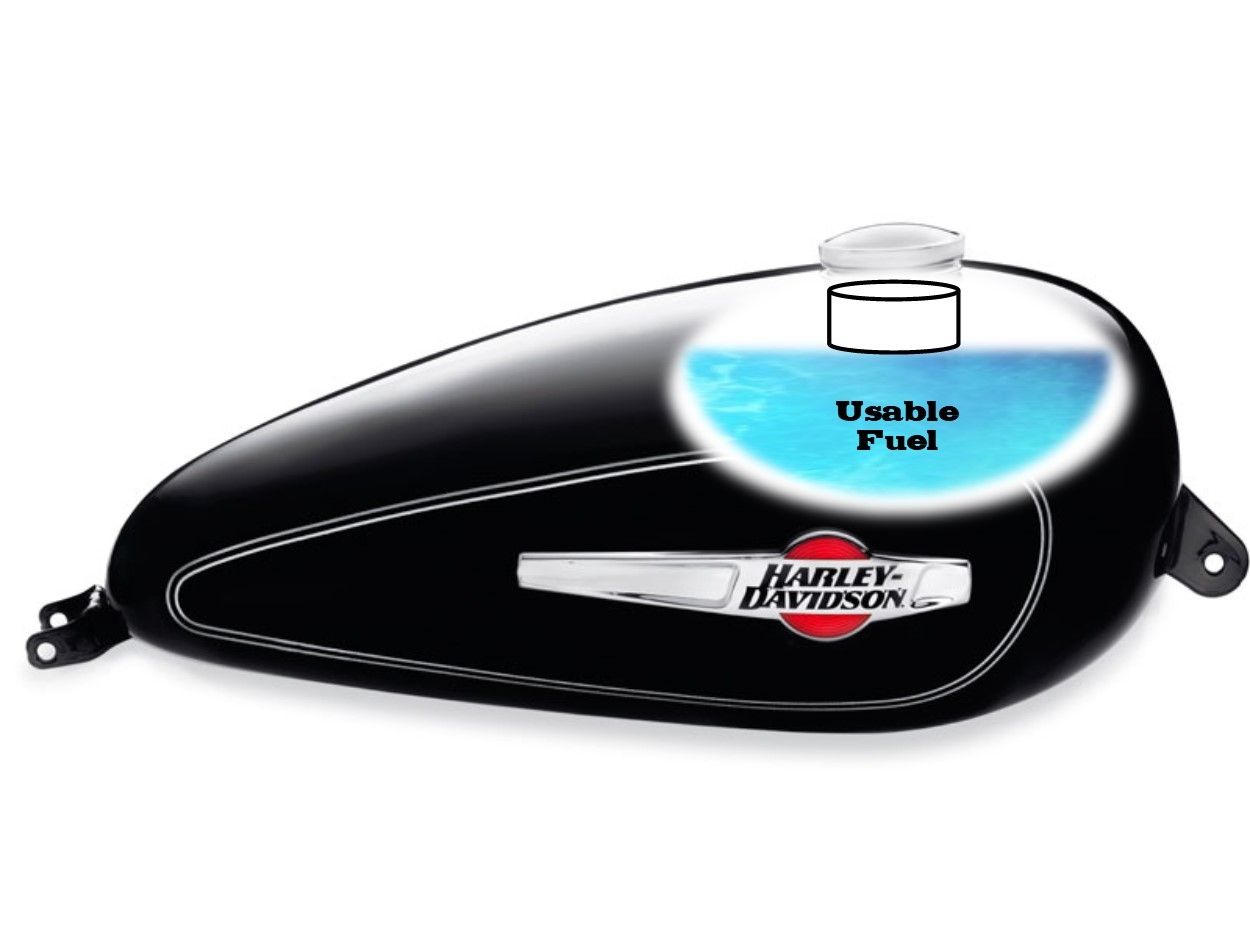
A few photos-
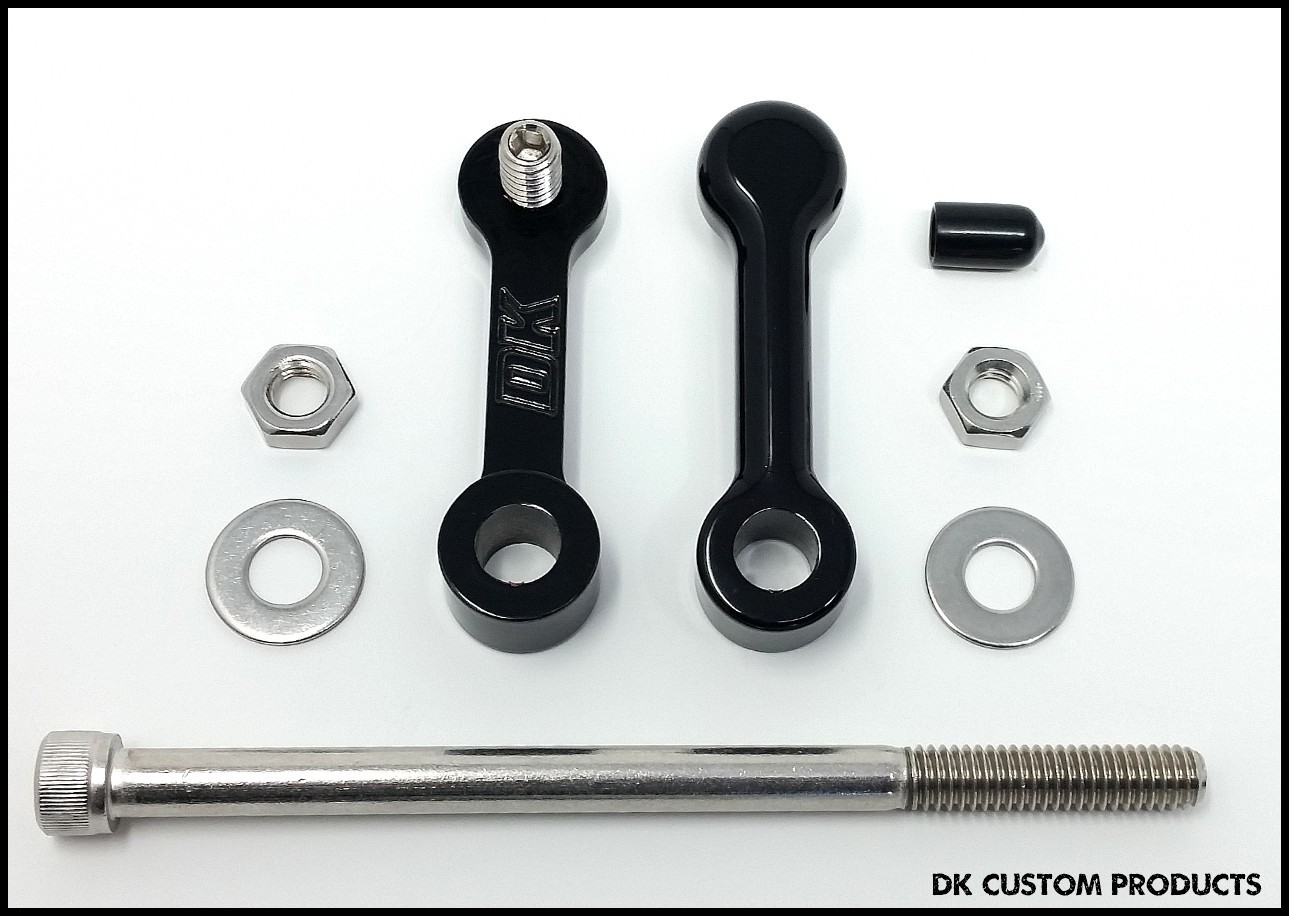


CNC Precision Cut Billet Tank Lift
New Sizes ~ New Finish
New Sizes ~ New Finish
The New Style Billet Tanks Lifts are still the same shape, & covered by the same patent. But instead of being 3 pieces of steel, with 4 welds, they are precision cut from 6061 Billet Aluminum with a Stainless Steel Thread & Hardware.
We've been making Tank Lift Kits for well over a decade now. Ours have been different than the various flat metal designs. They are purpose-made, matching the lines of the bike, and have a Lifetime Warranty.
Over a million welds later, we've kept the same sleek design, while evolving the look & function further.
We've also added a 1" option And a Machine Cut Finish, which can be polished to a Mirror, or Chrome-like, finish. Of course, the Gloss Black Powder Coat finish is still available too.
We've been able to keep the price the same, while making a better looking, easier to install, & better fitting, design.
We hope you like them, and they meet your needs. We'll be posting photos, Q&A and general info in this thread.
LINK to the Billet Tank Lift Kits.
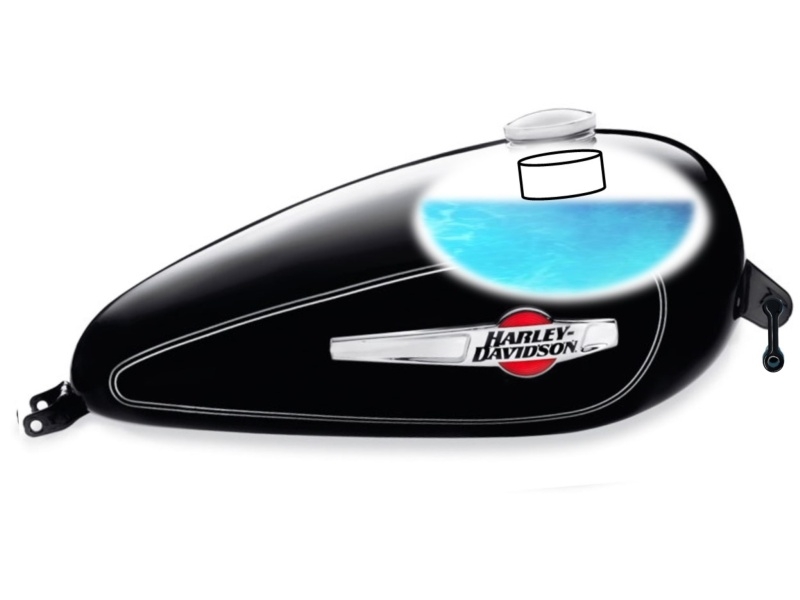
A few photos-