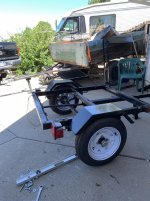
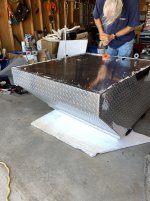
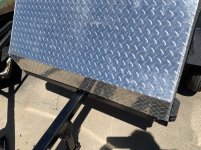
Friend had a good deal

Fuzz I think you can fuse the straps much neater job try it on the cut off piece propane torch just sayin Fred
 
Fuzz I think you can fuse the straps much neater job try it on the cut off piece propane torch just sayin Fred

I did melt the ends with a long reach butane "match". The knocts are just to keep the two parts of the straps together.

New business.

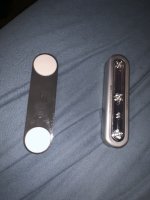
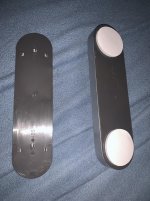
The two swivel lights came and since there was some interest in how they are made I took these pics:

Swivel Light 5.jpg

Swivel Light 6.jpg

The piece on the left in both pics is the "bar" that slides off to change the batteries.

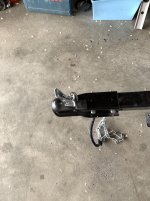
The paint was dry on the 2" coupler, so i put it back together and mounted it. I was able to use one of the holes, the rear ones I had to drill new since the 2" coupler was longer.

2%22 Coupler.jpg
 
A new twist

So my buddy Don got back from Minnesota Thursday and he came over yesterday to see the "new" little trailer. Don has a way better eye than I do ... apparently ... he noticed that the box of the trailer (aluminum part) was not centered on the frame. I wasn't particularly worried, I don't care all that much about it being crooked a little. At the time he noticed it, it was 102* outside, we where sitting in the garage on chairs (yep ... plenty of room for that) ... we decided to go in the house to discuss possibilities and he wanted to say Hi to Harley and Annabelle.

So after greeting the dogs, we sat at the kitchen table with pencil and paper to determine what could be off.

We came up with three possibilities.

1) the aluminum box is not square.

2) the frame of the little trailer is not square, but, square to the tongue and coupler.

3) the frame is not square and not square to the tongue.

#3 is the only one that would cause me any heart burn and require me to "take things apart". I'm a tad annal, so if it is #3 and it's out of square by more than 1/4" inch, I would fix it,

It was raining this morning, so didn't do anything

It finally stopped and I decided to take measurements since today was a "cool down" for us, also, I couldn't wait anymore to find out. Bottom Line, the frame is 1.25" out of square and the tongue to axle is 3/4" out of square in the same direction making the total out of square while pulling 2" .. unacceptable. I didn't notice any "fighting" while pulling it, but it was empty.

Good news, the box is square.

Since I still needed to put the other trailer back together ... I started with that. Put the frame up on the logs and checked it for square bulls eye. Dead nuts on the frame and the tongue to axle mounts.

Next I put the other trailer on two other logs and pulled the axle, fenders, coupler, foot off.

Mounted the axle onto the square frame, then put the axle with the little wheels on the crooked frame.

I was getting ready to put the rest of the stuff on the good frame, and decided since I still had some undercoating left. to seal the connectors and undercoat the frame. That's done and drying.

Frustrating, but, at least I'll know it's right.

As a side note, the neighbor saw me working on the trailers and came over. I told him I would give him back his money if he wanted. He asked if the frame could be straightened and i explained that all I need to do once the box is removed is to loosen the bolts holding it together and square it up. He said he'd be just as happy with that one .. so that's the plan.

Tomorrow I will put the fenders, foot, and coupler on the square one. And figure out what holds the box on the crooked frame.

Don is as annal as I am and wants to come over Monday to help ... He's smaller and more nimble ... he can get in the box to pull the screws ... :D ... When we lift it off, he'll help get in\i on the square frame ... He also will help squaring the crooked frame .. he likes to play like me.

Gonna work out ... just hope this is the last time I gotta do this ... LOL.
 
What a Day.

Started at 6am (first light) and it was a mess. My good deal has turned out to be lots of work.

First I installed all the lights, the foot, the fenders and the 2" coupler.

Don was here at 7:30 ready to help. I thought it was mainly gonna be just lifting and moving the box ... Oh My Lord was I wrong.

The guy I bought this box from screwed it to the trailer, then put 1" styrofoam foam on all the insides, of course, covering the screws. I counted 58 self tapping screws.

Next I had to pull all the carpeting and styrofoam, the air shocks and all the "tie downs". Then I had to use a wire wheel and drill to remove the mastic covering the screws ... I had to hold the tongue down while Don climbed into the box to get the screws out.

Then I had to use a flat bar to pry the box from the frame, because it had been glued with mastic. What a pain. My plan was to save the lights in the box and maybe add a few. I was careful looking for how the lights were wired to the trailer.

Here's a pic of both little trailers ... sans box, the crooked one is under the front of the trash trailer:

2019-07-21 11.16.40.jpg

I worked on figuring out the wires in the box, this was worse than the trailer, Don worked on cleaning the mastic from the bottom of the box. (he said he was "teaching" me not to hate tricity).

We then sat on some chairs drank iced tea and decided the best way to mount the box. The problem is there are six bolt heads that he box would need to sit on, leaving a big gap. We decided drill the holes needed house those six bolts and four more, 2 front, 2 back into the box. This would mean the box was held on by 10 7/16 bolts and nylock nuts. We measured, measured again, marked the spots and he drilled the holes (I was still trying to figure out the wiring). Next the plan was to put a ratcheting strap around the frame to keep it square, remove the six bolts, put the box on, replace the bolts and then add the 4 new ones and be done ... not so easy. I gave Don some money and he went and bought longer bolts, washers and some silicon sealer.

Here's Don drilling holes, never noticed how bald he's getting:

2019-07-21 11.16.36.jpg

When we removed the six bolts the frame stayed square, but, the cross members "rolled" a bit. I had to lay on the floor and grab the cross members with a crescent wrench and roll them back while Don put the bolts back in. This worked fairly well and in about an hour, we had all the bolts in, but, when we went to put the nuts on ... Don had bought 7/16 bolts, but the nuts and bolts we took off where 8.8 mm ... back to the Hardware store. When he got back, I laid on the floor and held the nuts while Don was in the box tightening the bolts.

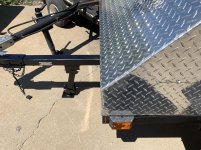
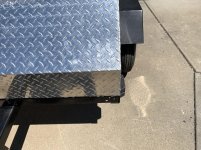
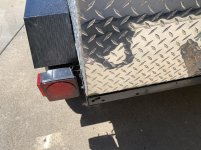
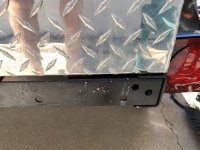
We took the strap off and voila, no offset. Here's some pics:

2019-07-21 14.37.18.jpg

2019-07-21 14.37.21.jpg

2019-07-21 14.37.25.jpg

2019-07-21 14.37.30.jpg

2019-07-21 14.37.36.jpg

John's Grandson did a great job with the box, the dimensions of the box are almost exactly the same as the trailer. It is about a 1/4" longer than the frame, but, exactly the right width. Don and I decided to let the 1/4" hang over the front. People would notice it if it was in the back ... maybe ... Anyway, we drilled the holes so the back was perfectly aligned with the frame and ended up with 1/4" in the front.

Next we set the trailer up on the logs and checked it for square, perfect. Even the tongue is now perfectly square to the frame and the axle, should pull great.

All that took us 8 hours ... well 8 for me, 6 1/2 for Don. At 2 pm it was 100* and I told him I'd finish it in the morning. I tried to pay him $100, but, he wouldn't take it, said he was helping a friend and he felt bad about noticing the offset. We agreed I'd take him and his wife to dinner next week, if mom is nice I'll take her too .. he likes Texas Road House.

So, all that's left is to finish wiring the box, put insolation back in, put the carpeting back in and reinstall the pneumatic lifts. I'm guessing 6 more hours ... couple hours a day before it gets hot. Gonna be a great trailer when it's done. If it ever gets done ... :AGGHH:

Forgot ... need to put the bull Dog back on, we took it off to set the box on the top to drill holes.
 
Good for you! Never, Ever, forget the dog!

The bulldog is back o the trailer standing proud. :D

Figured out the wiring, what a mess. Got everything working, sort of.

I took the LED Strip, tail/turn/brake lights off the frame of the crooked trailer. I mounted them high in the box and took off the single element LED stripe tail light. Now I have two sets of turn signals hi and low, two sets of brake lights hi and low, and about 15-20 tail lights ... all LEDS. I also took off the LED Clearance markers of the crooked trailer and I will mount them high on the sides of the box. I needed to get a step down drill bit that went to 3/4", Since it's not something I use often, I got a set at Harbor Freight, like $14. Was getting hot by time I got back, and I'm still a tad sore after yesterday, so decided to finish the lights tomorrow after taking the dogs to the groomers. And before I pick up mom at the airport.

I also picked up two rattle cans of bed liner. It's tan in color. The plan is to spray out the inside after wiring is done in hopes of sealing all the screw holes. I did put silicon in them all, but, with so many, I want to makes sure it's watertight. Also, there are lots of bolts through the rear ... so it will seal all that and seal the connections. Didn't want to use undercoating here, didn't want the tar smell in the box.

Here's a video I took when testing the lights ... I got lazy and didn't want to walk back and forth to see them ... LOL


The little white light in the center is the licenses plate light. I had painted the cover black and it was drying.

While on my way to get the drill bit, I stopped ant my sign guy. he's making me a black sign 10" by 25" with the name "Little Girl" in the same silver cursive lettering and the same "Body Piercing Saved My Life" with the hand pierced, also in the same silver cursive lettering. This will get mounted below the license plate. Also picked up a license plate frame with a clear cover on clearance when I got the bed liner ... classes up the plate ... :D
 
Look at her rear

Okay, while i was playing with the Zep stuff on the lens ... I took a pic of the back with all the add ons.

Trailer Rear.jpg

The blue painters tape is to minimize over spray when I do the bed liner ... I'm learning :D
 
Fuzzy, I'm sorry to report that the license plate frame is crooked.

The lighting looks great!:cool:
 
Early Morning

Was out working on the little trailer at 5am. Thank God for motion lights. .. LOL.

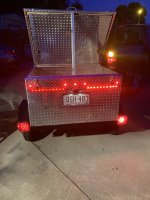
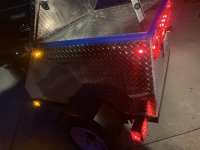
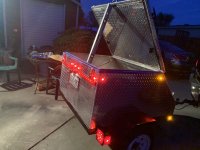
Added the 4 clearance lights to the box, amber in the front, red in the back. Wired them up and did a test of all lights again.

Back:

Back.jpg

Left:

Left.jpg

Right:

Right.jpg

If they don't see the trailer ... they are blind ... and shouldn't be driving ... :D

And for the record, the license plate frame is exactly 9 1/4" on both sides from the frame of the trailer. So, maybe we have some uncalibrated eyeballs out there ... LOL.
 
You might need a CDL to pull that thing :Shrug:

Will a library card work???? :Shrug:. I'm guessing the government charges big bucks for one of those ... especially if it's $27.18 just to inspect the little trailer ... :AGGHH:

All that is left is to put the styrofoam back in ... then the carpet ... after that ... I plan to take a trip with it, even if I don't need the storage space ... after this much work ... I'm getting some use out of it. :D
 
Keep in mind they put strobe lights on big yellow school buses because people can't see them.:xzqxz::xzqxz:
 

Trike Talk Community

Welcome to a community dedicated to the most diverse and fastest growing powersports segment, Motorcycle Trikes. Come join the discussion about the best makes and models, popular modifications and proven performance hacks, trike touring and travel, maintenance, meetups and more!

Register Already a member? Login

Forum statistics

Threads
55,571
Messages
901,985
Members
22,553
Latest member
Glockjock
 photo 260e2760-d89e-45b2-8675-2bc26fb3d465.jpg

 photo Trike-Talk-150-x-200.gif

 photo DK Trike Talk Right side banner 19.jpg

Merziere Reverser

 photo 9796095c-0d4b-4a9b-88ed-efe4c498d084.png
 photo f9866e4e-75c5-471a-86f5-5e72a446ecc3.png
Back
Top