ultrafxr
1250+ Posts
I've been wanting / considering different ways to improve the looks of my garage . . . especially the ugly raw concrete floor. Several years ago I got a quote from a company that did the local Harley dealers service entrance to do an epoxy coating in my garage. But I never acted on it due to cost and the hassle of having to clear everything out for them to put the epoxy down.
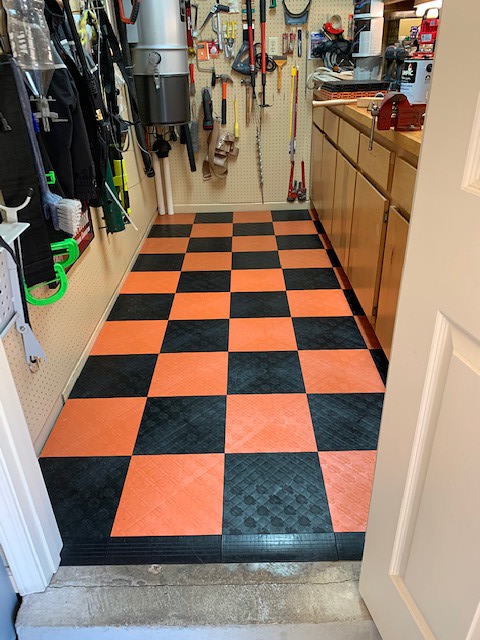
Probably like you I've seen the RaceDeck commercials. In fact several years ago I bought from the local Harley dealer a 4' x 8' section of black and orange tiles with the bar and shield logo and I've parked my motorcycles on it. After contacting RaceDeck I learned that they make the H-D version of the tiles . . . and they are quite a bit more costly than the non-H-D version. Surprise, surprise the Harley tax strikes again.
In any case I decided against the H-D version not only due to the cost but just looking down the road thinking I might not want that on my garage floor forever, lol. After due consideration and several consultations with a most helpful sales person / advisor I decided to go for it, spend the bucks and get a new floor.
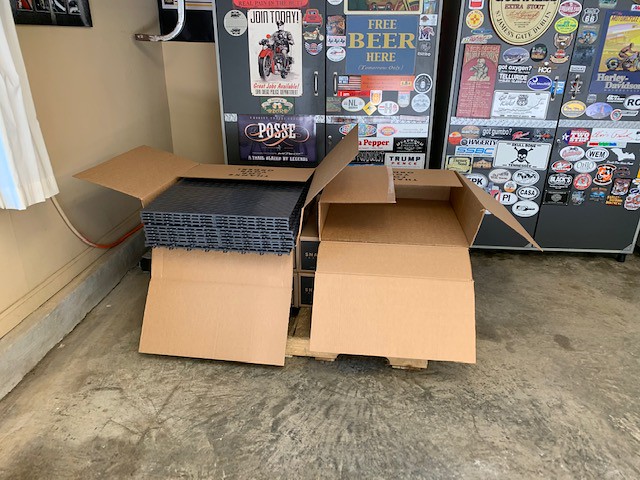
The tiles came on a pallet . . . all 576 pieces in 12 cartons weighing 552 pounds. Thankfully a $20 bill got the driver to pull the pallet up into my garage rather than leave it curbside which is all that was called for. Nice guy and well worth a little tip.
 IMG_0444 by Jerry Rice, on Flickr
 IMG_0445 by Jerry Rice, on Flickr
Next step was the unpacking.
 IMG_0448 by Jerry Rice, on Flickr
They suggest you put them in the sun to warm up and expand. That was no problem as it was blindly sunny and hot, hot, hot.
 IMG_0449 by Jerry Rice, on Flickr
 IMG_0450 by Jerry Rice, on Flickr
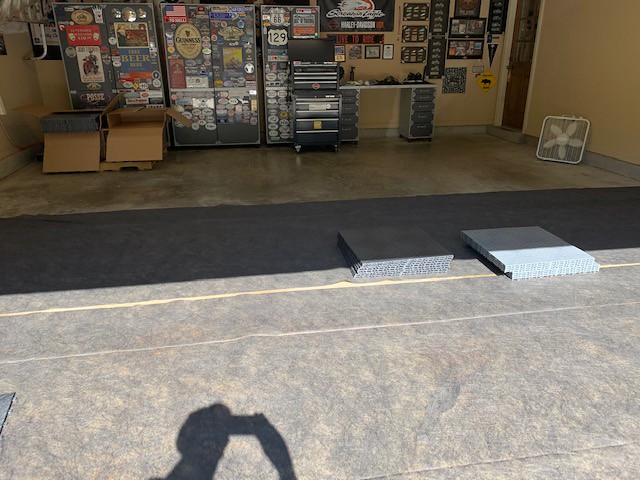
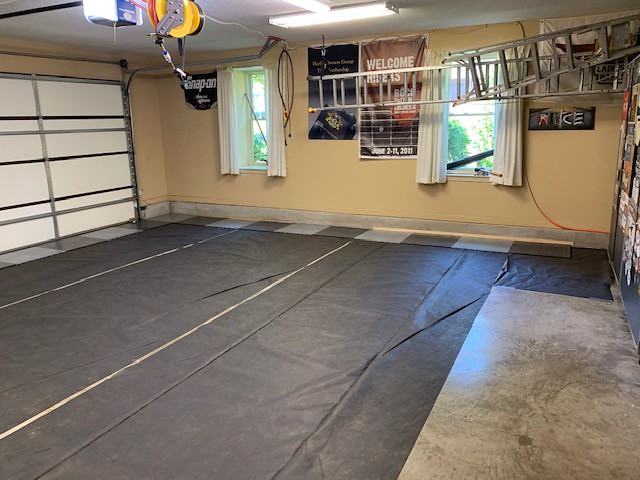
Now I had read quite a bit about the tiles and installation and several folks recommended putting down landscaping fabric to cut down on possible 'clicking' noise as you walked across the floor. Others said it was a waste of time and money and sound reverberation was not really that big an issue. But I thought 'what the heck' I'm only going to do this once and it couldn't hurt so I put down the landscape fabric prior to installing the tiles.
 IMG_0451 by Jerry Rice, on Flickr
 IMG_0452 by Jerry Rice, on Flickr
Now the fun begins . . . installing the tiles. I learned they come boxed in a 4' x 4' section - in other words 4, 12" tiles already assembled. If you want to install individual tiles in a checkerboard or other non-repeating pattern you must separate the assembled tiles. I thought the smaller checkerboard looked too 'busy' for my taste so I decided to make a checkerboard pattern using the 4' x 4' assembled tiles. And I choose gray and silver colors (well RaceDeck calls them graphite and alloy) since the match my storage cabinets pretty well. And those storage cabinets were a bear to move and re-position. I mean they are HEAVY. Here is the partially finished floor with one cabinet back in place.
 IMG_0453 by Jerry Rice, on Flickr
Almost finished the end is in sight.
 IMG_0454 by Jerry Rice, on Flickr
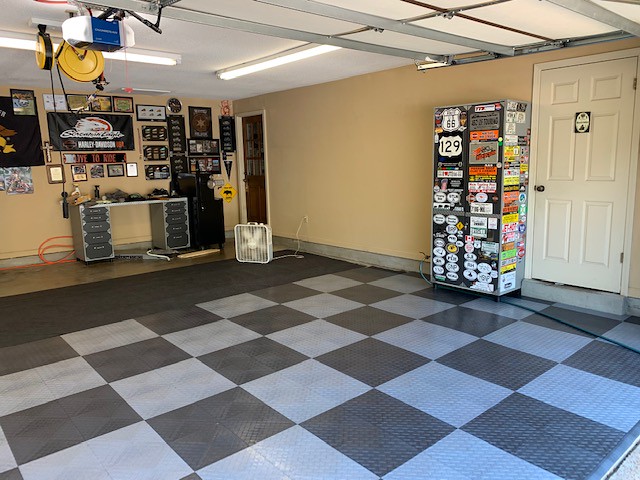
Ah done at last!
 IMG_0455 by Jerry Rice, on Flickr
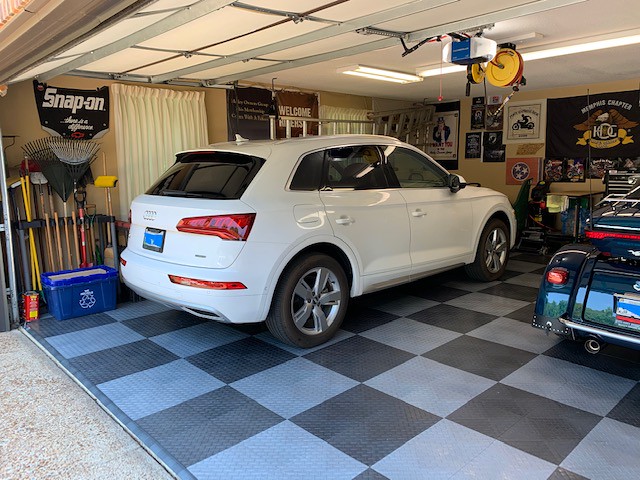
Here it is with all my 'stuff' back in place . . . or at least inside the garage, lol.
 IMG_0457 by Jerry Rice, on Flickr
 IMG_0458 by Jerry Rice, on Flickr
So what's the verdict? I like it and wish I'd done it sooner. However I'll tell you it's not a simple 2 hour fun job like they show on the commercials. It wasn't really difficult but it was tedious. I found that stomping on the tile seams to get them to lock in place was very tiresome so I resorted to dropping tiles in place for the entire row and sitting down and pounding the tiles into locking using a hard rubber mallet. That worked much better for me.
Should you be interested in purchasing RaceDeck tiles they do offer a military discount and be sure to join 'The Garage Journal Board' online forum as RaceDeck is a sponsor and offers members a discount.
Probably like you I've seen the RaceDeck commercials. In fact several years ago I bought from the local Harley dealer a 4' x 8' section of black and orange tiles with the bar and shield logo and I've parked my motorcycles on it. After contacting RaceDeck I learned that they make the H-D version of the tiles . . . and they are quite a bit more costly than the non-H-D version. Surprise, surprise the Harley tax strikes again.
In any case I decided against the H-D version not only due to the cost but just looking down the road thinking I might not want that on my garage floor forever, lol. After due consideration and several consultations with a most helpful sales person / advisor I decided to go for it, spend the bucks and get a new floor.
The tiles came on a pallet . . . all 576 pieces in 12 cartons weighing 552 pounds. Thankfully a $20 bill got the driver to pull the pallet up into my garage rather than leave it curbside which is all that was called for. Nice guy and well worth a little tip.
IMG_0444 by Jerry Rice, on FlickrIMG_0445 by Jerry Rice, on FlickrNext step was the unpacking.
IMG_0448 by Jerry Rice, on FlickrThey suggest you put them in the sun to warm up and expand. That was no problem as it was blindly sunny and hot, hot, hot.
IMG_0449 by Jerry Rice, on FlickrIMG_0450 by Jerry Rice, on FlickrNow I had read quite a bit about the tiles and installation and several folks recommended putting down landscaping fabric to cut down on possible 'clicking' noise as you walked across the floor. Others said it was a waste of time and money and sound reverberation was not really that big an issue. But I thought 'what the heck' I'm only going to do this once and it couldn't hurt so I put down the landscape fabric prior to installing the tiles.
IMG_0451 by Jerry Rice, on FlickrIMG_0452 by Jerry Rice, on FlickrNow the fun begins . . . installing the tiles. I learned they come boxed in a 4' x 4' section - in other words 4, 12" tiles already assembled. If you want to install individual tiles in a checkerboard or other non-repeating pattern you must separate the assembled tiles. I thought the smaller checkerboard looked too 'busy' for my taste so I decided to make a checkerboard pattern using the 4' x 4' assembled tiles. And I choose gray and silver colors (well RaceDeck calls them graphite and alloy) since the match my storage cabinets pretty well. And those storage cabinets were a bear to move and re-position. I mean they are HEAVY. Here is the partially finished floor with one cabinet back in place.
IMG_0453 by Jerry Rice, on FlickrAlmost finished the end is in sight.
IMG_0454 by Jerry Rice, on FlickrAh done at last!
IMG_0455 by Jerry Rice, on FlickrHere it is with all my 'stuff' back in place . . . or at least inside the garage, lol.
IMG_0457 by Jerry Rice, on FlickrIMG_0458 by Jerry Rice, on FlickrSo what's the verdict? I like it and wish I'd done it sooner. However I'll tell you it's not a simple 2 hour fun job like they show on the commercials. It wasn't really difficult but it was tedious. I found that stomping on the tile seams to get them to lock in place was very tiresome so I resorted to dropping tiles in place for the entire row and sitting down and pounding the tiles into locking using a hard rubber mallet. That worked much better for me.
Should you be interested in purchasing RaceDeck tiles they do offer a military discount and be sure to join 'The Garage Journal Board' online forum as RaceDeck is a sponsor and offers members a discount.