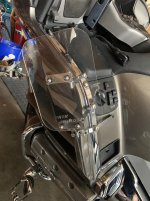
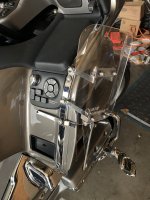
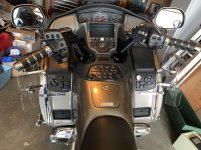
Started Fixing Jessica

The color matched stix look good from the pics. Hope you get all the reception you are supposed to. Thanks for posting.

We are freezing to pieces here today. 32*, wind chill 21*. Cloudy, breezy, misting on/off. Supposed to be 19 in the morning... we had low 80’s on Friday. Eating a warm, comfort food pot pie for lunch to make up for the indignancy of this weather....sans crust.. the best part of course.
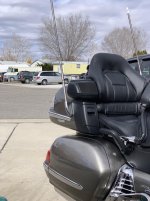

Warmer here ... like 45*, but pouring again. Sounds like you got a good day to snuggle up with the pooches and a good book. :D
 
We had sun for about 6 minutes

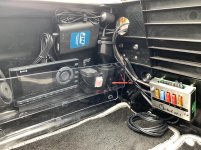
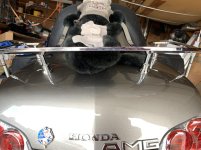
So I got a another pic of the antennas:

2019-03-03 12.38.19.jpg

Also took a pic of the pockets with the ceramic stuff:

Left:

2019-03-03 12.38.44.jpg

Right:

2019-03-03 12.38.32.jpg

I think they look pretty good ... as much as I hate the idea ... might have to do the rest of the black stuff.
 
Sunny and 40's today

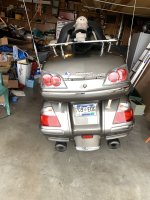
So ... I pulled the bike out into the sun.

Antenas:

Antennas.jpg

The next thing I did was to repair the hole in the trunk. I drilled an 1" hole to allow the plug to fit through, then ran all the wires through that hole.

Hole:

SiriusXM Radio.jpg

You can see the hole in the top center of the picture. The plan to repair this was to put a layer of duct tape over the hole from the inside. Then, from the outside I push black silicon rubber into there area until it "fills". Then I put duct tape on it from the outside and work the silicon through the tape. When it feels "right", I let it cure for about a week, pull the duck tape off and check it out. If it needs more silicon, I repeat the pushing silicon and taping until it gets totally sealed. At the point, I leave the duct tape alone. It will eventually release, then I remove it.

Repair.jpg

You can kid of see the bulges.
 
Still had some energy

So I installed the ISO Grips that mount over the heated grips. I've done like 3 or 4 sets of these. There are a couple tips I've discovered.

1) Read and follow Kuryakyn's instructions.

2) When you get them on and still are having trouble getting the chrome cages together, use a popsicle stick or plastic molding tool to "pull"/"push" the rubber nubs of the grips into the hole they need to fit though. You will never get the halves together if the nubs aren't in the holes all the way.

3) The instructions say to ensure the little chrome tabs fit into the slots ... yea right, never had them go into the slots by themselves. My trick here is to get them close, you'll have a gap between the halves. Get the screws started. Then, wrap the grip in a rag and put a C clamp unto the centers of the grips between the nubs at the widest parts of the gap. Gently tighten the C Clamp to snug it together. Leave it that way for about 5 minutes. Take the clamps off, and you're done.

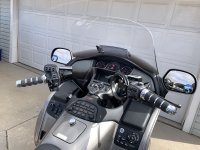
Here they are installed:

ISO Grips.jpg
 
45 and Sunny

My buddy, Don, came over this morning and did the "getting on the ground" thing for me.

First he put the belly pan on. This took longer than expected because there were washers on the screws with some kind of "crushable" rubbery stuff on them. They had to be "unscrewed" which took a few minutes to figure out. After that it went really quickly. Don's not much for slowing down for pictures, so you'll have to take my word that he did install it.

Next we tackled the trailer hitch. I already had the rear panel off and the plate installed with the bolts loose. I did this sitting in a chair, didn't have to get on the ground. Don did the arms that clamp to the saddle bag protector. Afterwards, he did the lining up of stuff and tightening all the bolts. I don't pull a trailer, but, I do use a luggage rack for a cooler or extra luggage if needed, and, since I had it, might as well install it.

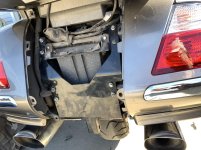
Here's the plate installed:

2019-03-05 10.06.03.jpg

I put the back panel back on while Don started on the Ride On install.

Watching him do that, I was really happy that I got Don to do that. Took awhile to get the goo into each wheel. Gravity would have been a help getting down, and maybe I would be able to get back up, maybe not. Just glad I didn't have to find out. :AGGHH:

After that, I did go for a ride. Did about 20 miles to get the goo to find it's own level. I was a little worried that it would be rough at first until it found it's happy place. It really wasn't a big deal. Maybe a little "wobble" for a mile or so, but, after that it got smooth as silk. I don't know if I actually "feel" a difference, or, you expect to "feel" something so you do. I liked the idea of making my tires "self sealing". If I had a puncture and pulled something out, I would replace the tire ASAP. But, it's nice to know that maybe I could make it back to civilization if I had a puncture. We got lots of that wide open space stuff around here. Like hundred to one hundred fifty miles between anything resembling a town or gas station. And, as you can imagine, cell service isn't too good either.

Anyway, with the ground work done, I'm just waiting for the chrome faring strips to come in, I'll mount them with the air wings and I'll be done. Well ... until I find something else I can't live without. :D
 
Forcing that Ride On in the tires is a bear of a job. I got C clamp and couple strips of wood to force stuff out of tube and into the valve stem. Maybe Ride On has a better way now.
 
Looking for that A.M. reception on the two foot antenna.

I did a 20 mile ride around town today and I was able to get AM reception. I don't listen to AM ... ever, so it would be hard for me to judge weather it was better or worse than before the Mod. Wish I could be more help. I can tell you all the FM stations I listen to were as good or better than I'm used to. Hope that helps.
 
Forcing that Ride On in the tires is a bear of a job. I got C clamp and couple strips of wood to force stuff out of tube and into the valve stem. Maybe Ride On has a better way now.

Don is pretty ingenious. I watched him sneeze it out util he got the bottle squeezed as much as he could. He then removed the bottle from the tube and tipped it upright allowing air into the bottle. Then he plugged the hole on the bottle with his finger, turned it upside down and shook it down like an oral thermometer. And he would start the whole thing over again. He did this 4 or five times with each bottle. I put 9 oz in the front tire and 11 oz in the rear. This is 1 oz more than they say, but, they also say you can add up to 25% more to help balance the tire better. We put an 8 oz bottle in the front, then 1 oz out of a second. We put an 8 oz bottle on the rear tire and 3 oz from the other one with 7 oz in it.

Question for people that have used this Ride On. Is there any point in saving the 4 oz I have left? Will it go "bad"?
 
Not a great Day.

So it started okay, but, I went to occupational therapy. I thought I was gonna get some exercises to help loosen up the tendon. Nope.

Apparently what I have is not "trigger finger". I have a nerve that has been "Stretched". So what does that mean???? Beats me, but, what it does mean is that the treatment I've been doing for 5 days may have aggravated it more.

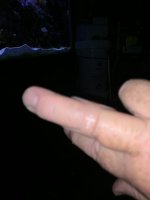
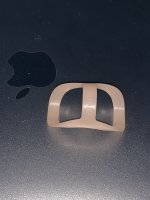
This little gizmo is the correct treatment (for now):

2019-03-06 13.12.37.jpg

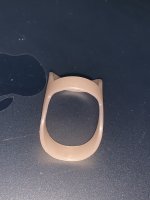
another angle

2019-03-06 13.13.16.jpg

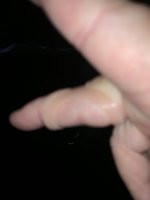
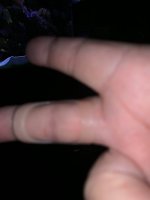
So here it is "installed":

2019-03-06 13.08.08.jpg

Another shot:

2019-03-06 13.08.14.jpg

And lastly:

2019-03-06 13.08.19.jpg

Okay, so this little thing doesn't seem like a big deal, but, it is truly amazing to me how much I use my right middle finger. Not like you think, Carla ... LOL.

I need to wear this little guy 24/7 for at least two weeks. I have to take it off every hour while awake and passively work the range of motion of the finger. That means I work it through the full range of motion by manipulating it with the left hand, not the muscle and tendon. The idea is to get the tendon to calm down, so the nerve can return to its normal place. I don't understand all I know about it. What I do know is that it is definitely gonna crimp my style. Glad I got most of the stuff on Jessica installed ... not sure I can do much with the hand like this. Maybe I'll get used to it and be okay. Yea Right. :xzqxz:

I can ride Jessica, just keep that finger pointed out ... different.

If the stage one treatment doesn't do the trick, there is a slight chance for surgery (when I say slight, I mean like ain't gonna happen).

I have a trip to Mesquite planned in 11 days. Might have to reschedule .. would stink to go and be limited riding .. we will see ... if I'm not making progress, might just go and take the little bugger off. If it's getting better, might push the trip back a week. Time will tell.
 
Fun getting to know Alan ... huh? LOL

Yeah, I'll say, you're just full of surprises. I have a friend in Sevierville TN, wife gave him a ring, his finger got infected, docter operated, twice, now it won't bend, he now rides his Harley with one finger in the straight position at all times. Now that is one sad story, but true. Anyway, reading your post, I thought about my friend, and noted that you would not be doing the surgery thing.
 
I thought about my friend, and noted that you would not be doing the surgery thing.
Well ... wouldn't say not doing surgery ... It would not be my first choice, as a last resort ... maybe ... 23 times under the knife is plenty ... I still heal well, but, it just seems to be taking a lot more out of me lately.

Old age ain't for sissy's.
 
Rain On and Off

Since today was not so nice, I decided to just do adjustments that I had figured out on my last 20 miles ride.

Adjusted the backrest ... it was okay, but, now it fits like a recliner. Adjusted the ErgoII Highway peg mounts, made the reach a bit shorter. Also adjusted the levers for brake and clutch. Some other minor stuff.

I also decided to put the trunk rack risers on. When I installed the rack, I wasn't sure I liked the risers. But, I decided I did, so I put them on. I also put the OEM antennas for awhile because I want to "fix" the quick Disconnects or buy some new ones. The chrome was peeling and when I sanded and painted them, it didn't stick very well. I need to sand again and primmer, then paint just the disconnects ... but that will have to wait until I get back from my trip. I leave in 10 days and doing anything with the thingie on my finger is harder than it needs to be.

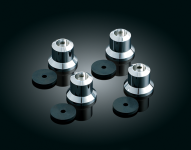
Anyway these are the risers I'm talking about:

2019-03-07 11.15.45.png

Here's how they look on the bike, I put the big washers under the trunk lid, so, shouldn't be an issue, the base of the risers is just a touch smaller than the washers.

2019-03-07 11.18.39.jpg

Anyway, with the weather predictions for the next 7 days, and this finger thingie, I think I'll just bide my time until my trip. All that's left is to install the air wings, chrome faring trim and a rear chrome trim piece. The chrome faring trim will be here tomorrow, so weather permitting, the air wings and trim might get installed before I leave.

On a side note, my white T's should be here tomorrow also, kind of excited about them.
 
She's Done

Well ... at least for now ... :D

Okay, so the last things I needed to finish her are here ... Came Friday ... :D

The Chrome faring pieces that will allow me to not drill holes in the painted pieces and the rear fender trim came in.

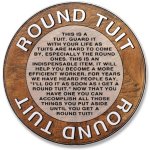
So. I installed the chrome faring pieces, marked the holes and drilled them out. Next I mounted my Air Wings ... Never got a round tuit on Helga. But, thanks to JaysGone .. I have one now and will never be able to put stuff off again ... thanks ... I think :AGGHH:

Round Tuit.jpg

Once I had them on I realized that one of the Chrome screw covers was missing ... hmmm ... time to dig in the boxes. Couldn't find it, but, O'Reilley's had a four pack, so I'm good. In my boxes I did find the helmet locks so they got installed too.

Here's the helmet locks and the rear fender chrome trim:

2019-03-10 09.13.55.jpg

Left side Air Wing:

2019-03-10 08.33.50.jpg

Right Side Air Wing, you can see the missing chrome cover:

2019-03-10 08.34.11.jpg

Both, after putting the chrome covers on:

2019-03-10 09.13.41.jpg

You can see the chrome fairing trim too.

So I'm done. Kind of, I got a bid on an aluminum Phone mount that I think I could make work on her. We'll see how the bidding goes ... not paying more than $20 for it, cause I'm not sure I need it ... LOL ... I might get a set of the mirror wind deflectors, but, I'm not sure I'll need them with the Air Wings. To be honest, I didn't think I needed them when I drove Carl's Trike in Kerrville. I just can't remember On the 01 if the wings were enough.

I'll find out next week when I go to Mesquite ... not a rambling ride, but, this time of year, best I can get. Since the knee is new, and there still could get snow on the mountains., my plan is to load up Jessica on the trailer ... get to Mesquite ... ride all day ... and gamble some and eat in the evening ... LOL.
 

Welcome to the Trike Talk Community

Join our vibrant online community dedicated to all things Trikes! Whether you're a seasoned rider or just starting out, this is the place to share experiences, tips, and stories about your three-wheeled adventures. Explore modifications, maintenance advice, and rides, all while connecting with fellow trike enthusiasts from around the globe

Forum statistics

Threads
55,537
Messages
838,977
Members
22,652
Latest member
wyldesydedavid

Trike Talk Community

Welcome to a community dedicated to the most diverse and fastest growing powersports segment, Motorcycle Trikes. Come join the discussion about the best makes and models, popular modifications and proven performance hacks, trike touring and travel, maintenance, meetups and more!

Register Already a member? Login

Forum statistics

Threads
55,537
Messages
838,977
Members
22,652
Latest member
wyldesydedavid
 photo 260e2760-d89e-45b2-8675-2bc26fb3d465.jpg

 photo Trike-Talk-150-x-200.gif

 photo DK Trike Talk Right side banner 19.jpg

Merziere Reverser

 photo 9796095c-0d4b-4a9b-88ed-efe4c498d084.png
 photo f9866e4e-75c5-471a-86f5-5e72a446ecc3.png
Back
Top