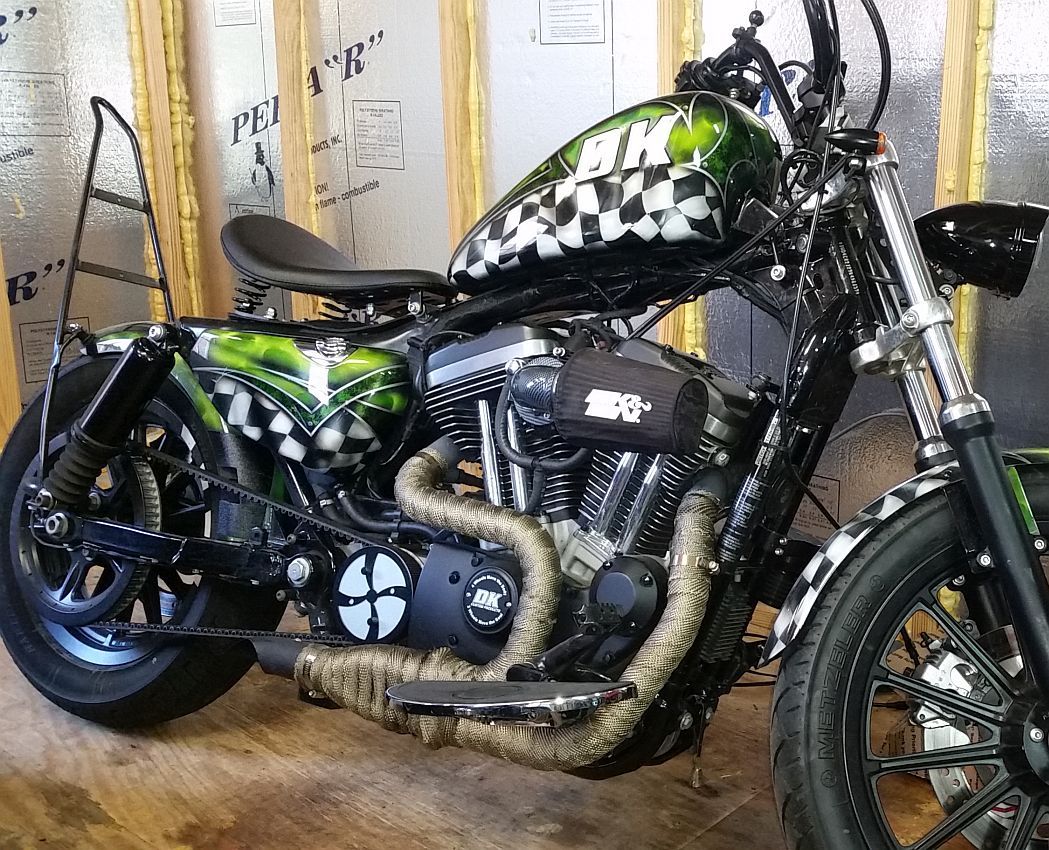
SBS Project - Sportster Chop w/ Lots of Photo's

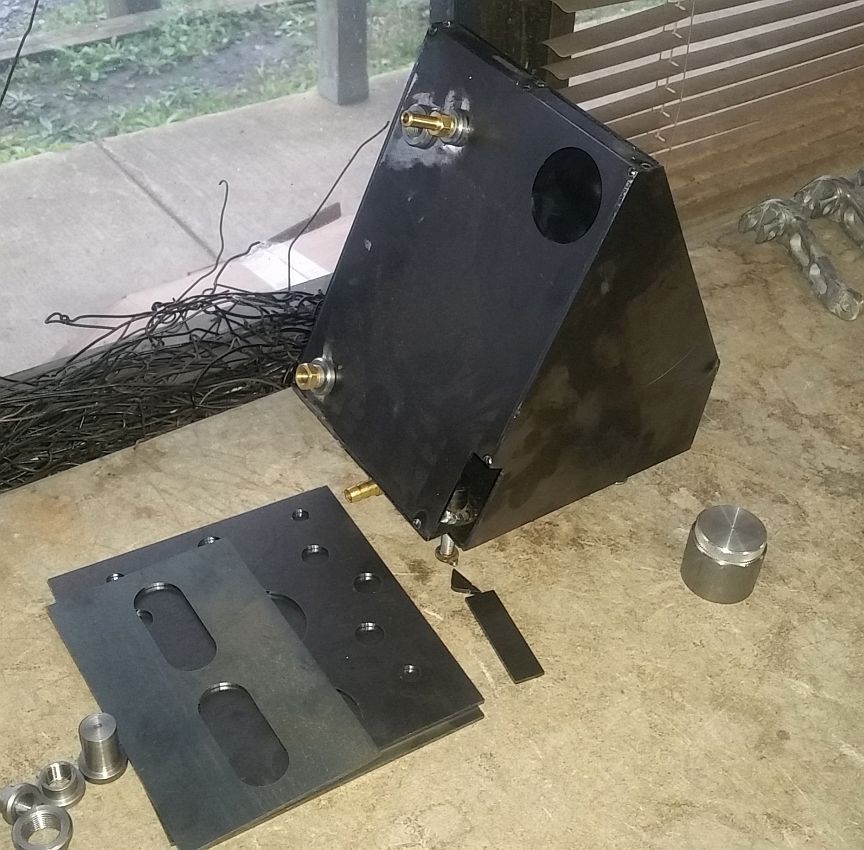
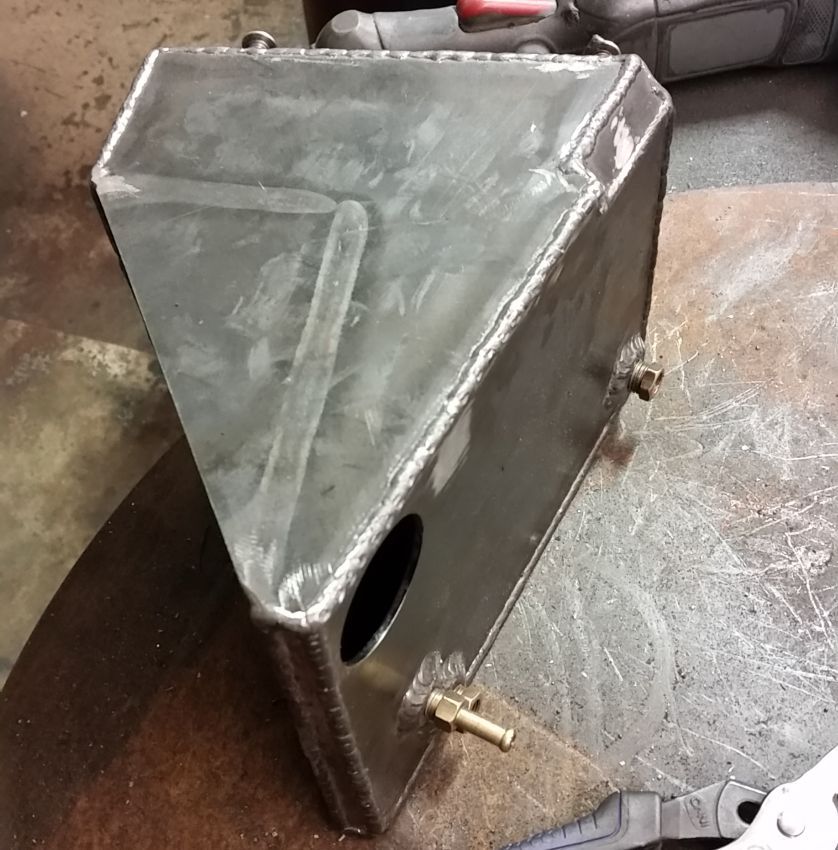
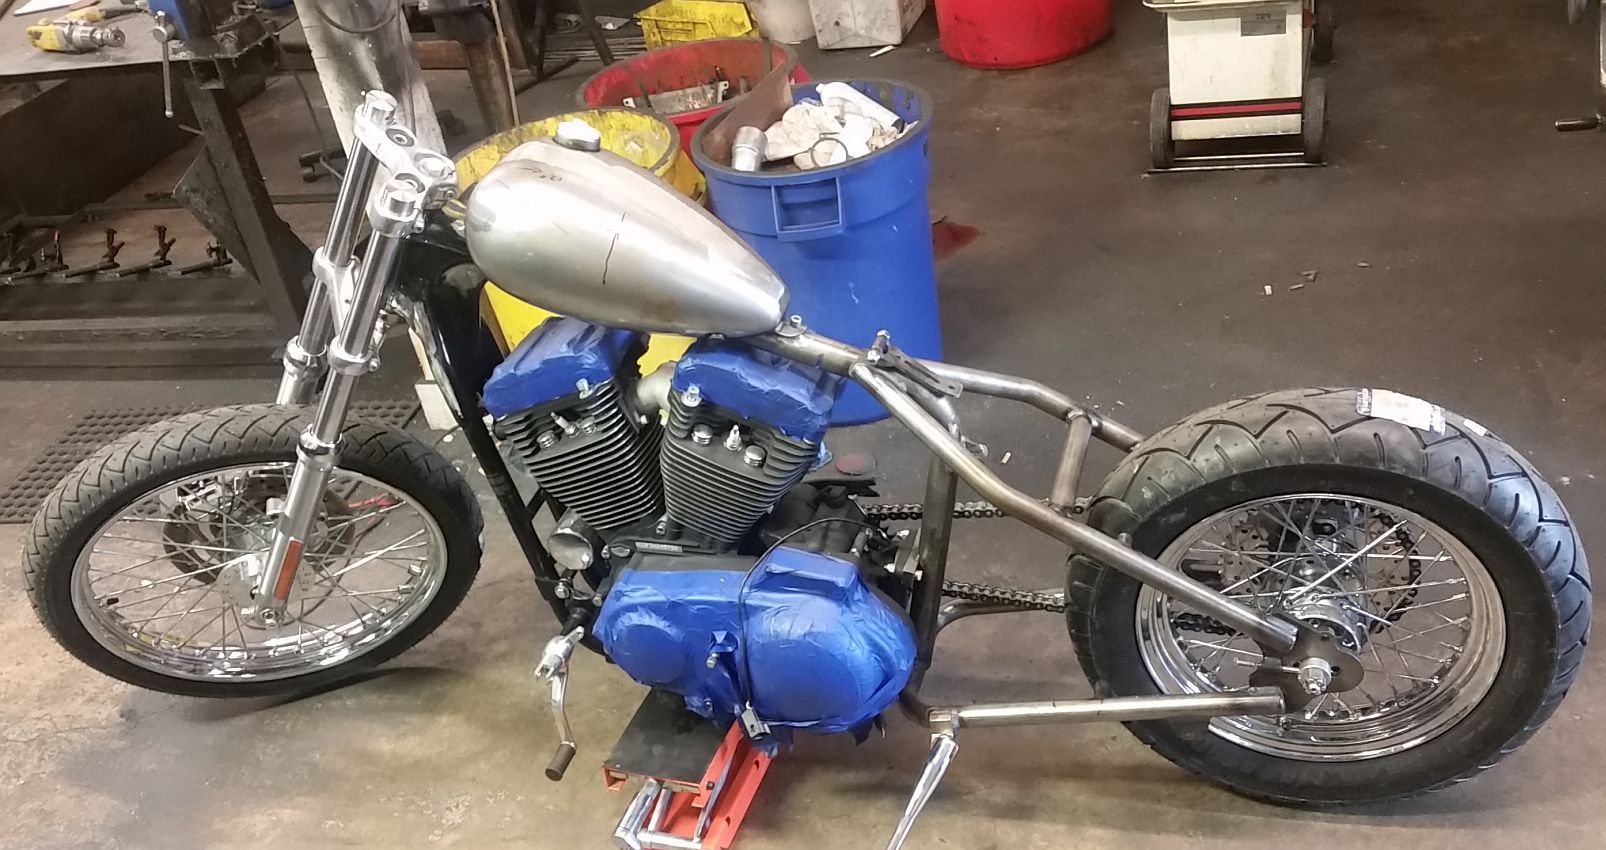
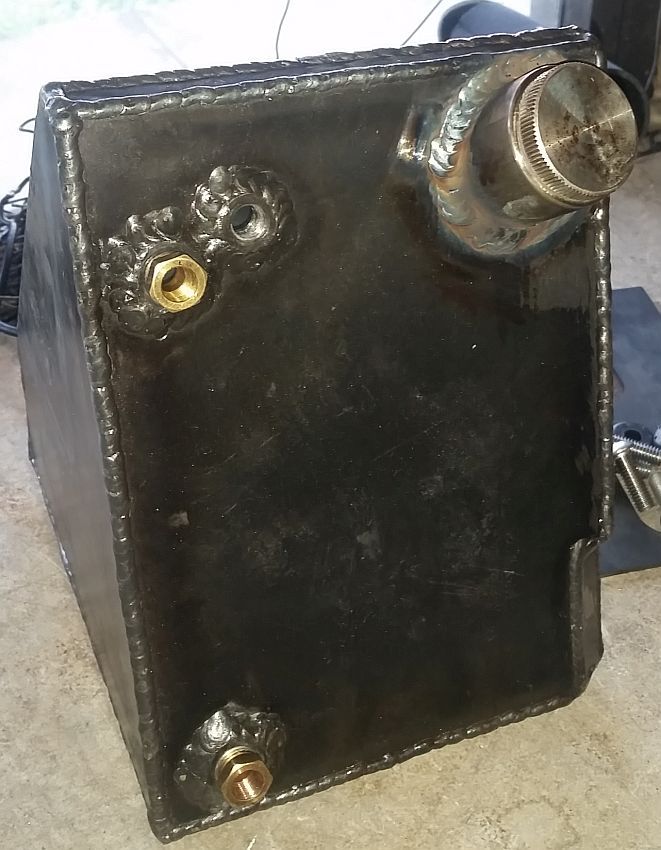
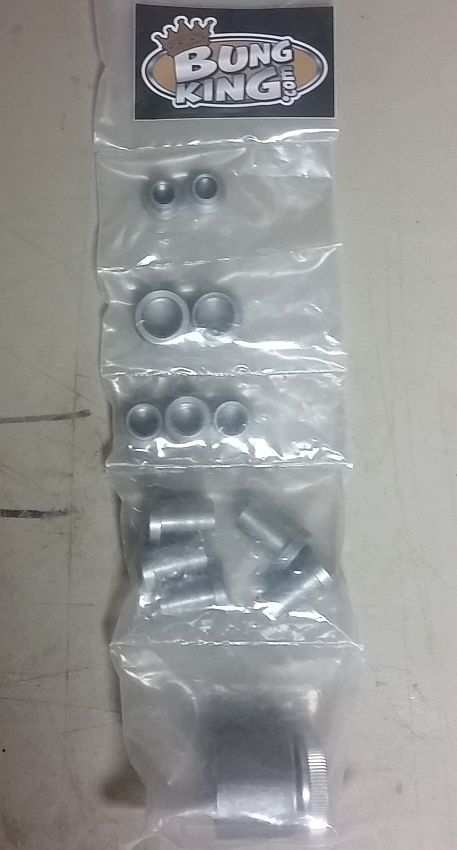
We got the tank pieces laser cut, and the bungs came in from Bung King.

Bungs_zpsnmbbyeh8.jpg


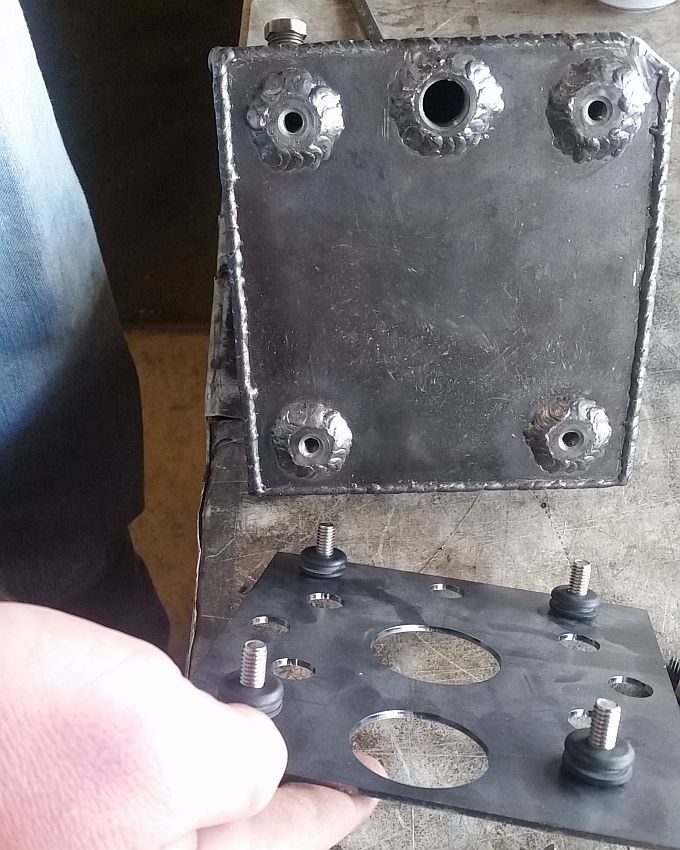
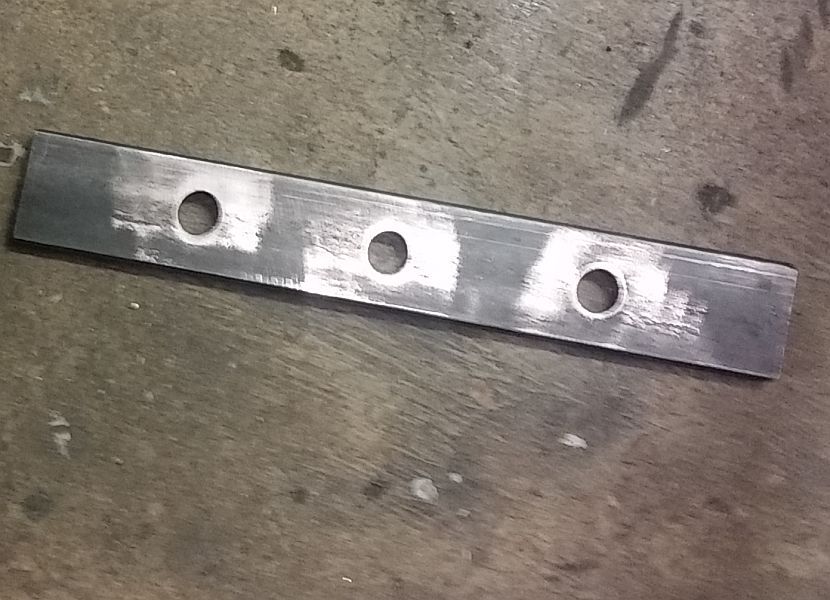
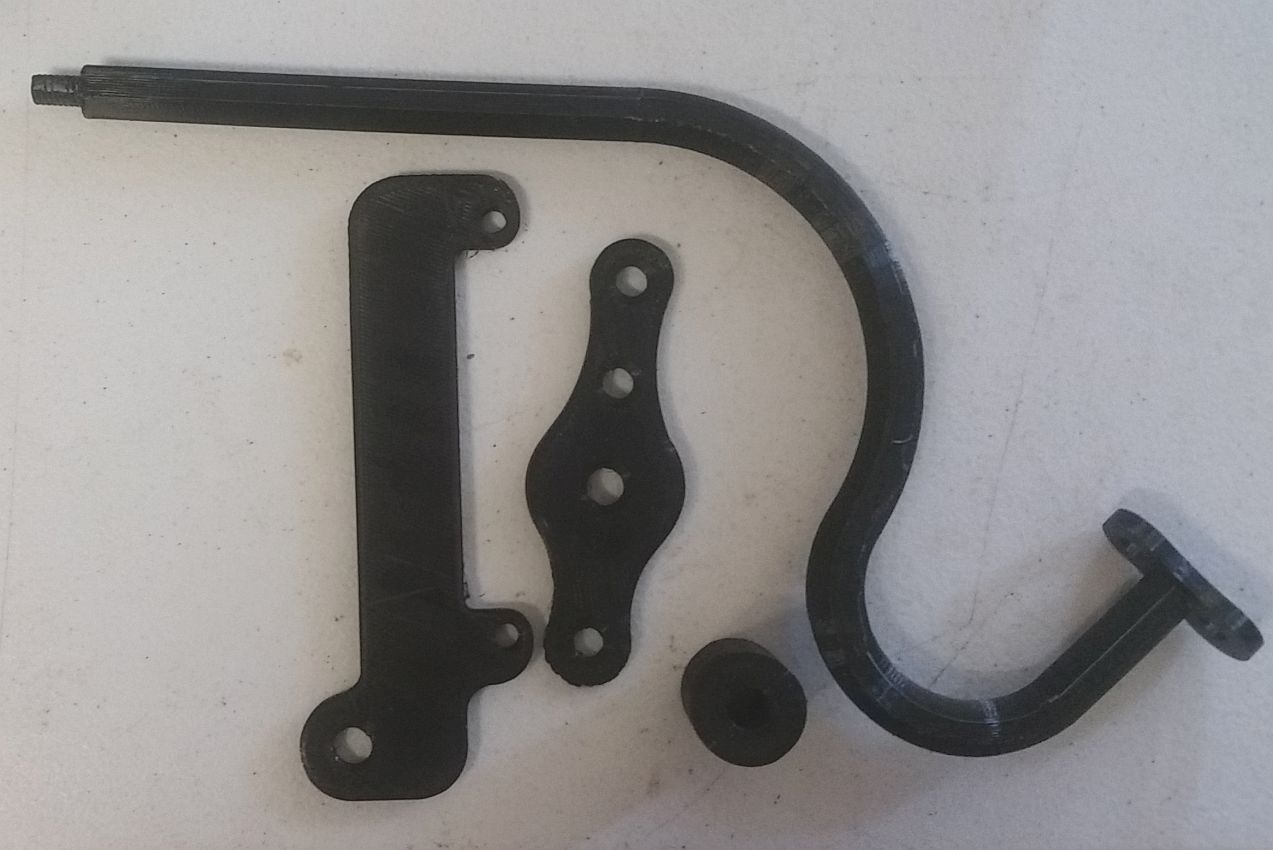
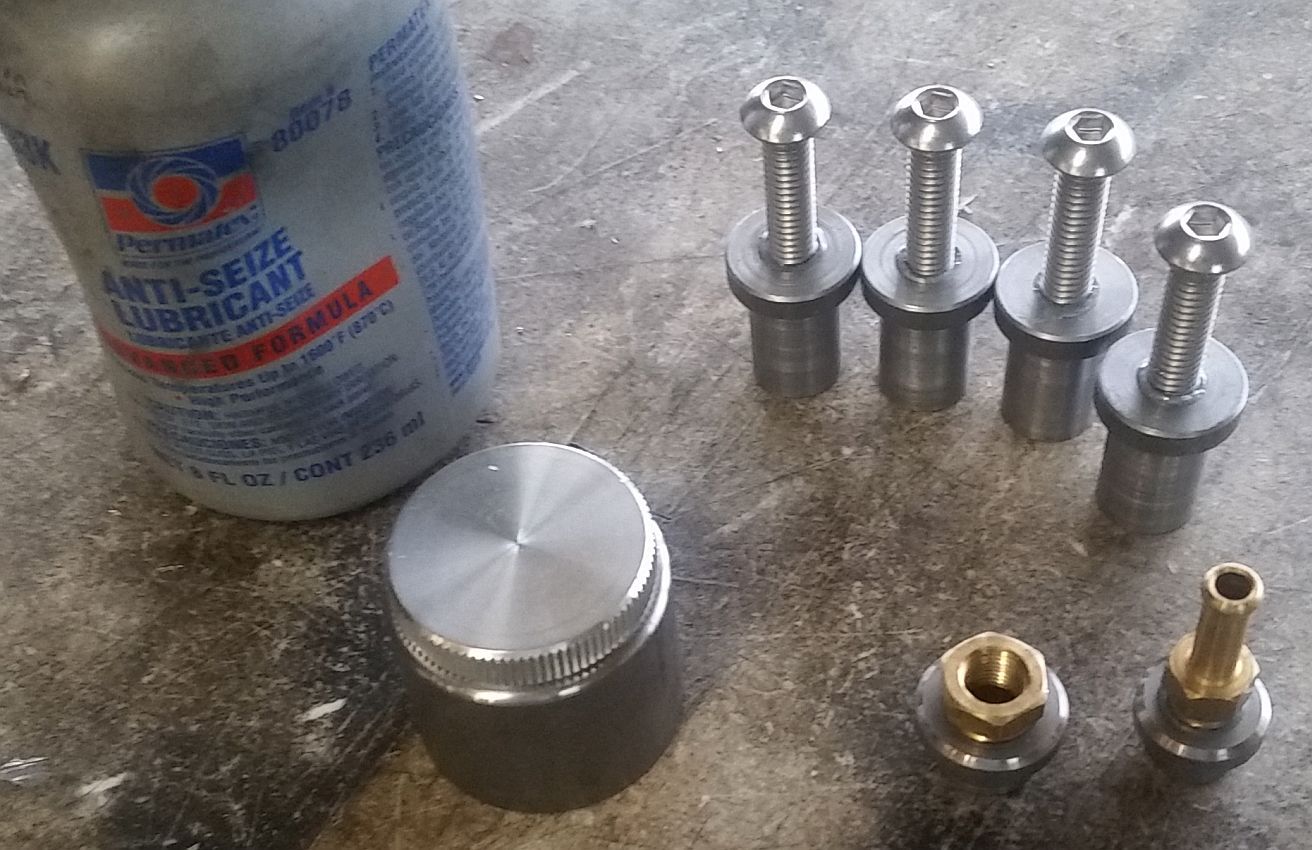
Here are all the parts laid out...
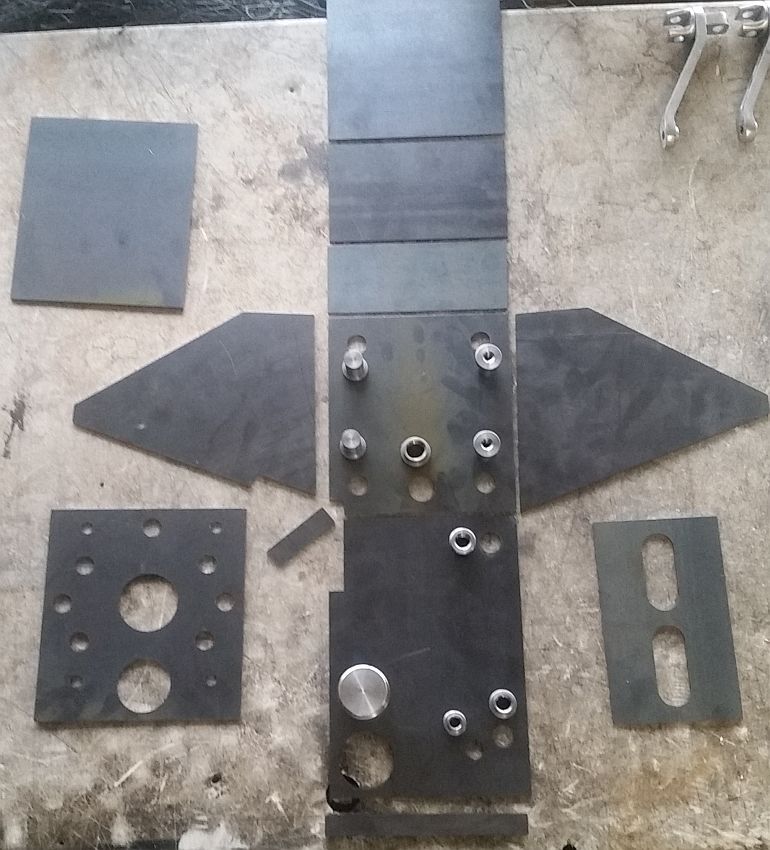
Pieces_zpsnzvnbvml.jpg


...what goes where.

Tank%20Ports_zpsvjatzheg.jpg


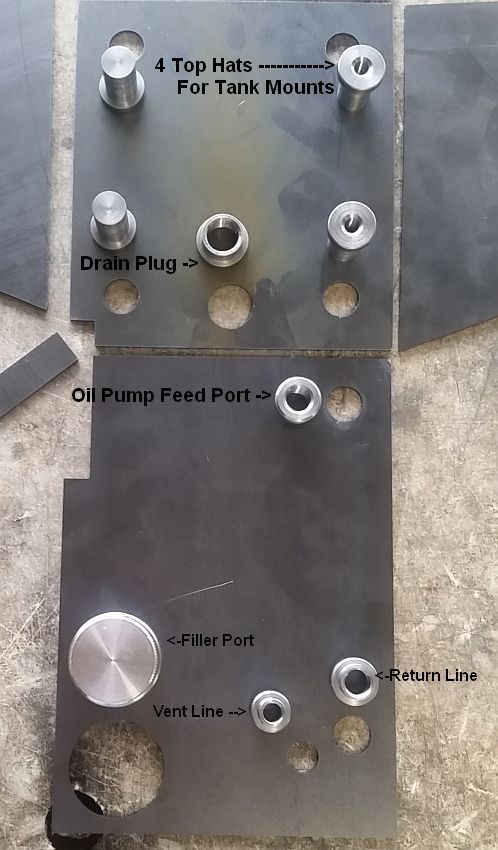
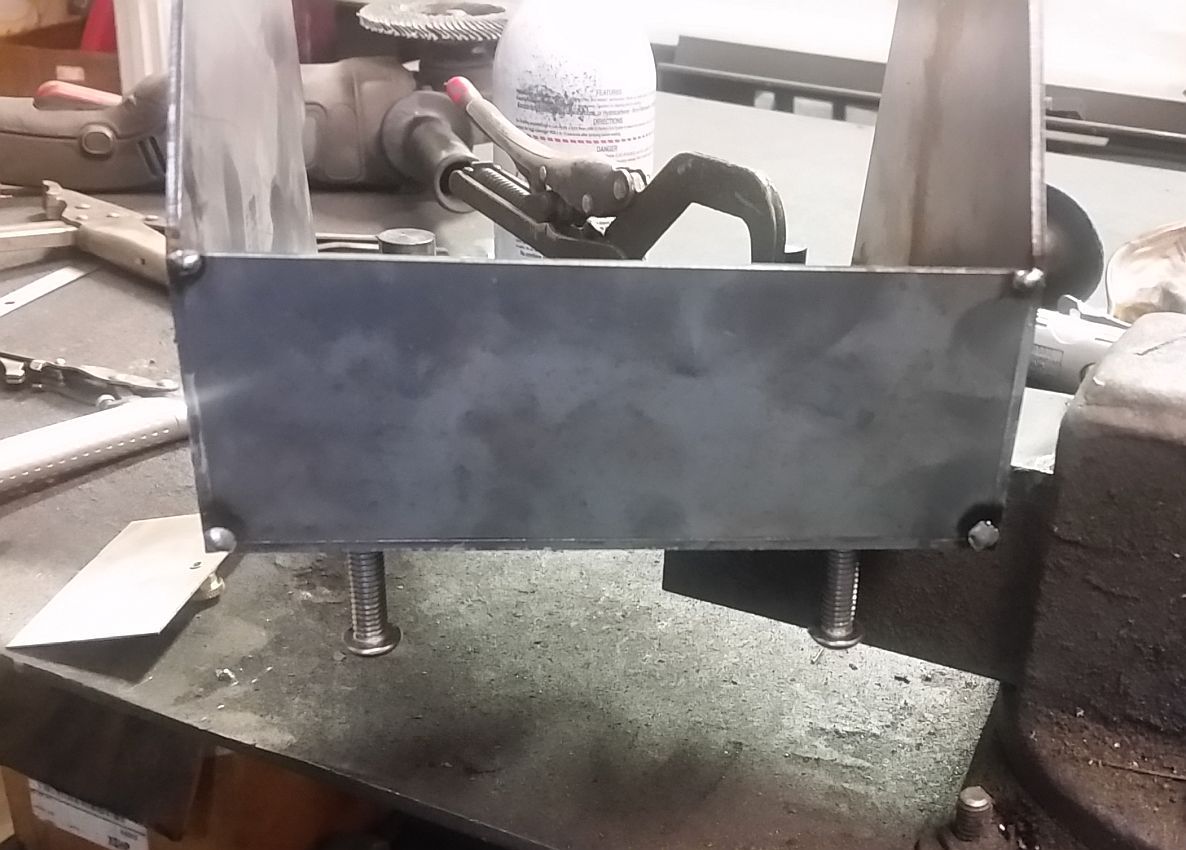
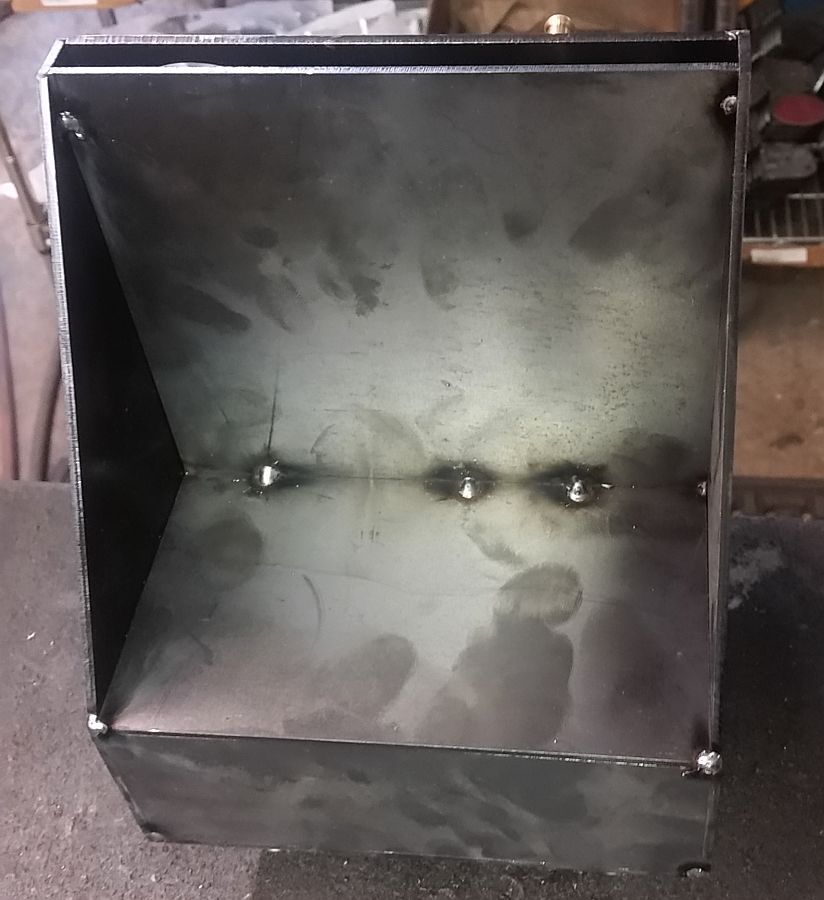
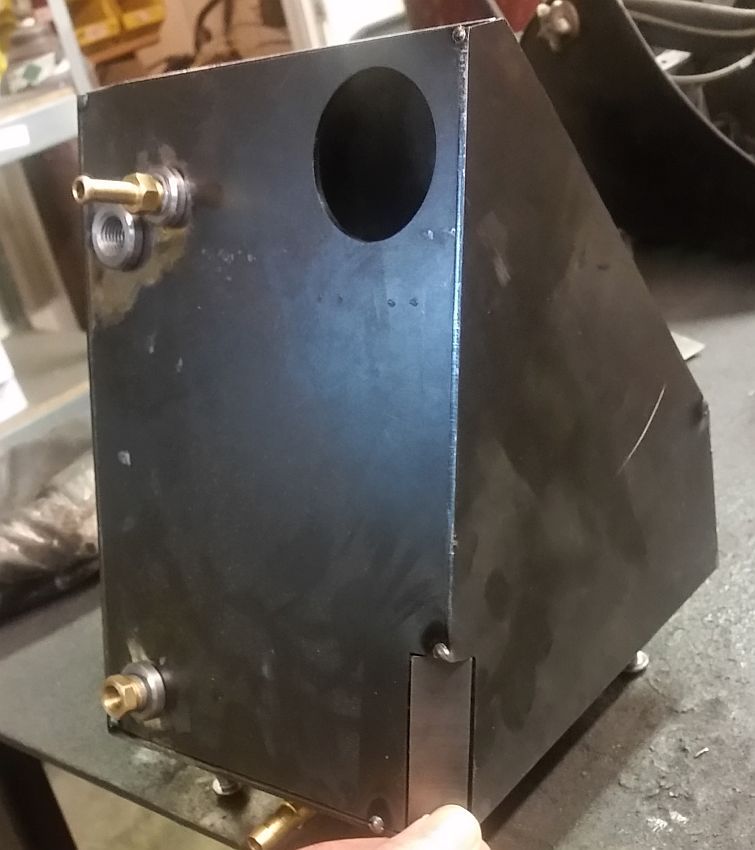
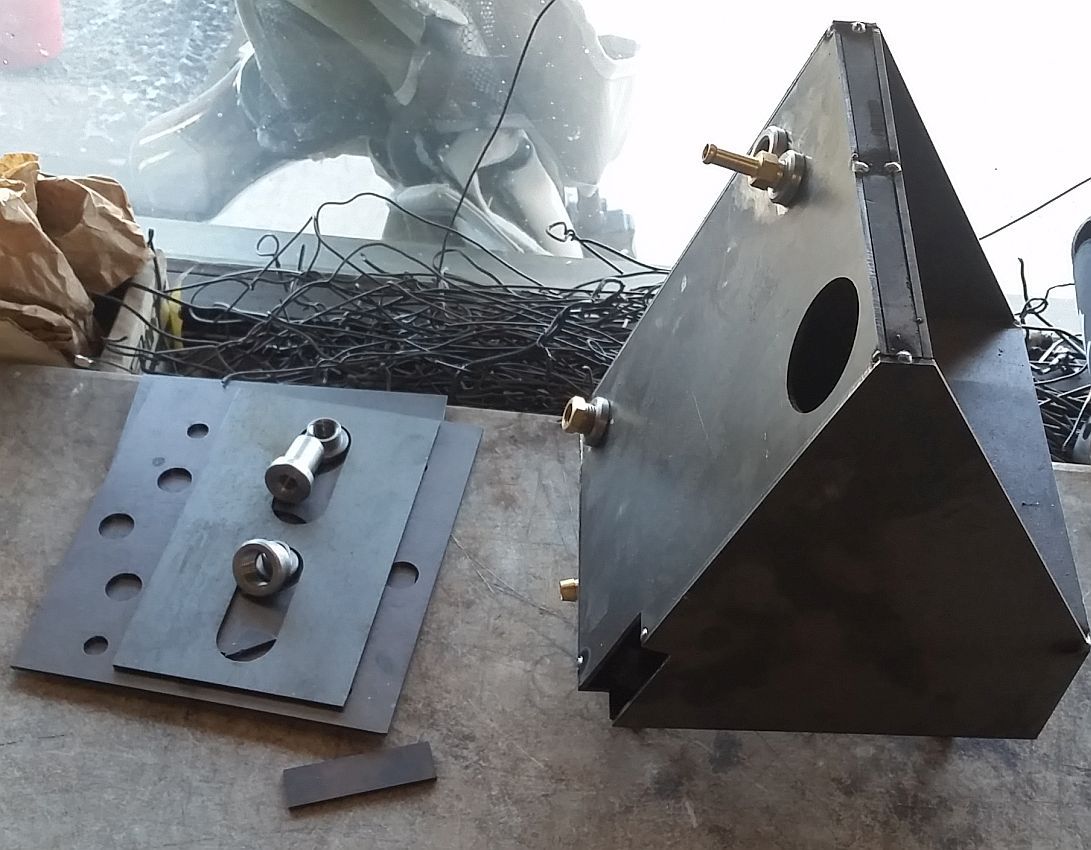
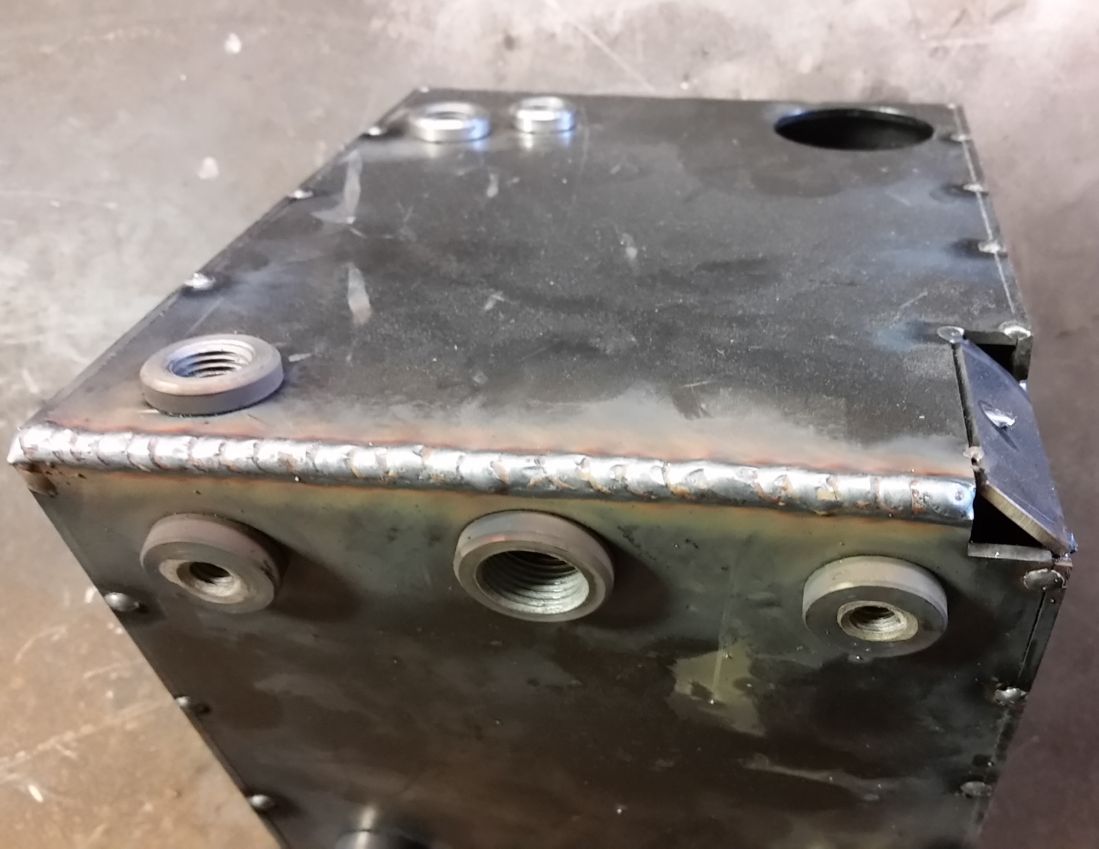
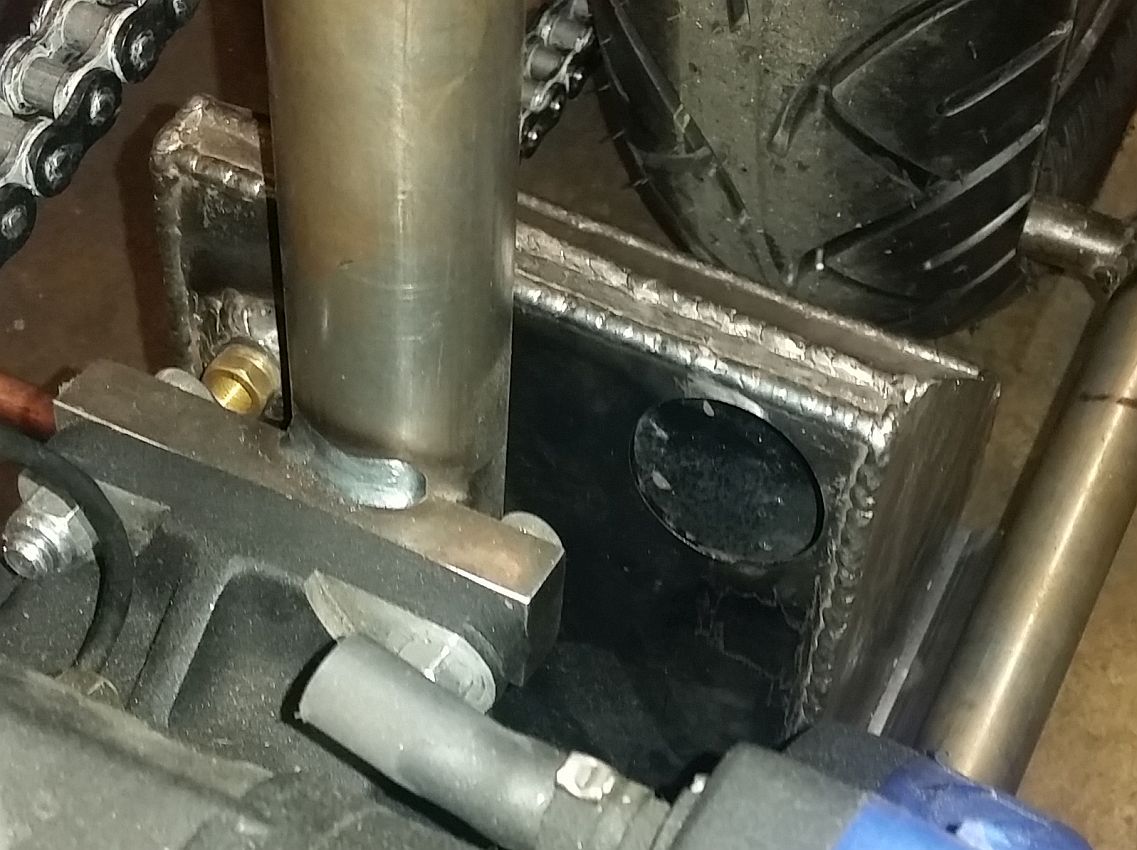
Today we are just going to tack everything together, making sure it all fits.

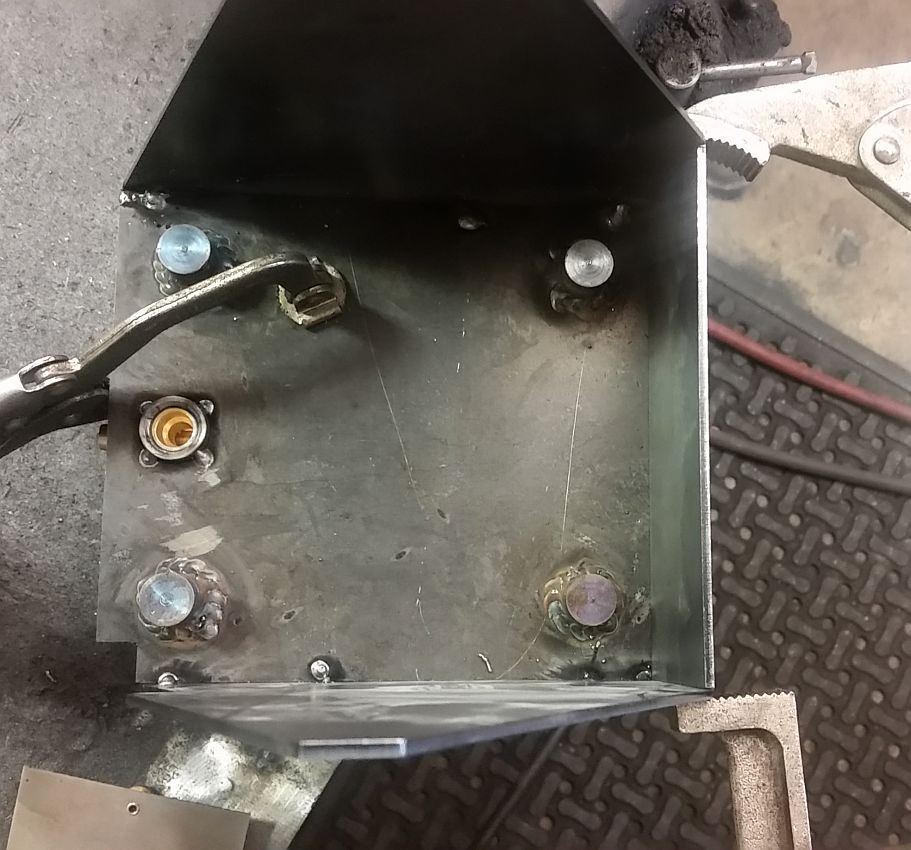
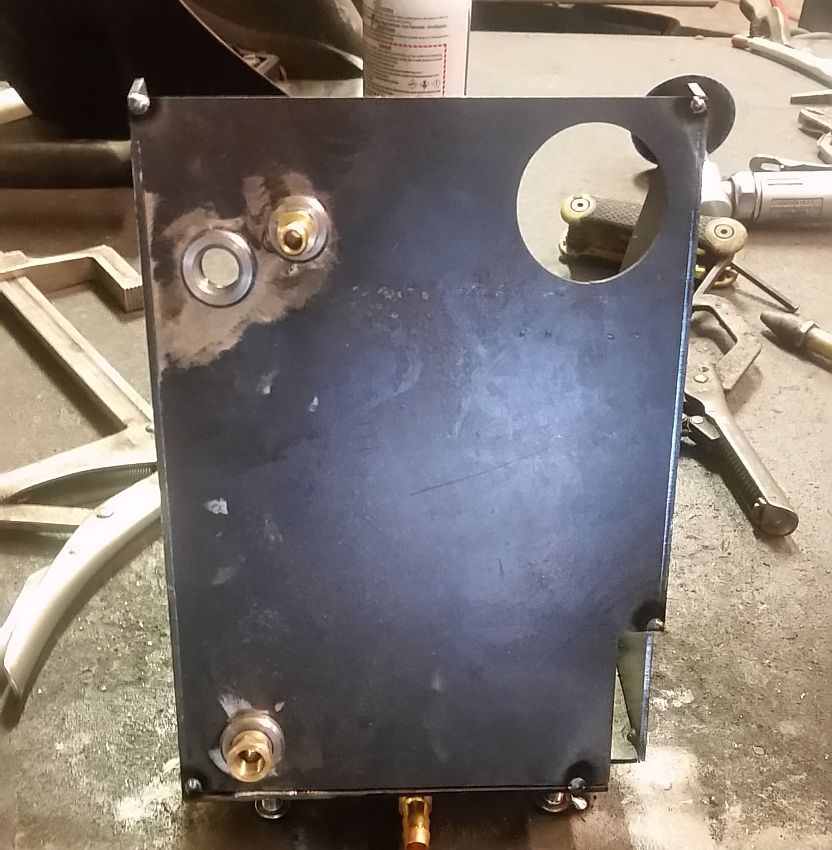
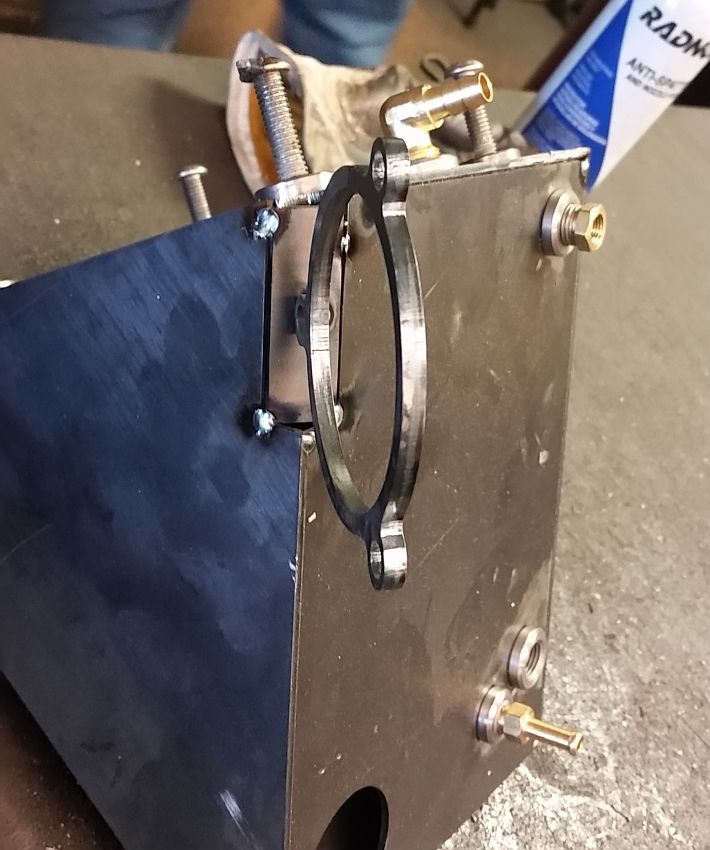
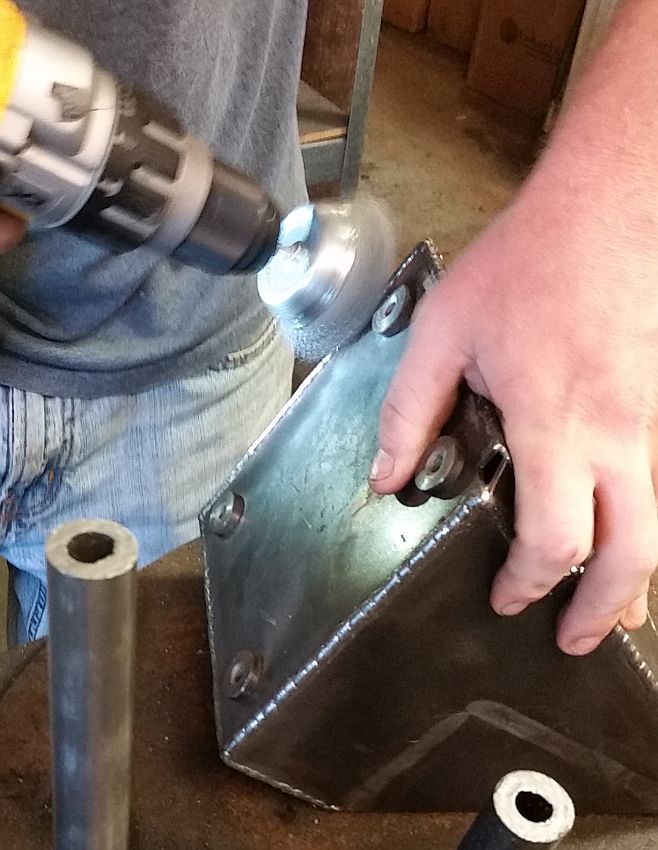
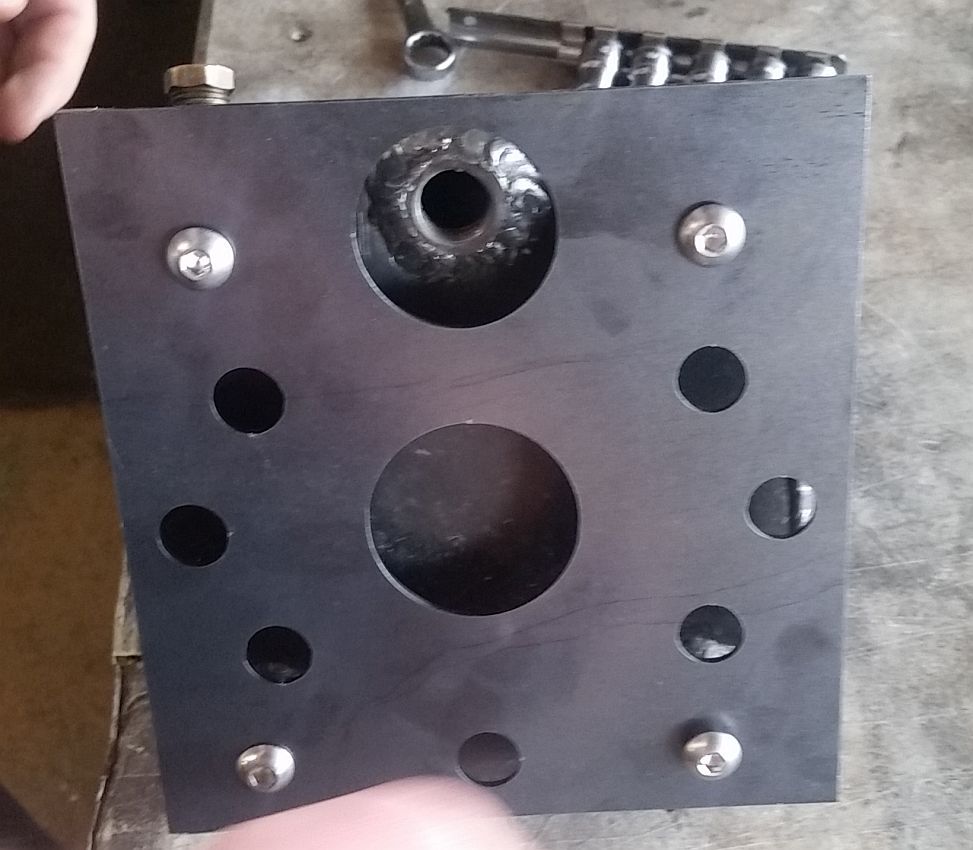
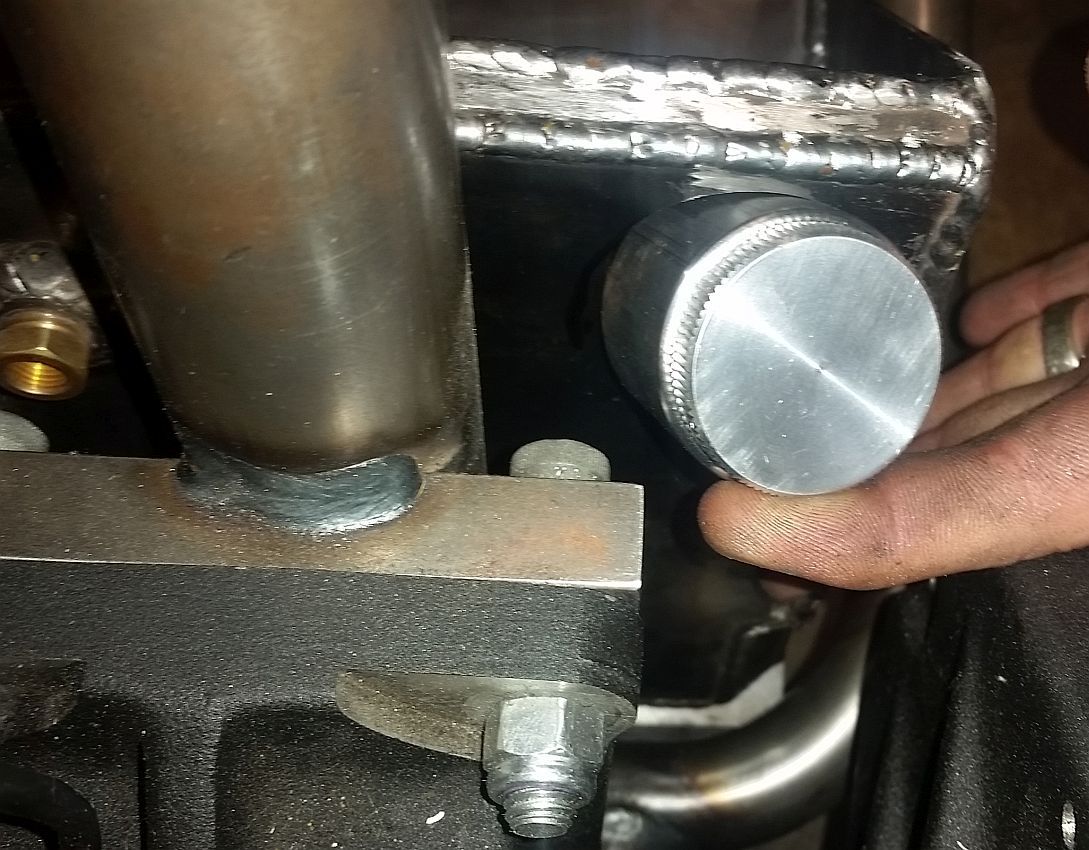
Before starting we coated the threads in anti-sieze and put bolts/fittings in to keep the threads from deforming while being welded.

Anti-Seize_zpsy6cwciyq.jpg


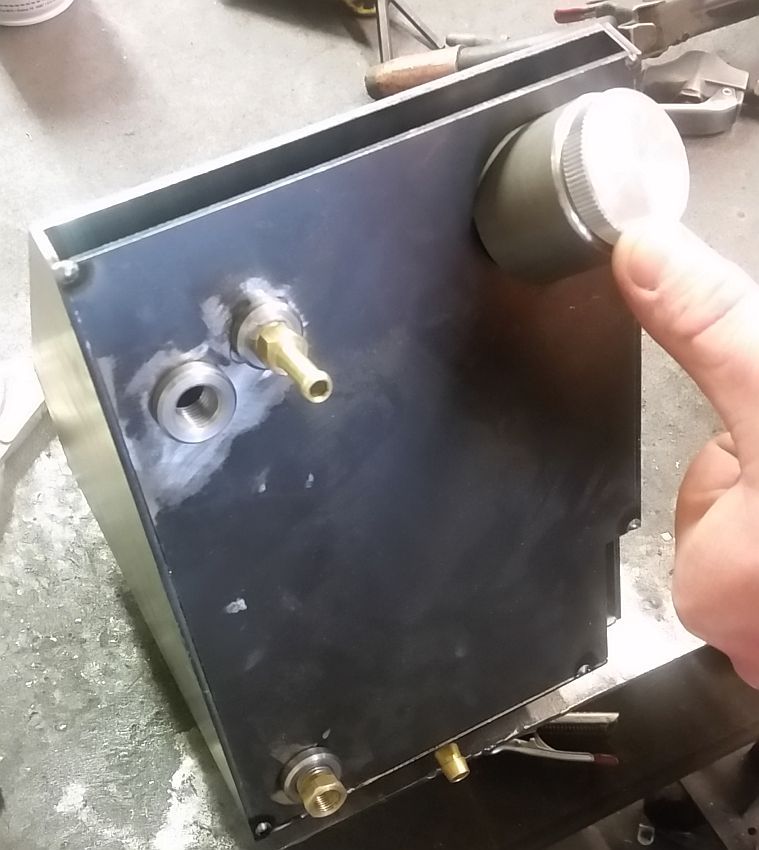
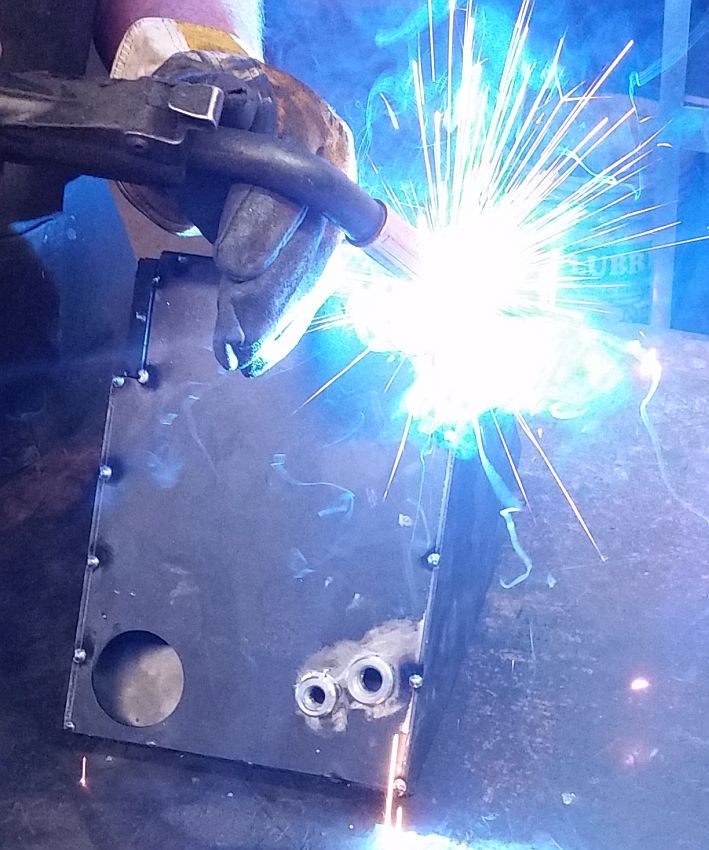
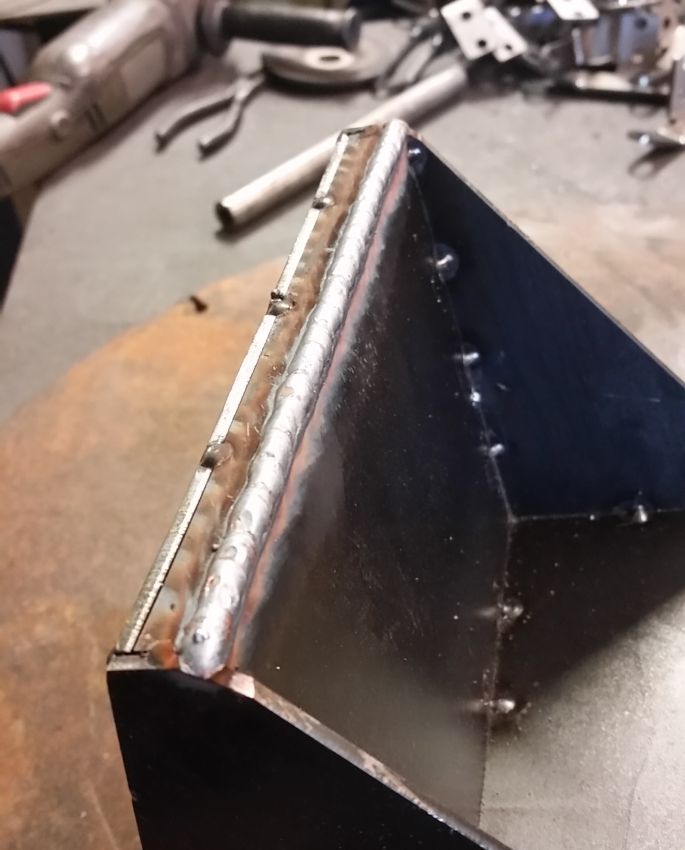
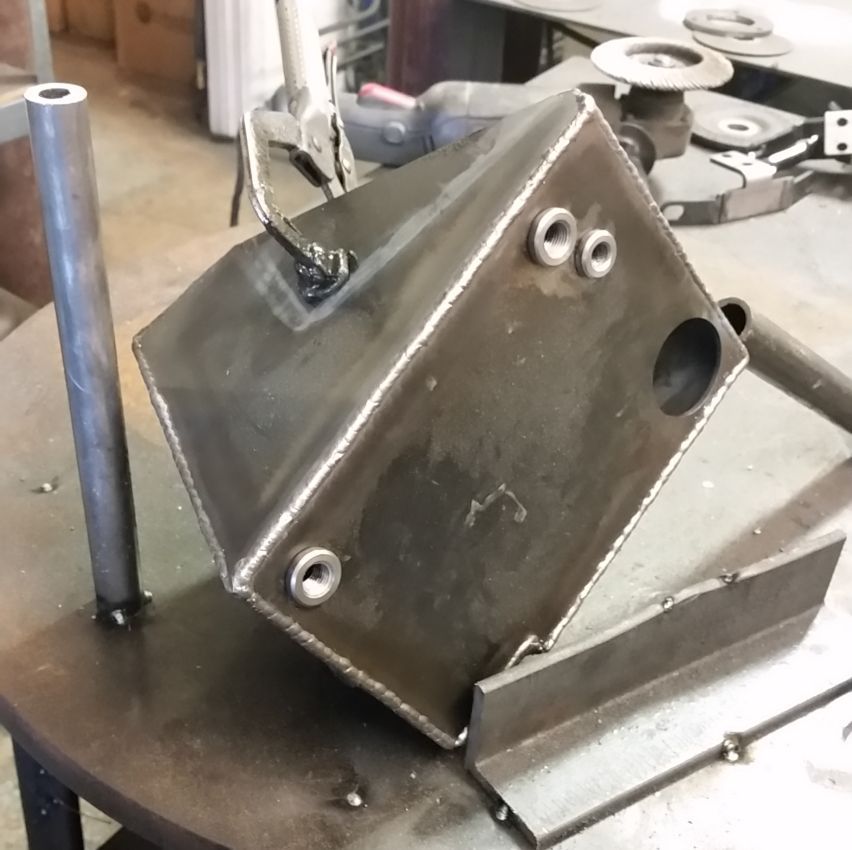
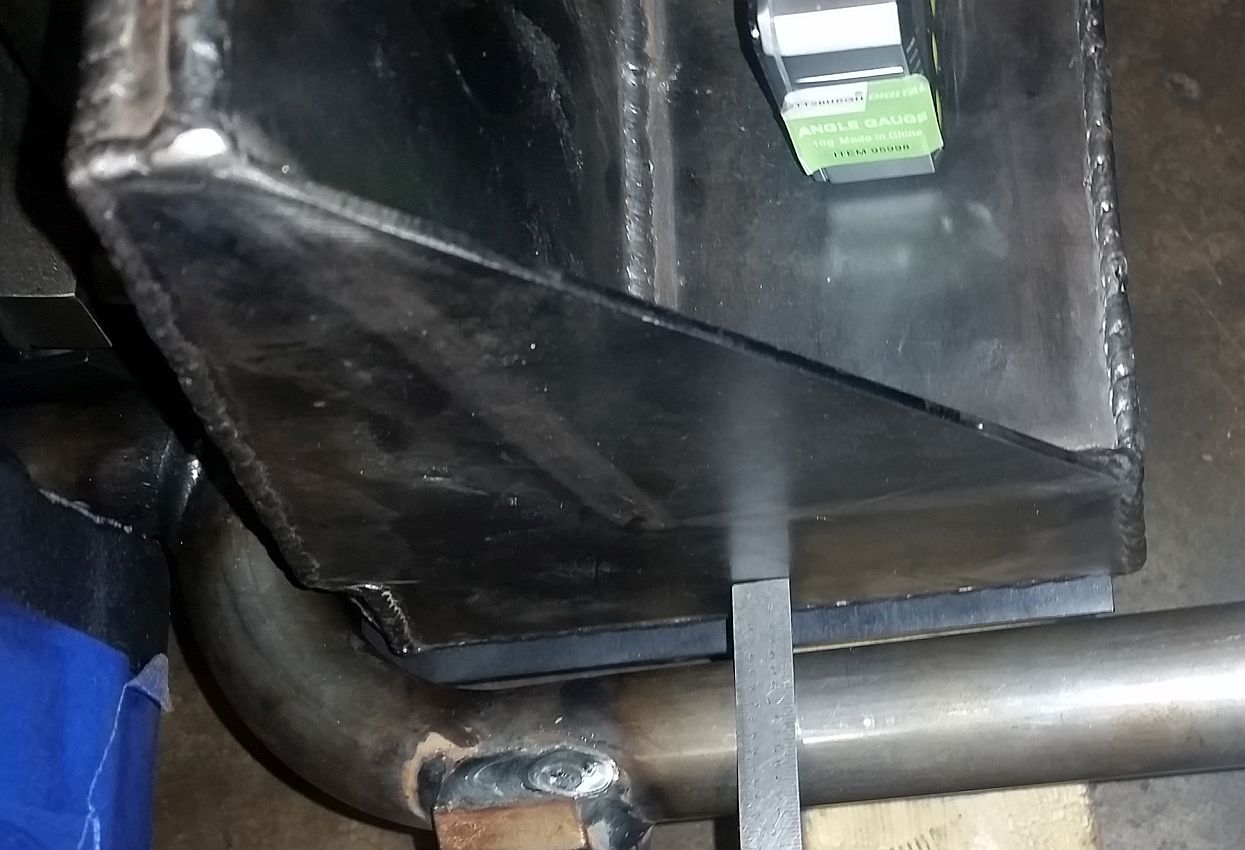
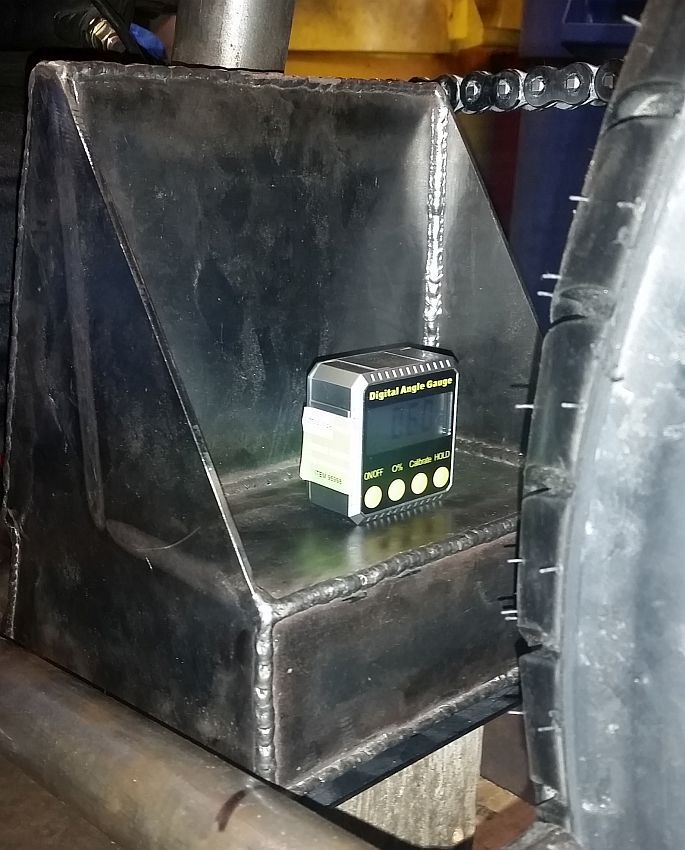
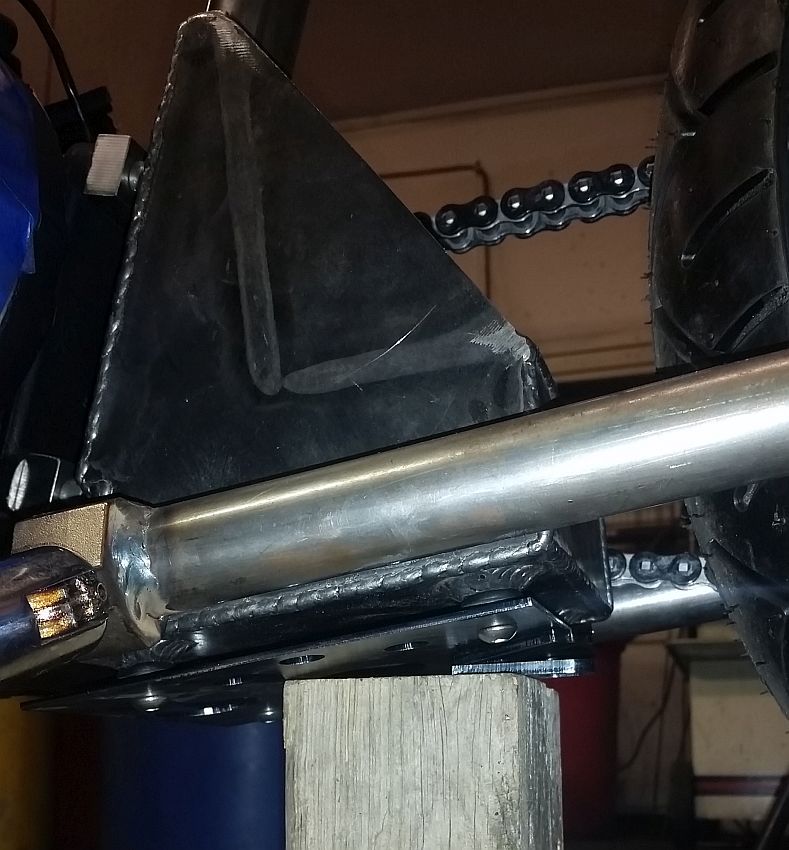
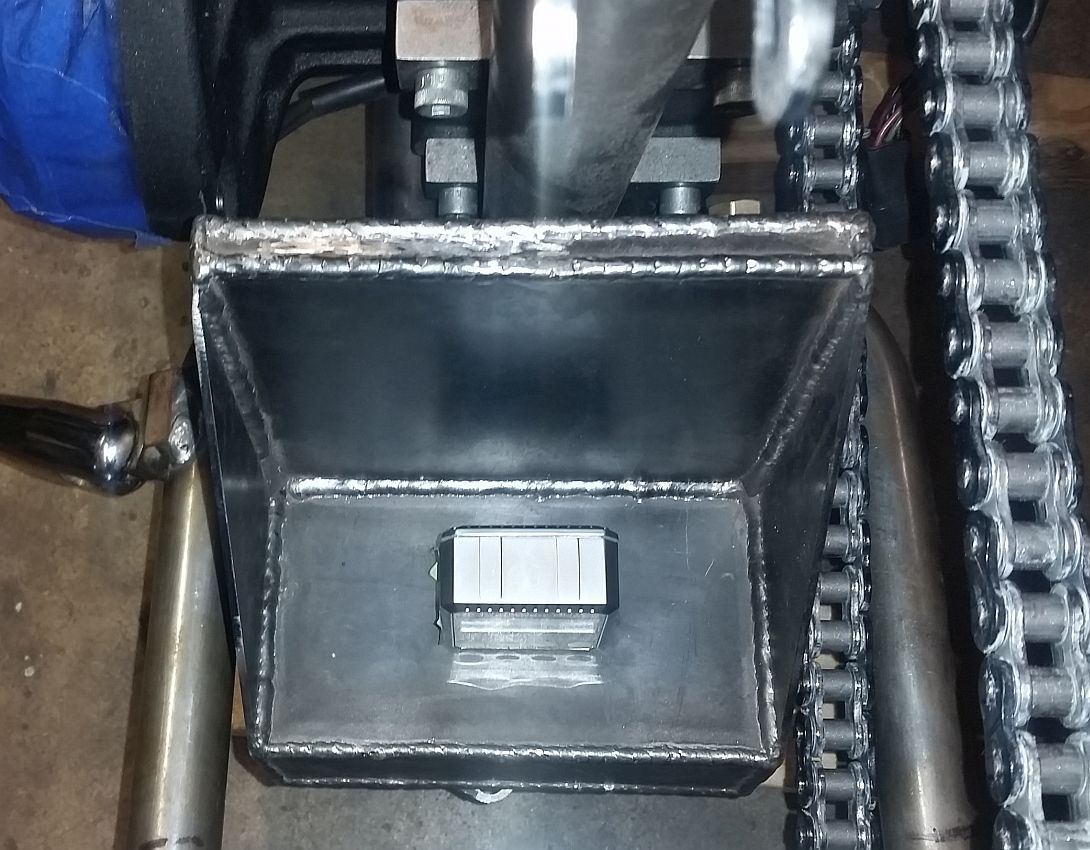
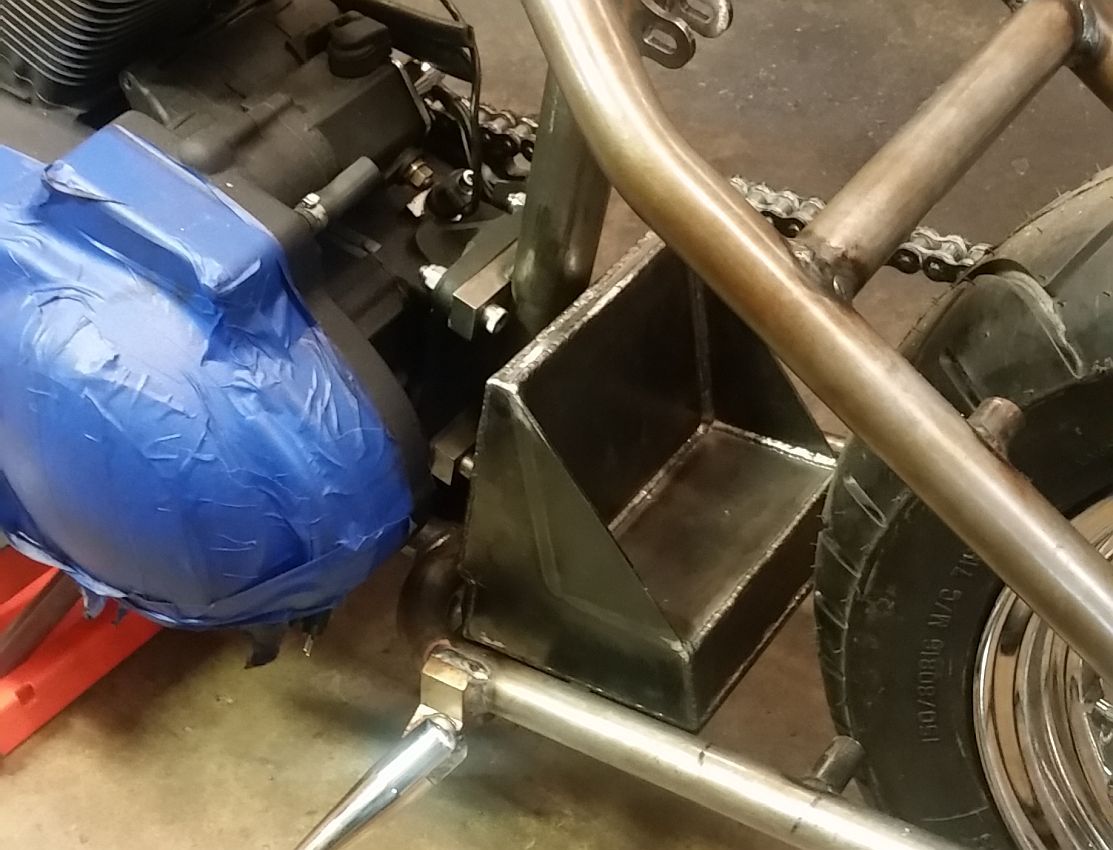
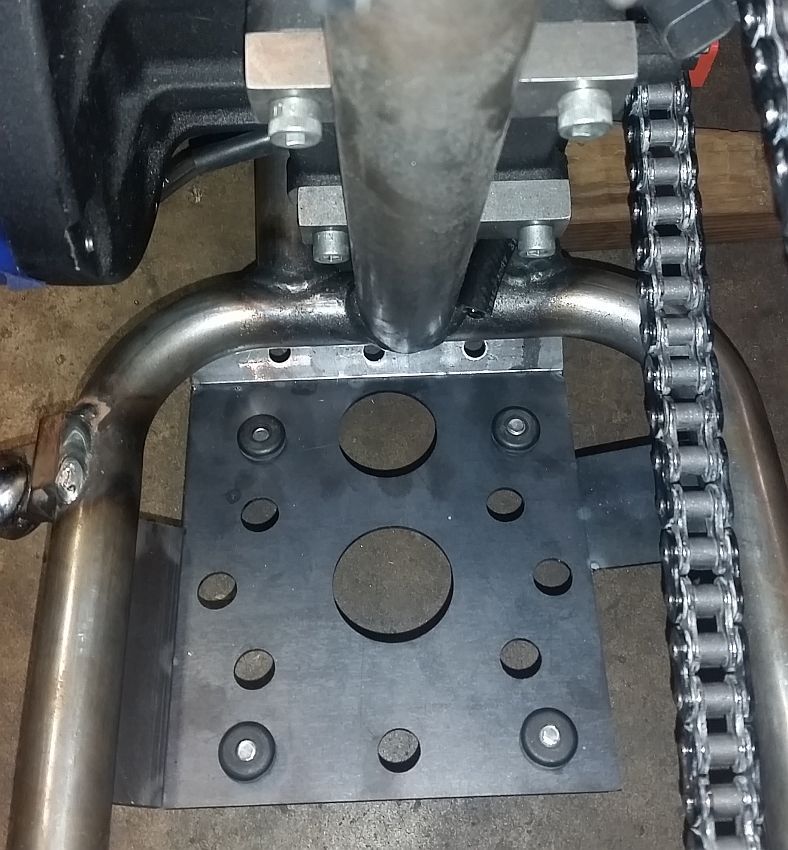
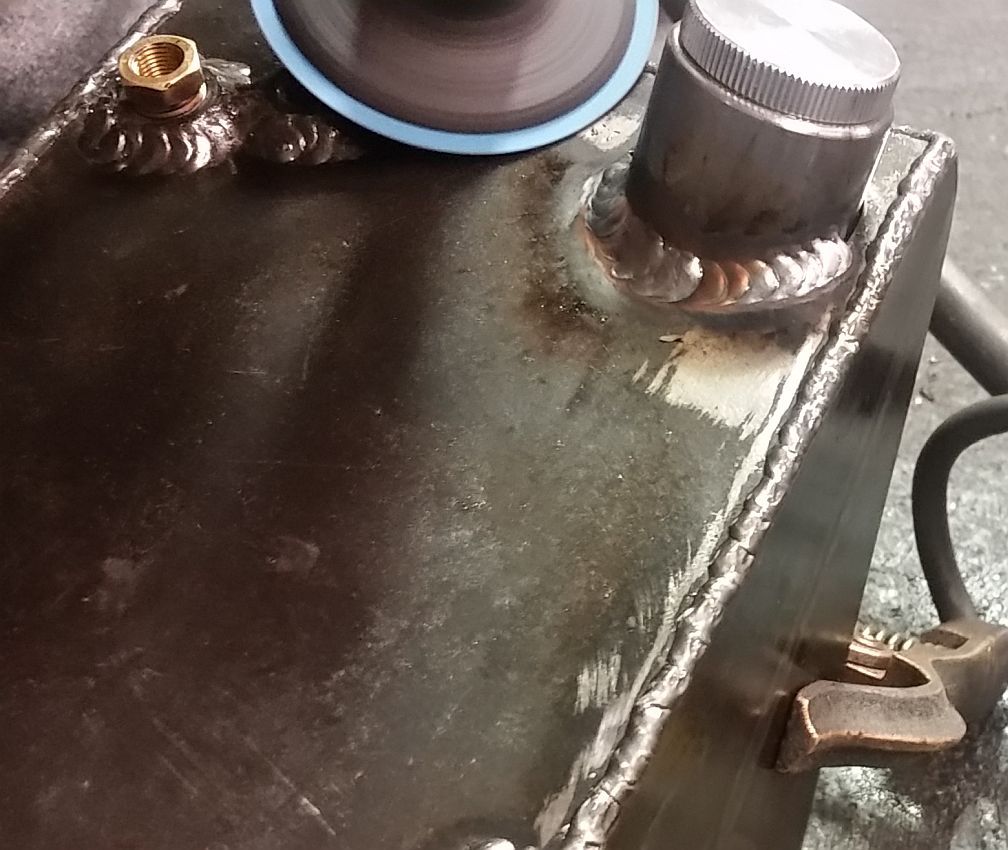
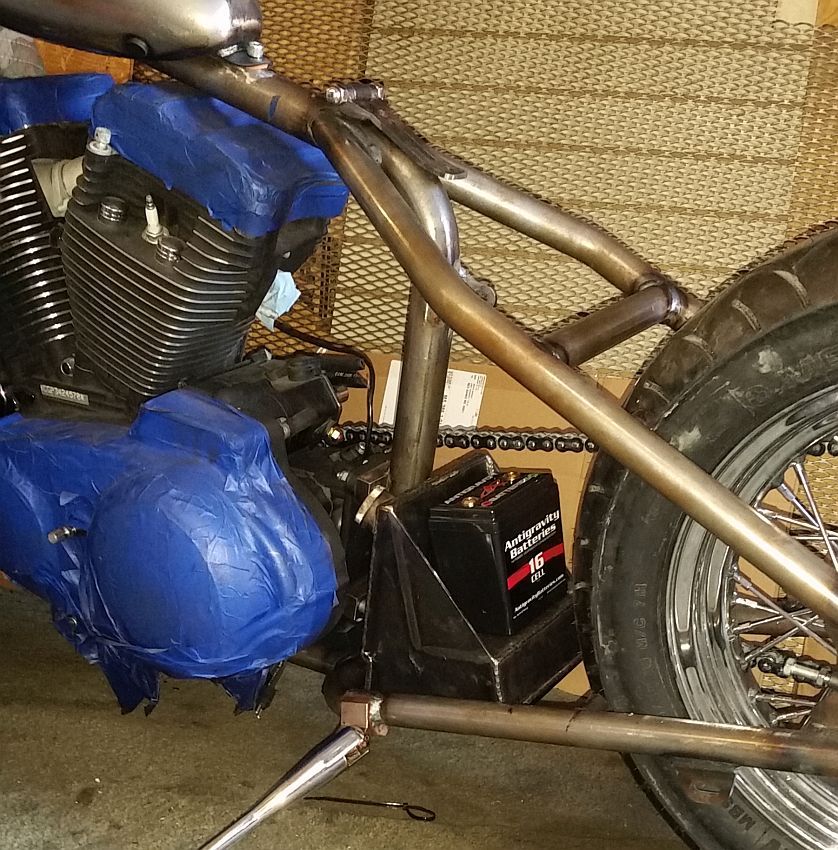
The four tophats are the only pieces that will be fully welded on the inside. They will also be welded fully on the outside. These 4 points are where the tank will be rubber mounted to the skid plate.

Bottom%20Tophats_zpsgfde8w1y.jpg


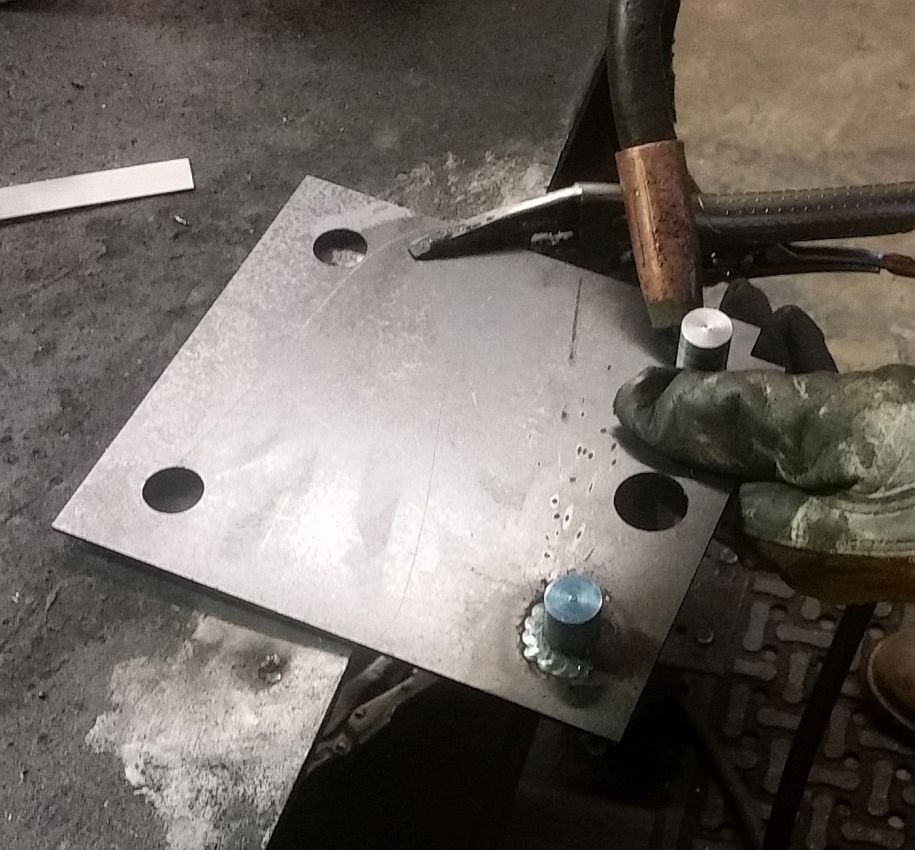
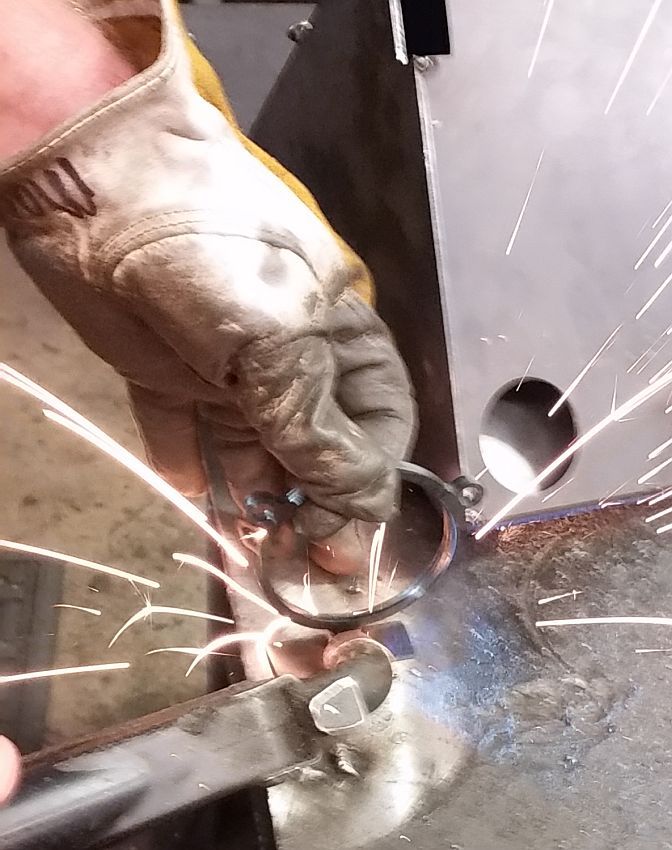
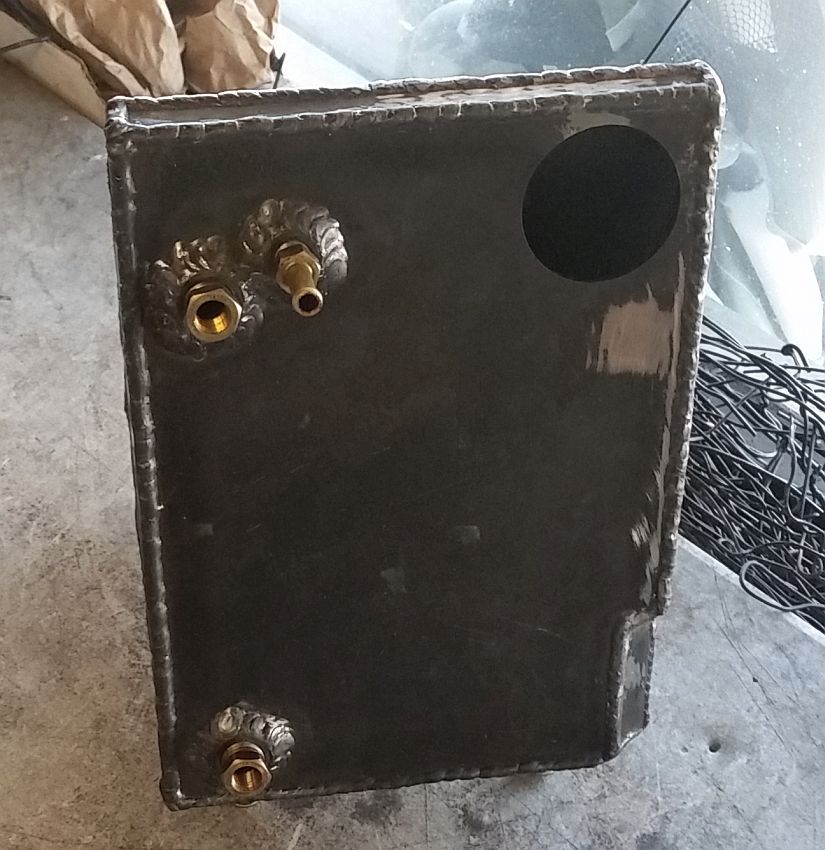
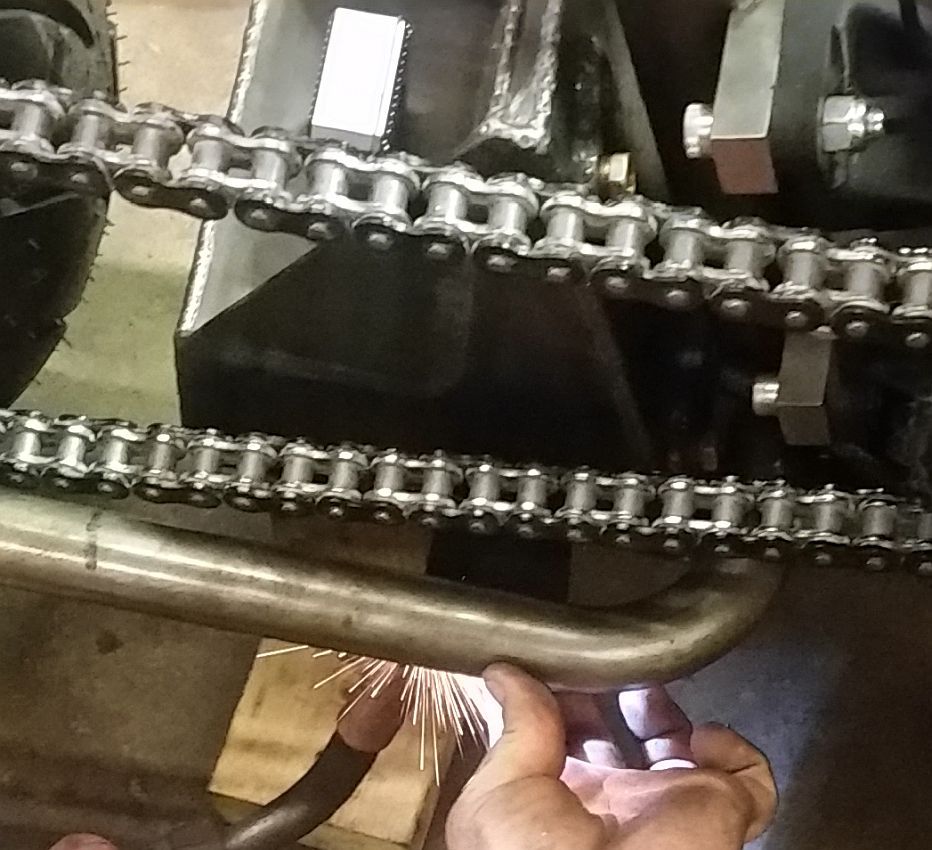
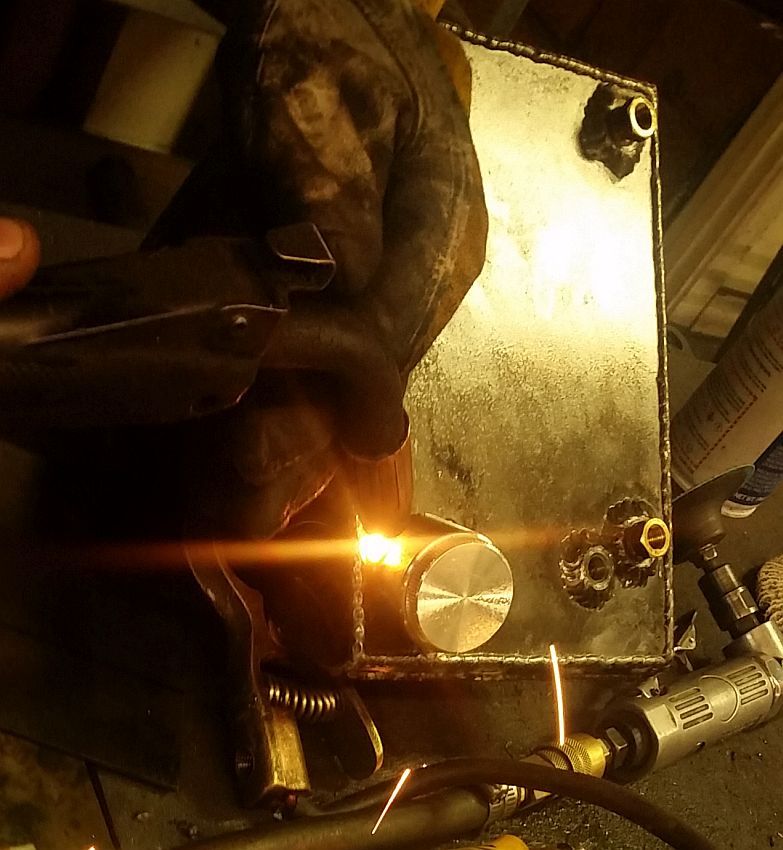
Tacking in the drain plug bung.

Bottom%20Drain_zpsirkyeelr.jpg


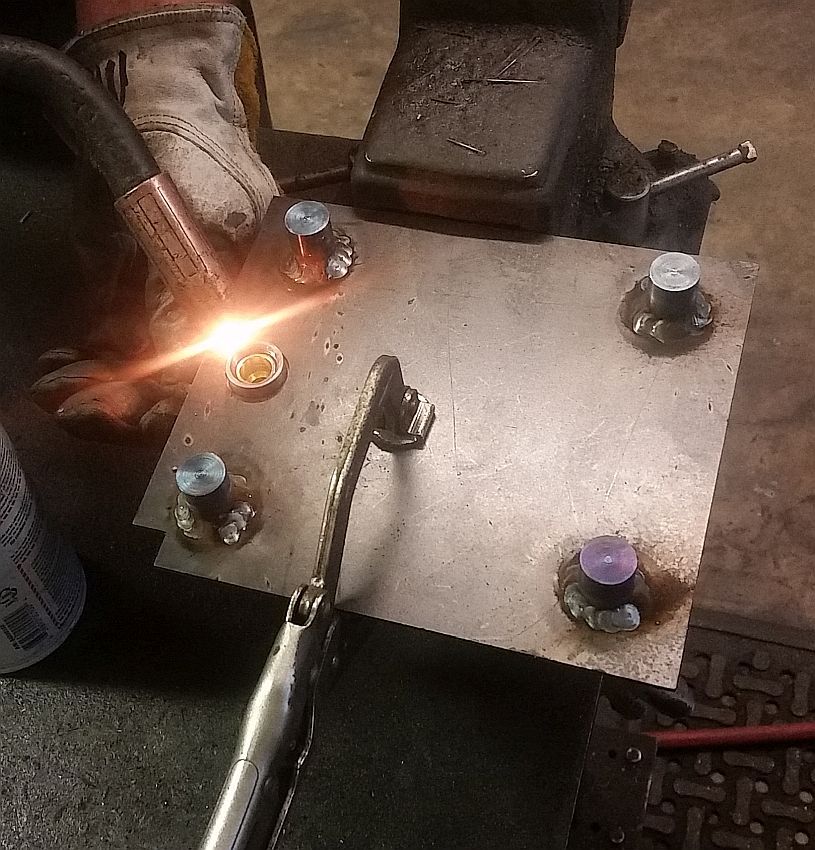
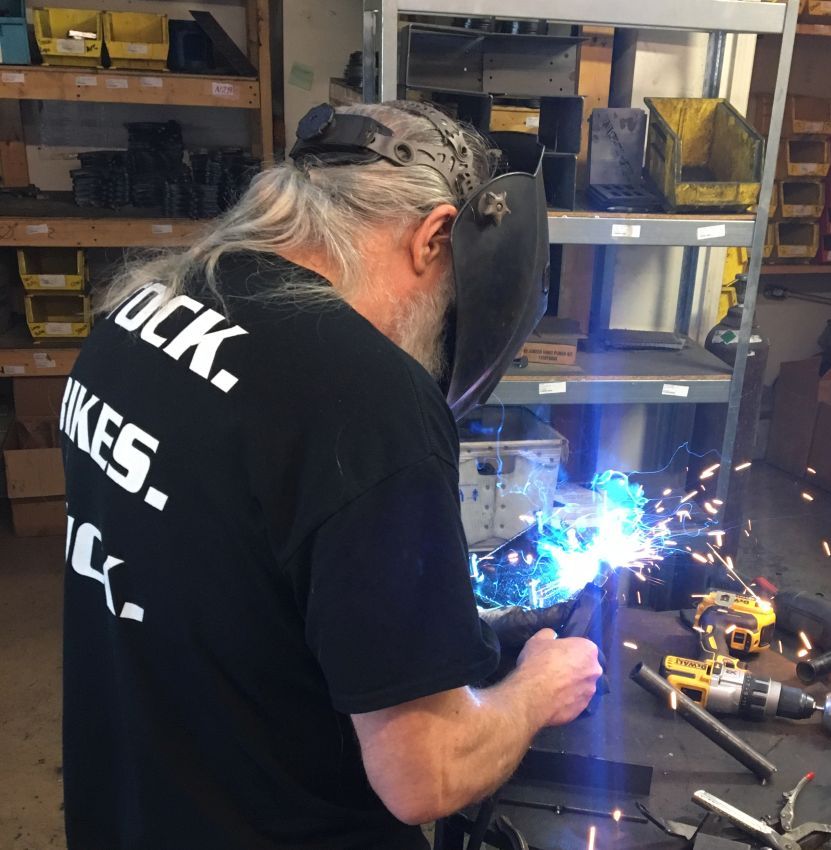
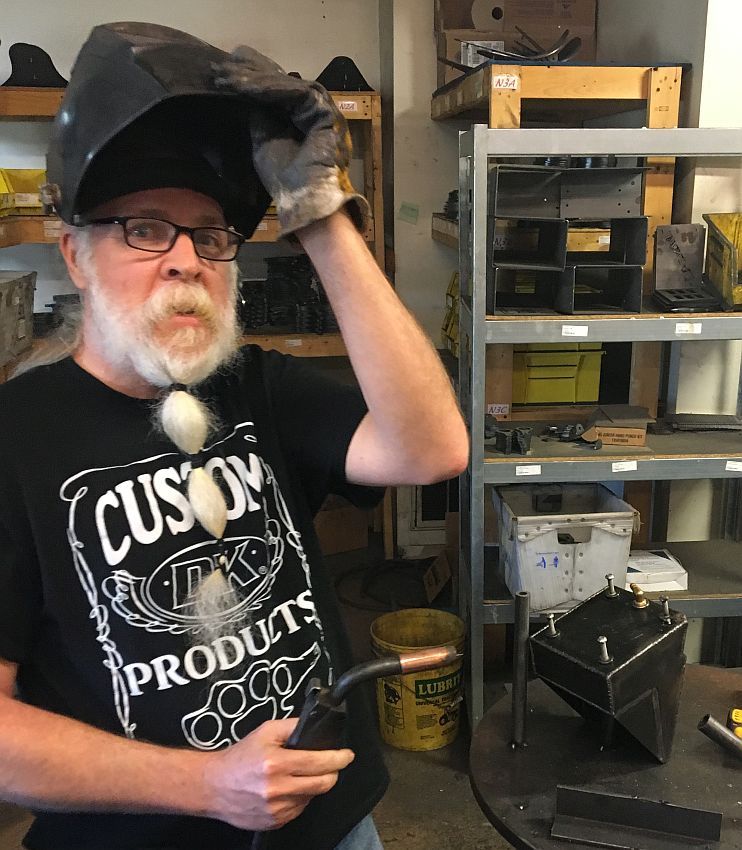
Don't laugh...or go ahead, it is pretty funny. The last time I welded was 42 years ago!

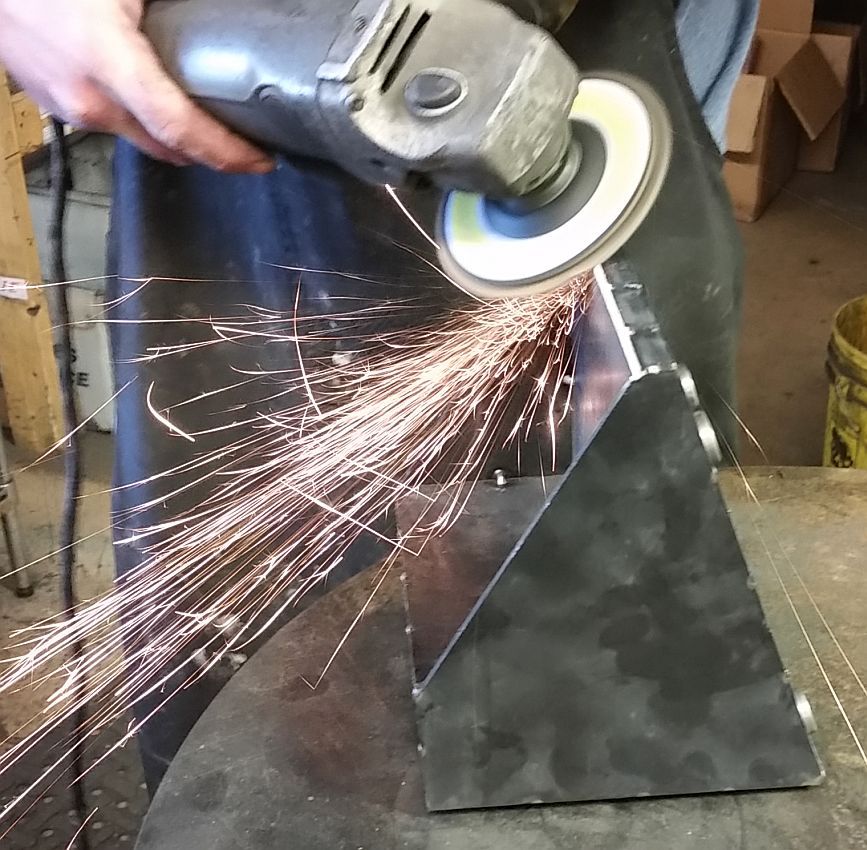
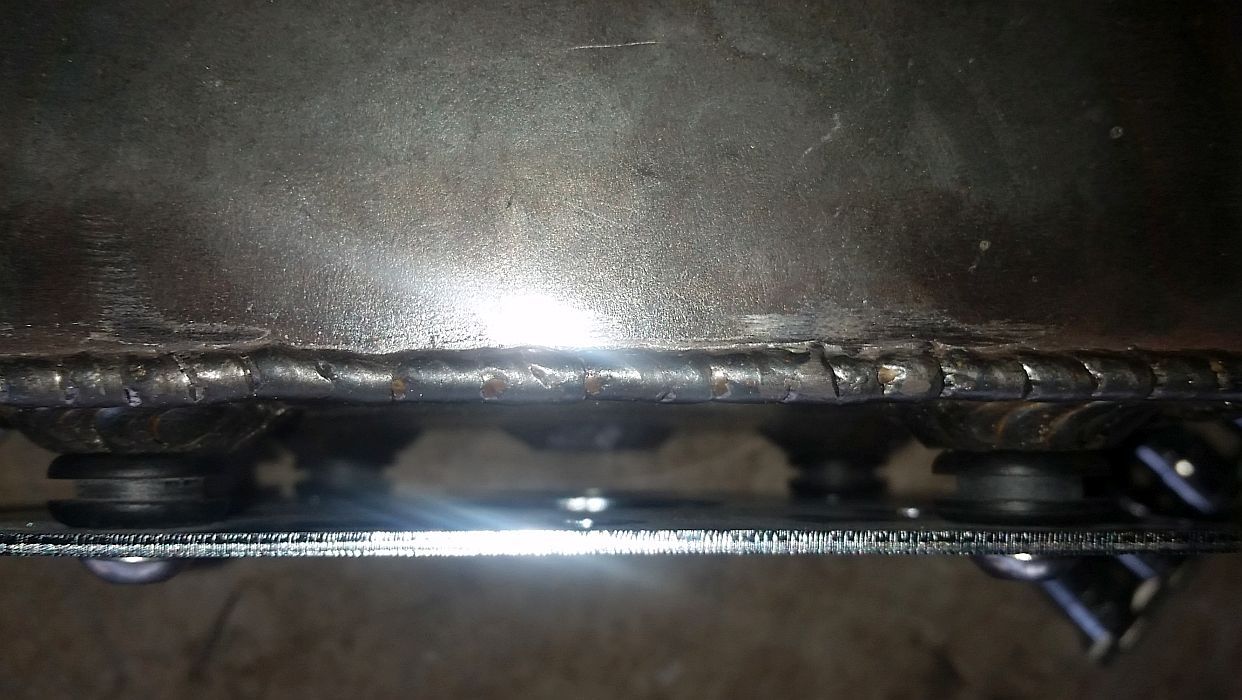
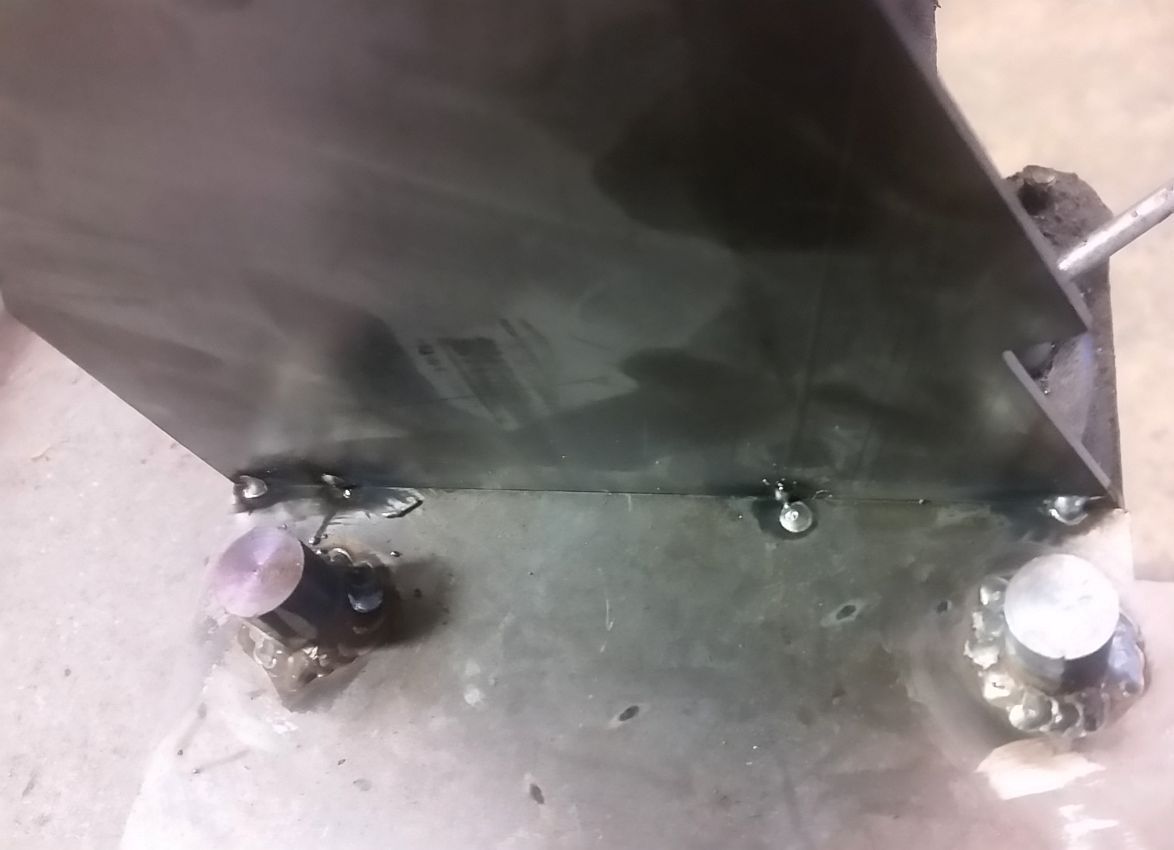
Devin held the 1st side plate in place while I tacked it. Not pretty, but it held. :D

1st%20Side_zpsovr38sgm.jpg


btw, I've shared this before, but....

The way that DK Custom Products got started was when I (the "K" in DK) had an idea for some Custom Handlebars. I had several shops that said they would weld them up for me...NONE of them had even started them within weeks of when they said they would be finished with them.

Devin (the "D" in DK) was, at the time, engaged to my daughter. On a flyer I asked him if he could weld them up for me. He said sure...AND, he had them done pretty quickly!

I had a few other ideas for parts...he made them up. Then other folks started asking for parts, and it grew from there. :)

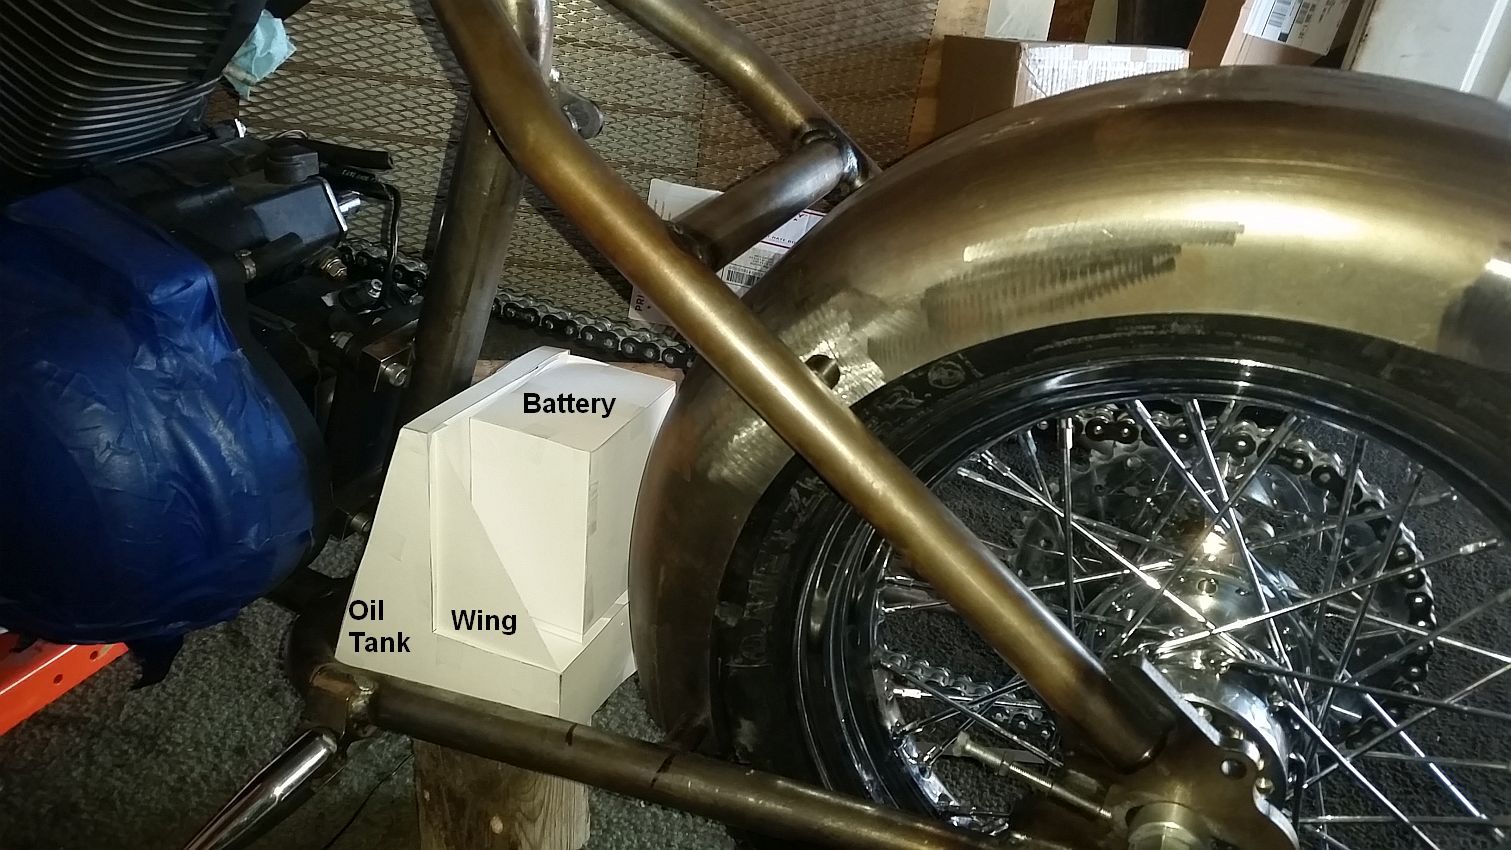
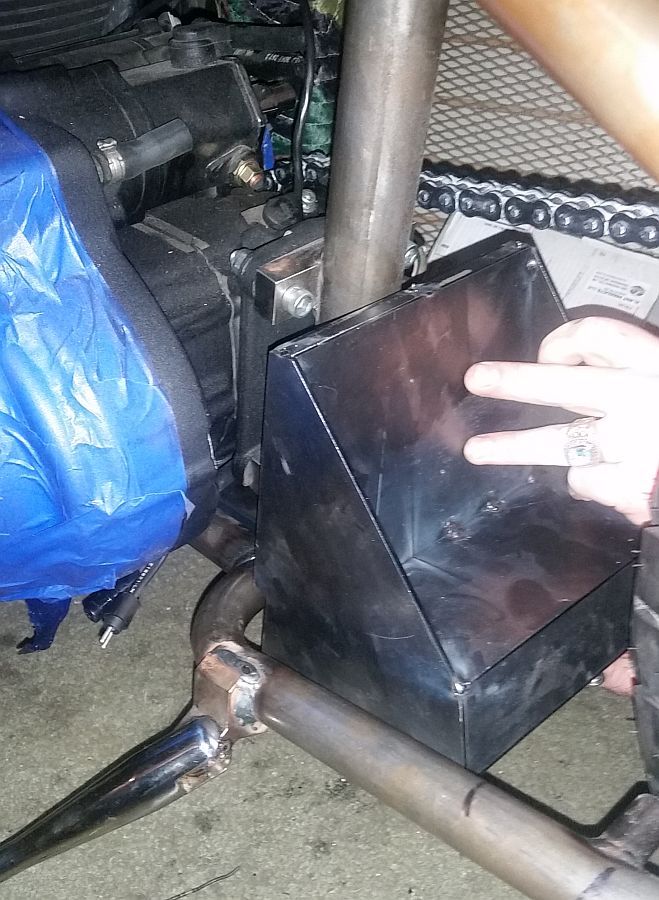
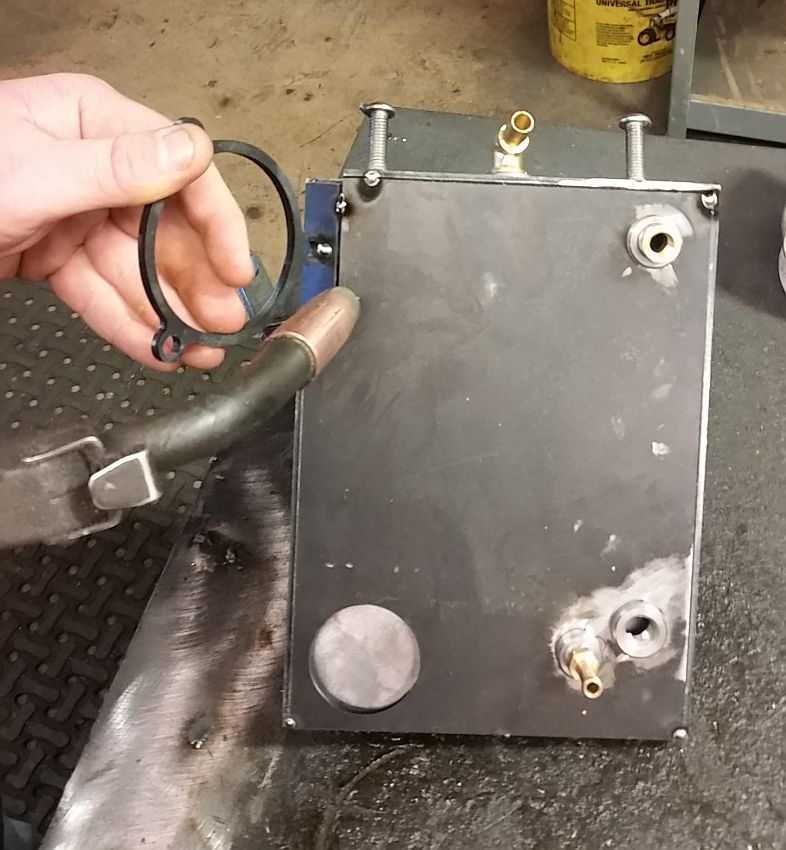
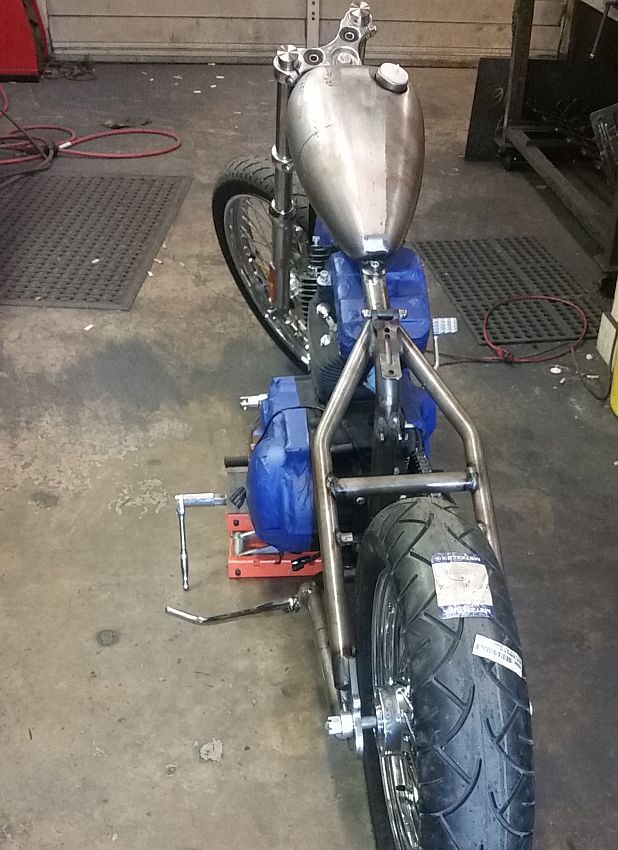
More on the oil tank in next post.
 
Oil tank continued...

After tacking in the second sideplate we put in the first cross plate.

Both%20side%201st%20cross%20panel_zps1jju6vgd.jpg


Everything is square!

Tacked%20in_zpsousbnsen.jpg


Backplate tacked in....

Back%20Panel_zpsxs0a2vf4.jpg


L-Tray tacked in...

L%20Tray%20tacked%20in_zpsmavleh2l.jpg


Looking at how the filler bung will be placed. Have some cutting to do, plus we'll be welding the entire tank before welding this big bung in.

Filler%20Cap_zpsssjhrfwe.jpg


Top piece...

Top%20Piece_zpsem45m633.jpg


Corner piece. This part of the tank is "cut-out" to accommodate the curve in the frame rail on the low side.

Corner_zps0rap2uel.jpg


All tacked together, and square.

All%20Tacked%20together_zpsbqmvwikv.jpg


From an idea, to a card stock mock up to....

Mock%20w%20Batt%20Wing_zpsfkxnsuut.jpg


...holding it in place on the bike....

Test%20Fit_zpsjanimmpv.jpg


How it sits now. Gotta weld it up, and do the skid plate...but hard part is done. :)

Waiting_zpsc7uryw7d.jpg


Kevin
 
Wow, it has been almost 2 weeks since I've done anything on this build. I have NOT lost interest in it. We've just been very busy.

I have this coming Friday afternoon blocked out to do some work on it. Will be updating soon after that.

Kevin
 
Last Friday we had some time (not as much as we hoped) to make a little progress on the SBS Chop bike.

Oil tank is sitting right where we left it 2 weeks ago-

1%20Where%20we%20left%20it_zps6w4dommd.jpg


Tacking a little holder ring to the corner piece...

2%20Temp%20Holder_zpsjbjxyme4.jpg


...so we could hold it in place while tacking it to the tank.

3%20Tacking%20corner%20in_zpscwy1mucn.jpg


All done-

4%20Done_zps3lrkebxz.jpg


Even though the seams are not at a 45*, we are beveling one edge so that the welds will look centered.

5%20beveling%20corner_zpsmm9radhi.jpg


It begins...

6%20Welding%20begins_zpsf9kdnwwx.jpg


...turned out nicely. We are going to be doing some pressure testing when done, fix any leaks, then we will clean everything up before powder coating.

7%20turned%20up_zpslnzptd9y.jpg


Continued in next post.
 
Oil tank continued-

Another weld done. We are doing these for strength/seal and trying make them so that they have enough meat to spend some time to make them look good too.

8%20Another%20down_zps4djfyqef.jpg


All done with the seams, except for one last on in the corner bottom....

9%20getting%20close_zpsicfqjet0.jpg


...cleaning it up just a bit, looking for any obvious points that might leak.

10%20Cleaning%20up_zpsheppfgb8.jpg


Time to get to work on the bungs...

10a%20KP%20welding_zpsfyjwdryy.jpg


hahahaha, I have no idea what I'm doing...only the second or third time I've welded in the last 40 years.

10b%20haha_zpsgvoi9afn.jpg


All done for the day....

11%20Bungs%20welded_zpsxdmtxt3y.jpg


...going to do the fill hole and tank skid plate next time we have some time to work on it.

12%20Back%20to%20table_zps7aoopjid.jpg


Kevin

:LooksGreat::goodjob:

Roger
 
Yesterday afternoon we had a bit more time to work on the bike.

Pulled it out...

13%20At%20it%20again_zpskworfrrj.jpg


...onto the shop floor. We need to do some welding on it.

14%20Side_zpsj5hdcaqe.jpg


This is a combo mounting plate/skid plate...

15%20Skid%20Mount_zpsr3wm7dlo.jpg


...that the tank sits on. The one hole is for access to the drain plug. The others are for air circulation. It is fastened in the 4 corners...

16%20Mounted_zpsz4qzzjrd.jpg


...and rubber mounted.

17%20Rubber%20Mounted_zpslr0fo3ku.jpg


Getting it lined up in the frame...

18%20lining%20it%20up_zpsxyln26ir.jpg


...and level.

19%20Getting%20it%20level_zpsaxaqb6dn.jpg


The angled bottom of the tank follows the same line as the rails.

20%20In%20line%20frame%20rail_zpsvt2un7uf.jpg


Ready to start tacking it together.

21%20All%20set_zpsseirtyno.jpg


Cutting some metal for the front skid plate brace.

22%20Cutting%20fron%20support_zpsdi6ngzvl.jpg


Continued in next post.
 
Put a few holes for air flow in the front plate support bracket.

23%20Front%20Support_zpsxyo1cfvh.jpg


Tacking the front support bracket and the two side support brackets to the frame and the tank mounting plate.

24%20tacking%20in%20place_zpsabxkjmrd.jpg


It's tacked in pretty solid for now....

24a%20Done%20for%20now_zpsu48dnjxm.jpg


....the next time we pull the engine out we will fully weld all three support brackets to the frame and the mounting plate.

25%20Done%20for%20now_zps1heekkzo.jpg


Last step...

26%20Filler_zpsfeo4kyca.jpg


...figuring the angle for the oil filler bung.

27%20Looks%20good_zpss8mhjf4h.jpg


Tacking it in place, so we can check the angle one more time on the bike.

28%20Welding%20it%20in_zpsv4r0bvon.jpg


Looked good, so here we go....

29%20Part%20way%20done_zpsgoywuklg.jpg


All welded up.

30%20Done_zpshrjdk9cz.jpg


I need to get some fittings, clean out the inside of the tank, and then do some pressure testing. If there are any leaks, we'll fix them, clean and test again.

Hope to have time to work on it some more later this week.

Kevin
 
Is there a "dipstick" on the filler cap?

I'm curious, as the angle it enters the tank looks steep:Shrug:

No dipstick.

Harley's are a remote system. How much oil is in the tank is irrelevant to lubrication and oil pressure, as long as it is not too low...there is a wide variable between "too low" and too high. I will be able to see down in the filler hole enough to make sure it is in the "safe" zone fill wise.

Kevin
 
Had a few things progress the last few days-

Got the battery in...

Battery_zpsnbyft3jm.jpg


...so now we can start thinking about options of a tray and securing it into the tank shelf.

Had to send the handlebars back...they arrived with quite a few scratches and some poor chroming.

Just got the replacement in yesterday. I peeled back a bit of the protective foam and what I saw looks good/better than the last set.

Will check it out more thoroughly after I transport them to the shop.

Brown%20Truck%20Handlebars_zpsnnpl5e0x.jpg


Tested out the new mount we made for the floorboards on the DK Sporty. Looks good, so now we will go from the plastic printed mount to machining it out of steel. :)

Sporty%20Floorboard%20Test%20Fit_zpsues9nqk1.jpg


That's all the photo's right now. We did spend some time on the jockey shift and foot clutch designs this last Friday. Will hopefully have time this next week to make some progress in that arena.

Kevin
 
This last week was BUSY!

We did get to spend a bit of time on the Sporty chop.

Here are a few pics of the 1st Gen Jockey shift we made with the 3D printer.

1st%20Gen%20a_zpspg07lfro.jpg


Shift arm added-

1st%20gen%20b_zps0jmaq7as.jpg


1st%20Gen%20c_zpsu74ccfwa.jpg


We did not like how the pivot arm was so far forward up top. So we made a different pivot arm that is more upright on top.

2nd%20Gen%20a_zps5vp2m3yx.jpg


Another view-

2nd%20Gen%20b_zpswo4zx0op.jpg


After much looking & playing with it, we decided we did not like it at all.

We made the following decisions:

1. The S-shaped shifter arm is cool (to us), but it sticks out too far. It is being redesigned with 1 less curve in it.

2. The main bracket (XXXX) is too big and ugly. A smaller one is being designed and will mount up at A & B points shown in the photo below.

3. The whole concept of a pivot arm (Y) & accompanying shift lever plate was interesting, and different, but in the end it was too busy, & has leverage challenges. So we are starting fresh, and we'll have a simpler design printed out soon.

2nd%20Gen%20C_zpscrgv3ldc.jpg


After putting that to bed, we spent a couple of hours looking for fresh ideas on a foot clutch. We came up with a few different drawings (can't find the photo's I took of them), but we still have not settled on one.

We even spent about 45 minutes studying how the cams on a compound bow works, seeing if we want to use something similar in the foot clutch design.

We did come up with one steampunk style design that is pretty cool, but I don't want to use it on this particular bike where I am trying to keep everything as clean/simple looking as possible.

Any ideas, photo's or drawings are appreciated.

Kevin
 
They look fairly rugged as is, so making the main bracketry smaller might compromise overall durability?

Perhaps you could make the final renditions out of stainless plate, with some type of ball milling or other decorative machining to make them more eye appealing without attracting too much attention away from the rest of the build?

Keep up the good work!:clapping:
 
This last week was BUSY!

We did get to spend a bit of time on the Sporty chop.

Here are a few pics of the 1st Gen Jockey shift we made with the 3D printer.

1st%20Gen%20a_zpspg07lfro.jpg


Shift arm added-

1st%20gen%20b_zps0jmaq7as.jpg


1st%20Gen%20c_zpsu74ccfwa.jpg


We did not like how the pivot arm was so far forward up top. So we made a different pivot arm that is more upright on top.

2nd%20Gen%20a_zps5vp2m3yx.jpg


Another view-

2nd%20Gen%20b_zpswo4zx0op.jpg


After much looking & playing with it, we decided we did not like it at all.

We made the following decisions:

1. The S-shaped shifter arm is cool (to us), but it sticks out too far. It is being redesigned with 1 less curve in it.

2. The main bracket (XXXX) is too big and ugly. A smaller one is being designed and will mount up at A & B points shown in the photo below.

3. The whole concept of a pivot arm (Y) & accompanying shift lever plate was interesting, and different, but in the end it was too busy, & has leverage challenges. So we are starting fresh, and we'll have a simpler design printed out soon.

2nd%20Gen%20C_zpscrgv3ldc.jpg


After putting that to bed, we spent a couple of hours looking for fresh ideas on a foot clutch. We came up with a few different drawings (can't find the photo's I took of them), but we still have not settled on one.

We even spent about 45 minutes studying how the cams on a compound bow works, seeing if we want to use something similar in the foot clutch design.

We did come up with one steampunk style design that is pretty cool, but I don't want to use it on this particular bike where I am trying to keep everything as clean/simple looking as possible.

Any ideas, photo's or drawings are appreciated.

Kevin

What about combining the Shifter Arm and Pivot Arm (Y) into one piece. That would make it less busy and may take care of some of the leverage challenges.
 
What about combining the Shifter Arm and Pivot Arm (Y) into one piece. That would make it less busy and may take care of some of the leverage challenges.

My engineering degree is still yet to be had, but rallsqh's suggestion sounds reasonable. Less is sometimes better.

It might take a try or 2 to get the shifter into its "ergonomically optimal" position, so the 3D printing perhaps comes into play from a financial standpoint as well...:Shrug:
 
They look fairly rugged as is, so making the main bracketry smaller might compromise overall durability?

Perhaps you could make the final renditions out of stainless plate, with some type of ball milling or other decorative machining to make them more eye appealing without attracting too much attention away from the rest of the build?

Keep up the good work!:clapping:

What about combining the Shifter Arm and Pivot Arm (Y) into one piece. That would make it less busy and may take care of some of the leverage challenges.

My engineering degree is still yet to be had, but rallsqh's suggestion sounds reasonable. Less is sometimes better.

It might take a try or 2 to get the shifter into its "ergonomically optimal" position, so the 3D printing perhaps comes into play from a financial standpoint as well...:Shrug:

Great minds think alike! :clapping:

Kevin
 

Welcome to the Trike Talk Community

Join our vibrant online community dedicated to all things Trikes! Whether you're a seasoned rider or just starting out, this is the place to share experiences, tips, and stories about your three-wheeled adventures. Explore modifications, maintenance advice, and rides, all while connecting with fellow trike enthusiasts from around the globe

Forum statistics

Threads
55,566
Messages
901,917
Members
22,548
Latest member
PERuss

Trike Talk Community

Welcome to a community dedicated to the most diverse and fastest growing powersports segment, Motorcycle Trikes. Come join the discussion about the best makes and models, popular modifications and proven performance hacks, trike touring and travel, maintenance, meetups and more!

Register Already a member? Login

Forum statistics

Threads
55,566
Messages
901,917
Members
22,548
Latest member
PERuss
 photo 260e2760-d89e-45b2-8675-2bc26fb3d465.jpg

 photo Trike-Talk-150-x-200.gif

 photo DK Trike Talk Right side banner 19.jpg

Merziere Reverser

 photo 9796095c-0d4b-4a9b-88ed-efe4c498d084.png
 photo f9866e4e-75c5-471a-86f5-5e72a446ecc3.png
Back
Top