SBS Project - Sportster Chop w/ Lots of Photo's

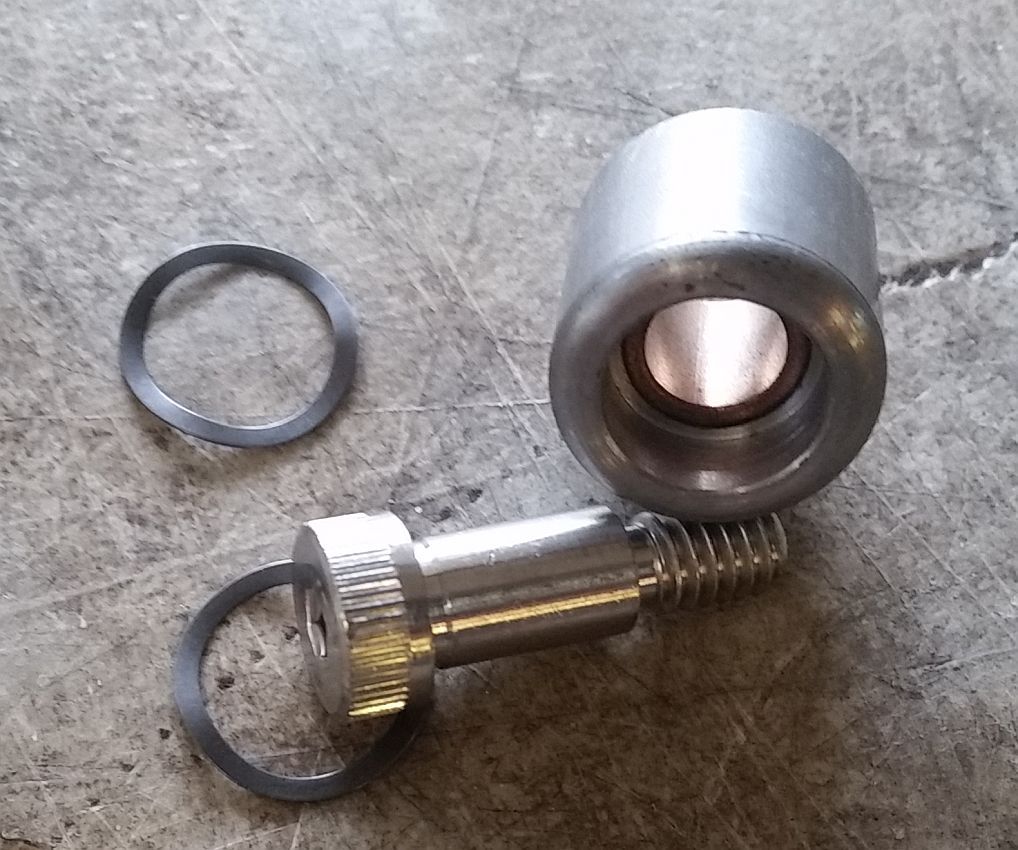
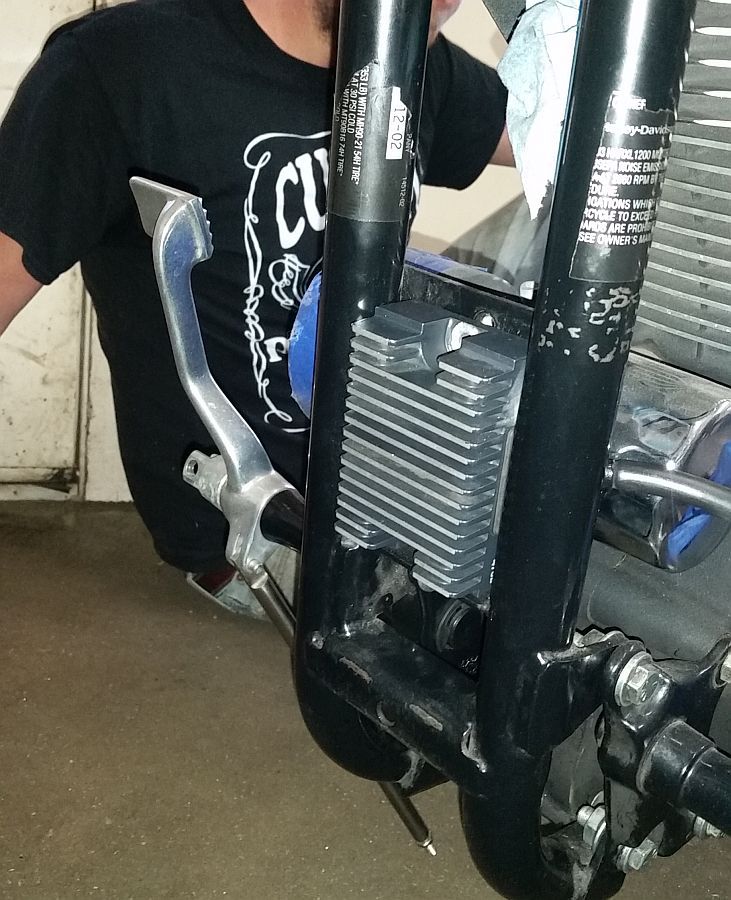
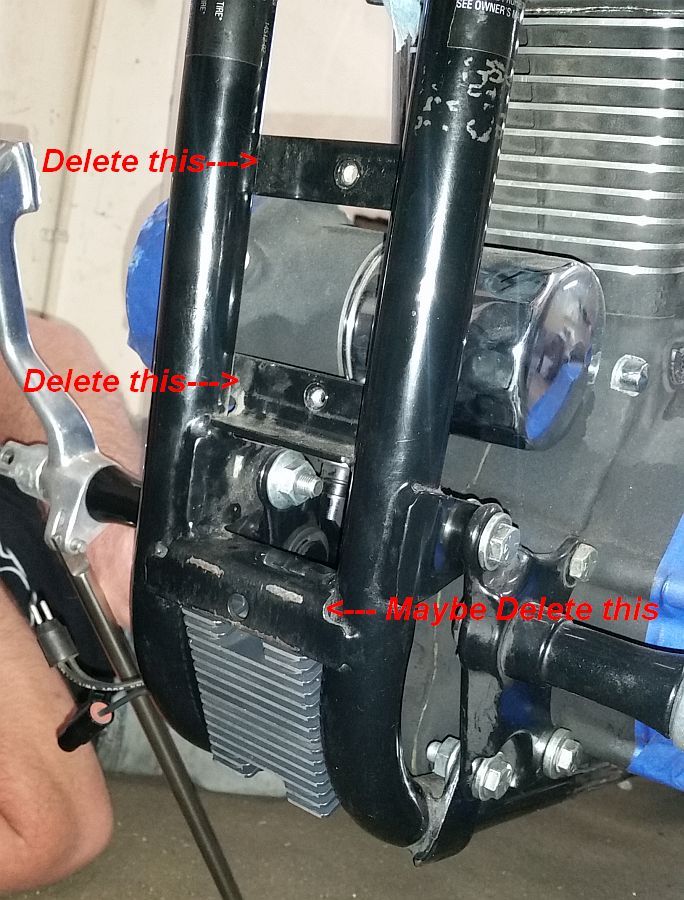
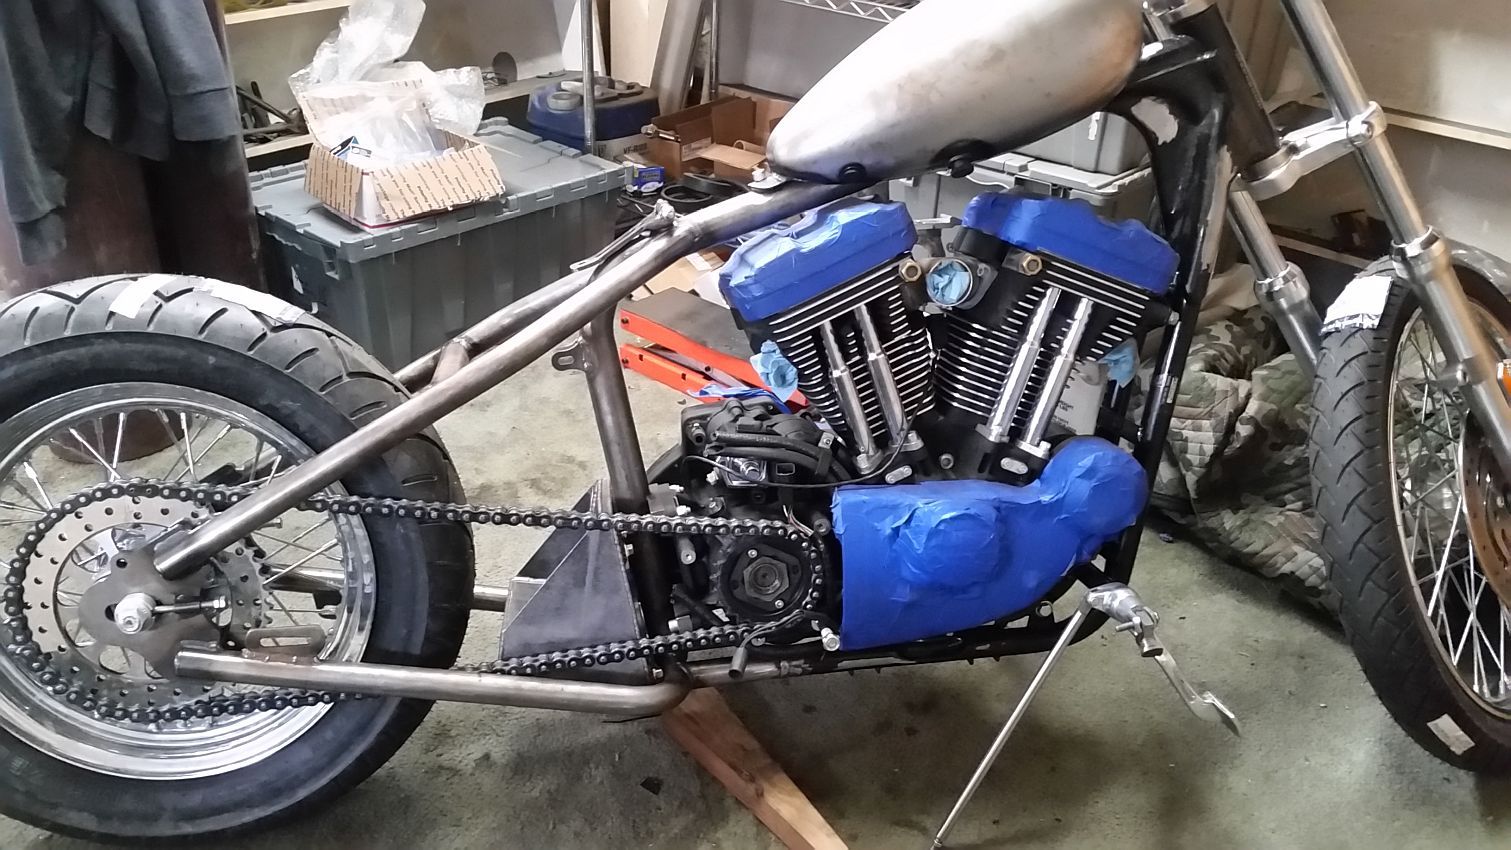
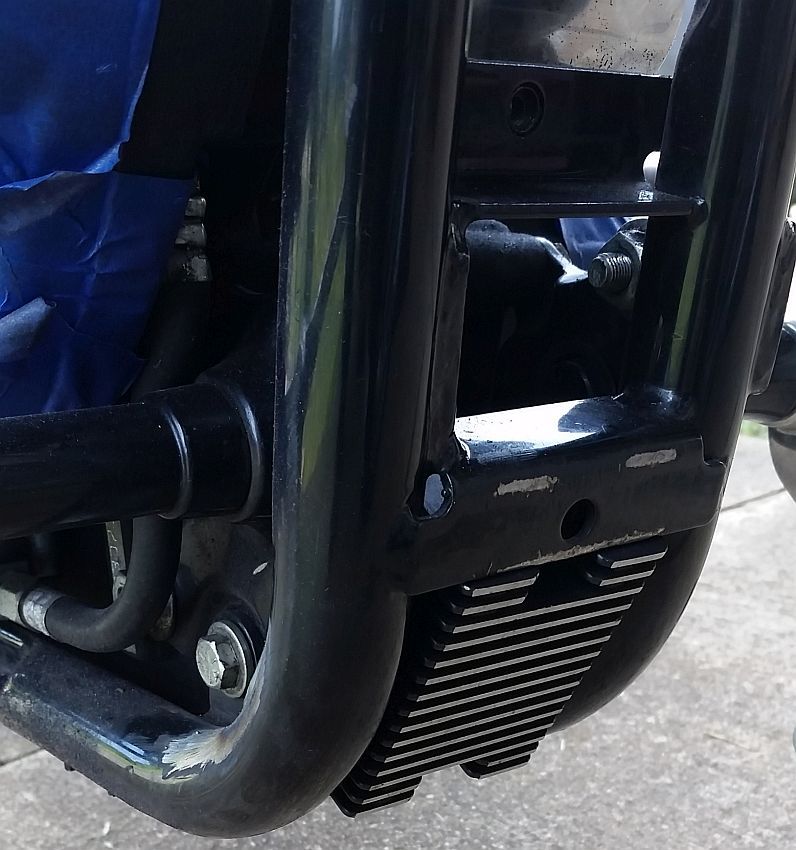
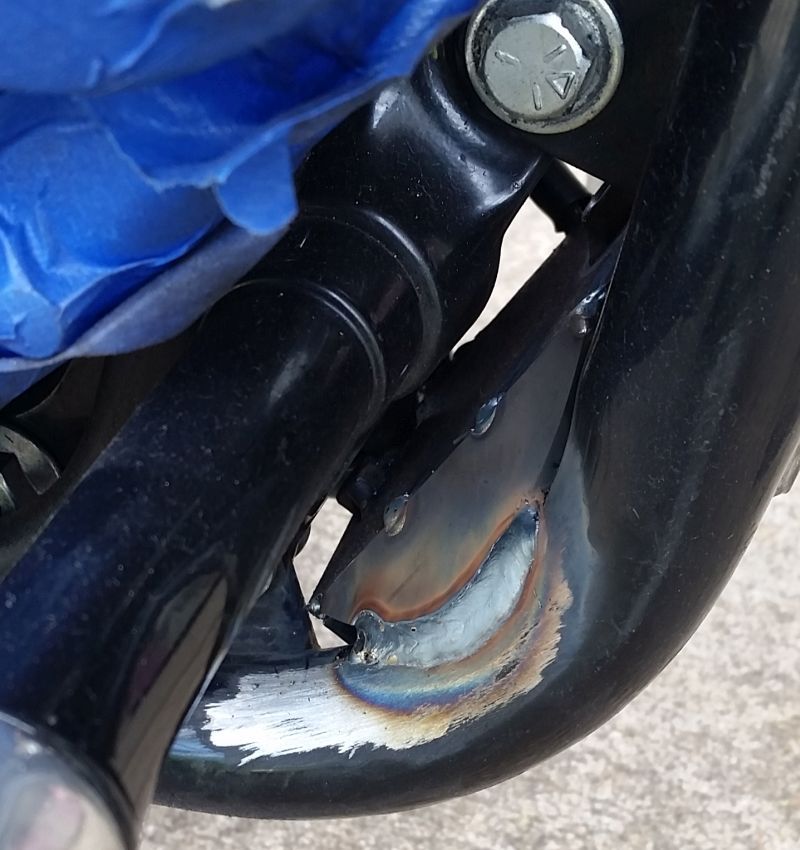
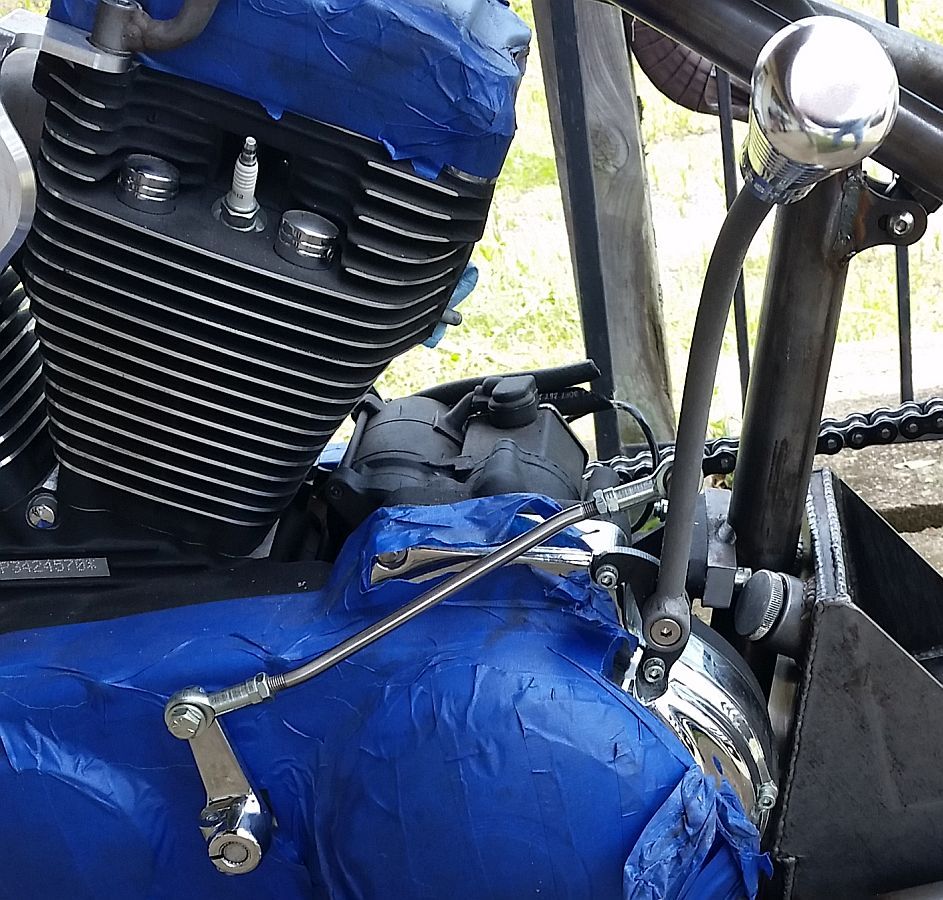
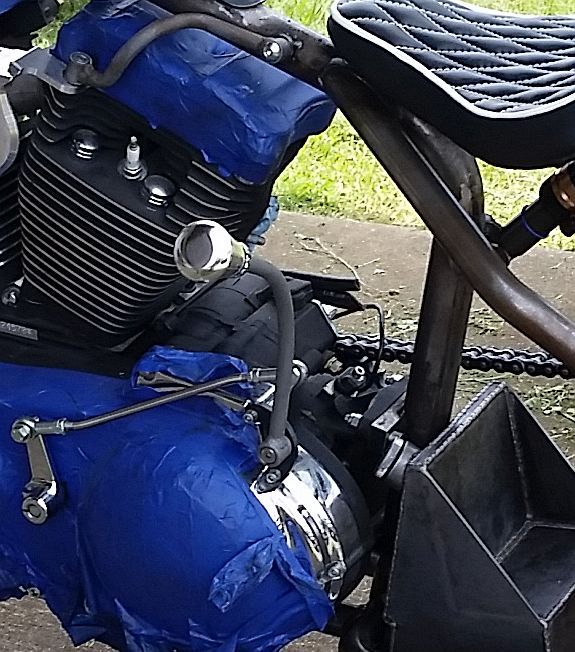
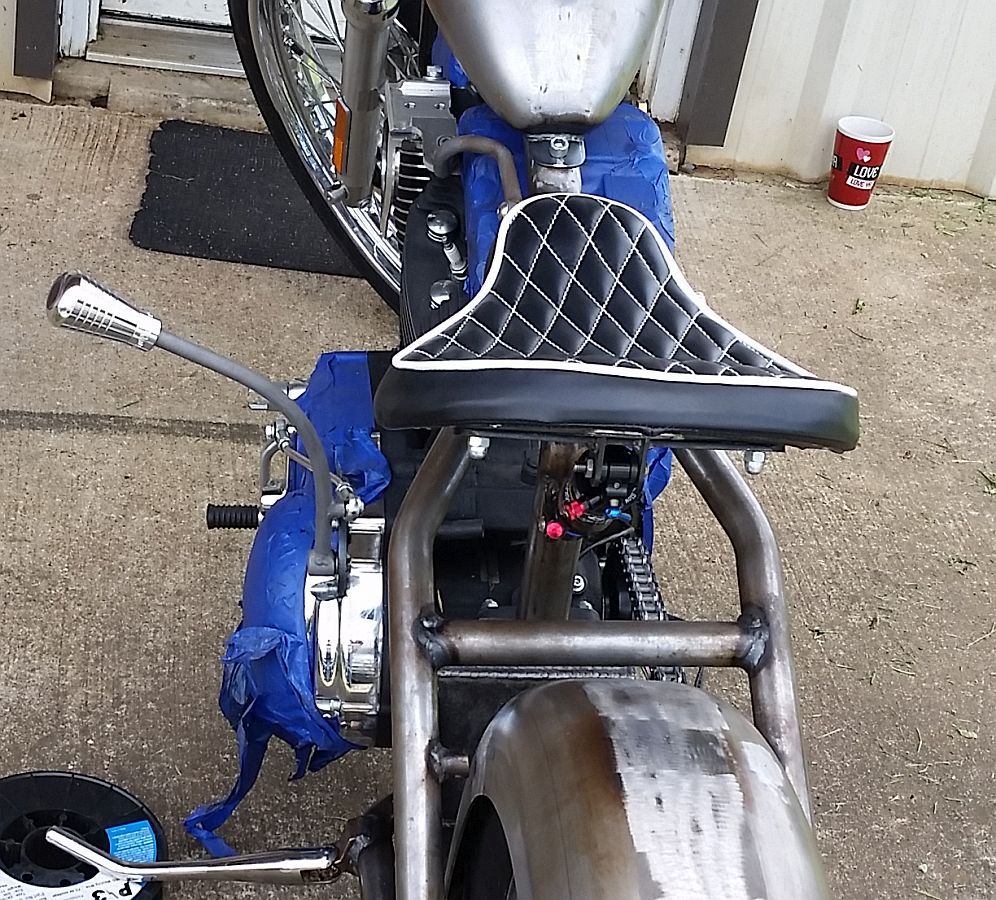
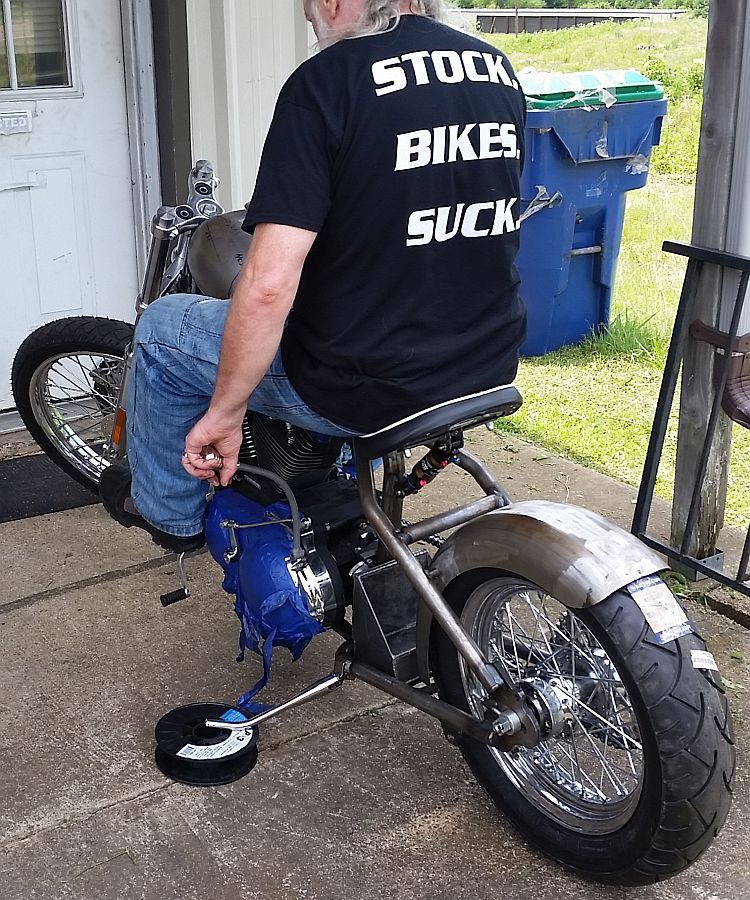
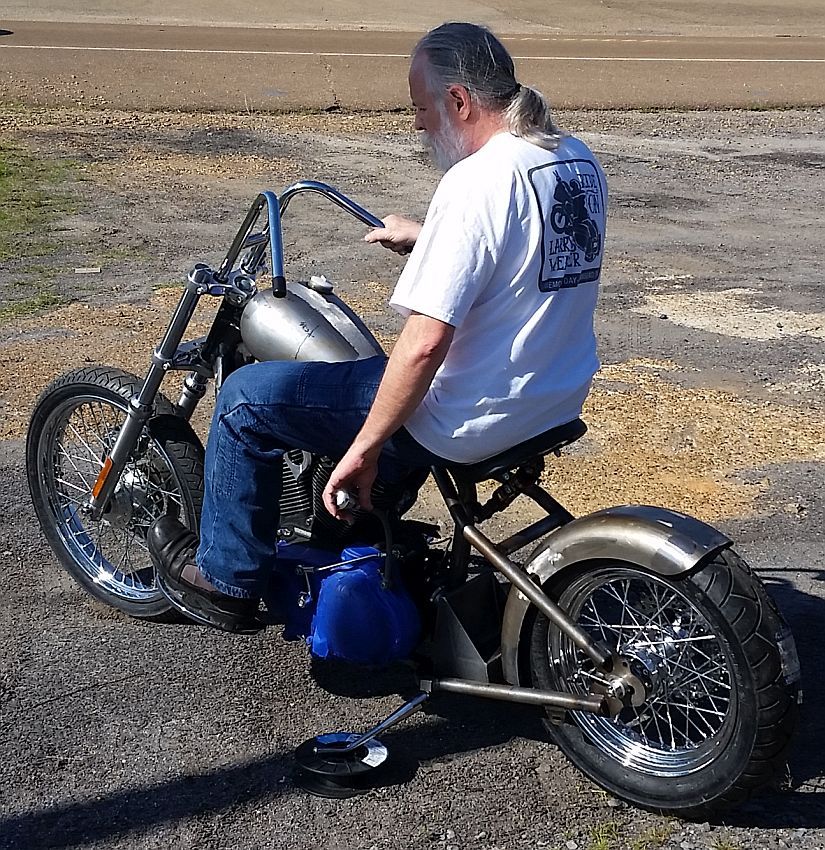
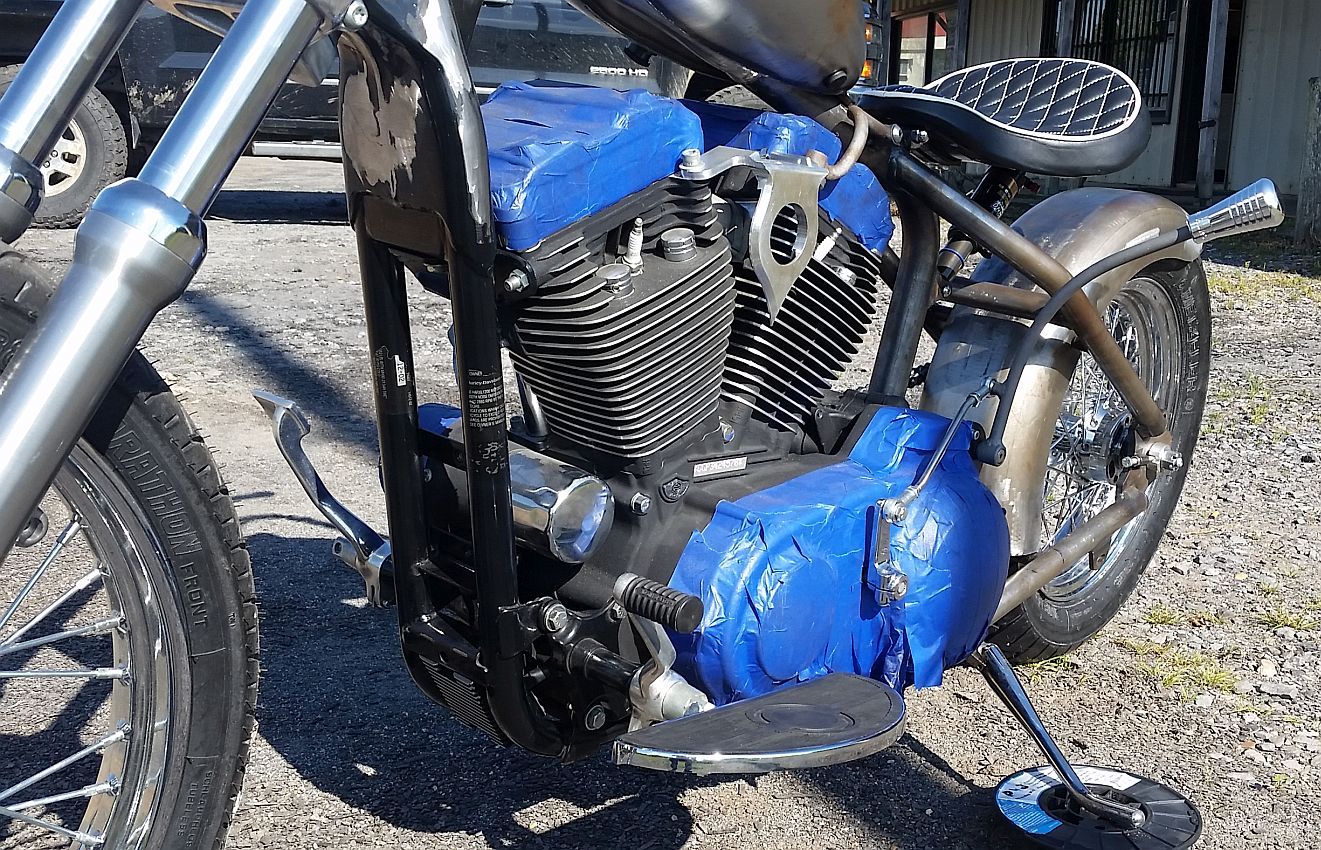
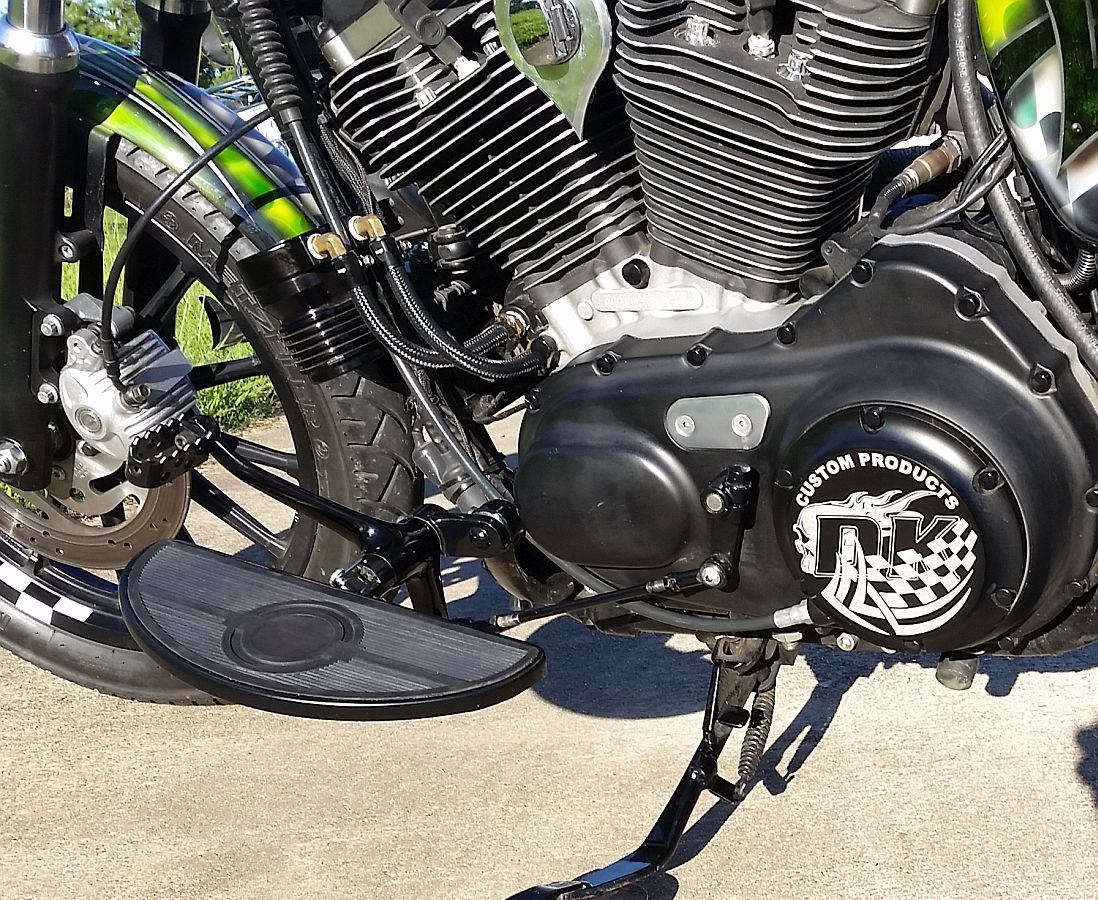
Getting close to what I want with the Jockey Shift.

Jockey%20Shift%203_zpsvxmnkuei.jpg


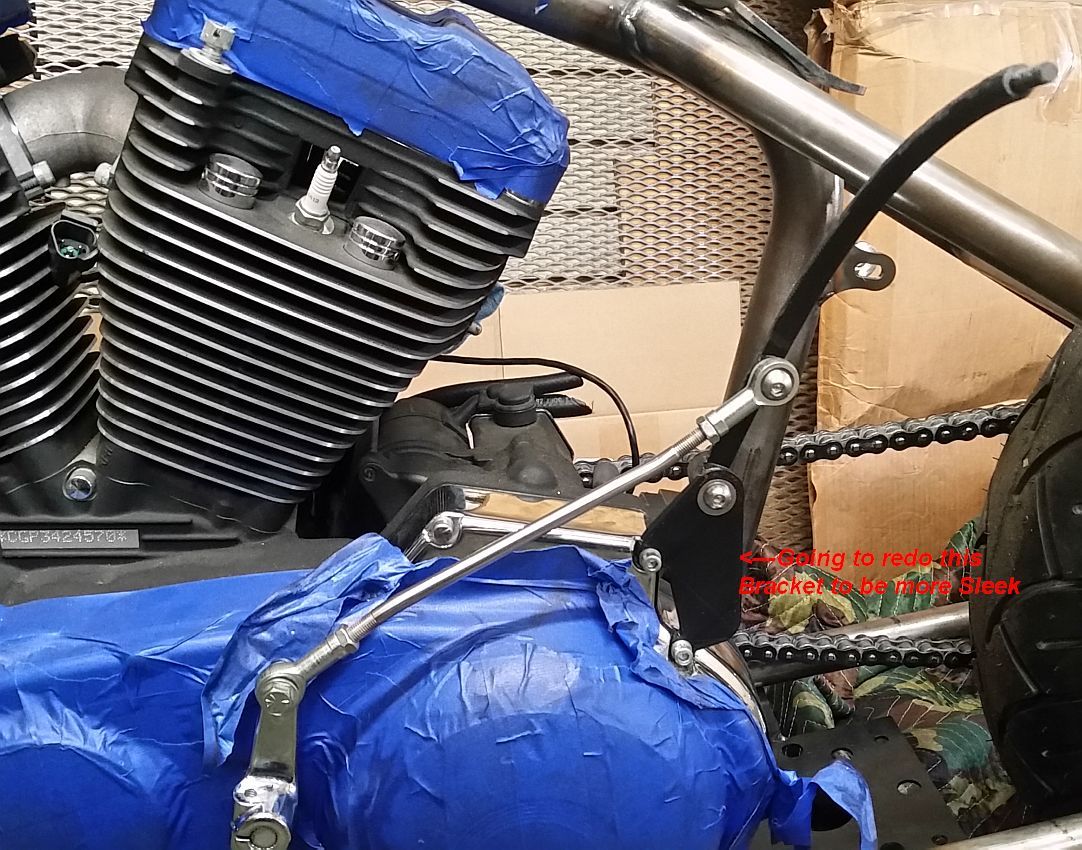
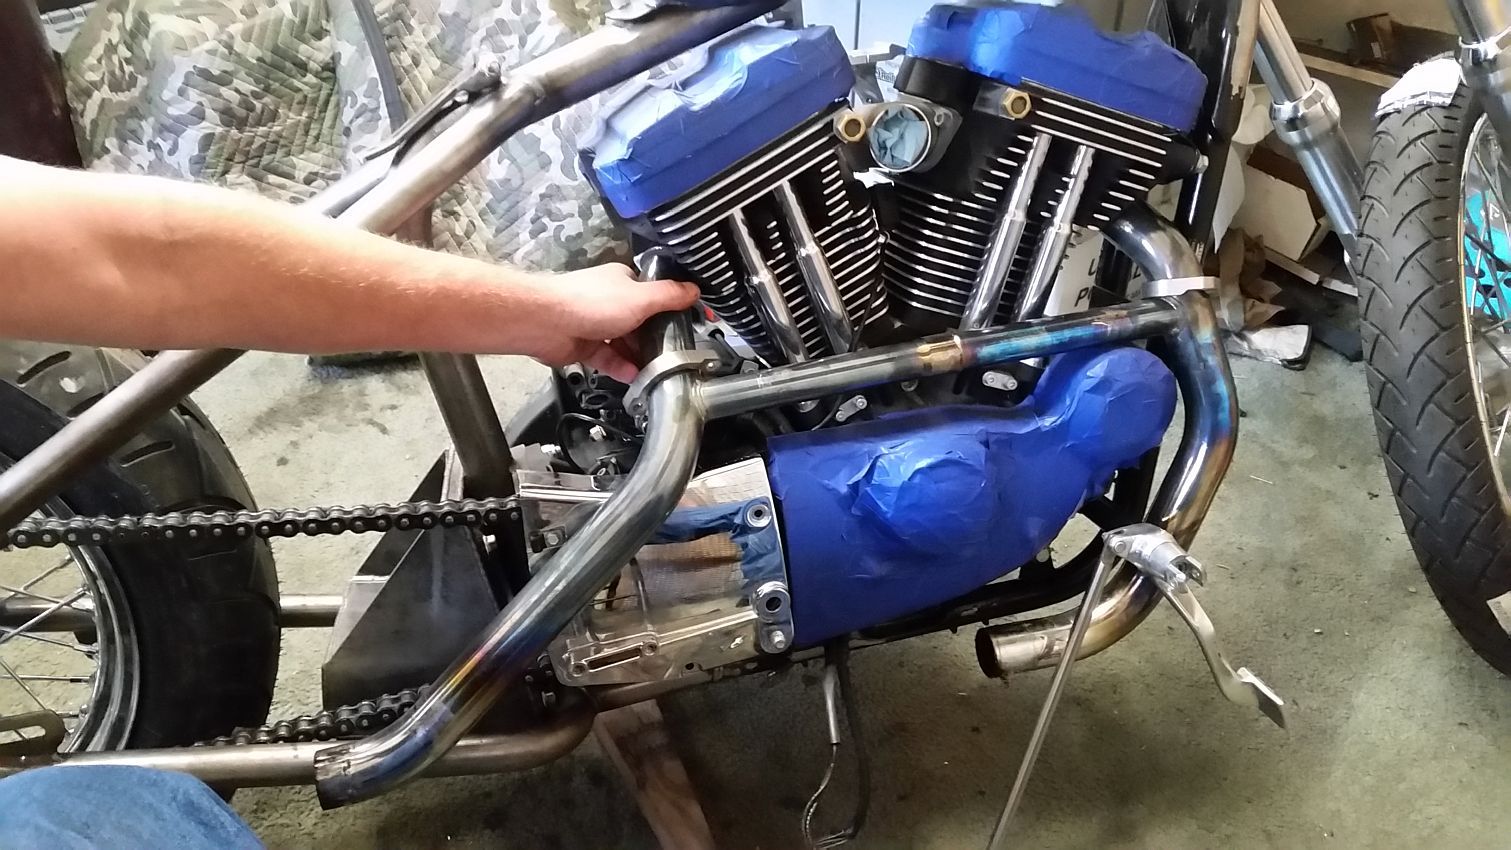
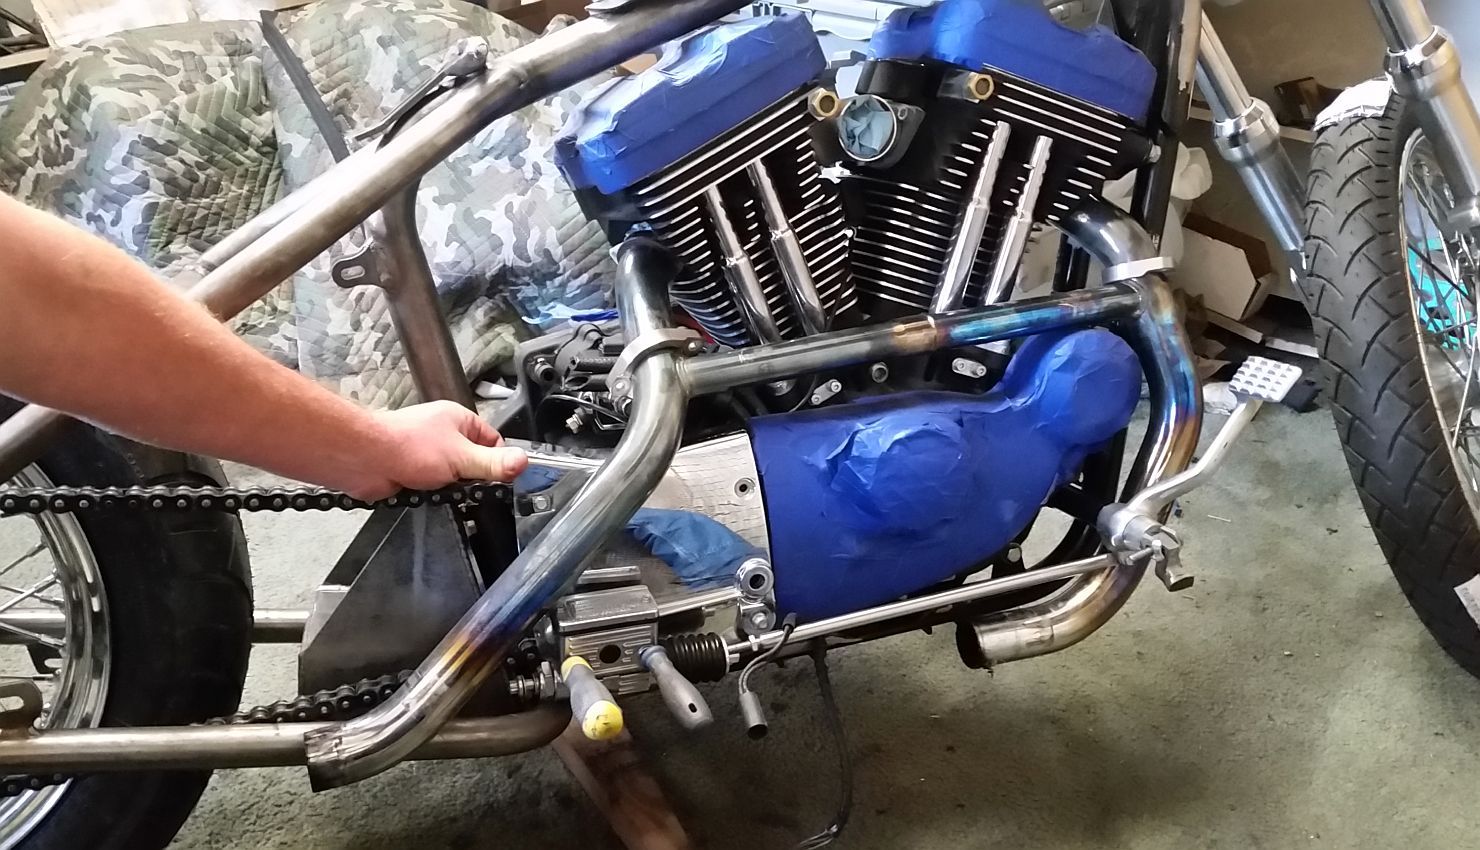
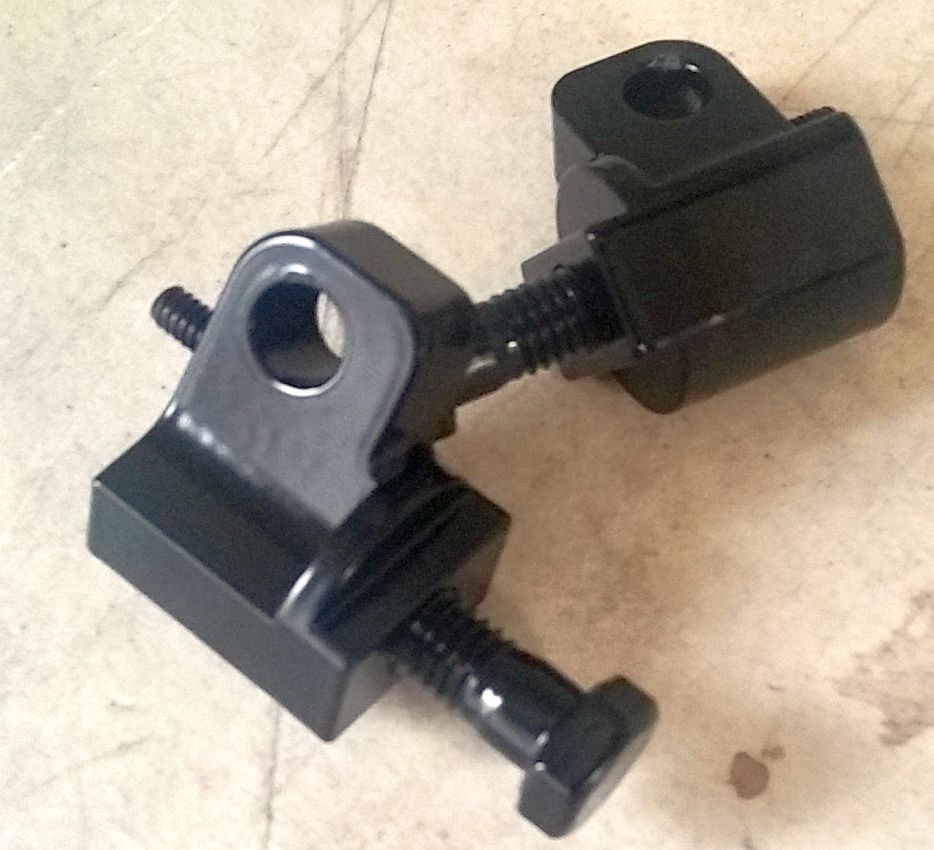
Still going to do a bit of work on that. We've started fiddling with the foot clutch.

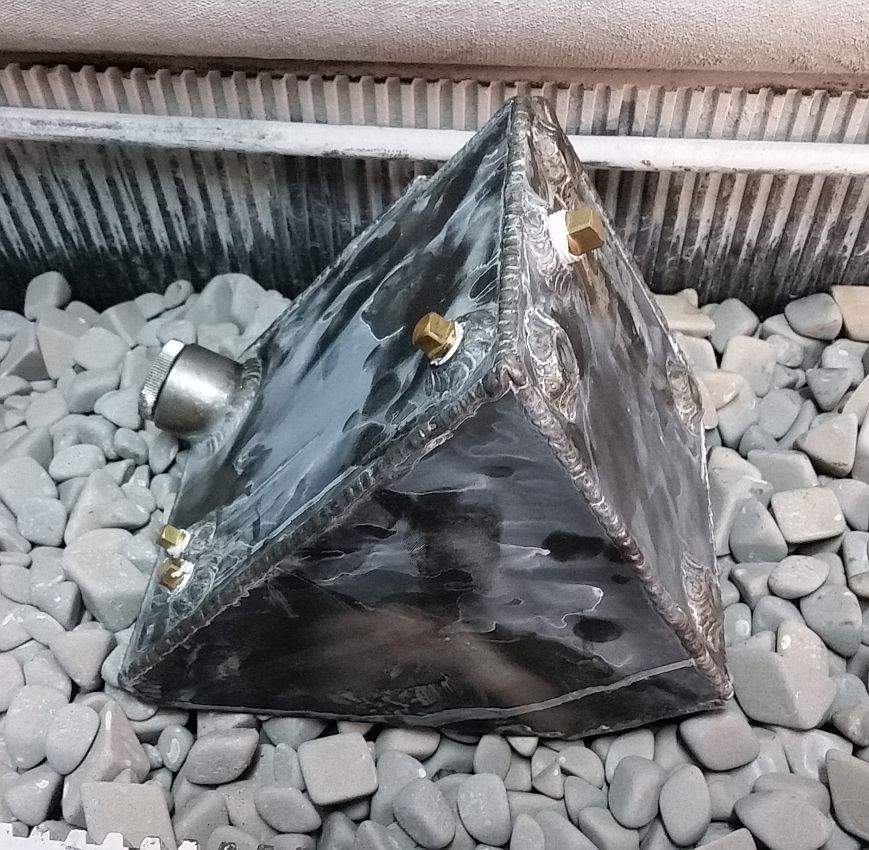
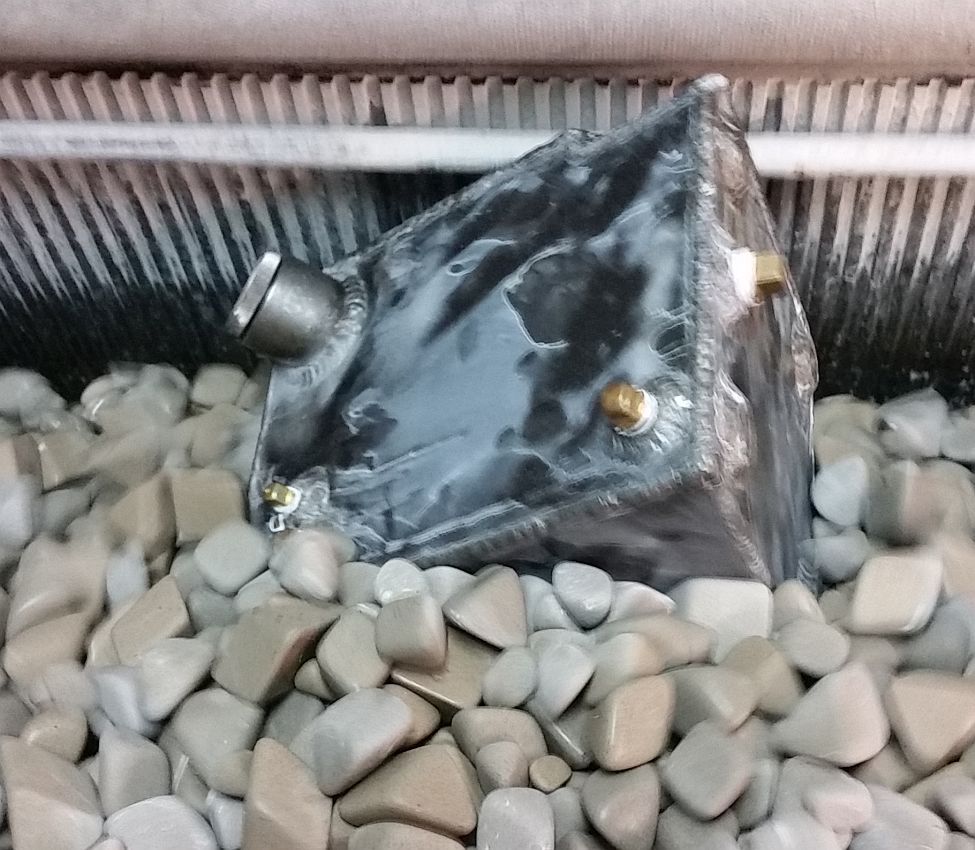
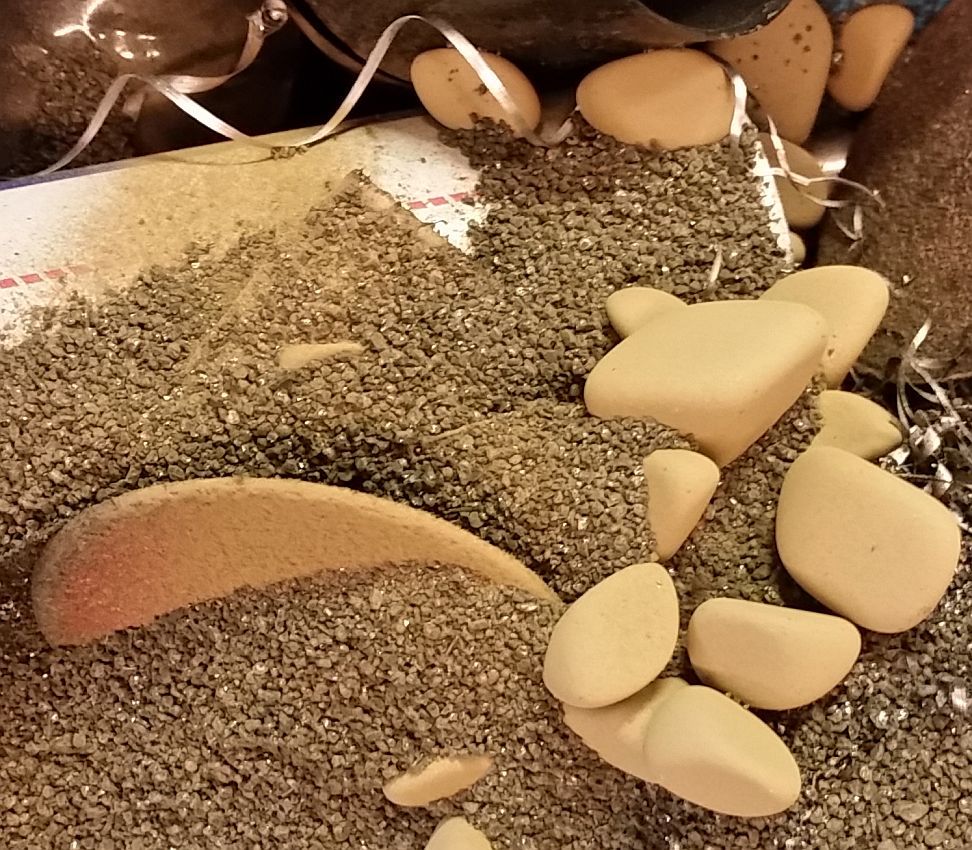
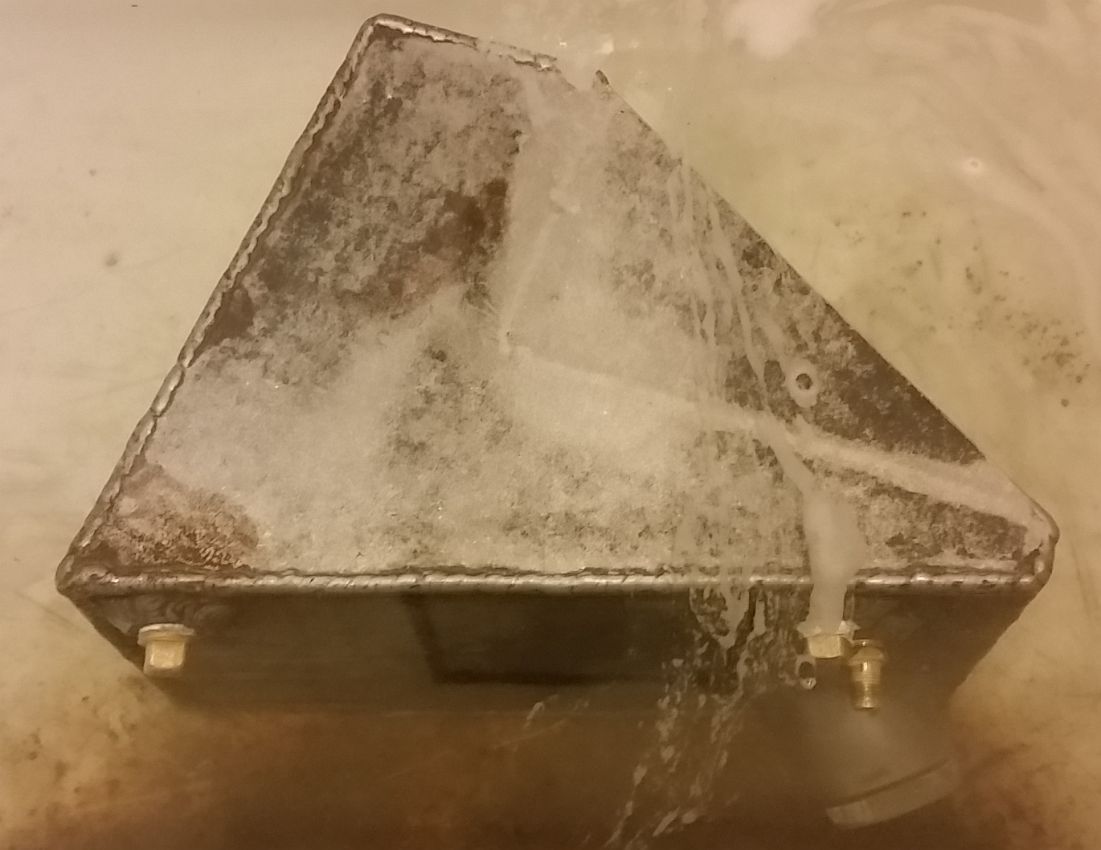
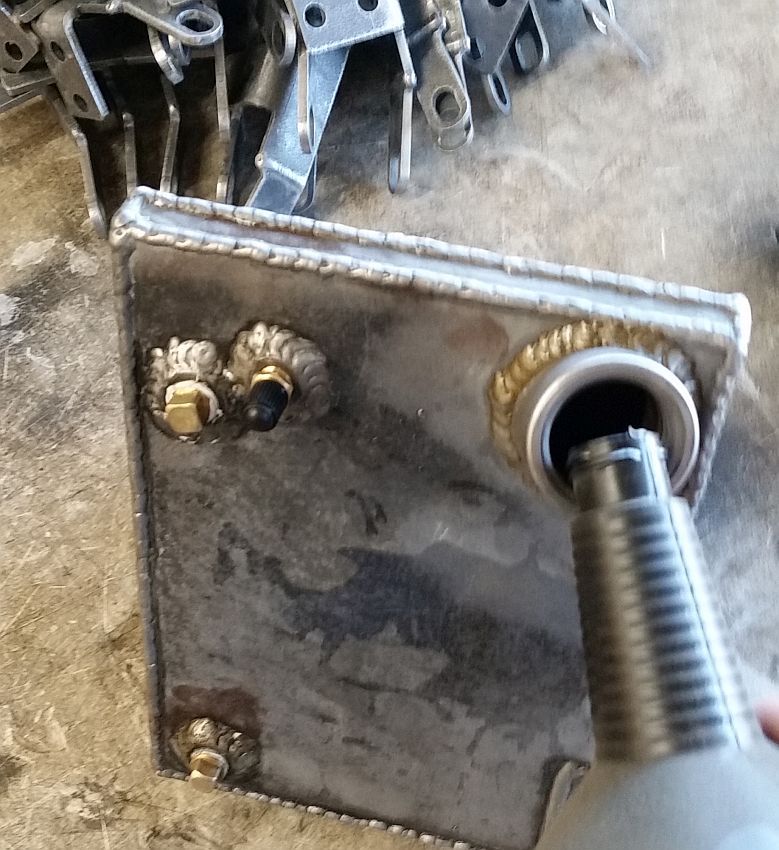
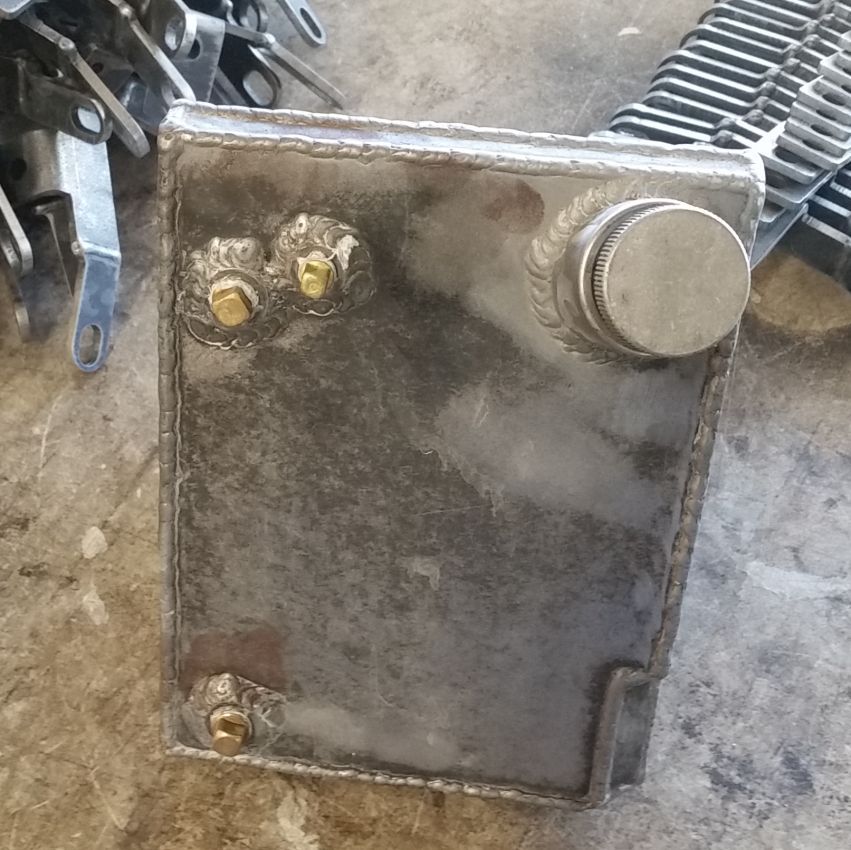
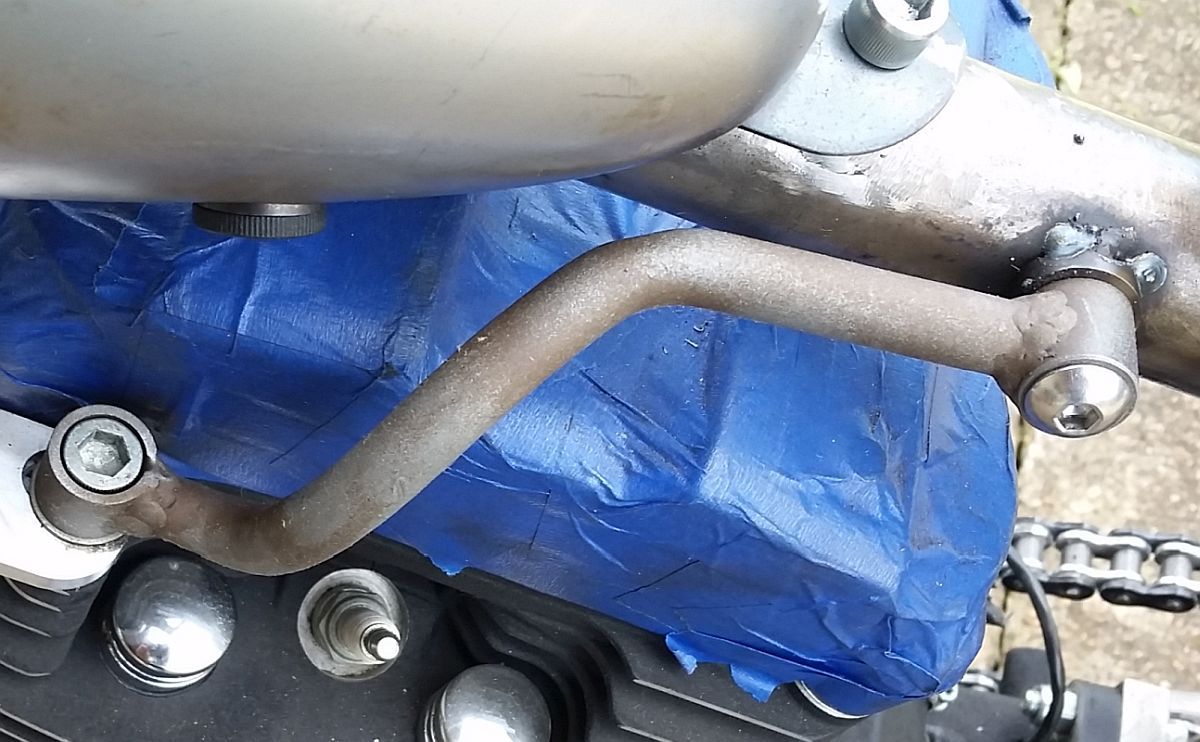
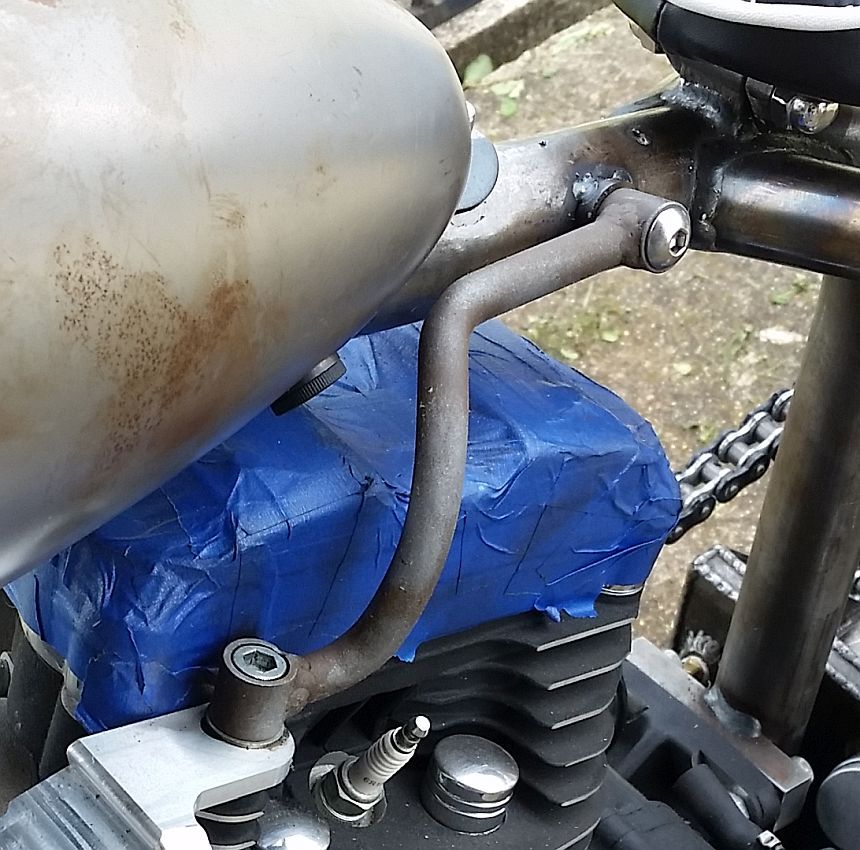
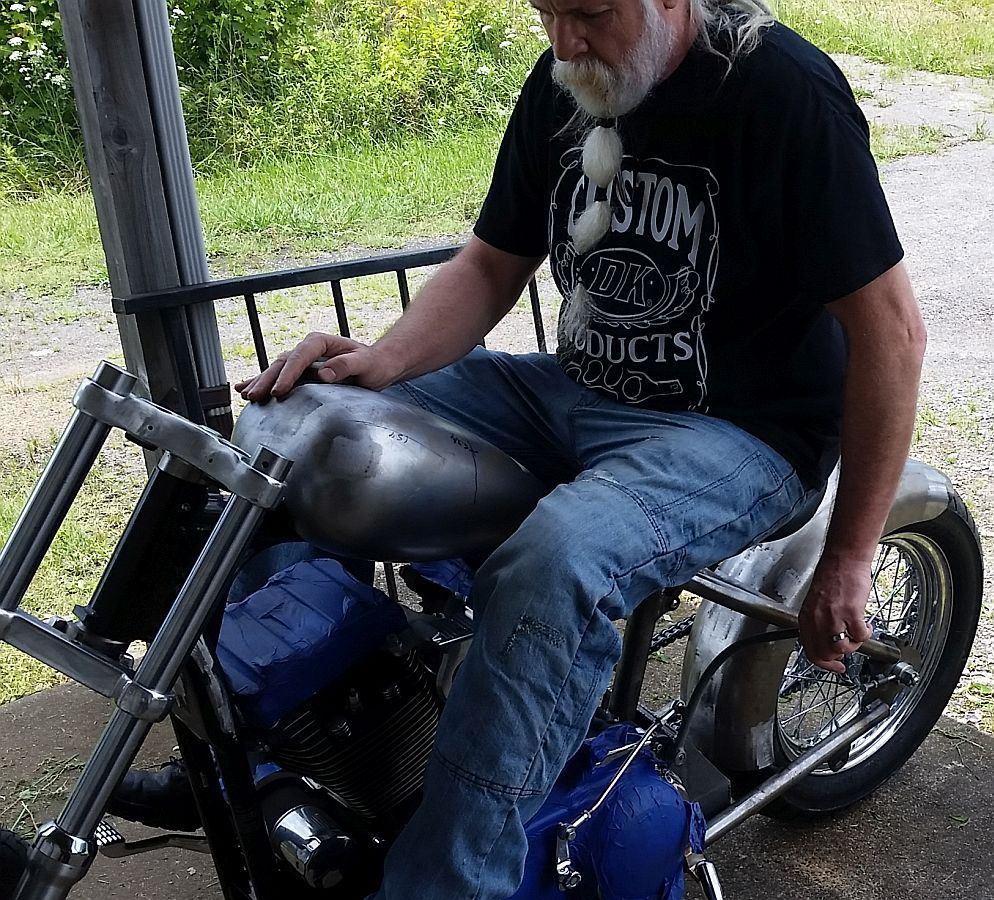
Couple pics of sand-blasting the oil tank/battery tray combo...

Sandblast%201_zps9avvuxsp.jpg


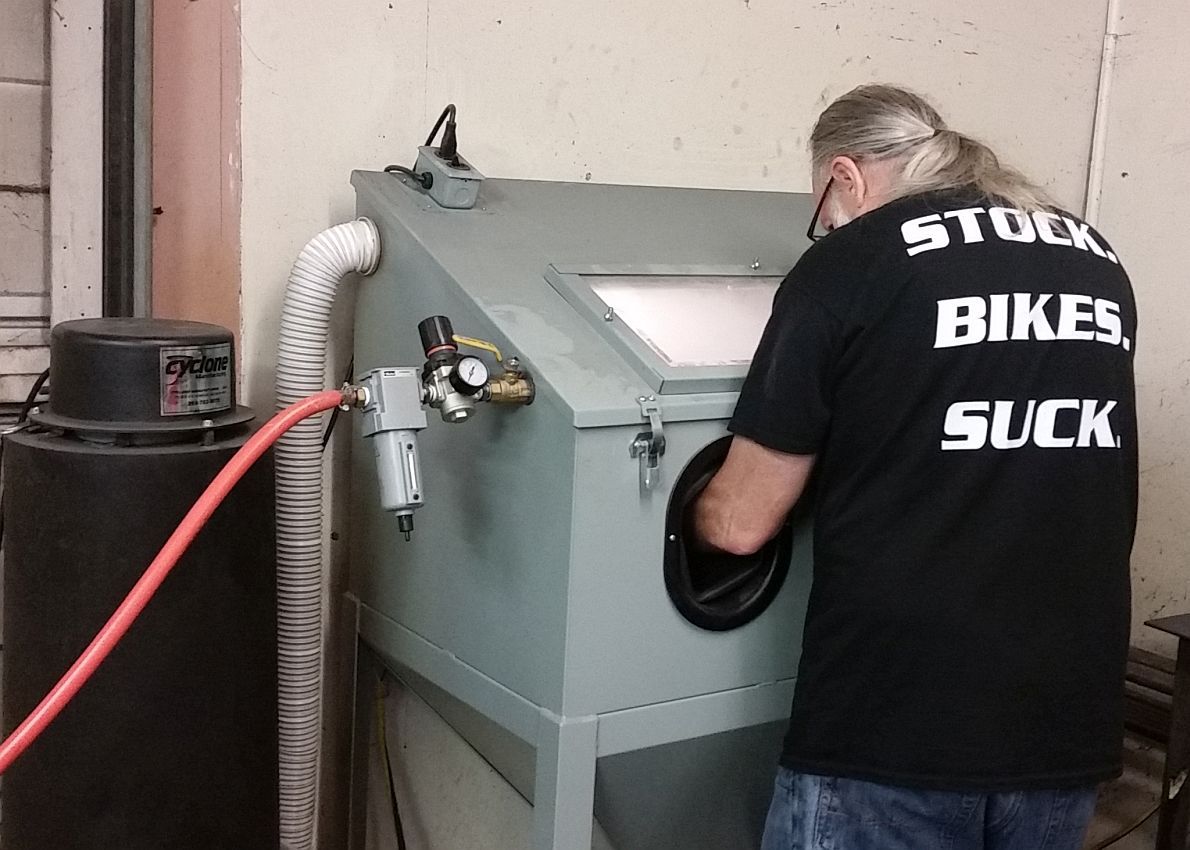
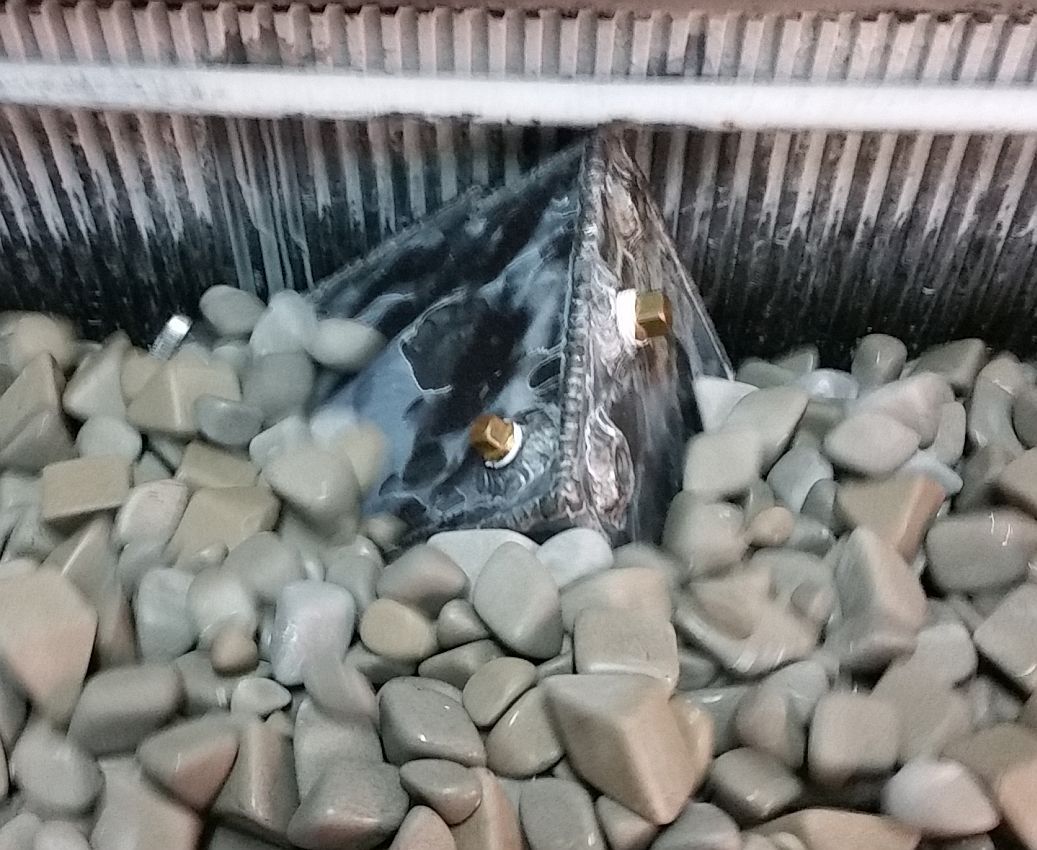
...pouring some of the media out.

Sandblast%20dump_zpslebcasu3.jpg


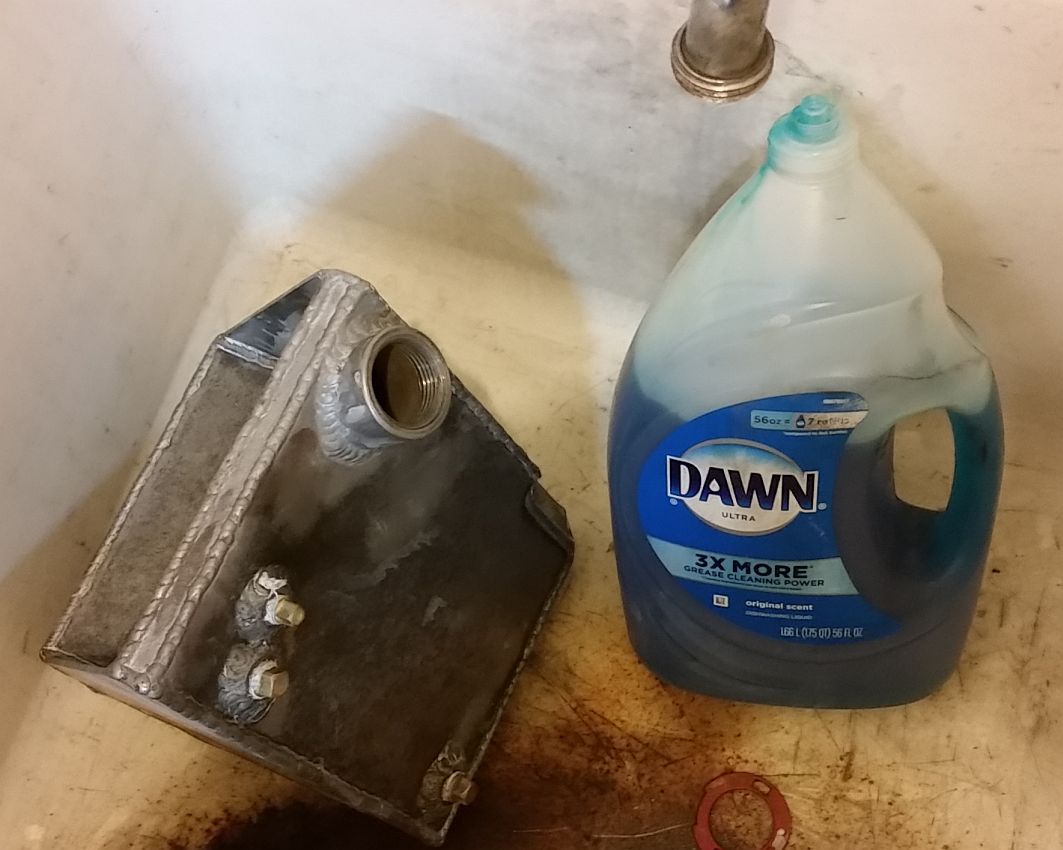
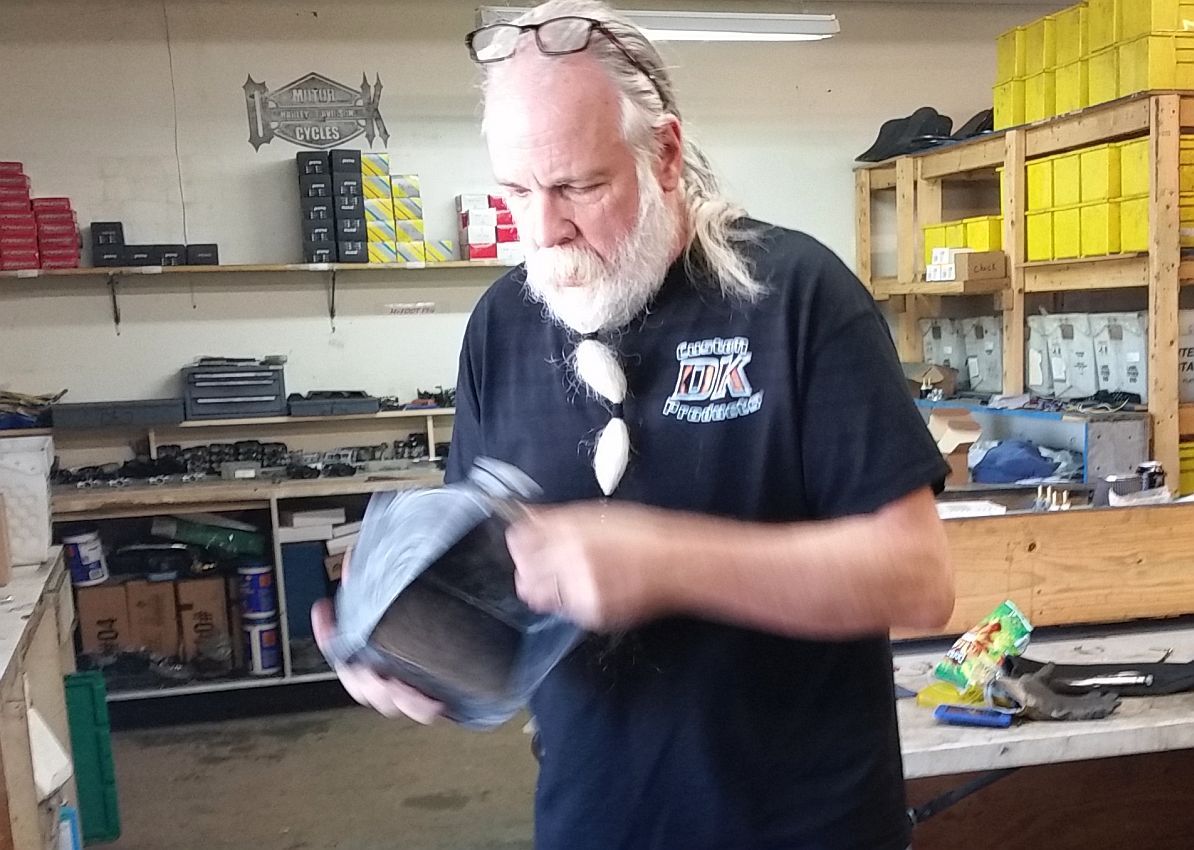
I will have some time later today or tomorrow to put some other media in the tank, seal it up and let it run in the tumbler for a bit.

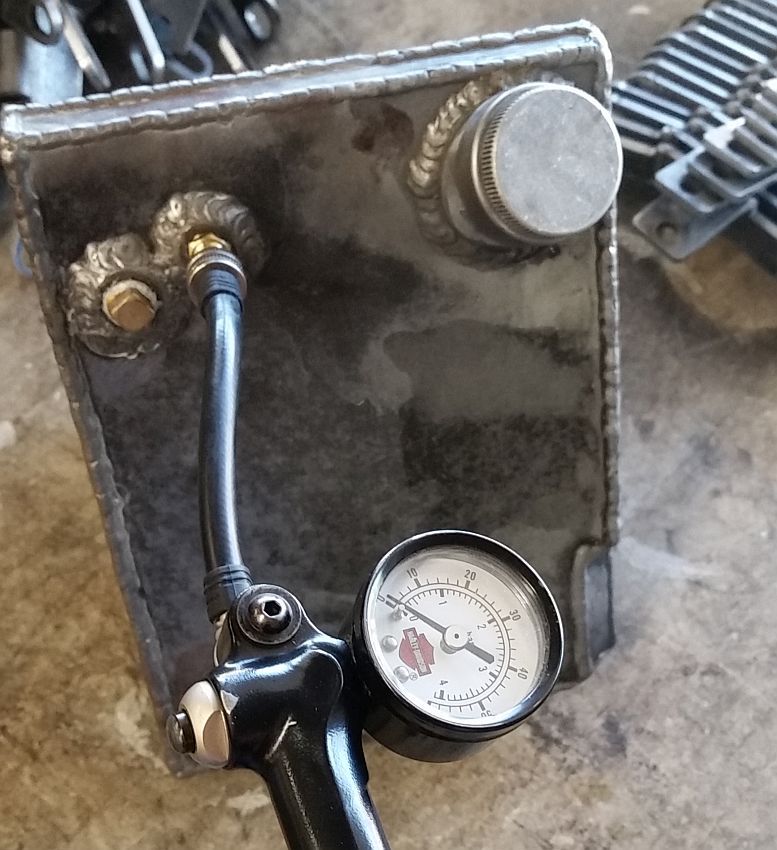
After that will be time to pressure test it. :)

Kevin
 
Forgot to post this earlier.

This is a Counter Bored Pivot, with a graphite impregnated bronze bushing, wave washer and a shoulder bolt. We'll be using this for the jockey shift...should provide smooth, clean movement.

Counter%20bored%20pivot_zpstaahjeh0.jpg


About 45 minutes ago I put some mixed media in the oil tank, capped off the openings, and put it in the tumbler to get the inside all cleaned up from the welding.

Tumbling%201_zpsababjijy.jpg


Going....

Tumbling%202_zpsl5wudgmz.jpg


Going...

Tumbling%203_zpsl9cpynlm.jpg


Gone.

Tumbling%204_zpszuk8iq9s.jpg


In another 10 minutes I'm going to pull it out, and empty the media and crap out.

Then it's time to pressure test it! :)

Kevin
 
Typically, when I get a bike I look at doing the following, pretty much in this order:

Get the Comfort Triangle set up with seat, pegs, handlebars

Do my best to SEE & BE SEEN with LED Lights

Performance- get a good Stage I installed, along with good cooling, & a sound I like

After that I may add additional creature comforts...highway pegs, grips, port for heated gear, adjustments/replacing suspension components, sissy bar, racks, etc. (this can be never ending)

Lastly I look at aesthetic changes, having kept that in mind in the previous adjustments, but sometimes there are things done purely for aesthetics...paint, license plate relo, etc.

With this bike I am doing everything in a Different order.

I have a certain look that I want...had that firmly in mind even before locating the donor bike.

That look/feel is at the core of what I am doing with this bike.

HOWEVER, being that I will be 59 before it is done, AND that it is intended to be a Daily Rider, AND that I have a fair amount of aches & pains :) .....

I am having to figure out how to do the look & feel that I want while still ending up with a bike that is:

Comfortable, with good front suspension and good seat suspension, will be well lit for SEEING & BEING SEEN, and will still have a good Comfort Triangle, as well as being a solid performer (and sound bad-ass) :).

These, sometimes conflicting, requirements make for some creative thinking to get it to all come together. Coupled with only having a few hours a week to work on it, it is making for some slow going.

This last week I did not get much done visibly, but we did spend sometime working out the last few details of the jockey shift, and made some progress on the foot clutch.

Hopefully I'll have a few pics next week of some progress.

Kevin
 
Got the oil tank done, ready to use. Pics below...

Waiting on some cables and a few other parts to be cut out before we can move ahead and finish up the jockey shift & suicide clutch.

After struggling for a couple of months on which switches to use on the handlebars, finally decided that NO switches are going on the handlebars.

Going to hide the switches best I can down on the frame, so I can reach them with my left hand...turn signals, kill switch, maybe a horn button. The high/low switch for the headlight will probably be On the headlight bucket.

This will leave the handlebars clean. A grip on the left side, throttle grip and front brake lever on the right side.

We toyed with the idea of a portioning valve for the front and rear brakes to operate off the foot brake. But there are too many slow moving times on grass, gravel, etc. that I will not want any front brake applied.

Here are the rocks and grit I dumped out of the tank that I was using to clean it up when in the tumbler.

T%20OT%20Grit_zpscbjhfhbp.jpg


Next was some hot soapy water....

T%20OT%20Cleaning%201_zpsfnhnwdhp.jpg


...then shaking it around for a bit.

T%20OT%20Cleaning%202_zpskvbeob2q.jpg


I repeated this process 4 times until I was getting only clean water out of it.

Next was pumping some air into the tank, went up to 20 PSI...

T%20OT%20Air_zps0otqd5yg.jpg


...then put it under water to look for leaks.

T%20OT%20under%20water_zpswzuyg5nc.jpg


Devin was sure there would be a few...there were ZERO leaks! :pepper:

Put some oil in the tank to keep it from rusting.

t%20OT%20Oil_zpsxyjpoux6.jpg


Tank is now ready for us to get the rest of the bike done!

T%20OT%20Done_zpsnbxfg8nu.jpg


Kevin
 
We spent a bit of time late Friday afternoon on the SBS bike.

Here is the stock location for the regulator-

Stock%20Regulator_zpshxbrimcp.jpg


We're building a bracket to relocate the regulator a bit lower, and then we'll be cutting out two, and maybe all three of the cross members, to open/clean things up a bit.

New%20Regulator_zps93xuy1gj.jpg


After that we spent over an hour brainstorming on what to do for a top motor mount.

I already cut the factory monstrosity off the back bone.

We came up with a ton of ideas, and discarded all but one....THEN we came up with an idea of something we have never seen before. It is a bit out there, and within a week or so we should have a mock up done, and we'll see how it looks.

Basically we are going to tie the two cylinder heads together with a coil mounting bracket...then we are going to come off the back of that with a curved bar that will mount to the backbone Behind the back of the tank.

It may end up ugly, or it may end up looking good...we'll see. :)

Kevin
 
So...we've been doing some work...but not much picture worthy.

Here is the whiteboard in my office...some of the things on it are done, or almost done, but still a lot to do. Nice thing is that it used to be quite a bit longer. :)

List_zpsdfdacccm.jpg


Last Friday Devin and I spent quite a bit of time researching alternatives for a rear brake master cylinder...we felt with the way we wanted to build the exhaust the MC could not go in the stock position. We then explored putting it along the frame rail on the right side.

After staring/conversing for hours on the exhaust, pulley guard and MC...

Just%20Looking_zpsnv9nlv8y.jpg


...we came up with a different thought on the exhaust than what I had been thinking of for the last few months.

More%20looking_zpshtctuluh.jpg


We'll be deleting the cross-tube...yes, that will sacrifice some power, but it will sound better, and I am not looking to get every bit of power that I can....

the front exhaust will follow the frame rail, then curve up for a few inches along the rear rail. The rear exhaust will get chopped about 7 inches from the end, then curved down to the rear frame rail, then run exactly parallel with the rear frame rail until right before the rear brake caliper.

Both exhaust will turn out from the bike just a touch at a 45* angle.

This will leave room for us to use the stock rear MC in the stock location.

We may use the factory pulley guard, or may make our own. I like the idea of the factory one with the nice chrome finish to match the rest of the chrome of the power-plant. But to do that we will need to clearance out quite a bit of the back side of it to get the chain to clear.

More%20looking%202_zpsdiuewnxs.jpg


That's where we stand right now. Not a lot of photo's / visual progress, but a lot of progress in decisions so that we can proceed in several areas.

Kevin
 
On May 1st I ordered a part from a pretty big name aftermarket supplier. I did not tell them what it was for (SBS Chop) or that I am the "K" in DK Custom.

When I ordered it I was told it would ship out within a day or two.

On the 9th I still had not received it, so I called. They said that is strange it is in the "Shipped File" but they could not give me a tracking number. They asked me to call back the next day to get the tracking number.

Long story short, I called back 5 more times, each time they said I should be receiving it any day, but that the gal that does the shipping is "out of the office" could I please call back to get the tracking # from her.

Finally, on my 7th call, which was on the 18th, they gave me a tracking number.

I received the product on the 19th, it had been shipped on the 17th.

For 6 calls when they told me it was shipped, it, in fact, was not shipped!

At least I finally got it....but if I was working on this bike as much as I want to, that would have been much more irritating than it was.

Bummer is that the quality is not so great on it, so we will probably be making our own version of it from scratch.

I am not going to name who it was...but I will not be recommending them as a supplier to anyone, that is for sure.

For the record, TC Bros. & Bung King are two suppliers I have ordered parts from for this build and their shipping has been quick, and the parts have been great! :)

I am going to be gone half of next week, on a Memorial Ride for Larry Weaver. So it will likely be week after next before the next update on this bike.

Kevin
 
So...we've been interrupted by various other responsibilities, and then a lot of the stuff we've been doing has not been picture worthy.

But we did get a bit done recently that is picture worthy.

We tacked a bracket together for relocating the regulator. When we pull the bike apart for paint and powder we'll finish welding it up.

Reg%201_zpsienlbvfs.jpg


At the same time we'll remove the top factory bracket for the regulator....going to leave the bottom one in place for structural integrity.

Right side view of the new bracket.

REG%202_zpswldxl1ns.jpg


On the solid mount Sportys, there is a bracket on the backbone that is for the top motor mount. It goes from the backbone to a bracket that bolt to each of the cylinder heads.

I really wanted to do something different, and to leave that space open between the backbone and the top of the engine.

While we are not going to tie the to cylinder heads together with the DLX Coil Relo pictured here, we are going to tie them together with some sort of bracket. Then, as pictured below we have a motor mount going to the backbone behind the tank.

I've never seen a top motor mount like this, but cannot think of any reason that it will not work well.

Here's a couple of photo's of it, and it is also visible in some of the shifter photos below.

MM%201_zpsfrbxxhef.jpg


MM%202_zpsmmcqizrw.jpg


On to some photo's of the Jockey Shift. We have futzed around with more variations of this than I can remember. We finally have it down to the simplest, cleanest form.

That is a Hurst Shift Knob on it. That may change, there are lots of choices, but I sorta like this one.

Shifter%206_zps06plbs6p.jpg


Shifter%204_zps6yte1n9o.jpg


Shifter%205_zpsz1olpao1.jpg


It seems to stick out quite a ways...and maybe it could be a touch taller, and a bit more tucked in...

Shifter%203_zpsm0ah89ar.jpg


...but it is pretty comfortable while sitting on the seat.

Shifter%202_zpsjbfoiecj.jpg


Shifter%201_zpsbrb2fj88.jpg


There's a bunch more stuff we should be making headway on over the next week.

Kevin
 
If it feels "right" when seated, its probably good. I would agree that Hurst makes a cool looking knob.:clapping:

Tucking it inboard might also disrupt the comfort factor you're looking to achieve?

It does look like a potential problem IF you were riding it through the woods, as branches might inadvertently pop it into a higher gear.

Other than that, I'd leave as~is. It sucks redoing something after its "done" but this is a relatively minor tweak, if any is really needed later...

Yeah, not looking to be riding thru the woods. :)

If lane-splitting were allowed in these parts, I would tuck it in.

We'll see how it feels when riding. It may still end up a bit higher and tucked in.

Kevin
 
We finally got the floorboard mounts machined!

It is a different look for a Sporty, but I think it is pretty low profile...

Jockey%20Shift%20Suicide%20Clutch%20Flbd%201_zpsdh82lrdc.jpg


...They are adjustable, tucked in neatly, & retain the ability to fold-up...

Jockey%20Shift%20Suicide%20Clutch%20Flbd%203_zpsh61x6w8i.jpg


...and very importantly, for old farts like me, they are super comfortable!

Jockey%20Shift%20Suicide%20Clutch%20Flbd%205_zpsygskqpsy.jpg


I am going to be putting a Black set of floorboards on the DK Sporty! They are that comfortable, and I won't be giving up any lean angle.

Jockey%20Shift%20Suicide%20Clutch%20Flbd%204_zps0ecov0lf.jpg


This is how the SBS Chop was sitting Friday afternoon.

Jockey Shift done.

Floorboards done.

Regulator Relocated.

Ready for the Suicide Clutch.

Handlebars Installed.

Jockey%20Shift%20Suicide%20Clutch%20Flbd%202_zpsafecmwmd.jpg


Next week we start working on some new items on the list. :)

One thing we have been researching, and not found an answer to....I would like to run an EFI coil on this carbed bike. We've figured how to jumper it to be Dual Fire, but the specs for an 03 is ohms and for the efi coil is 30 ohms.

If anyone has run the 07 up (efi coil) on a carbed Sporty, I would be interested in what was done/how it worked out.

Kevin
 
Your progress on this bike looks great Kevin:clapping:

Pardon my ignorance please, but what is the advantage of using an EFI coil over say an aftermarket dual fire type?
 
Your progress on this bike looks great Kevin:clapping:

Pardon my ignorance please, but what is the advantage of using an EFI coil over say an aftermarket dual fire type?

Thank you!

It's a looks and mounting thing only.

The coil HD made for the 1995-2003 model Sportster is fairly ugly, and not so easy to mount.

The coil they make for the 07-Up Sportsters (which are all EFI), is a good looking coil, and easy to mount in a variety of locations.

95-03 Coil-

$_3.JPG


07-up Coil-

607804-Ersatzzuendspule-EFI-Sportster-07-16.jpg


Kevin
 
After looking at many different styles of ignition switches, taking security into consideration....

I am about to pull the trigger on a M.Lock RFID system. Before I do, I'm wondering if anyone has had any experience with them...good, bad, etc.

4002000-motogadget-motoscope-m-lock-rfid-digital-ignition-switch-lock-1.jpg


It is a keyless ignition that is switched on and off by passing a FOB like device within 1.5-2" of the RFID reader that is installed (and hidden) on the bike.

What appeals to me is that there is no visible clutter, but still just as good (or better) security than having a key switch. Also, less hassle than a key.

Detail from Motogadget HERE.

TIA for any thoughts/input.

Kevin
 
That kit looks like it would conceal easily while also providing a clean look.

Never used one but if it comes with an extra FOB as is pictured?, & is fairly water resistant, it might be a good way to go.

Another consideration might be how easy it is to get a "spare" FOB if traveling & your main FOB gets lost?

Guess you could always "hotwire" it in an emergency though, so it might make the replacement FOB factor moot...:Shrug:

It comes with two fobs. A "master" that can be used to make other fobs, and then the daily use fob.

If I lost one on the road, it is a pretty simple matter of cutting two wires and twisting them together.

Someone else mentioned a M-Unit Blue version that uses any android phone via bluetooth...am going to be looking into that also.

Kevin
 
No actual work on the bike over the last week, but we did get a few things done.

We came close to getting the M-Unit Blue, but for a variety of reasons it does not look like this will work for me.

Unless something changes I'll be getting the M.Lock

I did get the following items ordered, and on the way to us:

1" Fork Tube caps to replace the 2" ones so they will be flush with the top tree

Charcoal colored Metalflake Grips

Chrome throttle assembly (single cable)

Low profile Billet petcock

Tank Crossover Plugs

Chrome dome gas cap

FSM

We also got the floorboard mounts back from powder yesterday afternoon.

Floorboard%20Mounts_zpscos0zrc1.jpg


Looks simple enough, but there are a bunch of cuts and angles in this, at tight tolerances, to get them to work right.

Hopefully this next week we will be getting the clutch done. Then as time permits, we'll:

Finish up the bungs on the rear fender

Swap out the fork tube caps

Install a front suspension kit, and get the sag set properly

Get all the plumbing done

Then all the wiring

lol, sounds easy, but there are a hundred plus details in the above list. :)

oh! And we need to fab up the exhaust!

Kevin
 
In a previous post I showed where we were test fitting some Chrome floorboards on this bike.

We worked on several different designs of mounts...kludging some ideas together with scrap metal, welding, drilling, tapping and grinding.

I wanted the boards to be as tucked in as possible, and to mount off the factory clevis.

We got some machined up and then sent them off to powder. Got them back last week.

While working on them for this bike, I got to thinking, I bet they would be comfortable on my other Sporty.

So I mounted up a set of Black Floorboards on the DK Sporty. Been riding with them the last few days.

WOW!!! I just started out with this idea because I thought it would be good for this SBS Chop with the Suicide Clutch.

It is amazingly more comfortable And stable feeling at speed. Plus I have More lean angle!

FB%201_zps2bo8773d.jpg


FB%202_zps1noefsek.jpg


FB%203_zpsyj9ipuar.jpg


FB%205_zpsvgke7rbb.jpg


6-26-17%20headed%20for%20shop%202_zpspp6mog0k.jpg


The black ones are staying on this Sporty and the Chrome ones are going on the SBS Chop. :)

Kevin
 
They look good in black KevinThumbUp

Added plus for black is they can be "touched up" easier than chrome, after a pavement scraping session through the twisties.
 

Welcome to the Trike Talk Community

Join our vibrant online community dedicated to all things Trikes! Whether you're a seasoned rider or just starting out, this is the place to share experiences, tips, and stories about your three-wheeled adventures. Explore modifications, maintenance advice, and rides, all while connecting with fellow trike enthusiasts from around the globe

Forum statistics

Threads
55,568
Messages
902,139
Members
22,548
Latest member
PERuss

Trike Talk Community

Welcome to a community dedicated to the most diverse and fastest growing powersports segment, Motorcycle Trikes. Come join the discussion about the best makes and models, popular modifications and proven performance hacks, trike touring and travel, maintenance, meetups and more!

Register Already a member? Login

Forum statistics

Threads
55,568
Messages
902,139
Members
22,548
Latest member
PERuss
 photo 260e2760-d89e-45b2-8675-2bc26fb3d465.jpg

 photo Trike-Talk-150-x-200.gif

 photo DK Trike Talk Right side banner 19.jpg

Merziere Reverser

 photo 9796095c-0d4b-4a9b-88ed-efe4c498d084.png
 photo f9866e4e-75c5-471a-86f5-5e72a446ecc3.png
Back
Top