DK Custom Ironhead build - Photo Heavy

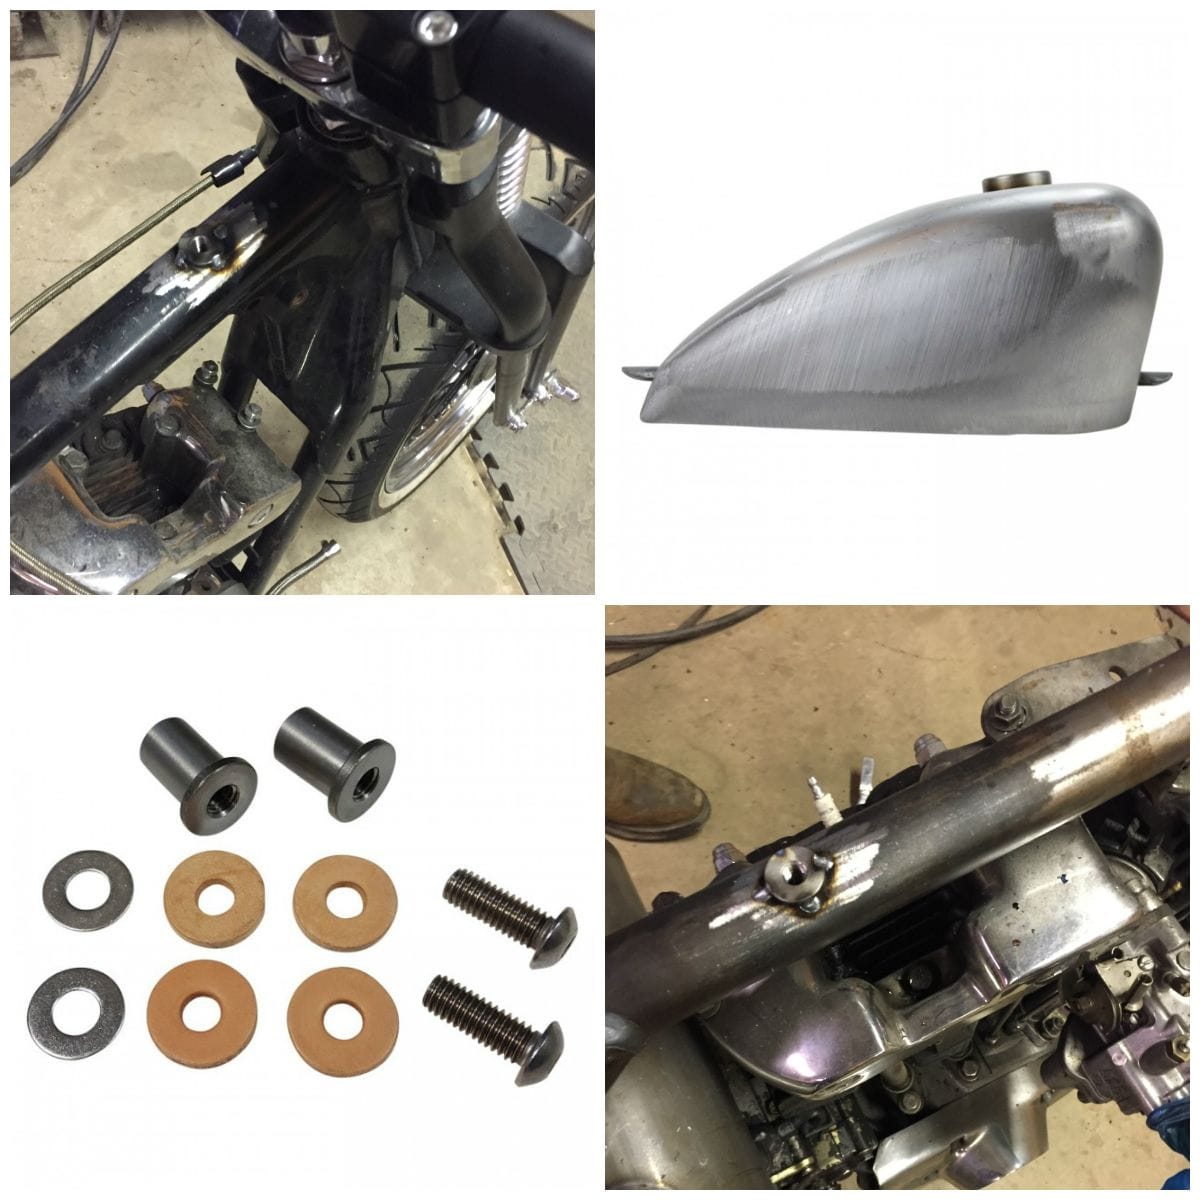
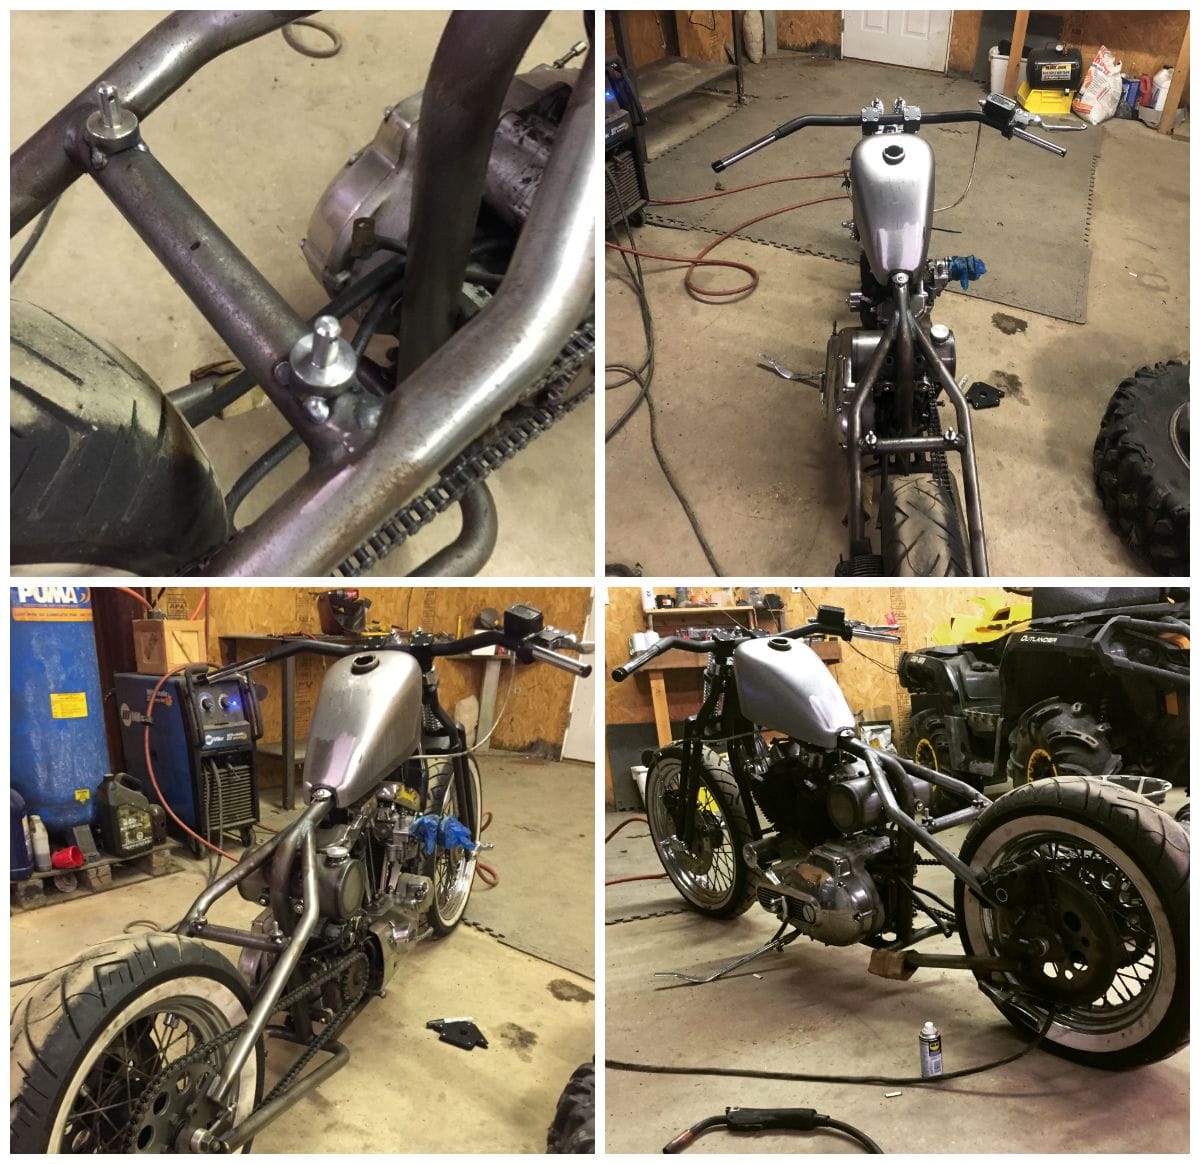
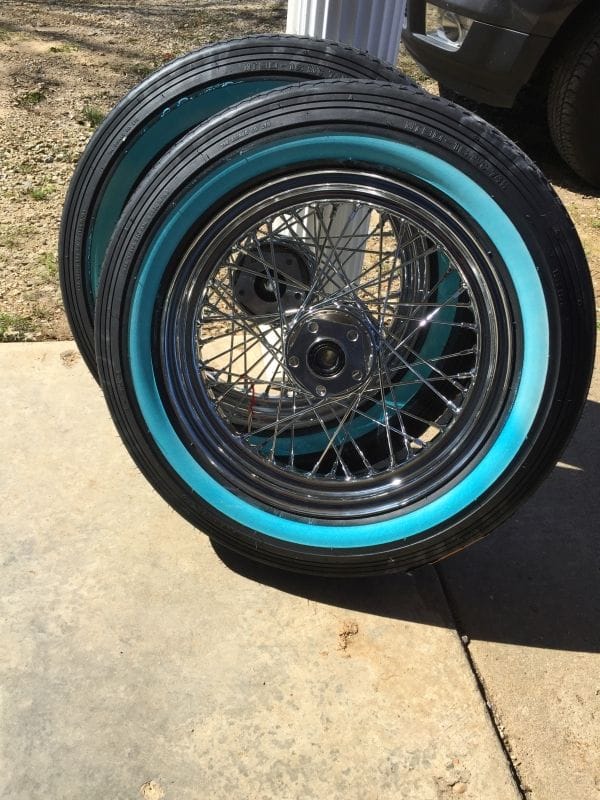
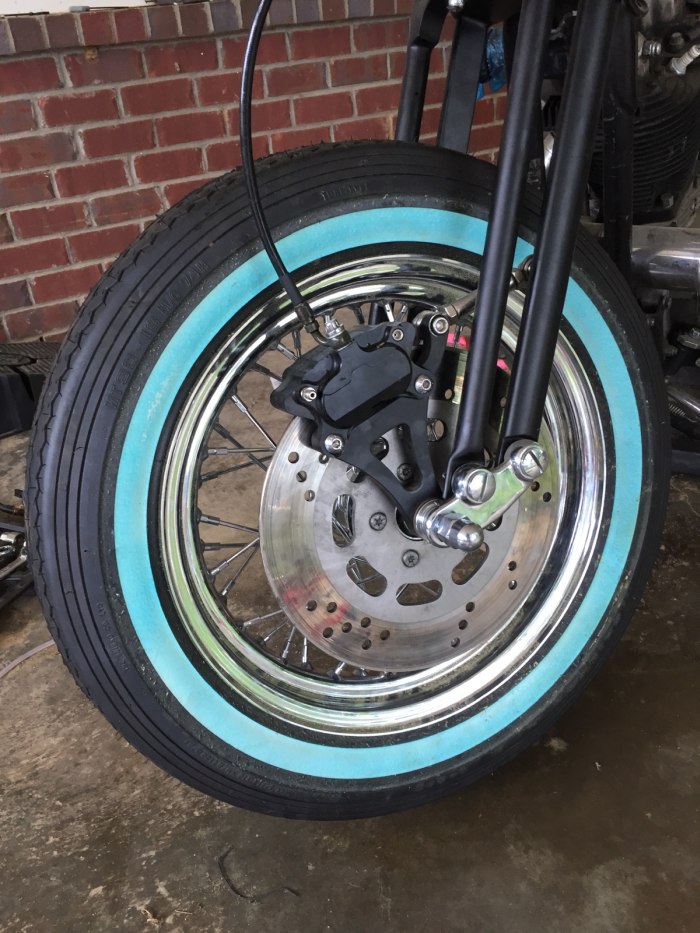
Just a little update for you guys...

80-waiting_for_bike_parts_to_arrive_1a28a3809815fd22f55835031f0e1a9468ad80f3.jpg


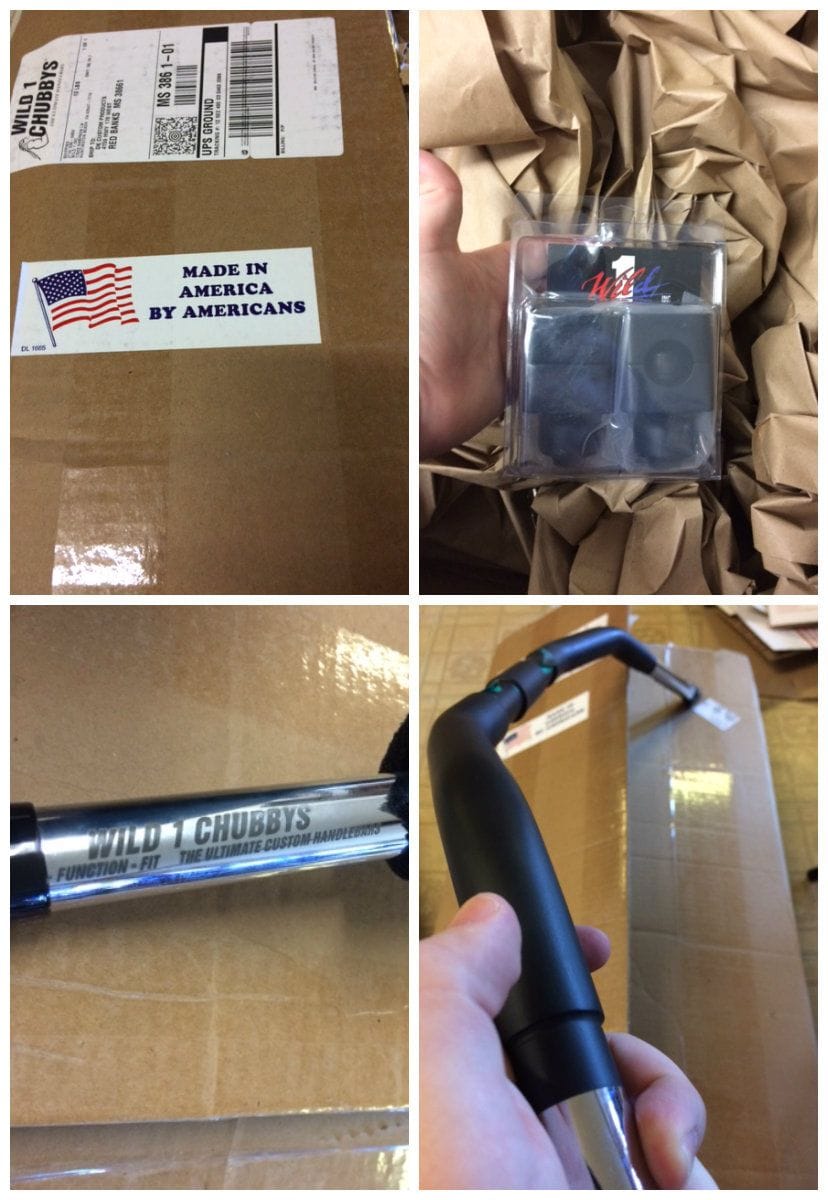
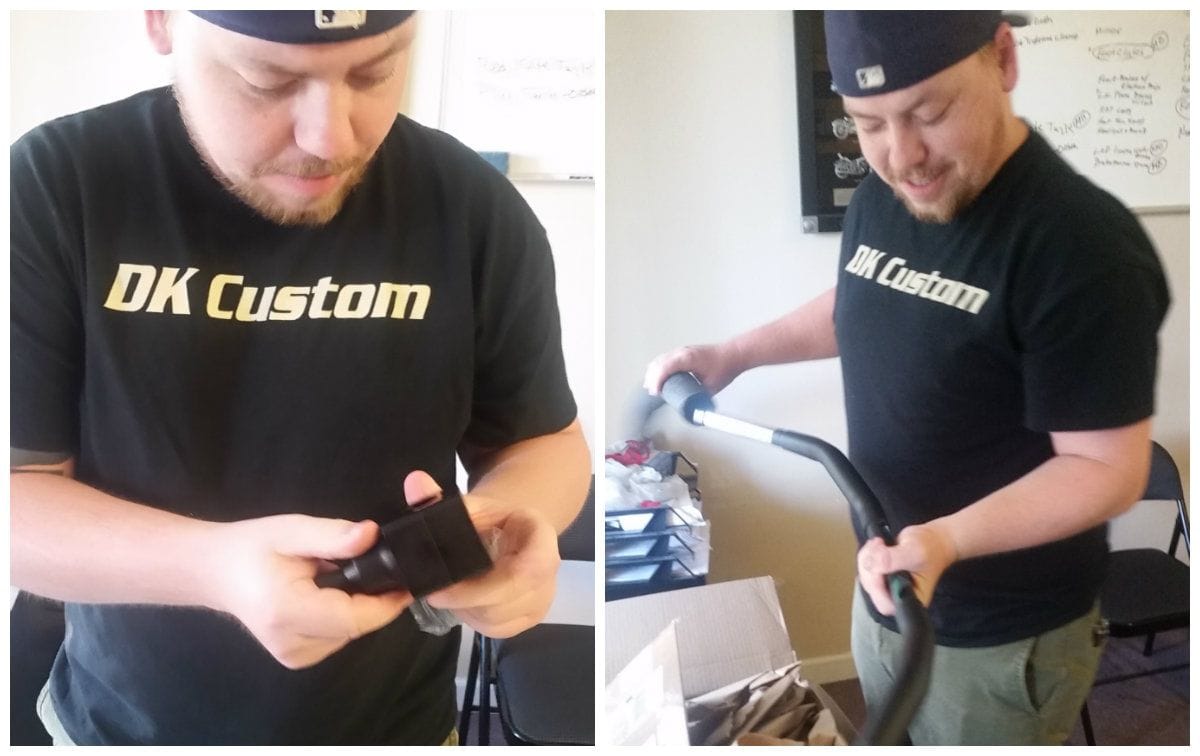
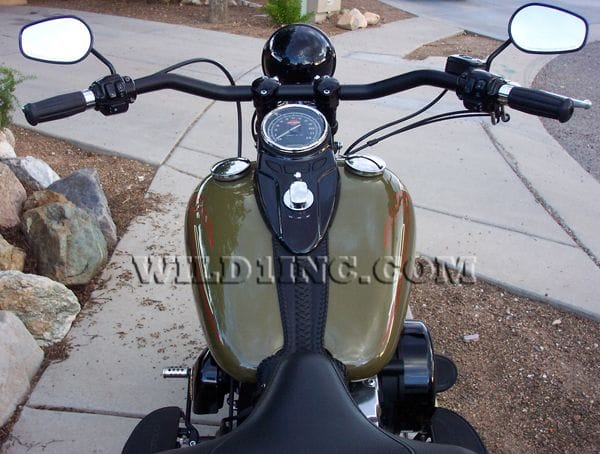
Currently waiting on the bars. I have decided on the Wild 1 Chubby Knuckle bars...

80-wild1_chubbys114_springer_knuckle_handlebars_detail_51dd5472246a223e44389d6910a609302ba0badf.jpg


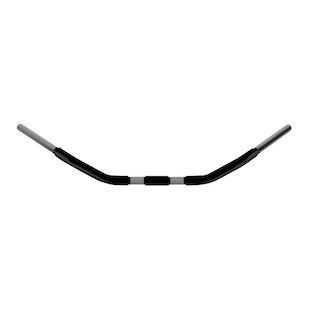
Wanted something low and wide and these should add to the overall styling of the bike.

80-519b1_5ac5f3e2c90af5c7fa7944e77f9c4c77a43a5da9.jpg


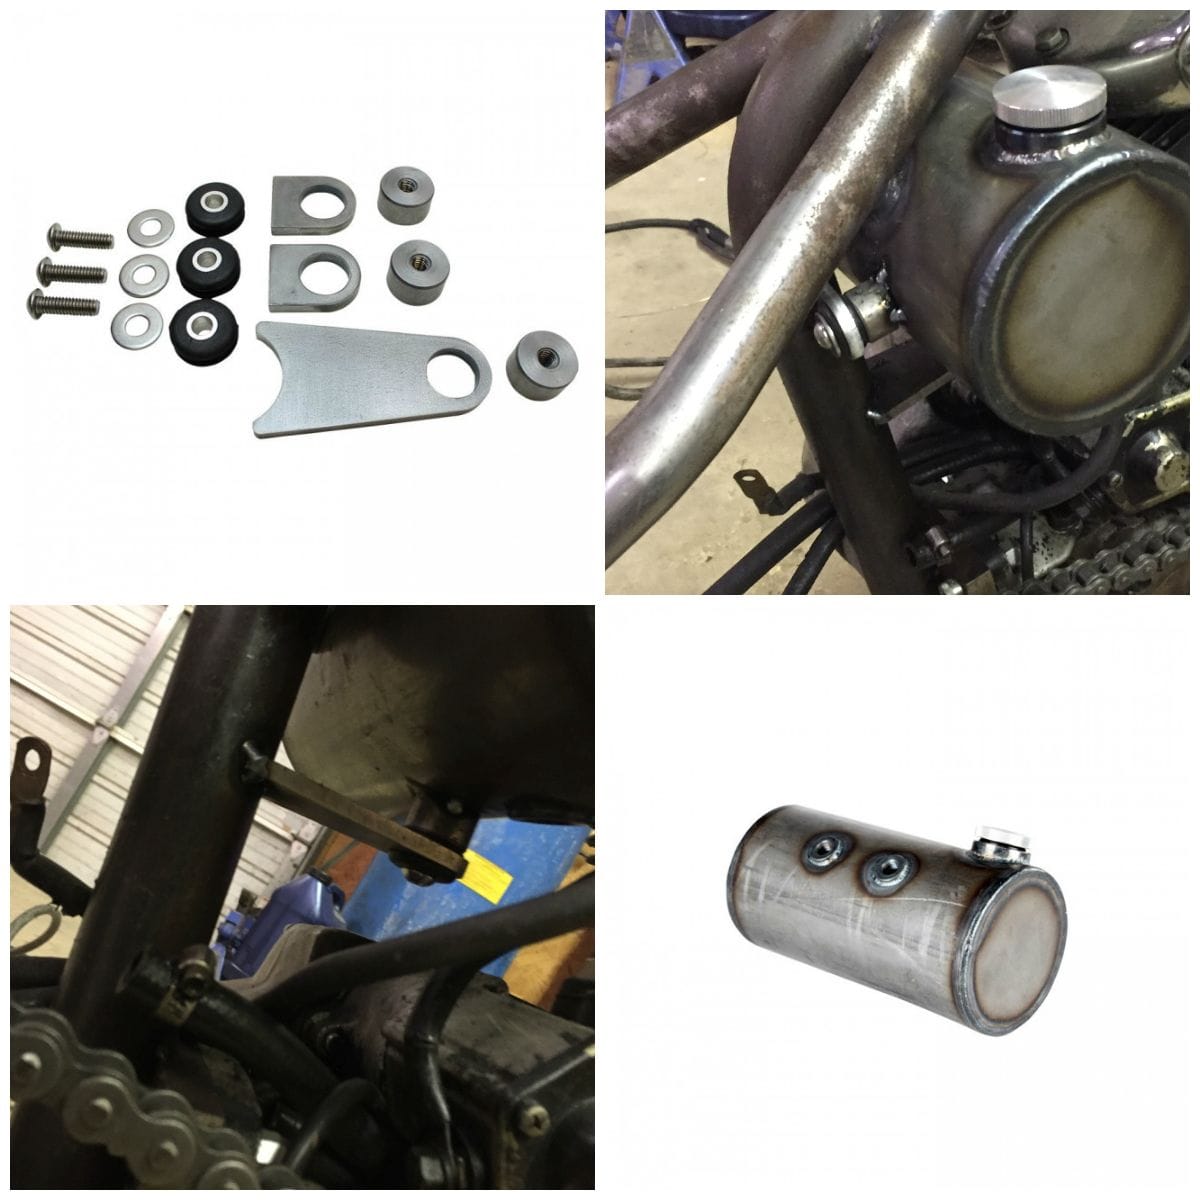
Also waiting on a couple of other small things like mounting bungs and have yet decide on tins.

Dwayne
 
So, My front wheel has been lacking the adequate spacers up until now. For the most part, especially on the right side, these are for mock up purposes.

TC Bros includes spacers with the springer and with the brake caliper. Unfortunately for me the spacers are cut to length for use with 84-99 Wideglide wheels which have a much wider hub than this sporty.

Notice the additional space...

80-wheel_20spacers_20needed_1ec9c9798f9450ff8ecc51a864c9ee9e87b0014c.jpg


So, for the time being, I will piece together a set of spacers not only to mock the front end up completely but to also use as reference when having the final spacers machined. You can measure as many times as your like but the chances are you will be cutting the spacers then install,remove,grind, repeat.

It is not optimal to use a typical grinding disc to shorten the aluminum spacers but a flap disc works perfectly

80-cutting_20spacers_dc80bf25e9d812eeab204e76acc7e534093fa7b4.jpg


I basically had to put a spacer on either side of 8 and 3...

80-img_1934_dd6a1797edfcd4541c0bb6255a5243ca8860c6c5.jpg


Mounted up rolls very smooth with the brake caliper in place...

80-spacers_20installed_11471e53eb86df1fb2097fe8eb46fff2d01ad068.jpg


Dwayne
 
Package arrived!

Speaking from a custom parts supplier standpoint, the first word that comes to mind when holding this product is "Quality". The Powder coat finish of the bars and the anodized of the risers is flawless. Additionally the machining of both products is very impressive. You cannot get this quality from imitation "chubby" bars or Riser. I suspect the sticker on the outside of the box is there as a precursor to product's fit and finish.

http://shop.wild1inc.com/WO519-CHUBBY-SPRINGER-KNUCKLE-BAR-WO519.htm

80-package_20arrived_c1847e1ba61bc21f3f938f64bc53208d2dd0660c.jpg


Photo credits to Kevin :icon_laugh:...

80-bars_20risers_20came_f02d67cf48ed9f4d65f7e7b6e38206d64ad97c5a.jpg


Dwayne
 
Devin and I spent some time installing the Gas tank, oil tank, and solo seat spring mounts. Pre-Fabbed bungs and mounting tabs are the way to go if you want to save time and effort. All bungs were tacked into place first to avoid any difficulty to remove them in case of some unforeseen issue with plumbing, fittings, clearance, etc... They will be finalized and cleaned up once everything is in place.

First, we mounted the oil tank...

80-oil_20tank_20collage_ef736e3ab87bc054f0878476e7ae4e81bfbae53c.jpg


... The hardtail, oil tank, and mounting kit are all from TC Bros. so everything fit as it should with no modifications needed. IMO it is best to get all conjoining components from the same company for the best chance of a direct fit.

On to the Fuel Tank and mounting bungs, again from TC Bros. A step drill is key installing bung inserts.

80-unibit_20tank_20bung_20devins_20shop_17479291bba5842780de18d4af0d0d7b86a290b6.jpg


80-tank_20mounting_20collage_13b824606489bd6be3353a03f96687074f8d4862.jpg


... after tacking those in place we installed the tank and solo seat spring mounts. The Spring mounts are exactly 7" apart which is something of an industry standard for aftermarket solo seats from DK Custom, LaRosa, etc.

Starting to look more and more like a motorcycle...

80-seat_20mounts_20collage_945e8057bdb587d8dcabe5606065d5a571214581.jpg
Dwayne
 
Been abnormally cold here recently so there hasn't been any progress on the Ironhead build. I do plan on putting together the seat this weekend.

The seat choice will be one of our DIY leather cover solo seat kits...

80-1384158288198_159128234_jpeg_7e65792471c24661e3d69ec7d5e157217f1f6f6b.jpg


http://www.dkcustomproducts.com/outlaw-leather-solo-seat-pan-cover-kit-more-details-dk-lth-sc.htm

The instructions are pretty straight forward and thanks to a few youtube tutorials, I am confident in my tooling abilities.

I should earn this patch soon :icon_laugh:

80-hqdefault_72d73248eca3950c39c3a29716e26aedebc5a779.jpg


Dwayne
 
Update on the seat... Didn't get to invest as much time as I would have liked over the last weekend but here is where i'm at...

80-tooled_20guns_761a32ee90ae91580c4694b55d8e54ce582a2af4.jpg
 
New shoes came in courtesy of TC Bros. Ordered on a Thursday and was tripping over boxes Saturday.... They ship fast!

80-img_1054_46470dc54597a2bd45d57ce04b86e9a0530b0750.jpg


The Rims are their Moto Iron brand and seem to be pretty good. No loose or bent spoke, chrome finish looks good... Both are 16x3. The front is 100% compatible with the Moto Iron Springer using the supplied spacers that came with the springer itself... So no need to cut new ones. I suspect the back will use the OEM spacers as well. TC Bros also offers the tubes and rubber strips needed to complete the tire mount.The tires are Shinko Classic White walls...

80-212_013_a_9cd8d18ad3bf9eaa18b169659eef840dd04746fa.jpg


When having the tires mounted, I opted not to have them balanced with a weight glued to the rim or attached to the spokes... The weights look bad and when they start to rust they really look bad.Kevin swears by the Dyna Beads for tire balancing and I have sold plenty to our customers while I admit, I have never personally used them myself. Figured now I would give them a go. Installing them in a tube can be very time consuming. I tried a few different methods such as using zip ties attached to a drill to slap the applicator for vibrations...

80-img_1061_b369dfd891ffd862bec38a345f4f8e1d79fdb014.jpg


Using air pressure to force the beads in...

80-img_1064_fa98926cb2dcb18e1aec9420af309e94ca04784f.jpg


... It is a PITA and very time consuming but should be worth it.Took about 45 minutes to do bot her wheels.

Dwayne
 
The build is still very much a work in progress I have just been preoccupied with work and other projects. I did buy a new, complete wiring harness since the original was older than I am and looked to have been cut, spliced, soldered, and burned in several places. I wasn't sure what was original and what was added so I just replaced it to start fresh.Also got the front wheel and brake system mounted using the spacers TC Bros supplied with Springer...
front%20wheel%202.jpg
 
The tires! Love the tires.

Just noticed that you used Shinko 240 whitewalls. Great choice. My next set for my Voyager/Harley will be Shinko 270s. Since my bike runs without laying over on the sidewalls, I don't need something that will handle a race track or drag my floor boards! The price seems OK and even if they only last 7500 miles, I will be money ahead since I change my own tires. :victory:

Oldveteran :Trike1:
 

Welcome to the Trike Talk Community

Join our vibrant online community dedicated to all things Trikes! Whether you're a seasoned rider or just starting out, this is the place to share experiences, tips, and stories about your three-wheeled adventures. Explore modifications, maintenance advice, and rides, all while connecting with fellow trike enthusiasts from around the globe

Forum statistics

Threads
55,566
Messages
901,941
Members
22,548
Latest member
PERuss

Trike Talk Community

Welcome to a community dedicated to the most diverse and fastest growing powersports segment, Motorcycle Trikes. Come join the discussion about the best makes and models, popular modifications and proven performance hacks, trike touring and travel, maintenance, meetups and more!

Register Already a member? Login

Forum statistics

Threads
55,566
Messages
901,941
Members
22,548
Latest member
PERuss
 photo 260e2760-d89e-45b2-8675-2bc26fb3d465.jpg

 photo Trike-Talk-150-x-200.gif

 photo DK Trike Talk Right side banner 19.jpg

Merziere Reverser

 photo 9796095c-0d4b-4a9b-88ed-efe4c498d084.png
 photo f9866e4e-75c5-471a-86f5-5e72a446ecc3.png
Back
Top