FuzzyWuzHe
New member
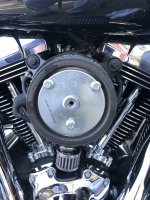
If you're like me, I already had a Harley Stage One Air Cleaner and Mounting Plate.
Being on a budget, i wanted to install a crank case breather and not spend a ton of $$$.
Contacted DK's customer support and got Devin, not sure there's a better man for that job (sorry Kevin, but, he is soooo knowledgable). He walked me through what I needed to figure out before he could recommend a "Kit". After sending him a pic of my air cleaner mount, he told me the only way to do a vent kit was to drill and tap the mounting plate. I wasn't real sure I wanted to be drilling and taping on my engine, even as handy as I am. He pointed me to the video on "How To" and it was a great video. Very detailed and really well done. Still, I wasn't sure I wanted to risk ruining this plate.
I routed around in my vast Harley Gold .... don't lie ... we all have this, and found the stage one mounting plate from my 15 Tri. I figured they were the same, so I pull the air cleaner off again and verified. Yep, the same part number and everything. So what does this mean? Means I can modify the 15 Tri one, install the kit, and install it on my bike. When I decide to trade it, I can put the stock one back on. Kewl.
So, I marched back to DK's site and watched the Video like 3 more times. Armed with my new found knowledge, I marched off and decided to document my efforts and share. Maybe someone wanting to do this and being a tad intimidated to do it will be able to tackle it too.
Should be noted here before I begin, none of the steps that I took where not covered in the Video. As stated, the Video is what gave me the courage to tackle this (well, that and it was a spare plate I was drilling on). Also, my decision to paint the plate externals, was not in the Video, so I boldly went where no man has gone before, not really, but it sounded good.
Step one is to measure, measure, measure. I used the one on the bike as a guide, then measured and transferred the measurements to the spare. I did not take pics of this, my bad, but basically I wrapped the ears in masking tape and marked where I thought they would look good. I then transferred the measurements for those marks to the spare mounting kit. I used a rule and a protractor to do this (protractor for the angle of the holes). If you where using the plate on your bike, transferring the measurements wouldn't be necessary. I would think eyeballing it might be good enough. As stated in the Video, make sure you have space to clear the control box on the left side of the mounting plate when mounted on the bike and left as looking at it. Made a "dent" with a punch and commenced drilling.
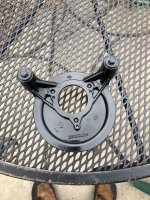
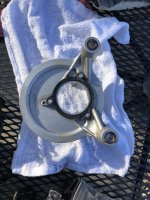
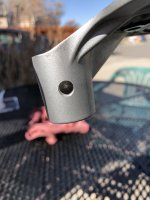
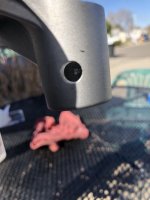
Being cast aluminum I think, I was a bit worried about it cracking if I did it in one or two steps (Drilling that is). I started really small and went one drill bit size at a time. All the way up to the bit just below the one I ordered with the kit. I ordered the drill and tap kit along with it. Just to be sure. By going drill bit by drill bit, I got a nice clean hole. See Pics.
The next step is to do the final drilling, and then tap. More about that later when the kit gets here.
While waiting, I decided to plug the holes with the RTV forma gasket used in the Video. This was incredibly easy, much easier than I thought it would be, the key here is to trim the nozzle as small as possible and squeeze it into the hole. It's a lot of squeezing, but, you end up with a nice clean "fill" of the hole. The actual "hole" (actually a tunnel that goes from the inside of the air filter to the inside of the ears where I drilled the holes) is about 2" long and maybe an 1/8" if that in diameter, so you can imagine forcing the RTV into that hole is time consuming. You can see in the pics below that it did indeed squeeze out of the tunnel (will be trimmed after it dries) and did fill all the way up to the air cleaner area.
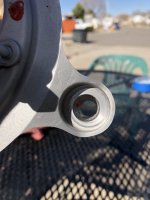
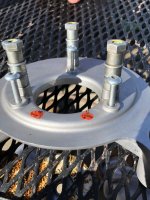
The inside will be cleaned up after it dries also.
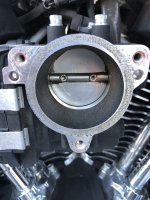
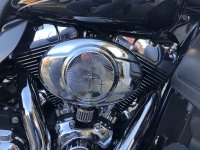
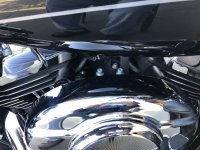
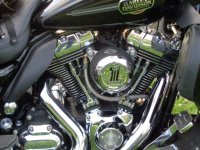
Another, "while I'm at it", add to this job was to paint the "Visible" portions of the mounting plate. I went with high temp engine paint. I went with an engine black. My thought process is my eye goes right to those ears, even though I have the Old Style Oval on my bike. The pic is from the 15 Tri, but, you can see the "ears"
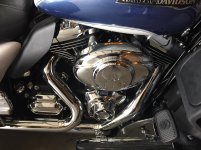
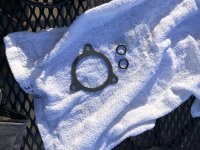
You still see them peeking out and I am obsessed with that ... LOL. Anyway, here's a pic of the paint and the RTV I used.
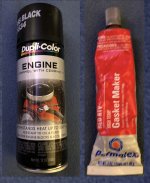
So right now, I am waiting for the RTV to dry and the paint to dry. Really exciting huh? But since I'm also waiting on the kit to arrive later this week, no biggie.
More as I keep going.
Being on a budget, i wanted to install a crank case breather and not spend a ton of $$$.
Contacted DK's customer support and got Devin, not sure there's a better man for that job (sorry Kevin, but, he is soooo knowledgable). He walked me through what I needed to figure out before he could recommend a "Kit". After sending him a pic of my air cleaner mount, he told me the only way to do a vent kit was to drill and tap the mounting plate. I wasn't real sure I wanted to be drilling and taping on my engine, even as handy as I am. He pointed me to the video on "How To" and it was a great video. Very detailed and really well done. Still, I wasn't sure I wanted to risk ruining this plate.
I routed around in my vast Harley Gold .... don't lie ... we all have this, and found the stage one mounting plate from my 15 Tri. I figured they were the same, so I pull the air cleaner off again and verified. Yep, the same part number and everything. So what does this mean? Means I can modify the 15 Tri one, install the kit, and install it on my bike. When I decide to trade it, I can put the stock one back on. Kewl.
So, I marched back to DK's site and watched the Video like 3 more times. Armed with my new found knowledge, I marched off and decided to document my efforts and share. Maybe someone wanting to do this and being a tad intimidated to do it will be able to tackle it too.
Should be noted here before I begin, none of the steps that I took where not covered in the Video. As stated, the Video is what gave me the courage to tackle this (well, that and it was a spare plate I was drilling on). Also, my decision to paint the plate externals, was not in the Video, so I boldly went where no man has gone before, not really, but it sounded good.
Step one is to measure, measure, measure. I used the one on the bike as a guide, then measured and transferred the measurements to the spare. I did not take pics of this, my bad, but basically I wrapped the ears in masking tape and marked where I thought they would look good. I then transferred the measurements for those marks to the spare mounting kit. I used a rule and a protractor to do this (protractor for the angle of the holes). If you where using the plate on your bike, transferring the measurements wouldn't be necessary. I would think eyeballing it might be good enough. As stated in the Video, make sure you have space to clear the control box on the left side of the mounting plate when mounted on the bike and left as looking at it. Made a "dent" with a punch and commenced drilling.
Being cast aluminum I think, I was a bit worried about it cracking if I did it in one or two steps (Drilling that is). I started really small and went one drill bit size at a time. All the way up to the bit just below the one I ordered with the kit. I ordered the drill and tap kit along with it. Just to be sure. By going drill bit by drill bit, I got a nice clean hole. See Pics.


The next step is to do the final drilling, and then tap. More about that later when the kit gets here.
While waiting, I decided to plug the holes with the RTV forma gasket used in the Video. This was incredibly easy, much easier than I thought it would be, the key here is to trim the nozzle as small as possible and squeeze it into the hole. It's a lot of squeezing, but, you end up with a nice clean "fill" of the hole. The actual "hole" (actually a tunnel that goes from the inside of the air filter to the inside of the ears where I drilled the holes) is about 2" long and maybe an 1/8" if that in diameter, so you can imagine forcing the RTV into that hole is time consuming. You can see in the pics below that it did indeed squeeze out of the tunnel (will be trimmed after it dries) and did fill all the way up to the air cleaner area.


The inside will be cleaned up after it dries also.
Another, "while I'm at it", add to this job was to paint the "Visible" portions of the mounting plate. I went with high temp engine paint. I went with an engine black. My thought process is my eye goes right to those ears, even though I have the Old Style Oval on my bike. The pic is from the 15 Tri, but, you can see the "ears"

You still see them peeking out and I am obsessed with that ... LOL. Anyway, here's a pic of the paint and the RTV I used.

So right now, I am waiting for the RTV to dry and the paint to dry. Really exciting huh? But since I'm also waiting on the kit to arrive later this week, no biggie.
More as I keep going.

