New Brake Shoes Locking Up 2004 Lehman Goldwing

This could be a master cylinder problem

Go out for an extended ride, if upon returning if you think brakes are locking, crack one of the rear bleeders loose, if pressure is present squirting out your master may be bad

After releasing the pressure do the wheels again spin free? If not that is a sign the master is not releasing the pressure in the wheel cylinders

Does your trike have residual check valve on the rear brakes?
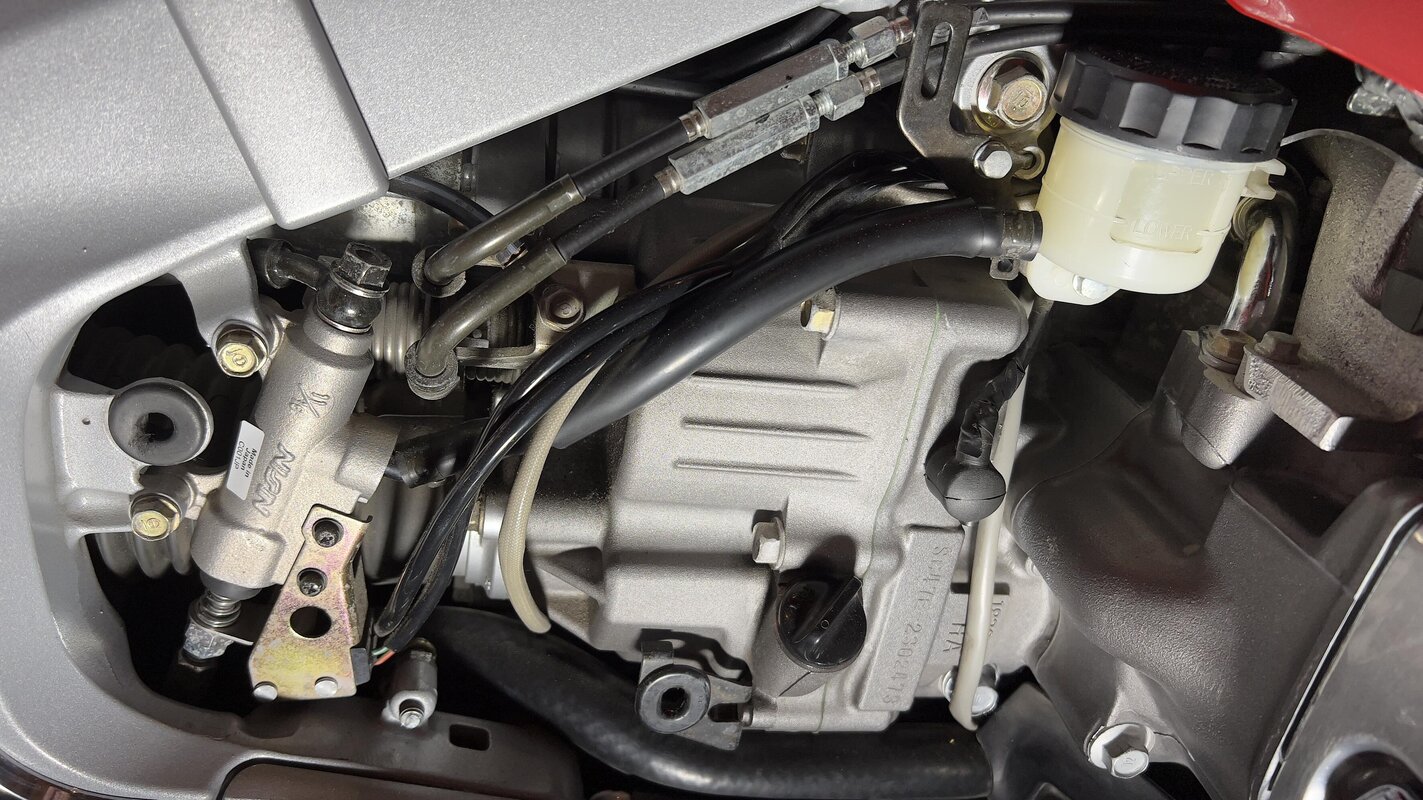
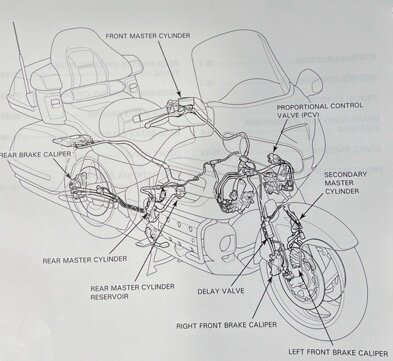
Thank You Jack for hanging in there with me..... I don't see anything other than oem therefore, I would say no residual check valve unless Honda has it built in somewhere. I looked in my Honda shop manual as well. The following pic's show my rear master and reservoir. I'll go ahead and take it for another test run. Thanks again.....

IMG_4654.jpgMaster 2.jpg
 
Back from the test.... Same problem after 12 miles of stop & Go. I went ahead and opened up the bleeder on the left side, not even a dribble. On the flip side, I believe I found the problem.... the backer plate. It appears to be warped/bent, it runs from the bottom 1/4" to about 1/2" at the top as shown in the video below.

When I initially removed the drum on the left side for this shoe replacement, I needed to back down the shoes but, I couldn't turn the adjuster star wheel. I did have the bracket pushed out but, it didn't help. Once off, the adjuster was rust free... go figure. The drum was close to coming off but, I had to do a little prying between the backer plate and drum. No way, did I ever think I bent the plate... I was well aware at the time to be careful not to. As for the right side drum removal, all went well backing the shoes off a couple clicks. I didn't pull the wheel off on the right side tonight but, I did feel around the perimeter between the backer plate and drum and it felt wider at the top as well.

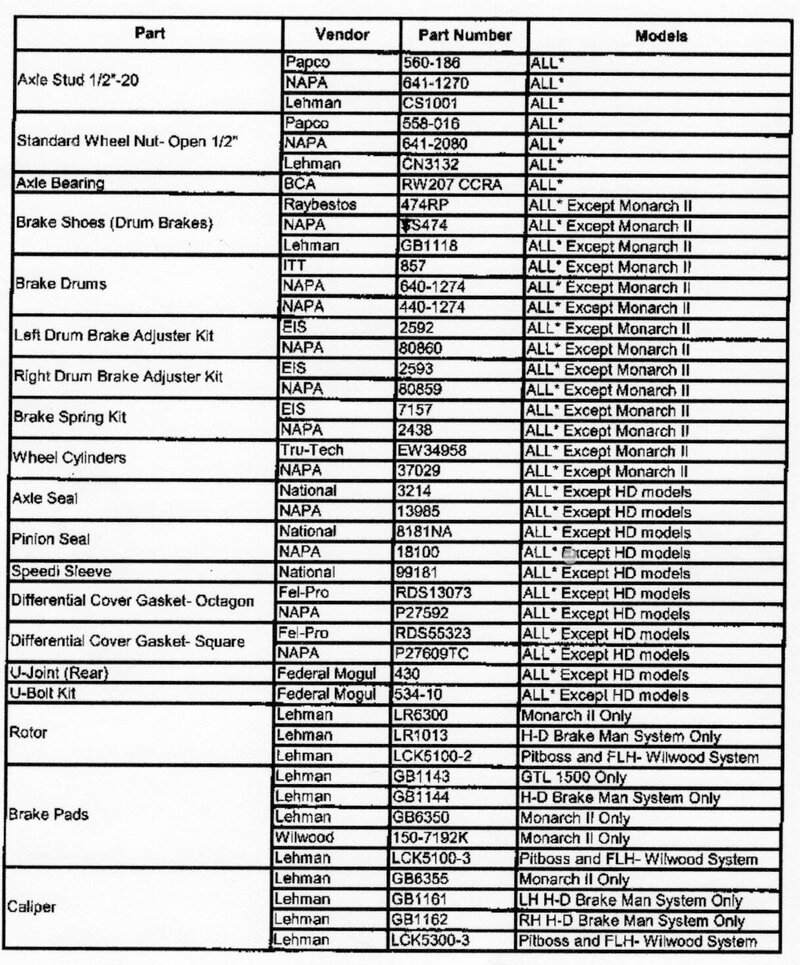
I had this trike built new at the same time I purchased the bike. I never had an issue with drum removal on the right side. Now, I have to try to find the part number for the backing plate... The list below is all I have in regards to Ford part numbers which doesn't list the backer plate. My Lehman was before the Monarch ll therefore most of the list complies. Fun..... I'll do some digging and will report back. Hopefully, there is a part number on the backer plate itself but, it would be old. Thank You Jack for all your time in helping me out, I sincerely appreciate it big time!! Ray ThumbUp


Lehman Parts.jpg Ford Drum.jpg
 
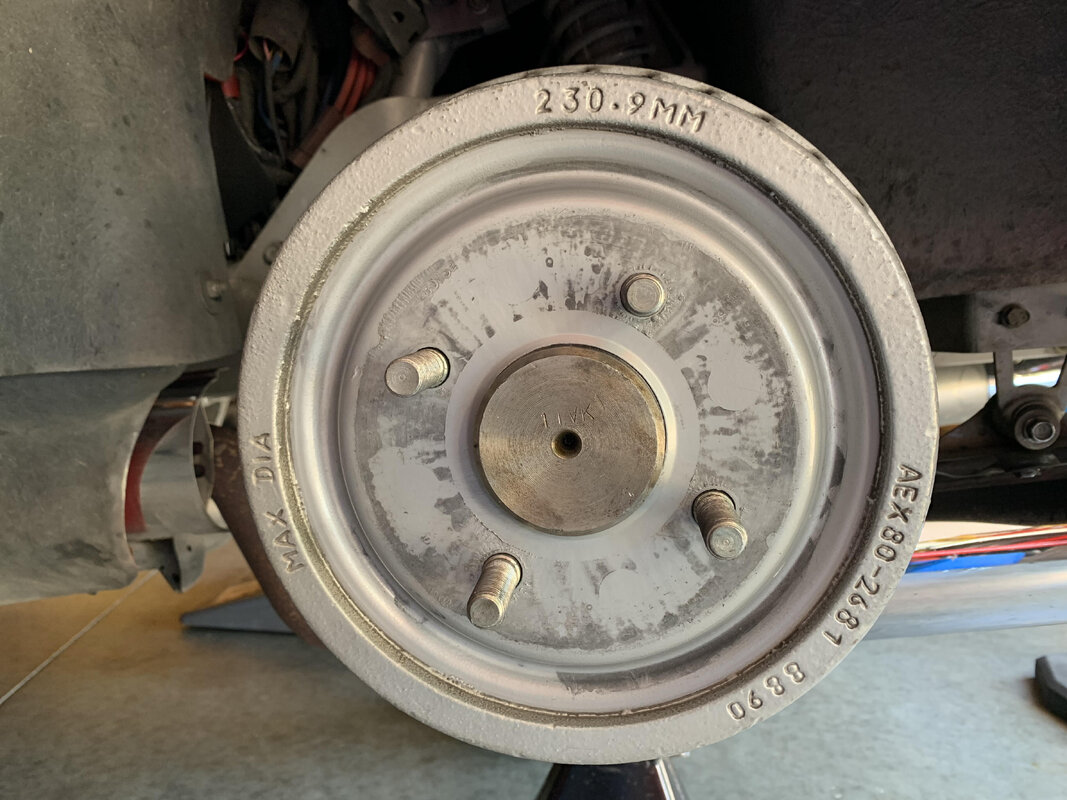
Measure the width of the drums, that is a ford type brake, most likely mustang or pinto

Backing plate should be stamped Bendix with a part number on the back

Thanks Jack.... You're right, it's in the Mustang / Pinto family. I'll check out the backer plate in the morning as well as the shoes. Also, I'll do some cross referencing in the morning for a four lug from the list of vehicles under the NAPA brake shoes link below. Thanks again, you've been a tremendous amount of help!! Ray

https://www.napaonline.com/en/p/TS_TS474

You will need to pull the axle to change the plate

You will have to remove the parking brake lever from the cable, then slide a small high gear hose clamp up the parking brake cable, tighten it until the fingers on the cable are flat, then pull the cable out of the backing plate, that way you can reuse the cable, just push it in the hole until the fingers click out

Thanks Jack.... If I have to pull the axle, then I'm screwed. I never got into anything that deep. Thanks fpr letting me know. Ray
 
I got to thinking that the backing plate is bolted with the nuts being on the inner side. I came across the following pic from when I removed my original brakes & wheel cylinder that has the bolts showing. Wouldn't I just need to remove the four nuts that holds it? Thanks again.... Ray

BP 2.jpg BP Bolt.jpg
 
I got to thinking that the backing plate is bolted with the nuts being on the inner side. I came across the following pic from when I removed my original brakes & wheel cylinder that has the bolts showing. Wouldn't I just need to remove the four nuts that holds it? Thanks again.... Ray

View attachment 113710

Also, in the pic on the right side is my parking brake cables to the bracket on the handle.
 
If it bent that easy,I would just bend it back. You have the axle flange to work off of. A straight edge across the flange and a ruler and you should have no problem.:Shrug:
Thanks for the help. I'll take a look at to see if I can. If I can get a straight edge on it to check all around, I'll give it a shot. At this point, I have nothing to lose. Thanks again. Ray
 
I did one more road test after adjusting the shoes on both Lt & Rt sides to where they just started to drag. I was able to go a little further testing the brakes but, it went back to grabbing once again on the left. Got home, jacked up the rear end and the left side had a lot of drag until it cooled off some. I then backed off the brake shoes for drum removal.

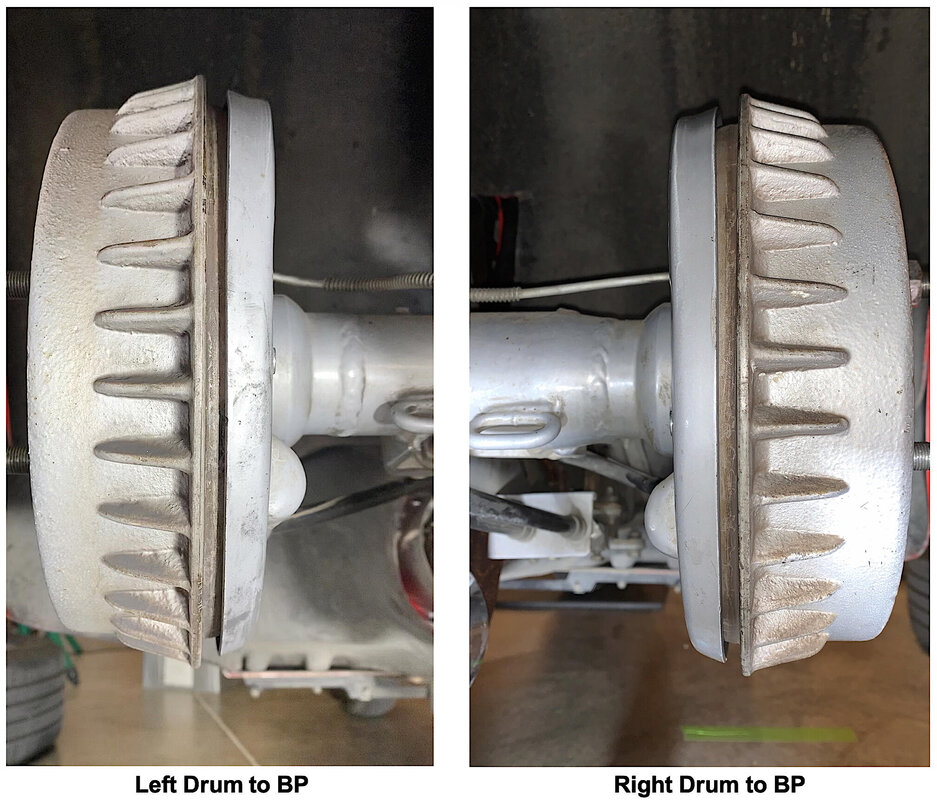
Wanting to check the distance from drum to backer plate again, I installed a couple lug nuts with washers as spacers. The drum was closer than my previous measurement and looks identical to the right side in both measurement and feel as shown in the pic's below. Keep in mind as I mentioned earlier on, I never had a problem backing off and removing the right side drum for shoe replacement in the past. Now, I believe that the backer plate on the left isn't bent.

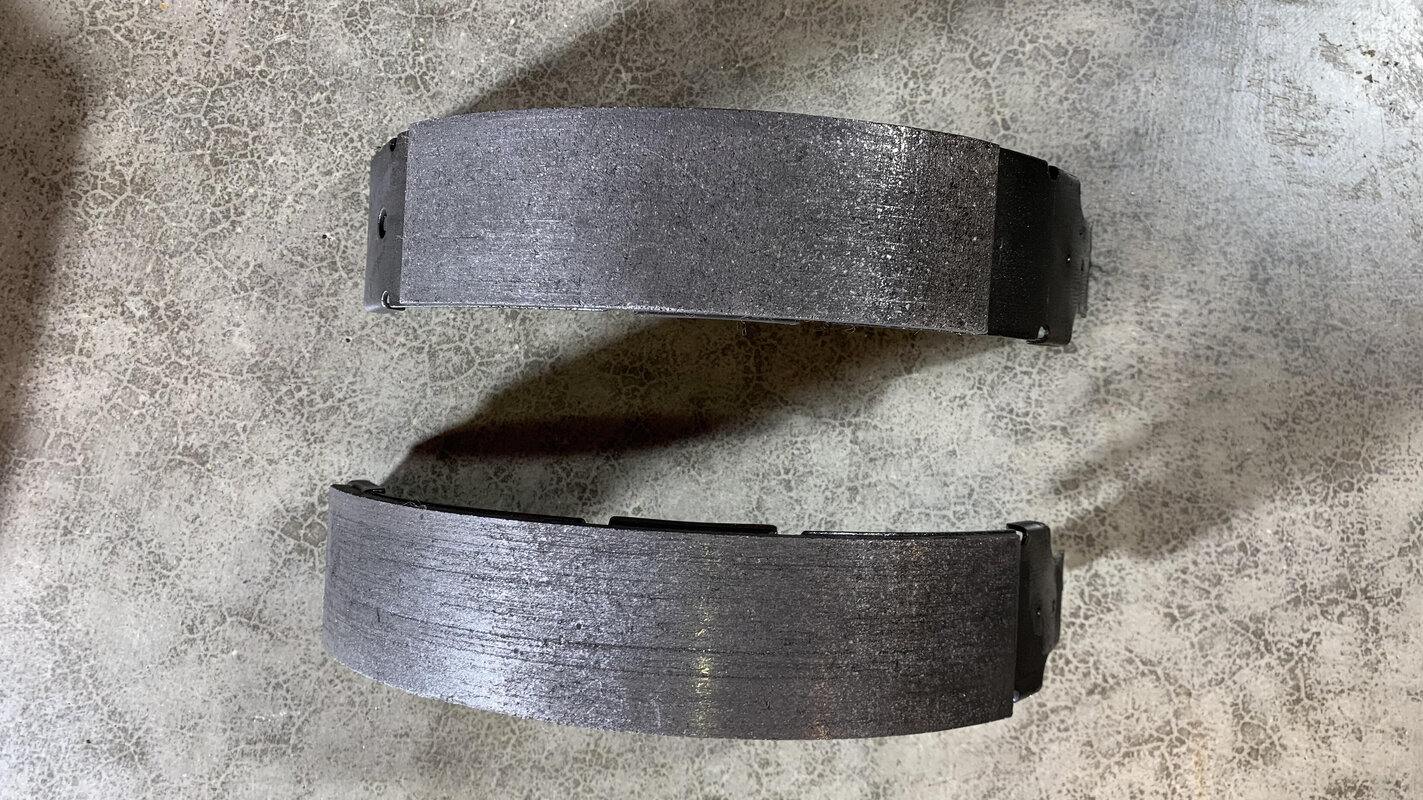
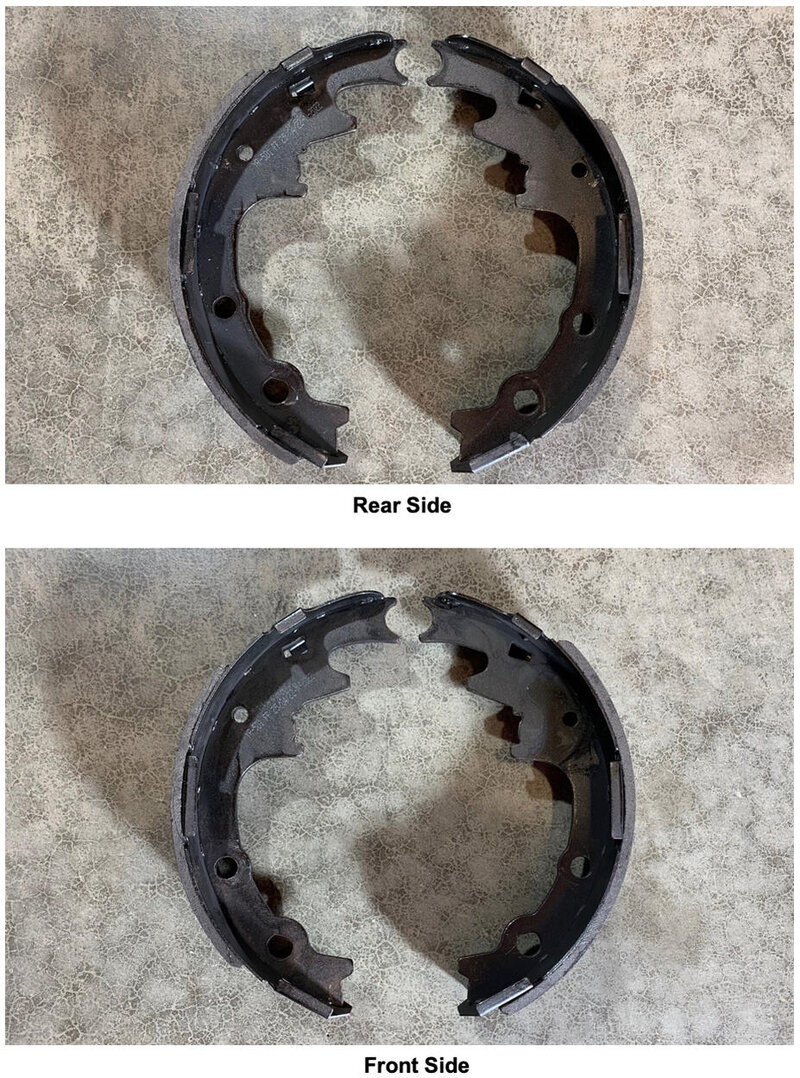
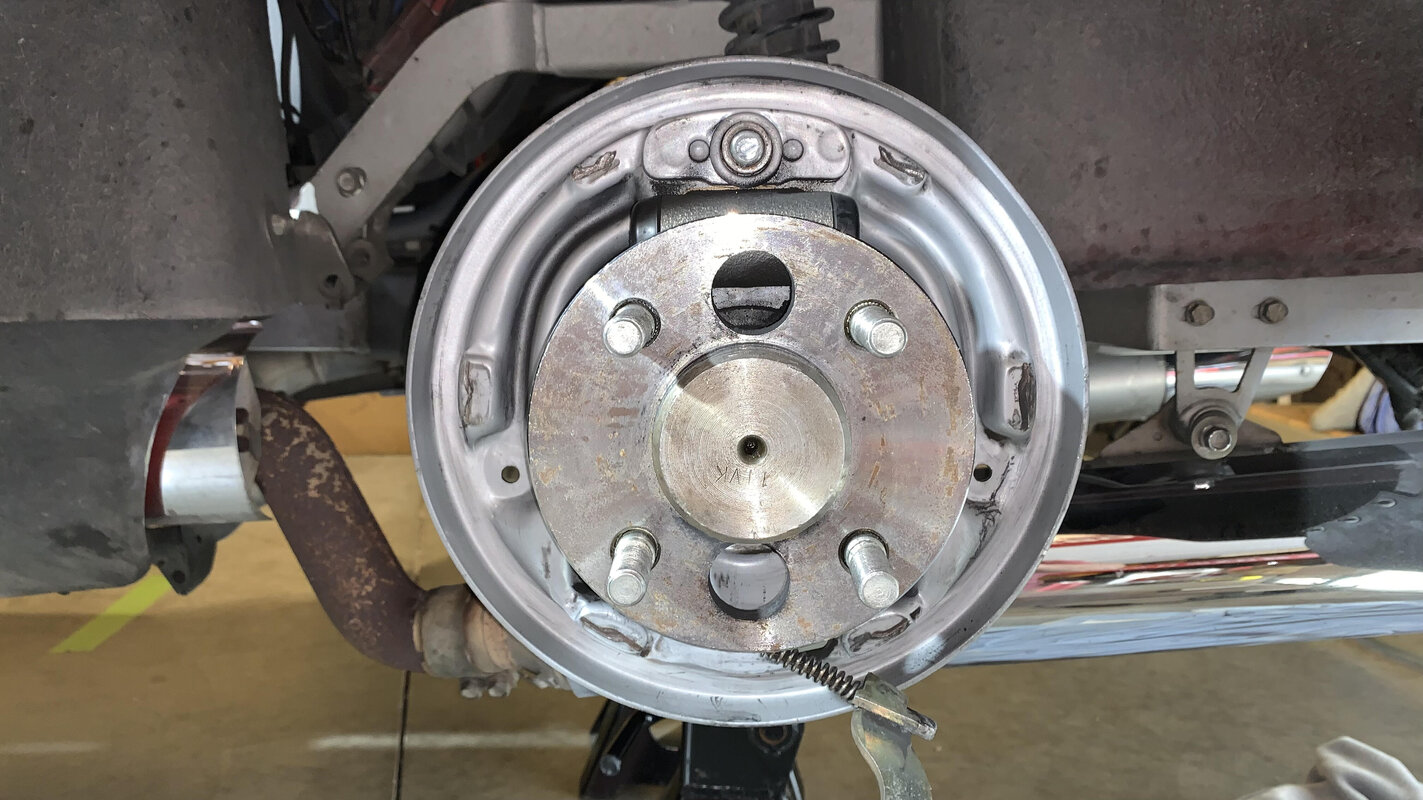
Problem now is the high spots that I greased are gouged on the left side as shown below. I'm not sure if sanding or grinding them back smooth is a good idea or not?? One would thing, did this guy install the proper shoes... I installed NAPA TS474 as I did last time in 2015. The shoes show some wear but, even across. Since these went through hell during these tests, I'm going to replace them once again but, not until I get to the bottom of this. Thanks. Ray

Drum to BP Lt & Rt Side.jpg BP Gouged Overall.jpg Lt Side Brake Shoes.jpg Rear & Front BS.jpg
 
Bendix type brakes always gouge the backing plates more it seems

Backing plates are stamped steel and pretty thin, go easy sanding the high spots

The plates still look bent at the top

Have the brakes always pulled and locked even before the overhaul?
 
Bendix type brakes always gouge the backing plates more it seems

Backing plates are stamped steel and pretty thin, go easy sanding the high spots

The plates still look bent at the top

Have the brakes always pulled and locked even before the overhaul?
Thanks Jack.... I'll be careful if I sand the high spots. As for the backing plates, only reason I feel that it may not be the problem is due to never forcing the right side off, along with never having a problem. I also felt between the Lt & Rt sides comparing them which feels the same. The top is wider than the bottom on both. What's even more wierd, the right side in the comparison pic's looks wider on the top, but doesn't feel like it.

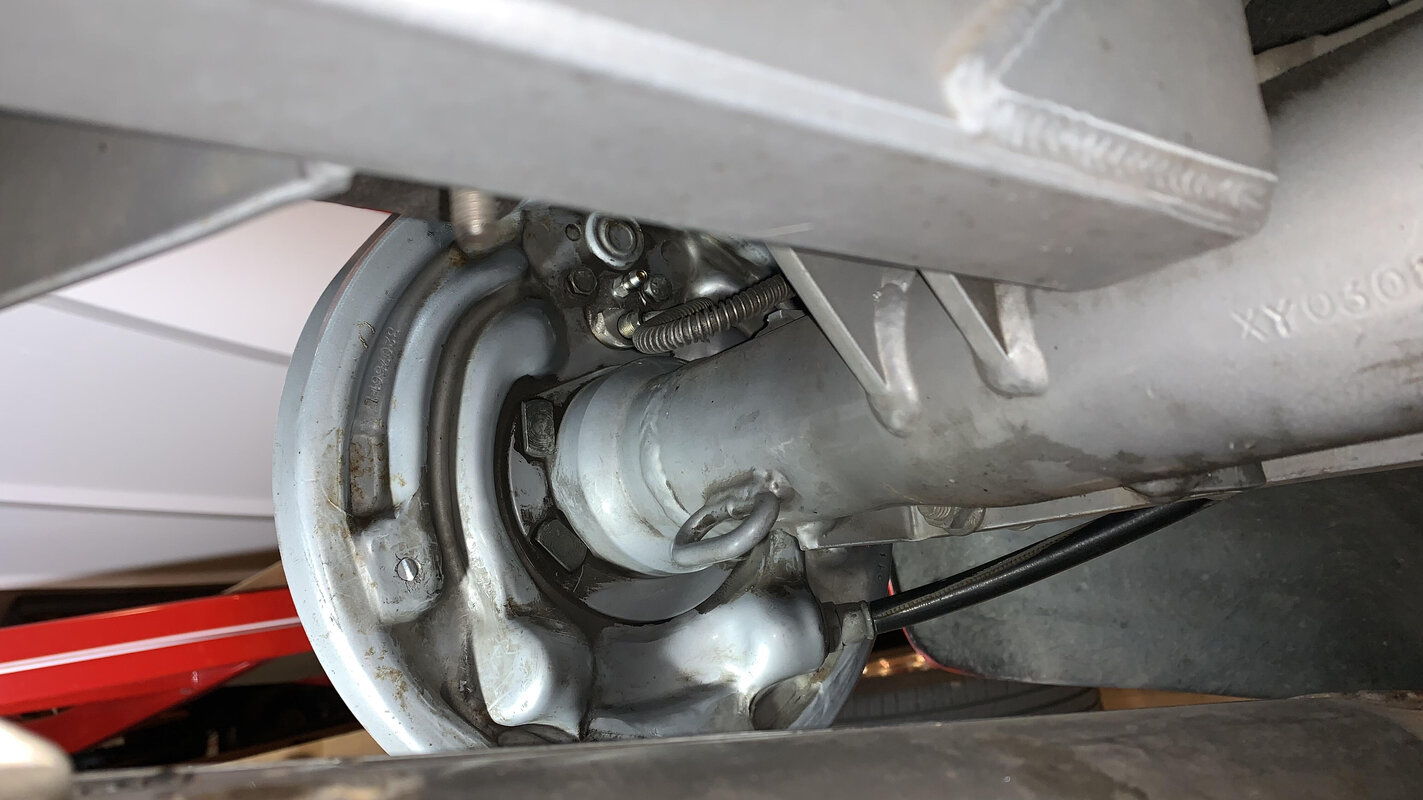
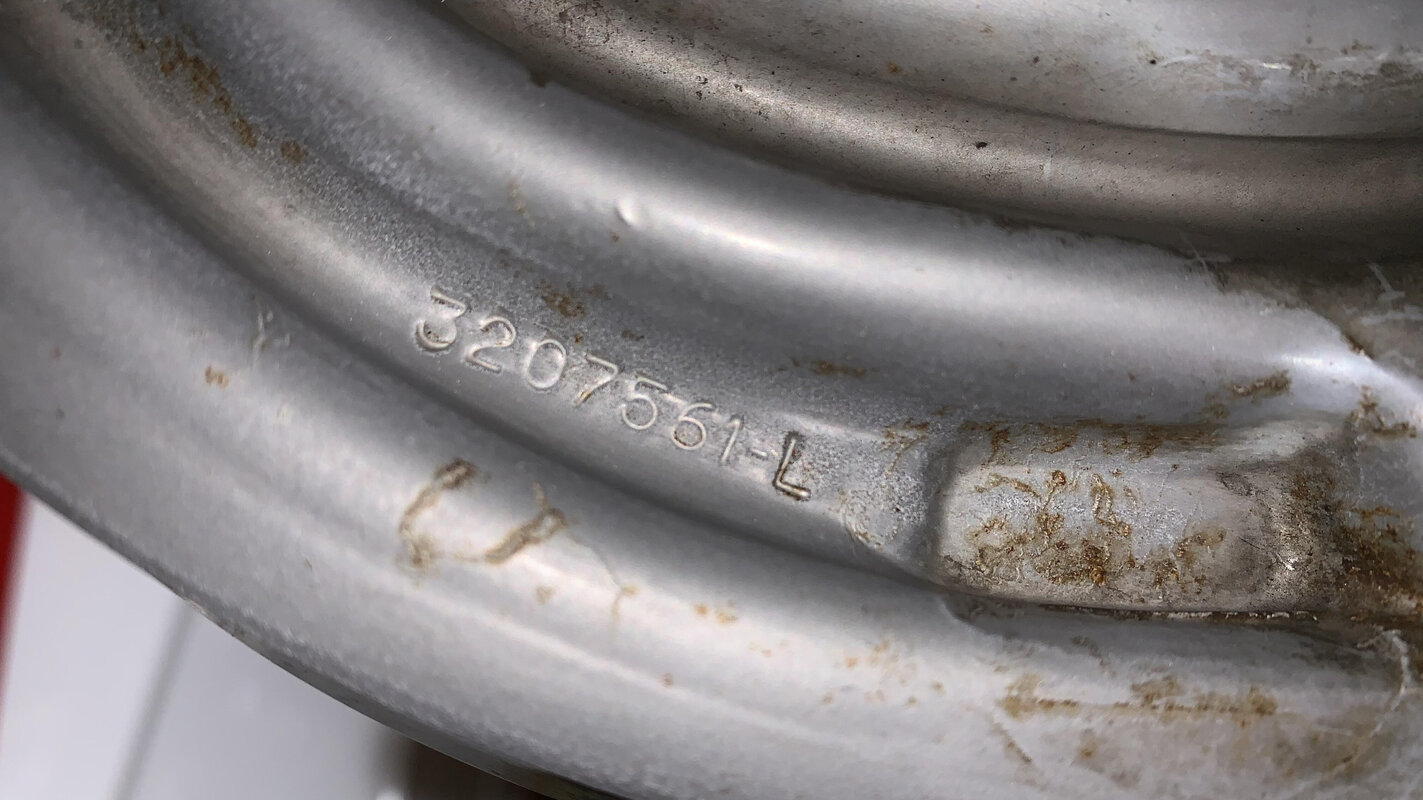
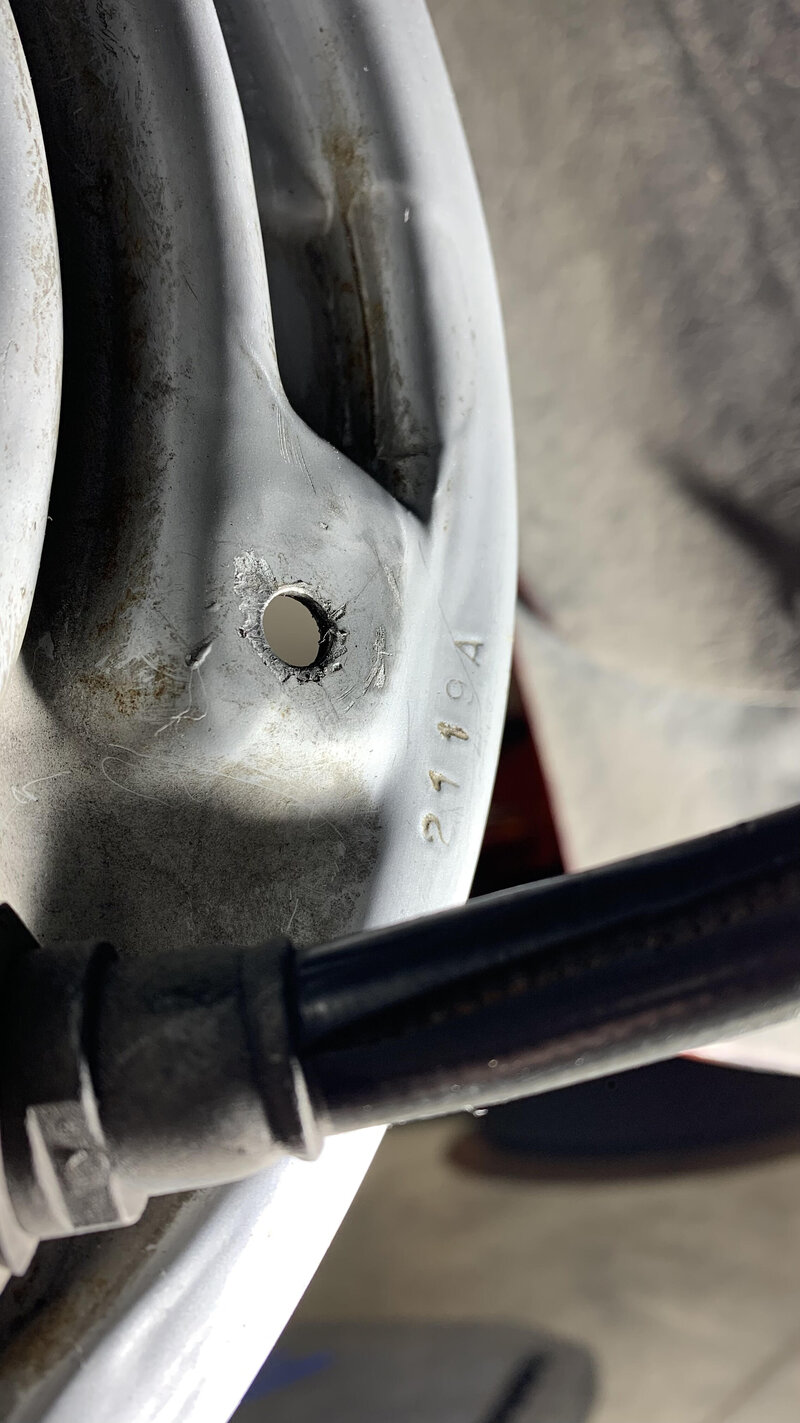
I removed the shoes and took some pic's of the backing plate which had a number stamped on it 3207561-L and 2119A. Other than that, there isn't anything else stamped on it. I've been searching all over starting with Bendix and couldn't find anything with those number's. I couldn't find a cross reference chart as well. I've been trying to find more information about pulling/removing the axle and came across some on YouTube but, not for the the Ford years from the list from NAPA so far. What I did see, seems to be a fairly straight forward job with some having a C-clip and some not.

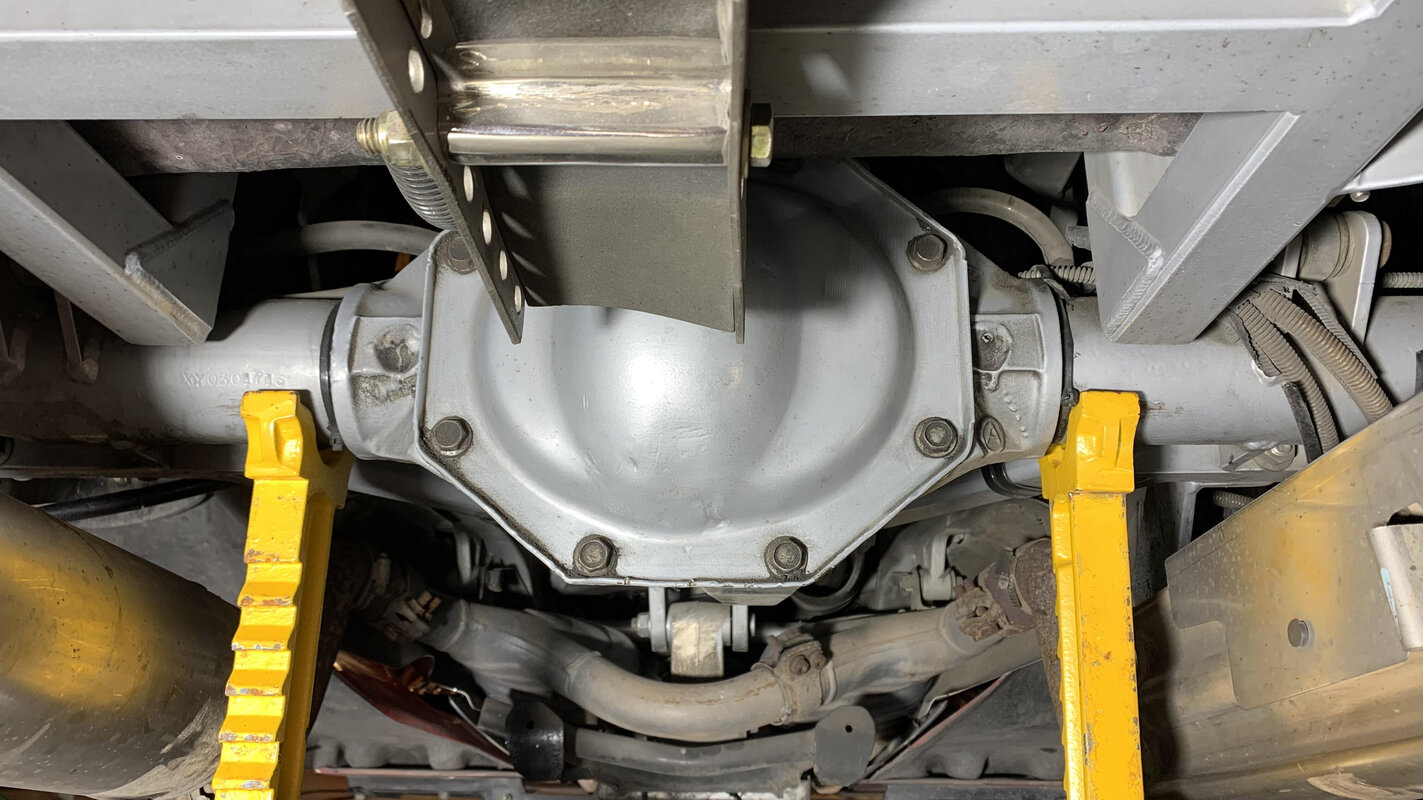
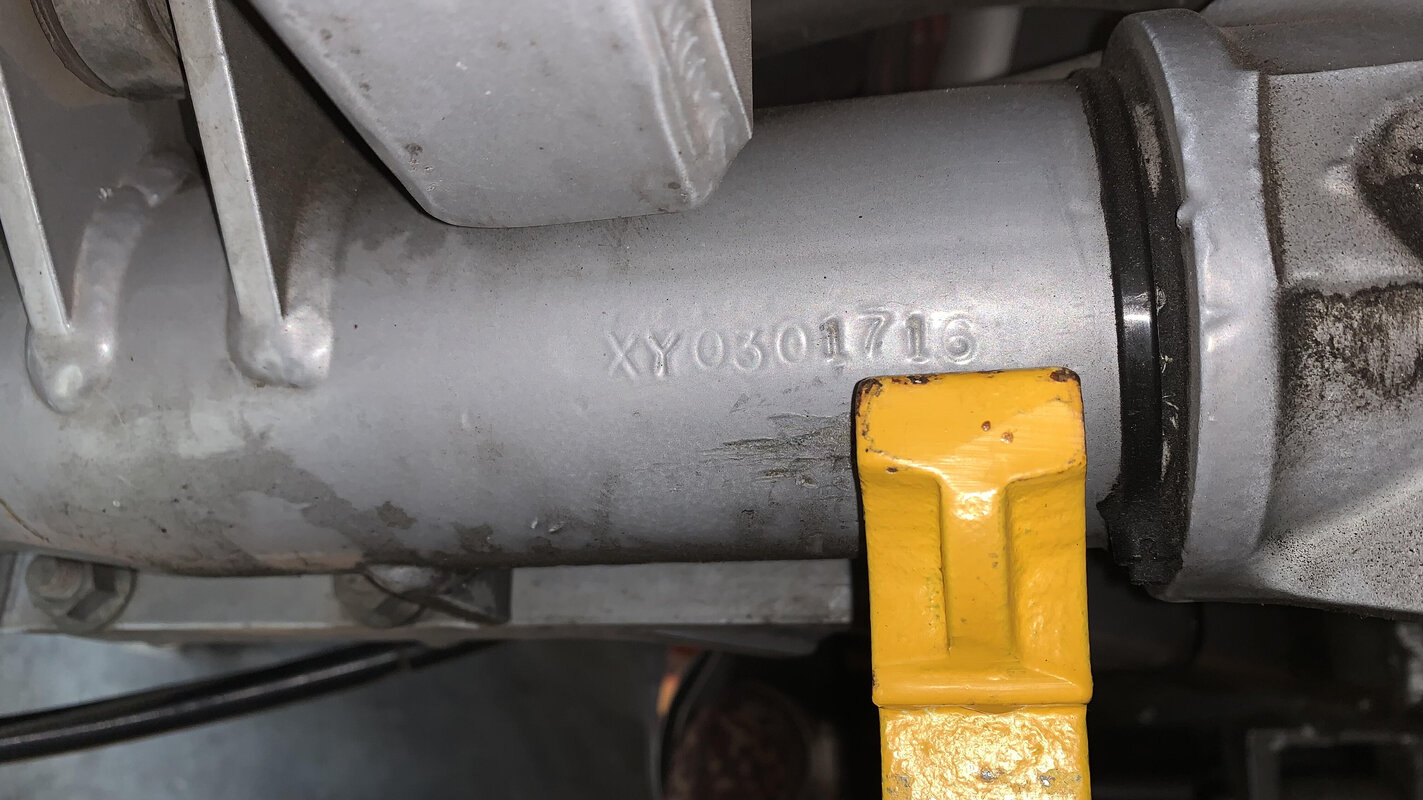
One person stated to try to keep the gears in place due to difficulty placing them back. I may make a seperate post to see if anyone has one like mine that has removed the axle for one thing or another. The following is a few pic's of the back side of the backing plate with numbers along with the rear end. That bar leading to the rear end is part of my receiver/hitch which can be removed quite easily. Thanks again, appreciate it. Ray
ThumbUp

BP Back Side Part Number.jpg BP Back Side w: Short Part Number 1.jpg BP Back Side & Axle.jpg Rear End 1.jpg Rear End Part Number Closeup.jpg
 

Welcome to the Trike Talk Community

Join our vibrant online community dedicated to all things Trikes! Whether you're a seasoned rider or just starting out, this is the place to share experiences, tips, and stories about your three-wheeled adventures. Explore modifications, maintenance advice, and rides, all while connecting with fellow trike enthusiasts from around the globe

Forum statistics

Threads
55,276
Messages
786,080
Members
22,744
Latest member
BeeMan
Back
Top